- Home
- Free Quilt Block Patterns
- Windmill Quilt Block
Windmill Quilt Block
From our Free Quilt Block Patterns Library
This post contains affiliate links, for which I receive compensation.
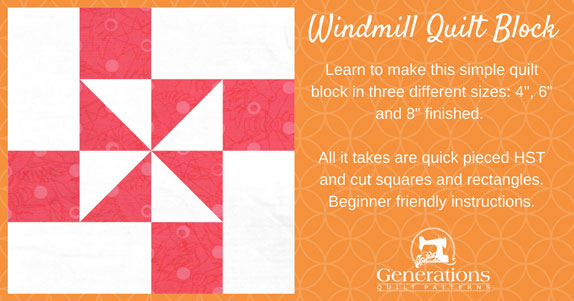
It doesn't get much easier than the Windmill quilt block.
A quartet of quick pieced half square triangles. Cut squares and rectangles.
That's all there is to it!
On this page you'll find instructions to make this beginner friendly design in three different sizes: 4", 6" and 8" finished.
Time to cut up and sew!
General Instructions
These abbreviations are used on this page:
- SA - seam allowance
- RST - right sides together
- HST - half square triangle
- BAC - background fabric
SA are 1/4" and pressed towards the darker fabric unless noted otherwise.
Using starched quilt fabric makes fingerpressing the HSTs open much easier.
If you've never used starch before, click here for more information.
The newest quilt fabrics to tickle your fancy...
Click the images below to see the full collection. We share any commercial and/or free patterns that showcase them, too. (For inspiration, of course!)
Step 1: Cut patches for a Windmill block
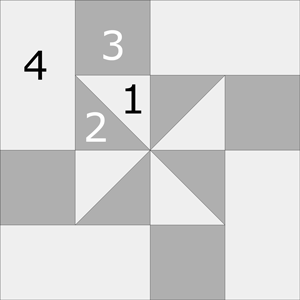 Windmill design
Sample Size: 6" finished / 6½" unfinished
Grid: 4x4
Design Type: Pinwheel, 4-patch
The hot pink print fabric (A) in the block is from Alison Glass' Sun Print line.
You can find more fabrics from Alison Glass here and here.
It's such a happy color.
Fun to work with!
 | Cutting Chart for a~Traditional Piecing ~ | |||||
|---|---|---|---|---|---|---|
| Patch | Fabric | Qty | Finished Block Size | |||
| 4" | 6" | 8" | ||||
| 1** | BAC | 2 | 1⅞" x 1⅞" | 2⅜" x 2⅜" | 2⅞" x 2⅞" | |
| 2** | A | 2 | 1⅞" x 1⅞" | 2⅜" x 2⅜" | 2⅞" x 2⅞" | |
| 3 | A | 4 | 1½" x 1½" | 2" x 2" | 2½" x 2½" | |
| 4 | BAC | 4 | 1½" x 2½" | 2" x 3½" | 2½" x 4½" | |
| Unfinished Block Size | 4½" | 6½" | 8½" | |||
| Grid Size | 1" | 1½" | 2" | |||
| **I prefer to cut my patches extra large for HSTs, stitch, and then trim them to size. If you prefer to do the same, add a bit extra to the measurements for Patches #1 and #2 above. There is a chart further down in these instructions where you need it for trimming them to size. | ||||||
Step 2: Assemble the units
HSTs
Make 4

We use the Quick Pieced method for making our HSTs.
If you plan to make many blocks, you may want to use another HST method like 8-at-a-time or triangle paper.
Draw a diagonal line from corner to corner on the backside of each #1 square.
With RST layer each #1 with a #2. Stitch a 1/4" inch from both sides of the drawn line.
Press each pair flat to set the seam.
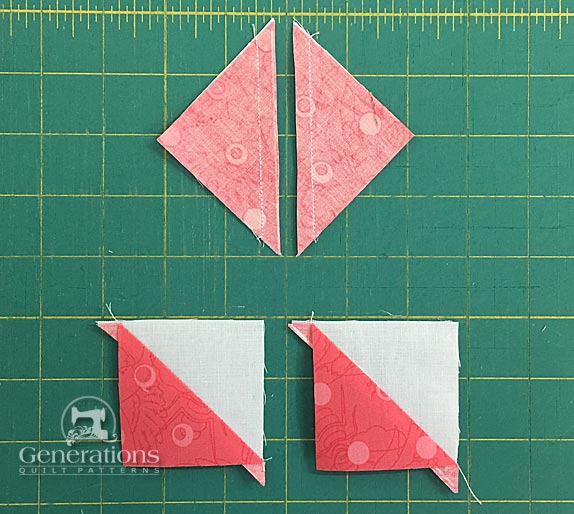 Cut along drawn line (top), after pressing (bottom)
Cut in half along the drawn line to create four HSTs. Press these units open with the SA toward the darker A fabric.
Check your sewing accuracy using the chart below. Trim as needed.
HST Dimensions | |
|---|---|
| Finished Block Size | Trim HST to… |
| 4" | 1-1/2" |
| 6" | 2" |
| 8" | 2-1/2" |
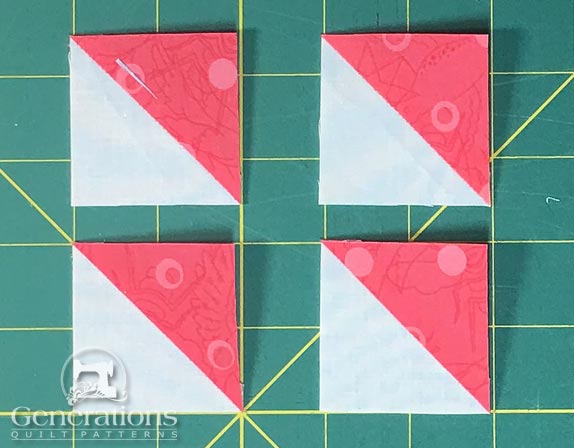 Four HST, trimmed and ready to use!
Quarter Blocks
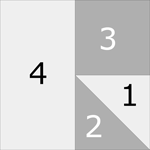
Make 4
With RST, sew a #3 to the #1 (background side) of a HST.
SA are pressed toward #3. Repeat for the three remaining HST.
With RST, sew a #4 to the #1/#2/#3 patch.
 Make 4
SA are pressed toward the #4 to avoid bulk. Repeat for the remaining patches.
Step 3: Assemble your Windmill block
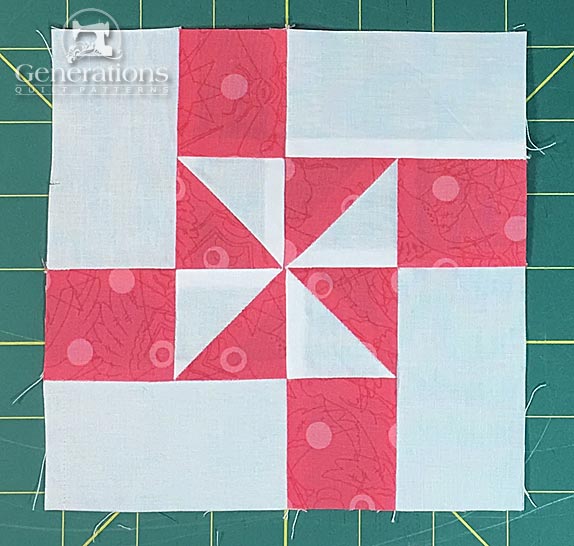
Arrange the units into the Windmill design shown below.
Each quarter unit is rotated a quarter turn as you move clockwise around the block. The long edge of the #4 patch is on the outside edge of the block.
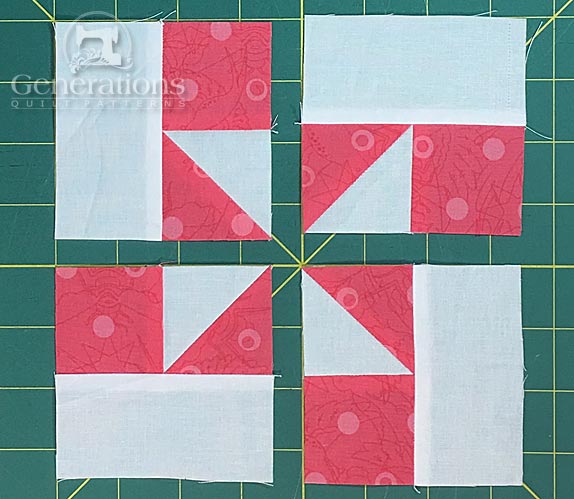 The patches create a pinwheel in the center of the Windmill design
With RST sew the units in each row together. If you've followed the pressing directions, all the seams in the units nest. That makes matching the centers of the pinwheel quite easy.
Use pins to hold everything in place as you stitch.
Press the SA in the direction of the arrows shown below.
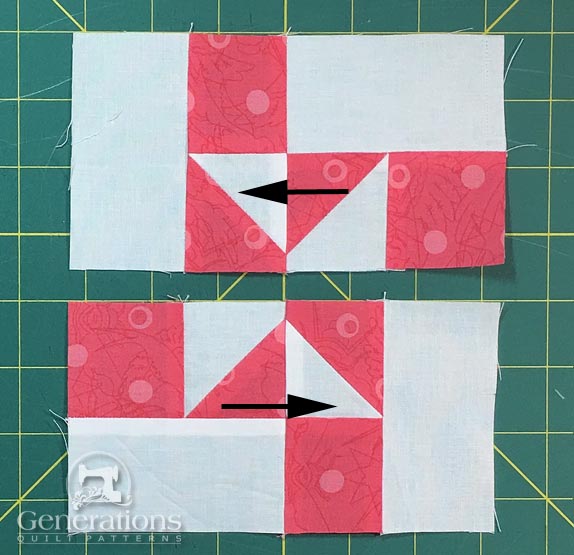
Again with RST, stitch the rows together.
It's helpful to use a pin through the match point in the center to ensure a good match.
The arrows point to the pin in the photo below.
[Click here for more on 'Pinning for Perfection'.]
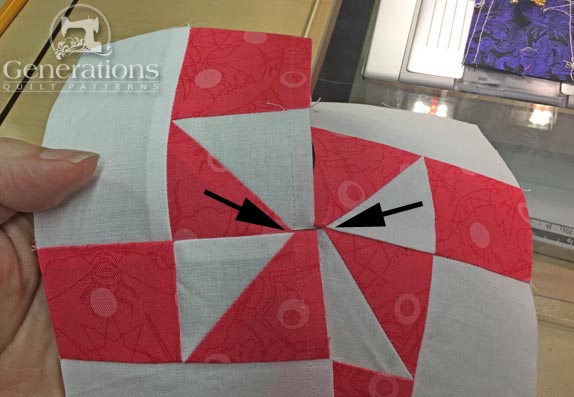 The pin is hard to see, but it goes perpendicularly through the very tips of the background HST.
After stitching pull a few of the stitches (do not cut them) away from the center so that you can twirl the seam allowance.
Then one final pressing.
Use my special pressing technique to get the flattest block you'll ever see. It's so-o-o-o-o simple. A real V8 head-thunk moment!
Here is the block from the backside. The twirled SA is circled. It forms a cute little pinwheel.
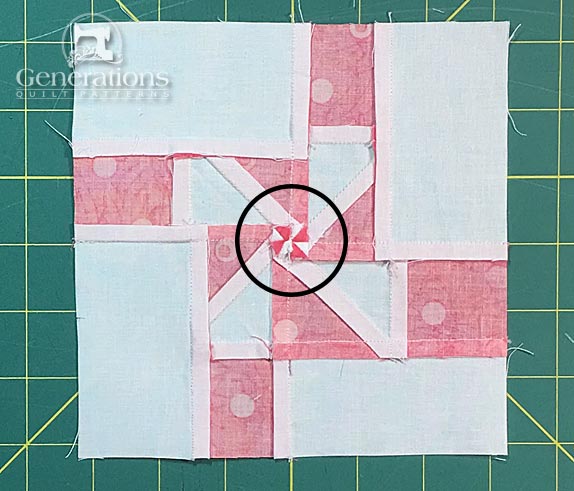
Our Windmill quilt block is now ready for a quilt.
What about a different quilt block?
For a list of all the 220+ quilt block patterns on this site, start here.
If you know the name of the block, shorten your search by using these links:
Click here if you're looking for blocks with at least some paper piecing.
Click here if you're looking for the basic building blocks of quilting, i.e., Flying Geese, half square triangles, quarter square triangles, etc., along with several techniques to make each.
And finally, use these links to find blocks in these finished sizes:
- Home
- Free Quilt Block Patterns
- Windmill Quilt Block
