- Home
- Paper Piecing
Foundation Paper Piecing Instructions
Introduction
This post contains affiliate links, for which I receive compensation.
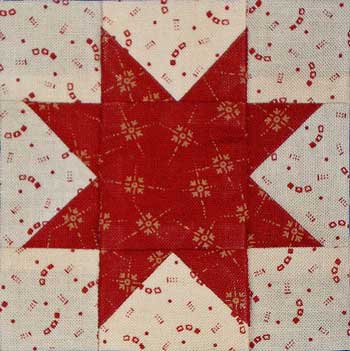
Follow our paper piecing instructions to create this adorable 3" finished Sawtooth Star quilt block.
You'll need the most current version of Adobe installed on your computer to download the pattern.
On the Adobe Print Menu page, under 'Page Size and Handling' set 'Custom Scale' to 100% before printing for accurate results. Click here to see what it looks like on the Print Menu page.
After printing, use the 1" square graphic on the printed pages to confirm they are printed accurately.
As a quick double check, Patch A4 measures 1-1/2" on the solid black line when it is printed at the correct size.
Sewing Machine Setup
When you're paper piecing, there are a couple of slight deviations from the standard sewing machine setup. All are related to making it easier to remove the paper in the final steps.
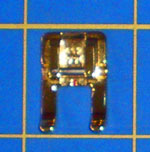 Open Toe Applique Foot
- Use a 90/14 needle to make a bigger hole. You can use an 80/12, but certainly nothing smaller.
- Set your stitch length to 15-18 stitches/inch or a 1.5 setting.
- Use a quality cotton thread in a neutral or matching color. The direction the seam allowances are pressed is determined by the piecing order. If you use too dark a thread it may shadow through. Test if you are unsure.
- Install an open toe applique foot so that nothing obstructs your view of the needle as you sew on the printed line.
- Clear Scotch Brand Magic™ Tape in case we need to repair a ripped pattern.
If you have a speed control on your sewing machine, consider setting number slower. Sewing exactly on the line gives you precise results. Slow the stitching speed down a bit to ensure that you are in control.
You'll Need a Few Additional Supplies...
If you have already done some traditional piecing, you'll likely have these supplies on hand.
- Rotary cutter, small ruler and mat
- Pins - very fine ones are best
- Scissors for trimming threads
- Pencil for marking placement lines
That's it!
Our paper piecing instructions continue with...
Cutting Over-sized Patches
For this example, a light fabric is used for the background and a dark fabric for the star. To make the piecing easier, all the pieces are cut over-sized.
Paper piecing is a trade-off between amount of fabric used versus accuracy of piecing.
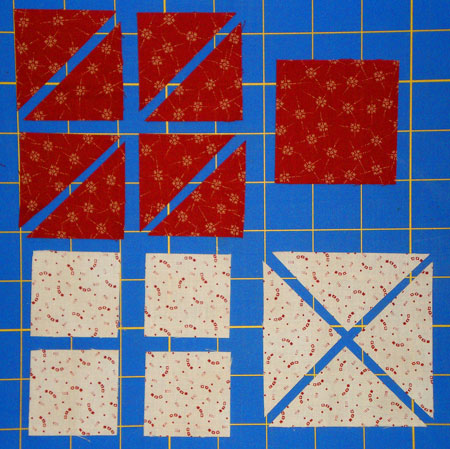
From the dark fabric (our red above), cut:
- Four 2" squares, sub cut once on the diagonal
- One 2-1/2" square
From the light fabric (our shirting above), cut:
- Four 1-3/4" squares
- One 3-1/4" square, sub cut twice on the diagonal
Understanding Your Pattern
Our sawtooth star block pattern is divided into four Sections: A, B, C and D. Each Section is divided into Pieces, as few as 3, to as many as 5.
For the purposes of these paper piecing instructions, when only a number is referenced, that refers to the same patch in all four sections. If a number AND a letter are used, it refers to a specific patch in a specific section. "Piece A1" refers to Piece 1 in Section A ONLY, whereas "Piece 1" refers to Piece1 in every Section (A, B, C, and D).
Now, you are ready to move on to the first lesson of our paper piecing instructions. Click the 'Lesson 1' link below.


