This post contains affiliate links for which I receive compensation
Why use safety pins rather than straight pins?
by Megan
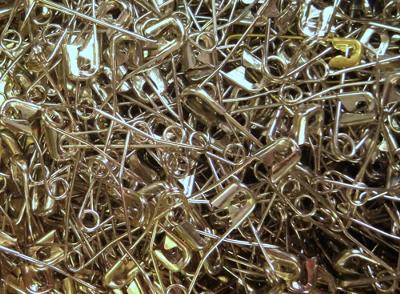
My safety pin stash...
I just finished my first quilt top, and since no one in my family has ever made a quilt before, I don't really have anyone to bounce questions off of. But, I've been looking at a lot of websites, and all of them to use safety pins to pin the backing, batting, and the top together, but they don't explain why.
I was wondering, why the safety pins instead of straight pins?
I have a lot of long, straight pins already at home, and would rather not have to buy more supplies. Would long straight pins work as well?
Thanks!
Reply
For a small wall hanging or tablerunner, you could probably get by with using your straight pins.The problem with straight pins is that you'll stick yourself with them and run the risk of getting blood on your quilt.
For a larger quilt that you need to roll or smush to get under the arm of your sewing machine, the pins are going to catch on the fabric and be poking out all over everywhere. With safety pins, you avoid getting stuck.
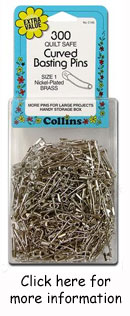
Personally, my favorite is the bent or curved safety pin, Size 1 (shown here). I find them much easier to open and close. My personal favorite is by Collins.
To gauge if you've got enough pins in your basting, lay your hand flat on the quilt sandwich. You should feel at least two pins with your palm. I've slowly amassed a huge cache of safety pins...slowly transferring over to the bent ones as I find them on sale.
Taking the prick out of straight pins...
There is a relatively new product on the market called 'Pinmoors' that allow you to use your straight pins to pin baste your quilts. The short video below shows how to use them.Neat idea! However in my opinion, Pinmoors are pretty expensive at $19ish for a pack of 50...I use several hundred safety pins in my quilts.
Some have suggested making their own 'Pinmoors' from a product called Backer Rod - 3/4" that you can find at home remodeling stores. While I haven't tried it, at a price of about $6 for 20 feet, if it works it'd be a much more economical solution.
Megan, I hope this helps answer your questions. And CONGRATULATIONS on finishing your first quilt! You should be proud of your accomplishment!
Readers, if you have experience with Pinmoors, please share it with us. If you have come up with your own homemade Pinmoors, we'd love to hear about that, too. Thank you!
Piecefully,
Julie Baird
Editor
Comments for Why use safety pins rather than straight pins?
|
||
|
||
|
||
|
||
