- Home
- Free Quilt Block Patterns
- Wheels Quilt Block - Traditional
Wheels Quilt Block Tutorial using Traditional Piecing Methods
4", 6", 8", 10", and 12" finished block sizes to choose from
This post contains affiliate links, for which I receive compensation.
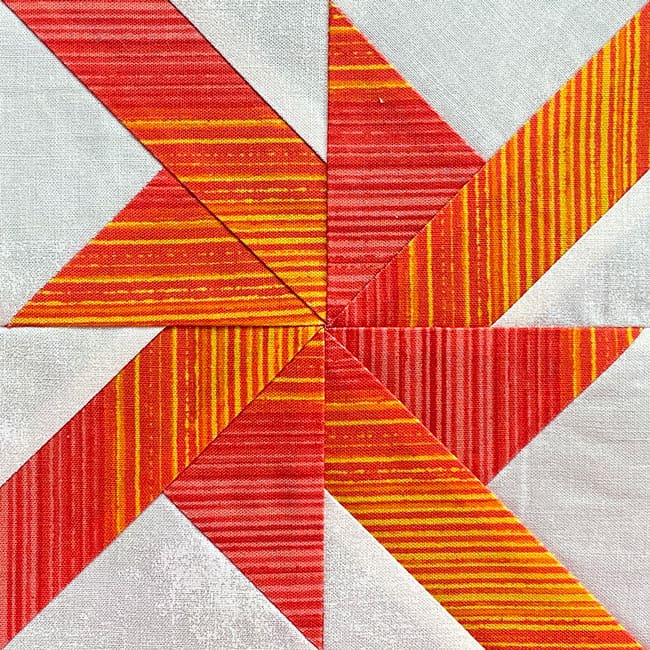
The Wheels quilt block is constructed with a simple variation on a 3-patch quarter square triangle unit. The addition of a single Folded Corner triangle in one corner completely transforms the unit into something with more movement.
I also use glue-basting for this version to help manage the longer bias edges without having to pin. Simple and effective without adding a pricey new tool or any difficulty.
 If sewing isn't on your calendar this week, Pin this for later!
The instructions that follow on this page use traditional piecing techniques.
Big Wheel keep on turnin', we proud quilters keep on burnin'…
As always, beginner-friendly, illustrated instructions are the backbone of the tutorial. There's more free goodies available for you to download to help you. They are:
Cut. Sew. Press. It's time to get your Wheels turning!
📋General Instructions
Several abbreviations are used on this page. They are:
- SA - seam allowance
- RST - right sides together
- HST - half square triangles
- QST - quarter square triangles
- FC - Folded Corner
A 1/4" SA is used in this tutorial.
Highlighted in yellow, pressing instructions are easy to spot.
To press, first press the patches in the closed position as they came off your sewing machine. This sets the seam, melding the fibers of the threads into the fibers of the fabric.
Then press towards the darker fabric unless otherwise instructed.
✂️Cutting patches for a traditionally-pieced Wheels quilt block
 Wheels design, traditionally pieced
Sample Block Size: 6" finished /6 ½" unfinished
Grid: 4x4
Design Type: Pinwheel | Paper piecing
Please label all your patches. We use their numbers throughout this tutorial.
I've used my go-to Grunge for the background and a fun ombre stripe for the A fabric. I made the decision not to care about the direction of the stripes in the finished block before starting,
Patches for the QST (#1-#3) are cut oversized. The QST is trimmed before adding the right-sized Folded Corner square #4.
Download and print the traditionally pieced design and chart.
 | Cutting Chart for a~ Traditional Piecing ~ | |||||||
|---|---|---|---|---|---|---|---|---|
| Patch | Fabric | Qty | Finished Block Size | Sub Cut | ||||
| 4'' | 6'' | 8'' | 10'' | 12'' | ||||
| 1 | Bac | 1 | 3½'' x 3½'' | 4½'' x 4½'' | 5½'' x 5½'' | 6½'' x 6½'' | 7½'' x 7½'' | |
| 2 | A | 1 | 3½'' x 3½'' | 4½'' x 4½'' | 5½'' x 5½'' | 6½'' x 6½'' | 7½'' x 7½'' | |
| 3 | A | 2 | 3¼'' x 3¼'' | 4¼'' x 4¼'' | 5¼'' x 5¼'' | 6¼'' x 6¼'' | 7¼'' x 7¼'' | |
| 4 | Bac | 4 | 1½'' x 1½'' | 2'' x 2'' | 2½'' x 2½'' | 3'' x 3'' | 3½'' x 3½'' | |
| Unfinished Block Size | 4½'' | 6½'' | 8½'' | 10½'' | 12½'' | na | ||
| Grid Size | 1'' | 1½'' | 2'' | 2½'' | 3'' | na | ||
REMEMBER to subcut the patches where indicated in the charts.
The smaller 3, and 4 squares are subcut as once as HSTs while the larger 1, and 2 are subcut twice on the diagonal as QSTs.
While highlight this?
Because Moi screwed up the subcutting TWICE while making the samples! Sheesh!
🪡Assemble the Wheels quilt block units
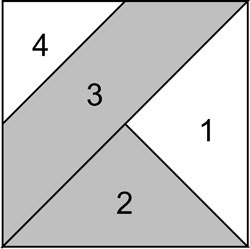
Make 4
With RST, layer a #1 and #2 matching all the edges.
Using the photo below as a guide, sew the seam on one short side with the A fabric on top, the flat edge feeding into the sewing machine first (to avoid your machine chewing up the points.)
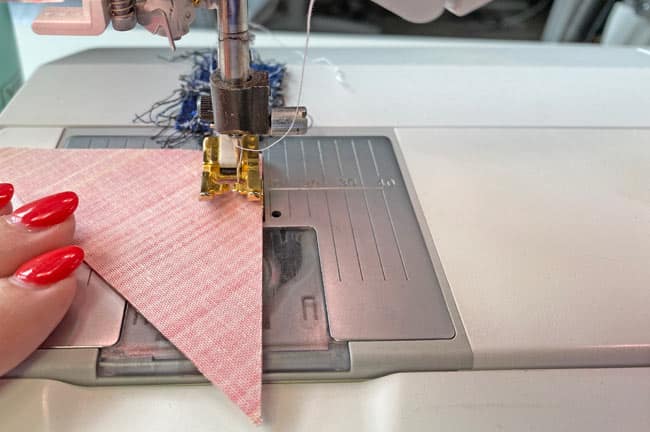
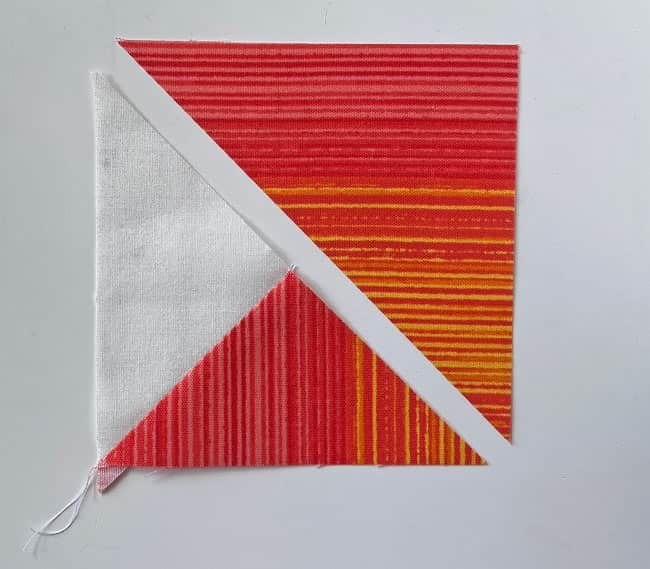
Press with the SA towards the darker fabric.
At this point your #1/#2 unit and #3 are the same size—oversized, but the same size.
Lately, I've been using glue basting to hold patches with bias edges together instead of pinning and am I liking the results.
Here, I've laid down tiny dots of Elmer's School Glue with a fine tipped bottle at less than a 1/4" from the edge. (blue arrows). You'll want dots at the very ends of the seam and a few between the end points.
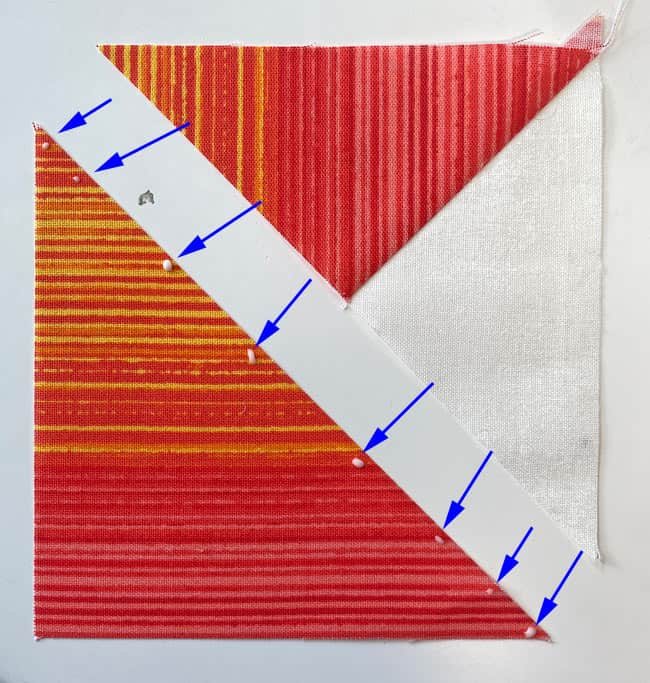
With RST, match the long edges. With an iron, heat set the glue (dry it out).
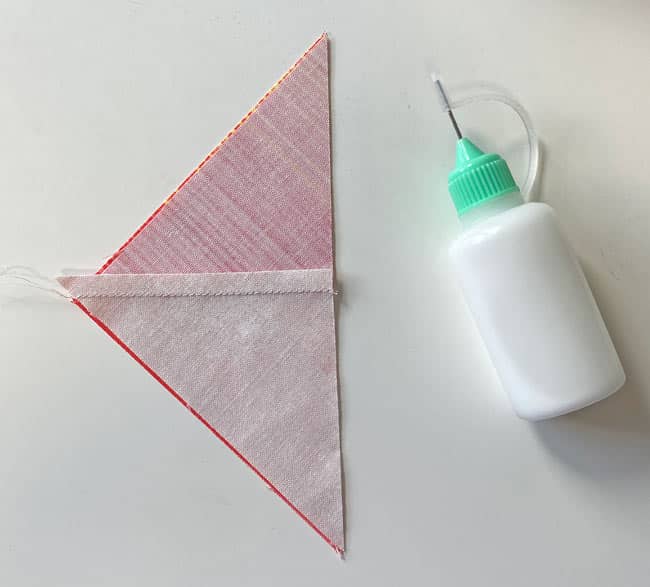 You can see the very fine tip on the glue bottle. The one that comes on a bottle of Elmer's Glue is great for elementary school, but much too large for this.
Start stitching on a 'spider' (that little scrap of blue fabric behind the presser foot) to avoid mangling the points on this HST shape. The heat set glue does seem to stabilize those points, as does starching my fabric before cutting.

Press.
We cut our patches oversized and now it's time to trim to size.
Use the chart below. Find your finished block size and the corresponding Center of the block.
3-Patch QST Dimensions | ||
|---|---|---|
| Finished Block Size | Center Measurement | Trim QST to… |
| 4" | 1¼" | 2½" |
| 6" | 1¾" | 3½" |
| 8" | 2¼" | 4½" |
| 10" | 2¾" | 5½" |
| 12" | 3¼" | 6½" |
For our 6" finished sample, using the chart we find for our QSTsthat the:'
- Center is at 1-3/4", and
- QSTs are trimmed to 3½" x 3½"
At your cutting mat, position the 1-3/4" marks on the ruler over the center of the unit. At the same time, line up the 45° marking with the seam allowance that runs diagonally through the unit.
Trim away the excess on the exposed top and right sides.
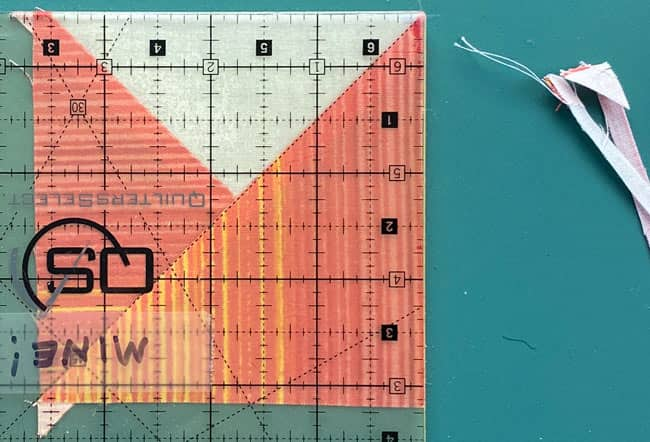
Rotate the unit 180°, so the trimmed edges are underneath your ruler.
This time, line up your ruler so that:
- The Center measurement is over the center of the QST
- The diagonal marking is directly over the long diagonal SA
- The markings for the 'Trim QST to...' size of the block are directly over the freshly cut edges of the QST (blue arrows below)
Trim away the excess.

Adding the #4 FCs
On the backside of the four #4 squares, mark a diagonal line from corner to corner. Just dark enough so that you can see it when you stitch.
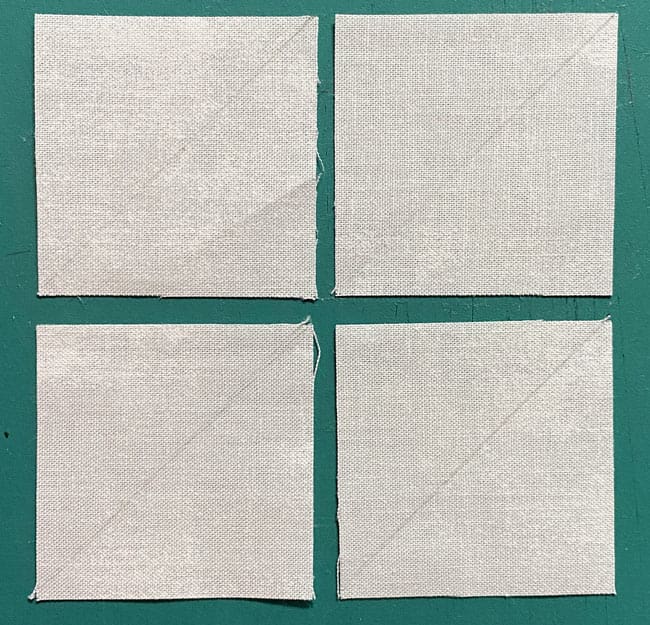 These lines are just dark enough for me to see while stitching.
Why such a light marking?
This line is going to stay in your quilt. On darker fabrics it won't matter, but on the light-light ones, it could either show through or shadow on your seam.
With RST, position this square in the corner of the HST portion of the QST (show below).
Sew on the side of the line closest to the corner. (This tiny adjustment makes up for the 'turn of the cloth' that gets used up in the SA.)
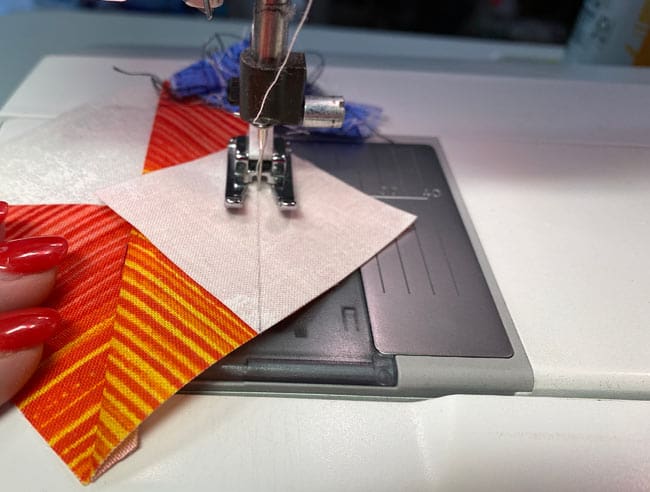
Repeat for all four units.
Press.
Do a quick check to see that the sewn patch, when pressed open matches the edges of the HST patch, If they're off a tiny bit, it doesn't make a difference for this unit. If they're off a lot, rip out your stitches, press the patches, remark and sew again.
Cut away the excess, leaving behind a 1/4" seam allowance, pressing again if needed.
 I've positioned the 1/4" on the ruler with the seam line and trimmed. You could choose to do this with a scissor, too.
Repeat for a total of 4 and give them a final press.
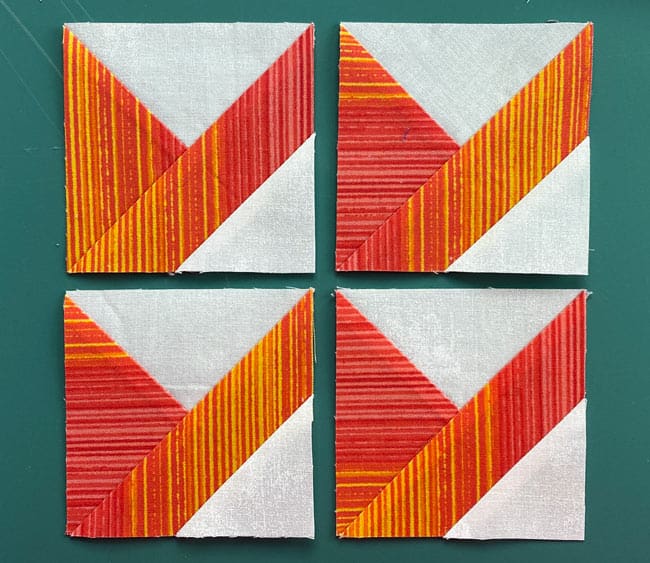
🧩Assemble your Wheels quilt block
Arrange the 3-patch QSTs as shown below, rotating each unit 1/4 turn clockwise as you move around the block.
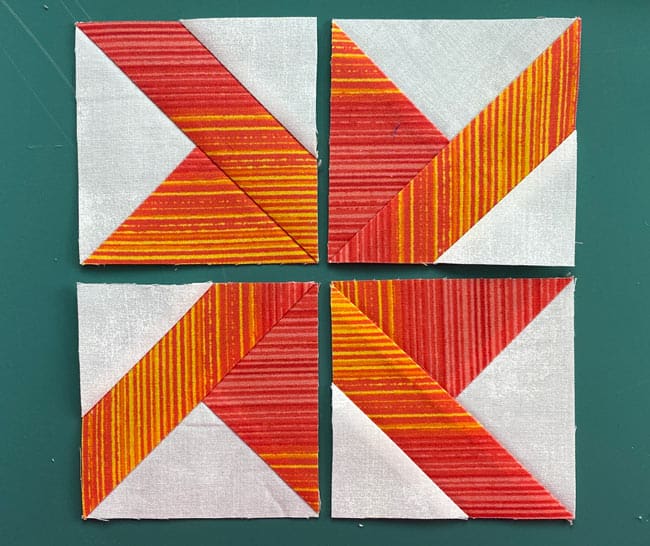
With RST, sew the units in each row together. Pin to get a good match in the center. The seams nest.
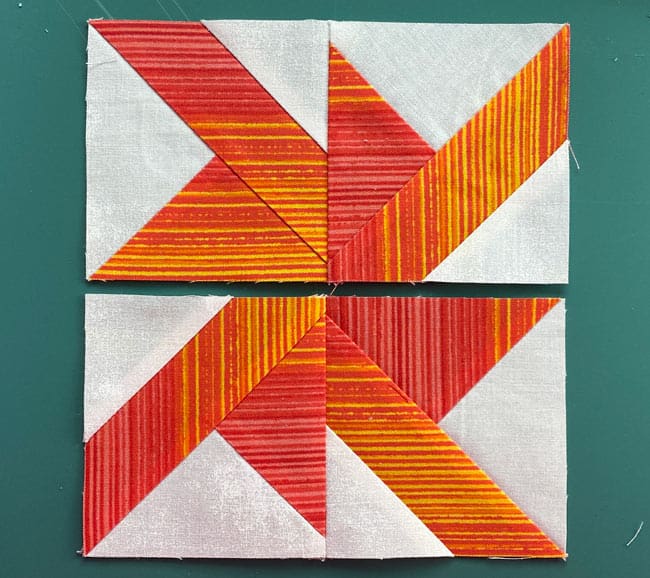
Press the SA towards the darker #2 QST shape.
With RST, sew the rows together, pinning as need to help with matching the center point. Again, the seams will nest to make this easier to do.
Twirl this final seam in the center by loosening the threads in the SA and twisting it to the sides. Finish by pressing the seams flat as they move counterclockwise around the block.
The completed block looks like this.
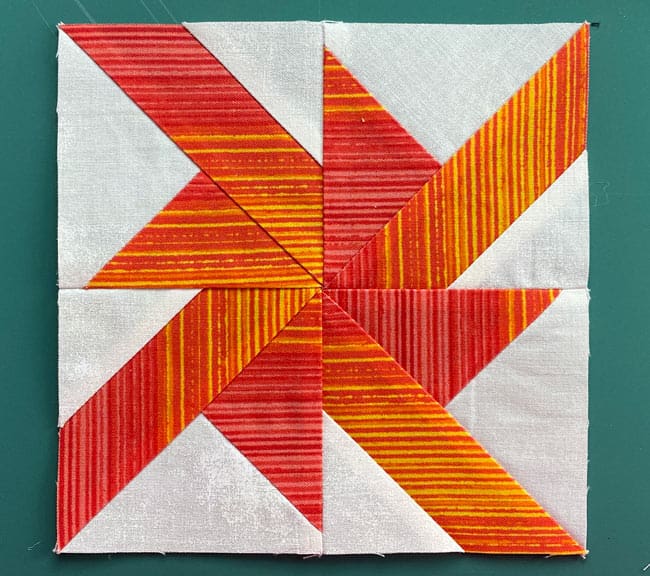
From the backside, the twirled or spun seam allowance is visible.

And a closer look at that twirled or fanned seam in the center.
DO NOT cut away the thread tails that you loosen. They maintain the stability of the block so it doesn't come undone.

So which technique is better?
I am completely biased towards paper piecing...in my mind it's the 'one technique to rule them all...'.

However, with this Wheels quilt block, that center is pretty lumpy (which is why I pressed open the SA in the paperpieced version). Even so, it's still a little lumpy.
With traditional piecing, YOU control the direction of the seams and twirling or fanning them is possible. The result. A flatter, more uniform center that'll be easier to quilt on your home sewing machine.
For the paper pieced Wheels, there are only two halves to trim instead of four units.
A saving of 8 cuts.
As always, the choice is up to you to make. Enjoy the journey!
🌀More playful pinwheel quilt blocks to stitch!
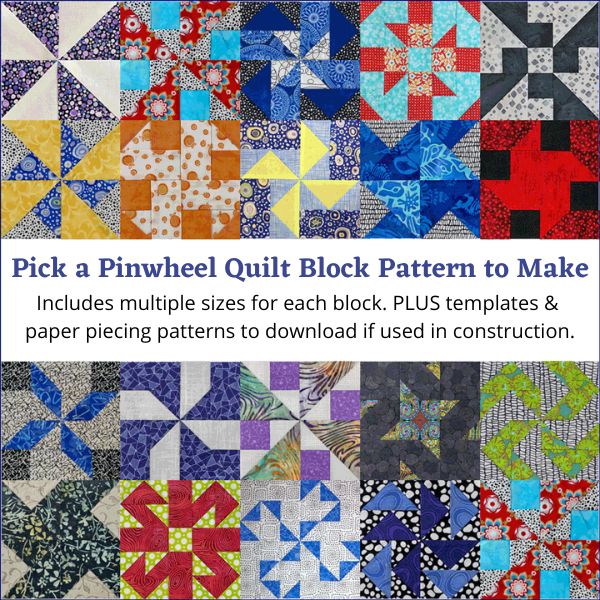
You've finished your pinwheel quilt block, and you're ready for more!
Our pinwheel quilt blocks are a delightful blend of playful interlocking patterns and vivid, eye-catching color. The interlocking patterns dazzle your eyes and inspire your creativity, while our step-by-step instruction ensures that you can create these stunning blocks with ease.
Click here to dive in and turn your fabric into MAGIC!
For even MORE blocks to make… 🧩🎨

...visit our Free Quilt Block Pattern Library, with over 260+ blocks to choose from in multiple sizes.
Free downloads are included in all sizes for any blocks require paper piecing patterns or templates.
- Home
- Free Quilt Block Patterns
- Wheels Quilt Block - Traditional


