- Home
- Free Quilt Block Patterns
- Valley Square Quilt Block
Valley Square Quilt Block
From our Free Quilt Block Patterns Library
This post contains affiliate links, for which I receive compensation.
Skill Level: Beginner
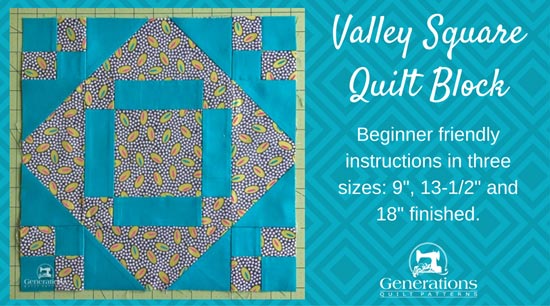
The Valley Square quilt block puts the 'connector corners' technique to good use. It's used to make the half square triangles patches in this beginner friendly design.
The only shapes you'll need to cut are squares and rectangles.
Not a bias edge in sight!
On this page, you'll find instructions to make this block in three different sizes.
At the end of this tutorial, there are links to ideas on how to set YOUR own blocks, as well as to some of my favorite design tools and books.
Let's get started!
General Instructions
I use a couple of common abbreviations throughout this tutorial:
- SA - seam allowances
- RST - right sides together
All your seam allowances (SA) are 1/4" unless otherwise stated.
Check out this simple pressing trick (no special tools needed) to create the flattest quilt blocks...EVER.
You'll be amazed at how such a simple thing can so greatly improve the quality of your blocks!
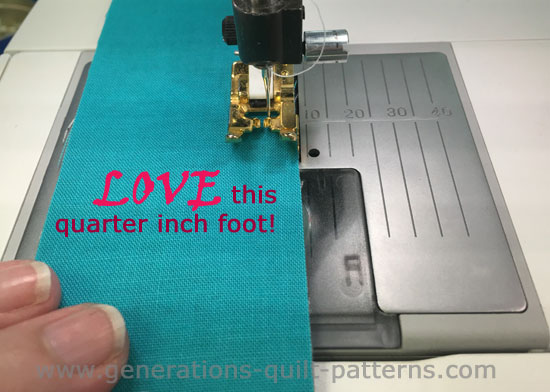
Finally, I use two different presser feet in the construction of this sample—my favorite quarter inch foot, the one with the guide on the side.
For stitching the connector corners, I prefer an open toe applique foot.
There's nothing to block my view of the stitching line.
The newest quilt fabrics to tickle your fancy...
Click the images below to see the full collection. We share any commercial and/or free patterns that showcase them, too. (For inspiration, of course!)
Step 1: Cut patches for a Valley Square block
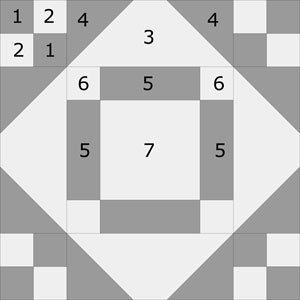 Valley Square design
Sample Size: 13½" finished / 14" finished
Grid: 8x8
Design Type: Uneven 9-patch large center
Choose quilt fabrics with good contrast.
In this sample Valley Square, the turquoise fabric is my 'dark'; the print is my light.
Patch #1 and #2 are a little bit longer than needed so that you can square up the ends before subcutting.
 | Cutting Chart for a~Traditional Piecing with Connector Corners*~ | ||||
|---|---|---|---|---|---|
| Patch | Fabric | Qty | Finished Block Size | ||
| 9" | 13½" | 18" | |||
| 1 | D | 1 | 1½" x 13" | 2" x 17" | 2½" x 21" |
| 2 | L | 1 | 1½" x 13" | 2" x 17" | 2½" x 21" |
| 3* | L | 4 | 2½" x 5½" | 3½" x 8" | 4½" x 10½" |
| 4* | D | 8 | 2½" x 2½" | 3½" x 3½" | 4½" x 4½" |
| 5 | D | 4 | 1½" x 3½" | 2" x 5" | 2½" x 6½" |
| 6 | L | 4 | 1½" x 1½" | 2" x 2" | 2½" x 2½" |
| 7 | L | 1 | 3½" x 3½" | 5" x 5" | 6½" x 6½" |
| Unfinished Block Size | 9½" | 14" | 18½" | ||
| Grid Size | 1" | 1½" | 2" | ||
| *Units used for the connector corners method. | |||||
Step 2: Assemble the Valley Square units
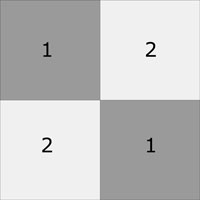 Make 4
Four Patch
Uses Strips #1, #2
With right sides together (RST) align the long edges of #1 and #2. Stitch.
Press with the SA to the dark.
Use the chart below the check that your strip set is the correct width.
| Finished Block Size | Stripset Width | Subcut Width |
|---|---|---|
| 9" | 2½" | 1½" |
| 13½" | 3½" | 2" |
| 18" | 4½" | 2½" |
Make any necessary adjustments now. Units that are the correct size make putting the block together much easier. The final result more accurate, too.
Straighten one short end of your strip set with your rotary cutter and ruler.
Then find the corresponding Subcut Width. Cut this strata into eight equal units.
After subcutting your strip set, arrange the patches into pairs, alternating lights and darks.
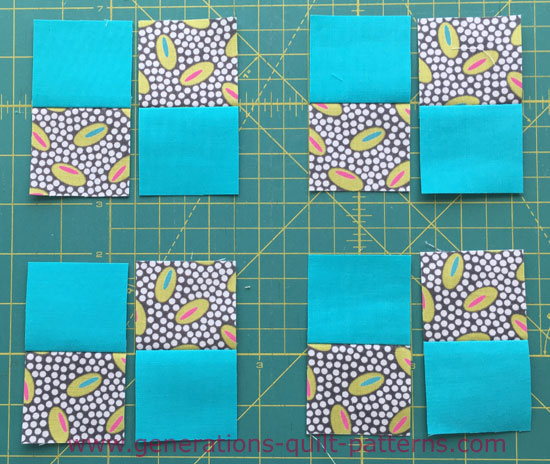
With RST, stitch them together into four-patches.
To finish off these units, twirl the seam allowance in the center. This helps to reduce bulk.
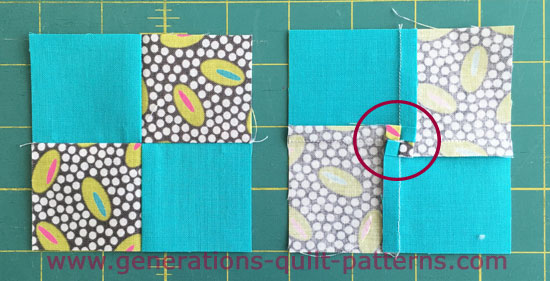 Twirled SA reduce some of the bulk in the center of your four patches.
It also makes setting blocks edge-to-edge in a quilt easier—the seams will nest automatically!
Center
Make 1 using Patches #5, #6, #7
Arrange the #5, #6, and #7 patches into rows. Sew the units in each row together.
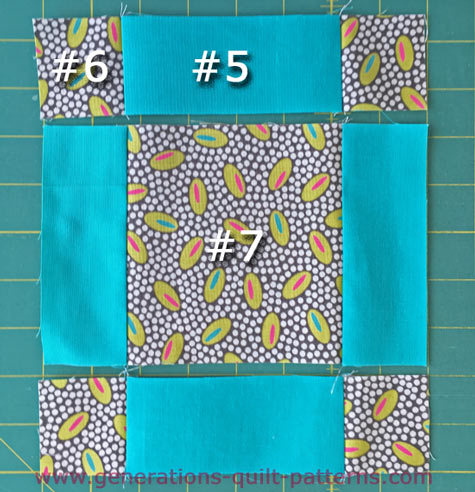
SA are pressed toward the turquoise (#5) patches. If your lights and darks are reversed, press towards the dark. These SA are not matched to any other SA.
Stitch the rows together to form the center unit. SA can be pressed in either direction.
Connector Corner Rectangles
Uses Patches #3, #4
 Make 4
Draw a diagonal line from corner to corner on the backs of each #4 square—marking the line only as dark as you need to see it.
I've used pen here (very bad girl!) so that you can see the lines.
Usually, I'd use my Bohin mechanical chalk pencil for a much lighter, removable marking.
Align three edges of a #4 with the end of a #3 rectangle. Use pins if you find them helpful (I do!).
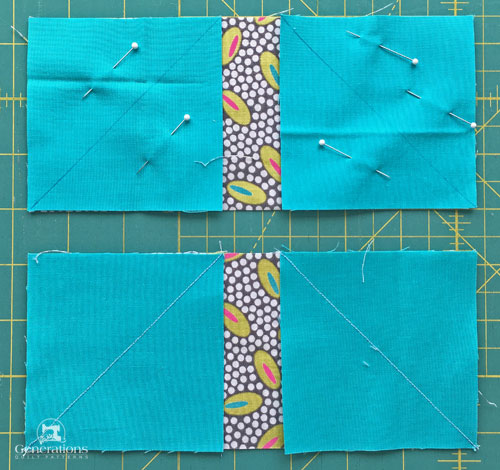 Lines are marked and patches pinned ready to sew (top). After stitching (bottom).
Stitch on the drawn line. (This is where I use my open toe applique foot.)
Repeat for both ends of the #3 rectangle. Your stitching lines must bisect the corners of the same side of the rectangle.
Press.
Trim away the excess #4 (turquoise) squares, leaving behind a quarter inch SA (below, top patch)
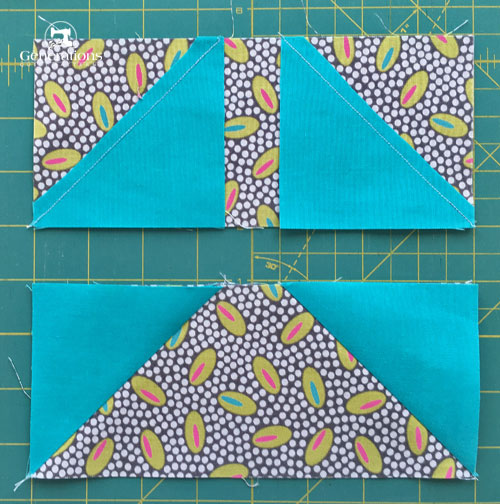
Press #4 patches out toward the corners (above, bottom patch).
Repeat for a total of four units.
Step 3: Assemble the Valley Square quilt block
After switching back to your favorite quarter inch foot, lay out all the units into rows. The dark fabric is in each corner of this design.
It's much too easy to get things flipped as you can see in my Oops! photo. (Click here to see it.) Somehow I forgot this WASN'T a star block.
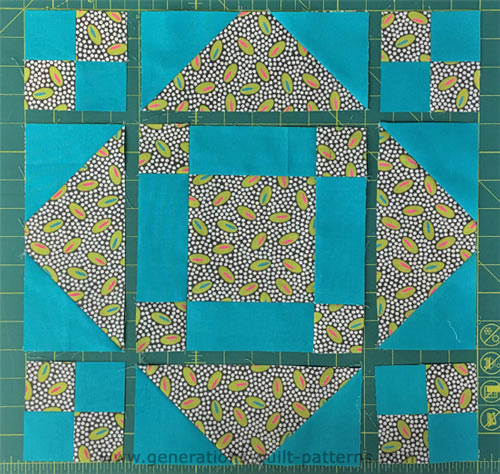
Stitch the patches into rows, pressing in the direction of the arrows.
If you've left the #3 rectangle intact, the rows may be a bit lumpy. This is the perfect time to try my favorite (wickedly simple) pressing technique for the flattest blocks you'll ever see. It works wonders!
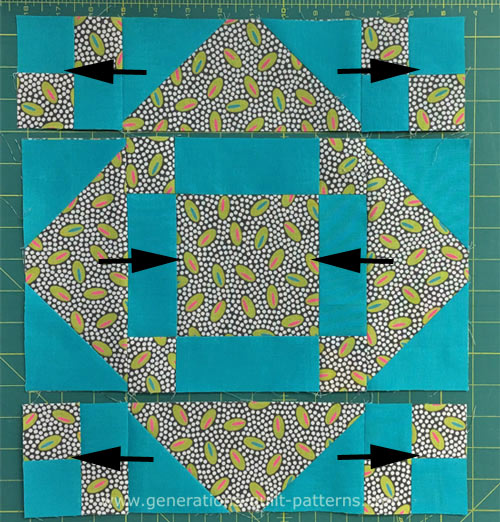
Stitch the rows together. Pin if needed. (I never met a block I didn't want to pin!)
Give the block one final press.
This is your finished Valley Square quilt block.
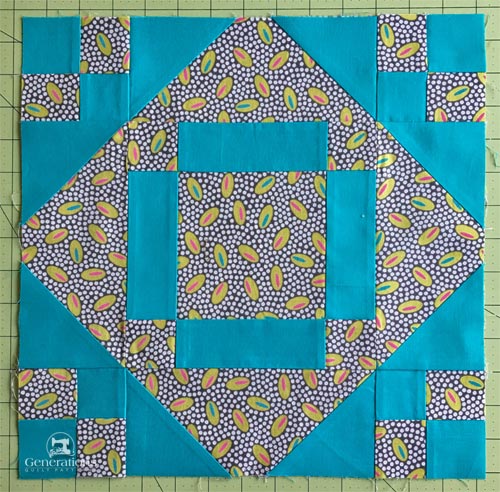 The finished Valley Square quilt block
And now from the back.
If you look closely, you can see that all the seams will nest when the blocks are set edge-to-edge. If they don't nest on the first placement, give one a quarter turn. Voila!
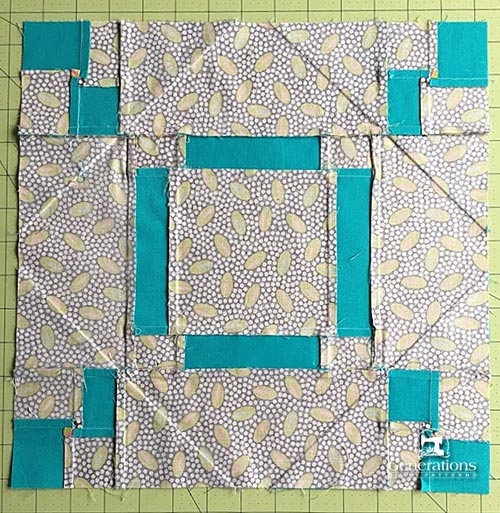 Valley Square from the backside
Now what?
You like this block.
And want to make more.
But what to do with them?
Check out the different ways to set these Valley Square quilt blocks and see if one appeals to you!
Or if you'd like to make more, different blocks, check out the links below.
Happy Quilting!
What about a different quilt block?
For a list of all the 220+ quilt block patterns on this site, start here.
If you know the name of the block, shorten your search by using these links:
Click here if you're looking for blocks with at least some paper piecing.
Click here if you're looking for the basic building blocks of quilting, i.e., Flying Geese, half square triangles, quarter square triangles, etc., along with several techniques to make each.
And finally, use these links to find blocks in these finished sizes:
