- Home
- Free Quilt Block Patterns
- Twelve Triangles Quilt Block
Paper Trail to Perfect Points: Master the Twelve Triangles Quilt Block
Follow the Lines, Find the Magic 📝🪄
This post contains affiliate links, for which I receive compensation.
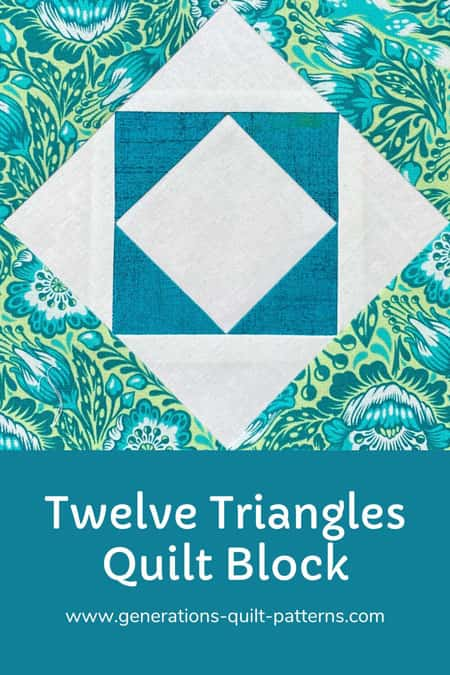
The Twelve Triangles quilt block is rather like a cousin once or twice removed to the Square in a Square or Economy quilt block. It simply has an additional round of HST to add to create the design.
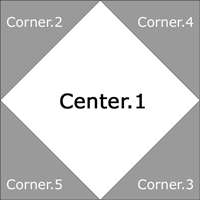
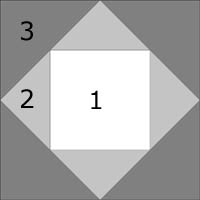
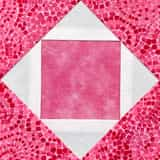
Click either image to go to the tutorial for that block, or to download the paper piecing patterns for it. (The links open in a new window.)
Paper piecing is my technique of choice. The reasons are three-fold:
- We avoid the fabric-gobbling Folded or Stitch n' Flip corner techniques
- We don't need to purchase a specialty ruler (i.e., Corner Pop) to make it
- The accuracy is A-MA-ZING when you sew on the line
Time to get to the 'thing'!
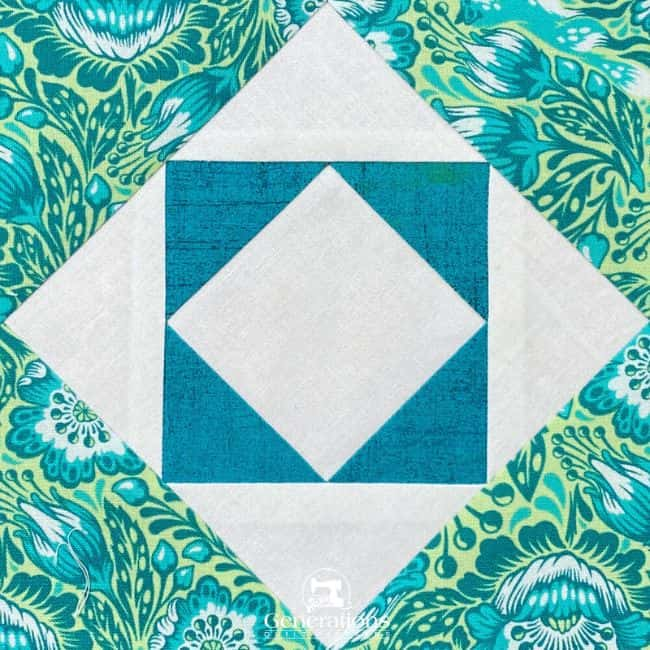 A finished Twelve Triangles quilt block, up close and personal...
🧭 Ready to hit the trail?
Ready to hit the trail? These signposts will guide you to exactly where you need to go on your paper-piecing journey. No wrong turns here—just click and arrive!
- Buried in bindings and borders? Bookmark or Pin this block for when you want a fresh start.
Cut. Sew. Press. Turn your fabric into MAGIC!
📋 General Instructions
Several abbreviations are used on this page. They are:
- SA - seam allowance
- RST - right sides together
- HST - half square triangles
A 1/4" SA is used in this tutorial.
Highlighted in yellow, pressing instructions are easy to spot.
First press the patches in the closed position as they came off your sewing machine. This sets the seam, melding the fibers of the threads into the fibers of the fabric.
In paper piecing, the SAs are then pressed toward the last patch you added.
📥 Download and print the paper piecing pattern
To download the pattern, use the most current version of Adobe.
For accurate results, on Adobe's Print Menu page, under 'Page Size and Handling' set 'Custom Scale' to 100%. Then print.
Click here to see what it looks like on the Print Menu page.
Find your finished block size from the chart below. Click on the Finished Block Size to print the pattern.
Print Twelve Triangles Quilt Block | |
|---|---|
| Finished Block Size | Units/Blocks per page |
| 2" | 6 |
| 3" | 4 |
| 4" | 2 |
| 5" | 1 |
| 6" | 1 |
After printing, use the 1" square graphic on the printed page(s) to double check that your patterns printed at the correct size.
Then cut out the required number of patterns from your copies. A rough cut is good enough—an 1/8"-1/4"-ish away from the outside dashed square.

Not sure which paper to use?
Take a look at my review of several of the most popular brands available to us quilters on the market.
You want a super-easy paper to tear away—less stress on the stitches.
The newest quilt fabrics to tickle your fancy...
Click the images below to see the full collection. We share any commercial and/or free patterns that showcase them, too. (For inspiration, of course!)
✂️ Cutting patches for your Twelve Triangles quilt block
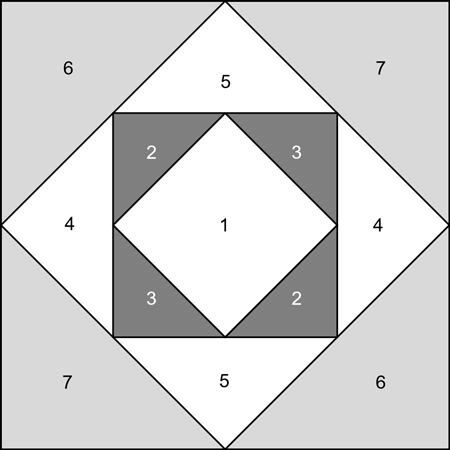 Twelve Triangles design
Sample Block Size: 6" finished /6 ½" unfinished
Grid: 4x4
Attribution: Farm Journal
AKA: Shadow Boxes (Yvonne Khin)
Brackman ID: 2377
Design Type: Log Cabin | Paper Piecing
The turquoise and green print is a Tula Pink (of course) from Tiny Beasts—Glow Out Foxed and the tone-on-tone turquoise is from Moda's Grunge Basics line.
I love, love, LOVE how the final block turned out.
Success starts with organization. Number each patch as shown, these will be your faithful companions throughout construction.
NOTE: After cutting Patches 2-7, subcut each once from diagonal corner to diagonal corner.
 | Cutting Chart for a~ Paper Piecing ~ | ||||||
|---|---|---|---|---|---|---|---|
| Patch | Fabric | Qty | Finished Block Size | ||||
| 2'' | 3 '' | 4'' | 5 '' | 6'' | |||
| 1 | Light | 1 | 1¼" x 1¼" | 1⅝" x 1⅝" | 2'' x 2'' | 2¼" x 2¼" | 2⅝" x 2⅝" |
| 2, 3 | Dark | 2 | 1⅞'' x 1⅞'' | 2⅛'' x 2⅛'' | 2⅜'' x 2⅜'' | 2⅝'' x 2⅝'' | 2⅞'' x 2⅞'' |
| 4, 5 | Light | 2 | 2'' x 2'' | 2⅜'' x 2⅜'' | 2⅞'' x 2⅞'' | 3⅛'' x 3⅛'' | 3½'' x 3½'' |
| 6, 7 | Medium | 2 | 2⅜'' x 2⅜'' | 2⅞'' x 2⅞'' | 3⅜'' x 3⅜'' | 3⅞'' x 3⅞'' | 4⅜'' x 4⅜'' |
| Unfinished Block Size | 2½'' | 3½'' | 4½'' | 5½'' | 6½'' | ||
| Grid Size | ½" | ¾'' | 1'' | 1¼'' | 1½'' | ||
General Sewing Machine Setup for Paperpiecing
- Reduce your stitch length to 16–20 stitches per inch (1.3-1.6 mm). This perforates the paper and stabilizes the seam when you remove the pattern. [Learn more about stitch length here.]
- Reduce your machine's speed or just plain slow down. Sew only as fast as you can stay on the stitching lines.
- Install an open toe appliqué foot (sometimes called an 'embroidery' or 'satin stitch' foot) if you have one (it's easier to see where you're stitching with one installed).
- Use a larger needle (90/14) if you have problems removing the pattern.
- If your machine has a needle stop up, use it. The stitching goes faster when you don't have to lift the presser foot with every seam.
- As you stitch each seam, start and stop a generous 1/4” before and after the solid stitching lines. ALWAYS. Future lines of stitching secure the ends.
After adding each patch, press the unit as it was sewn to set the seam and then open. The SA is automatically pressed towards the last patch added.
Before adding the next patch, take a look to make sure the one you just added covers the space plus seam allowance that it is supposed to.
Steam is optional and usually curls the pattern.
If that bothers you, don't use steam. Sometimes I do. Sometimes I don't.
It truly depends on my mood.
Remember, as you follow this paper piecing tutorial, the printed and the fabric sides of this block are mirror-images of each other.
At last!
Let's sew!
🪡 Assemble your Twelve Triangles quilt block
Use a dot of Elmer's Washable Glue Stick to hold the #1 square in place on the unprinted side of the pattern. Use the dashed guidelines around Patch 1 for quick and accurate placement.
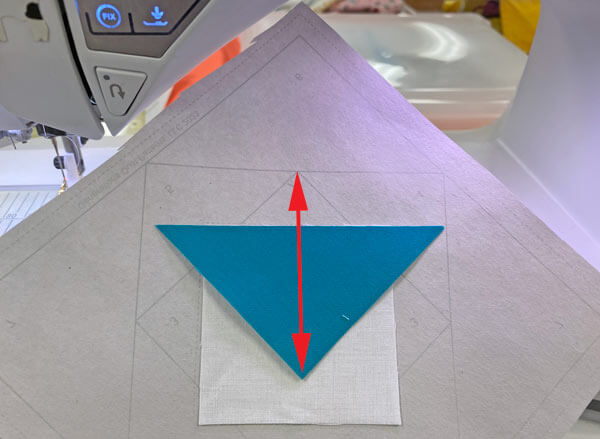
Then with RST, layer a #2 with one edge of #1, aligning the edges and centering the patch.
Helpful Tip
When positioning all the triangle patches in this quilt block, the point on the patch should be directly opposite the point you can see through the pattern (red arrow).
Sewing from the printed side, start and end a generous 1/4" past the beginning and end of the solid line between #1 and #2 (red arrows below).
Stitch every seam in this same manner...starting and stopping a generous 1/4" from the end of the marked sewing line.
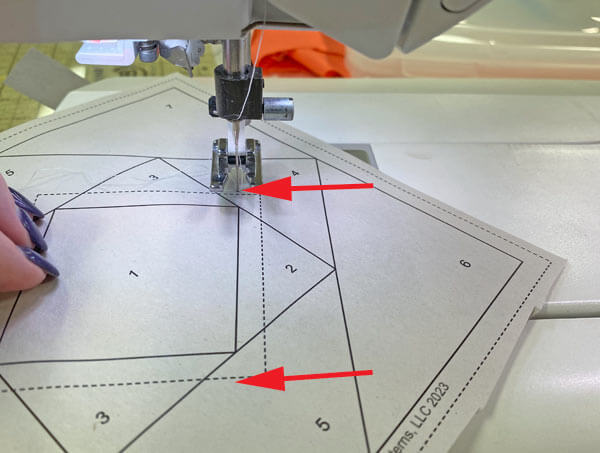
For our 6" sample, the #2 patches don't overlap, so I didn't stop to press the first #2 open.
For smaller blocks you WILL need to press before adding the second #2. If you've starched your quilt fabrics, you can give it a good fingerpress and save you a trip to the iron.
With RST, layer the second #2 with the opposite edge of #1.
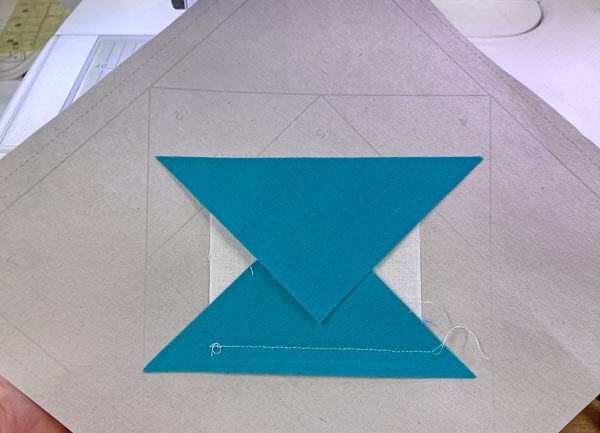
Stitch.
Now press at the iron.
With RST, position #3 on an open side of #1, centering the patch.
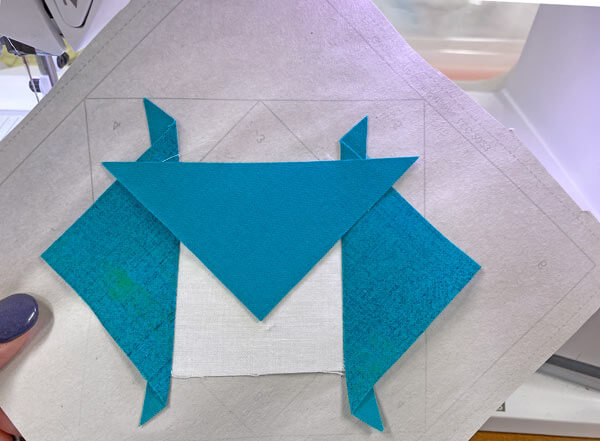 Position the first #3
Stitch.
Fingerpress it open or press at the iron, depending on the size of your Twelve Triangles block.
Add the second #3.
At this point, I like to take scissors and trim away those dog ears to remove the excess bulk. I've removed the first of four at the red arrow.
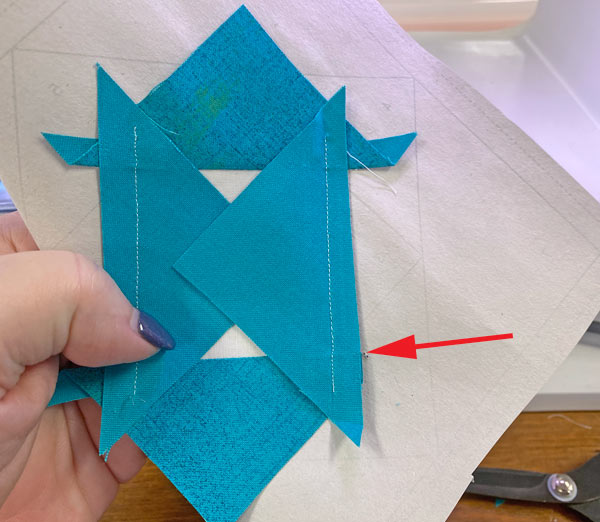 Trim away the dog ears created by adding the #3 patches
Press at the ironing board.
It's time to trim to establish the SAs for the next round of triangles.
At your cutting mat, printed side up, align the edge of your ruler with the solid line between #2/#3 and #4 on one side. (red arrow)
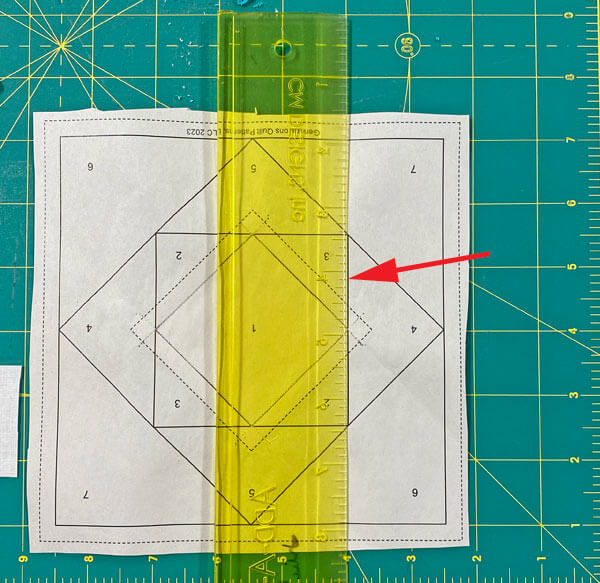 Using my Add-A-Quarter Plus ruler to fold back the pattern
Fold the pattern back on itself using the edge of the ruler. You will pull the fabric and stitches away from the paper pattern. The paper will rip a tiny bit. That's normal.
If it rips too much, use a piece of Magic Tape on the printed side. DON'T press on the tape. It'll gum up your iron.
Below I'm using the Add-A-Quarter Plus Ruler (12" version). There is a 1/4" lip that 'catches on the fold, making this trim job virtually foolproof...
...and this fool needs all the help she can get! ;)
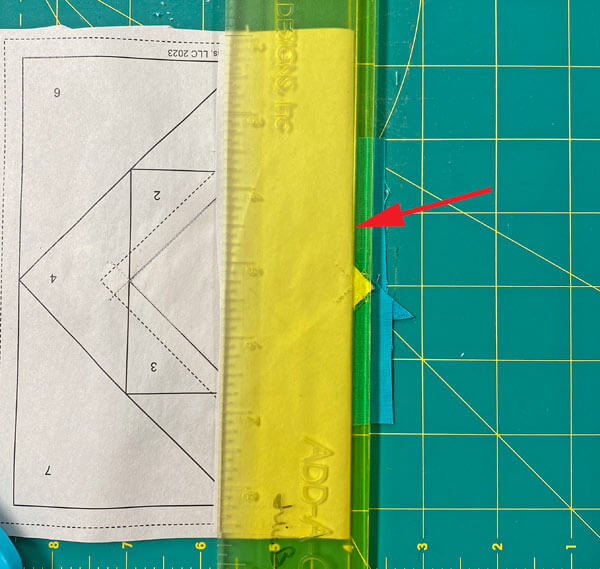
Trim away the excess fabric sticking out. It's the bits of our Turquoise Grunge above.
Repeat for the three remaining sides.
We'll use this same trimming technique after we add the #4s and #5s.
Here is the 2" finished version of this block after trimming the sides. Perfect points and 1/4" SA. Ready to add the #4 and #5 triangles.
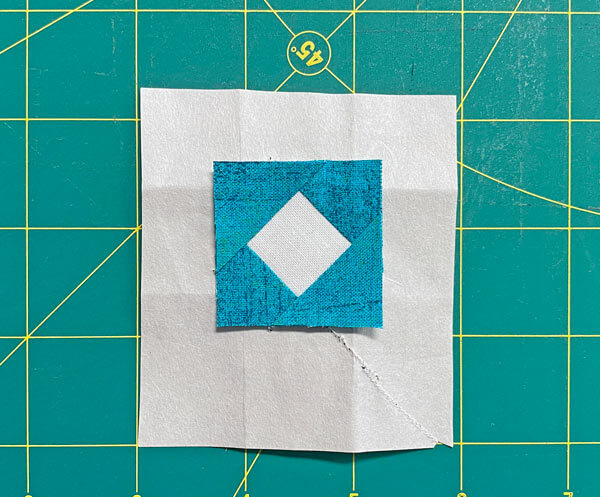 Silly me! I missed taking a picture of the bigger, 6" sample block at this stage.
Back to our larger sample, with RST, align the long bias edge of a #4 with one #2/#3 side.
Since I'm adding a lighter patch on top of a darker one, I like to nudge the edge of the light #4 a couple of threads past the edge of the darker #2/#3. That way, the darker fabric won't shadow through the top of the quilt block.
Our patches are oversized, so you DO have a bit extra. And a few threads is all it takes.
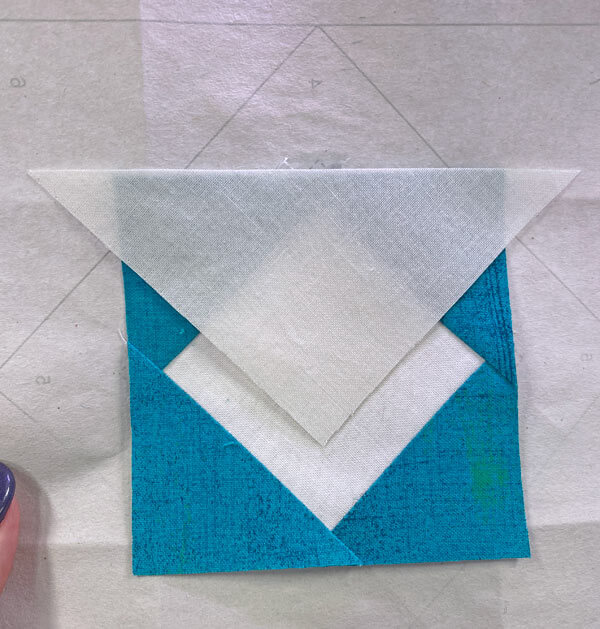
Sew just like we've done all the seams to this point.
Add the second #4, nudging a couple of threads past the edge again to avoid any shadowing through.
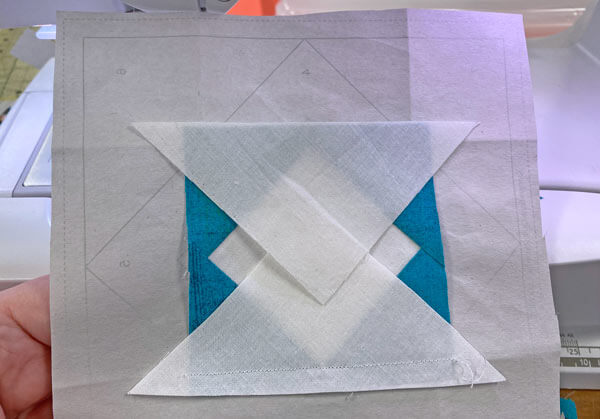
Press.
Add the first #5.
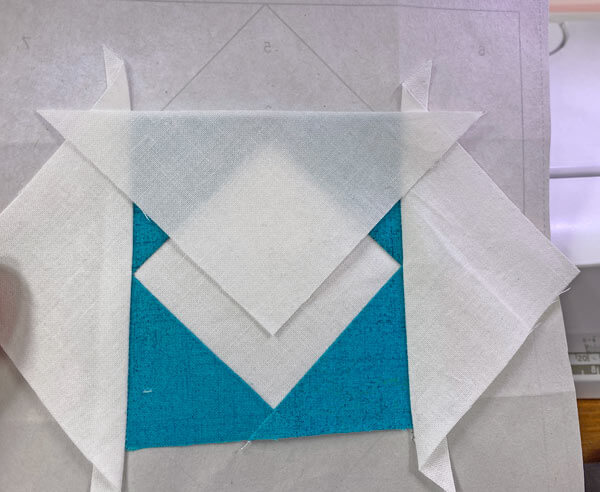
And then the second one.
Trim away the dog ears created by adding these last two patches.
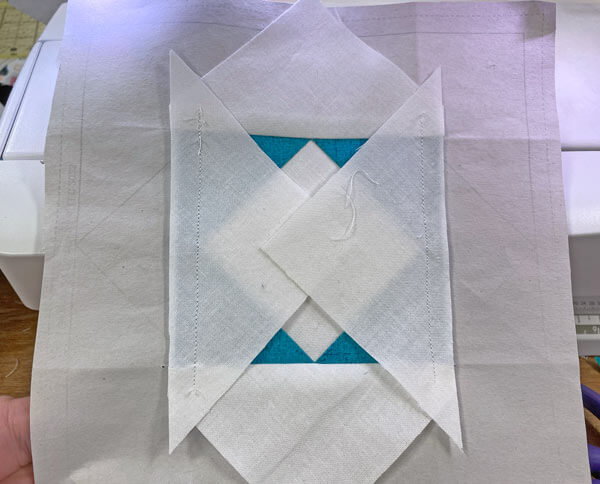
Press.
Trim away the excess fabric in the #4 and #5 patches just like you did for the #2s and #3s.
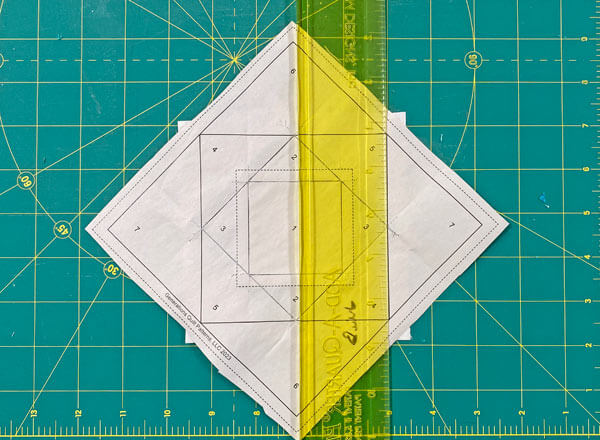 Position the ruler. Then...
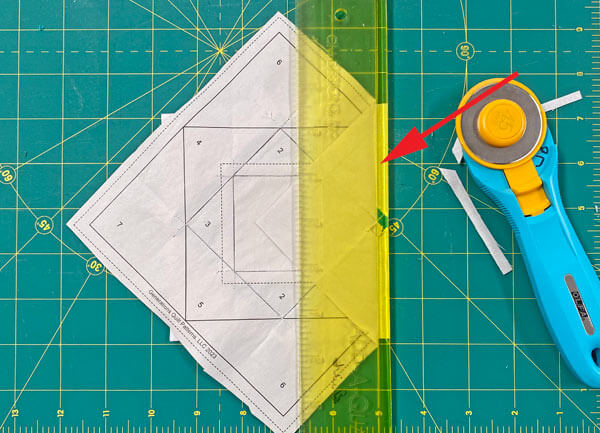 ...fold back the pattern, reposition the ruler and trim away the excess.
Repeat for all four #4/#5 patches.
Your block looks something like this after trimming.
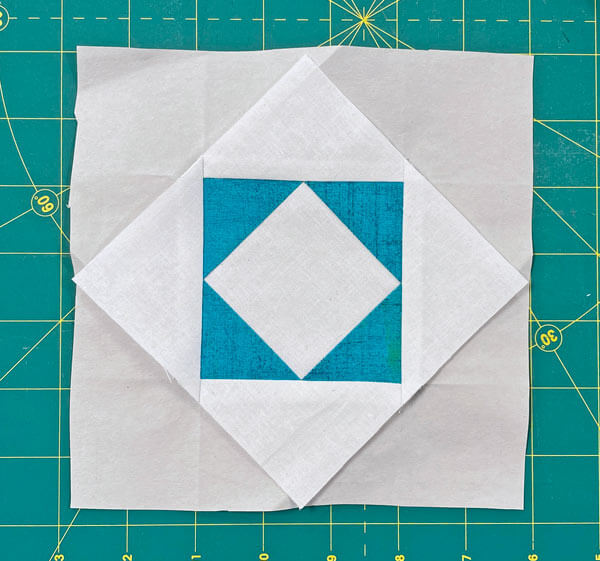
All our points are intact and pointy. AND we've got the perfect placement line to position our last four patches accurately.
Match the edges of the first #6 with a trimmed #4/#5.
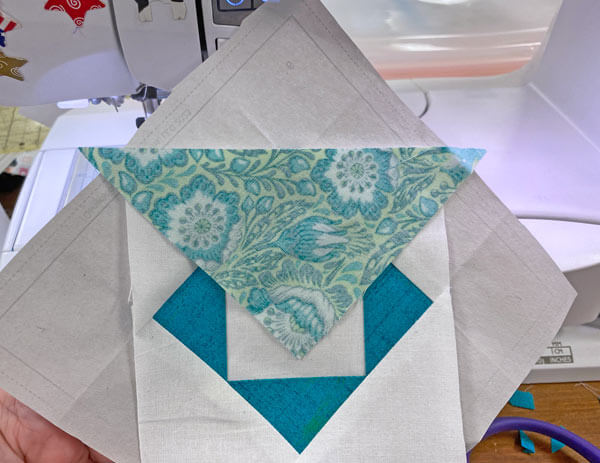
No need to nudge the patch a few threads because we're adding a darker patch to a lighter one. No chance of shadowing with this round of #6s and #7s.
Stitch from the printed side just as you've done for the first two groups of triangles.
Press.
Add the remaining #6 and press.
Finally, it's time to stitch the two #7s.
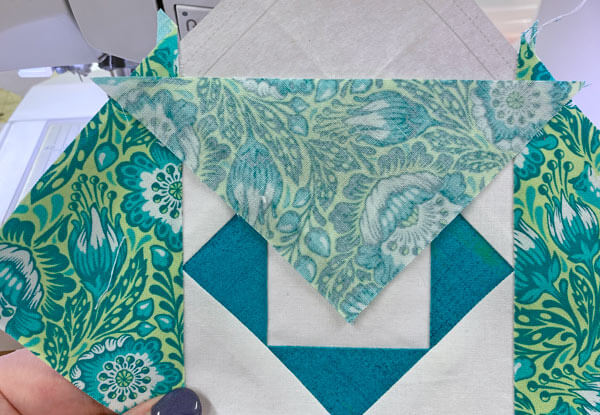 This #7 is in position. Only 1 left to go.
Finish with the second #7.
All the sewing is done.
Give your Twelve Triangles a good pressing.
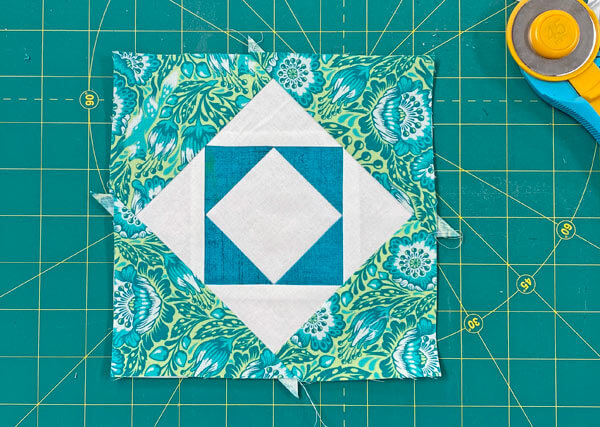 Looking good, but needs a trim job!
Return your sewing machine to your everyday settings.
Re-install your favorite quarter inch presser foot. Adjust the needle position if needed. Increase to your normal piecing stitch length so your already for your next sewing excursion.
Move to the cutting mat, and trim the block to its unfinished size. That number—the bigger one—is in the SA allowance on the pattern itself.
For our 6" finished sample block, we're trimming to 6½" x 6½"
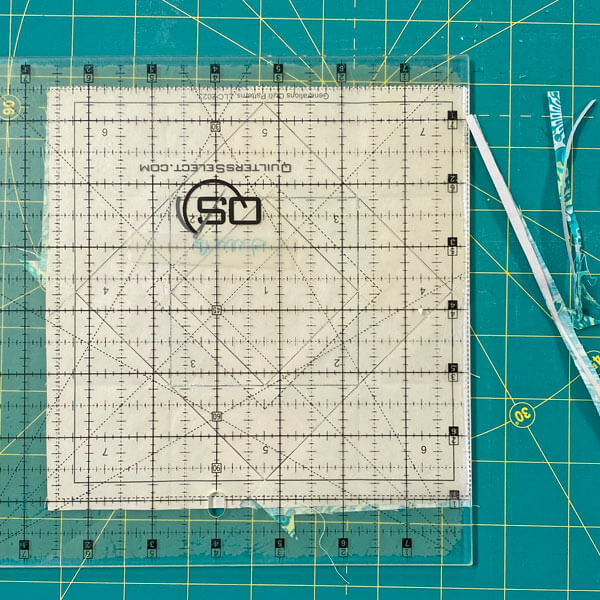 Trim the first side of the finished Twelve Triangles...
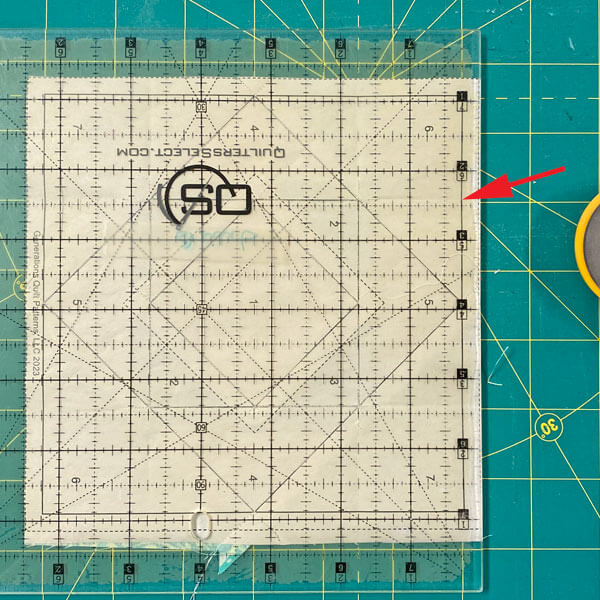 ...and the 2nd...
 ...and the 3rd.
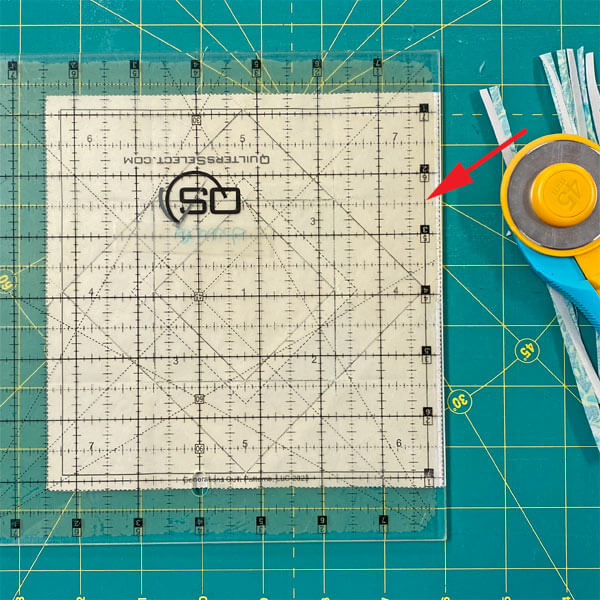 Finally, the last one!
Why not use the Add-A-Quarter Plus ruler for this?
Since we're not folding the pattern back on a seam line, there is no edge for the lip on the Add-A-Quarter to catch. The only tool for this job is one of your everyday rotary rulers. Pick one that is big enough and fits nicely in your hand.
Now with the ruler out of the way, these are the results of all that trimming.
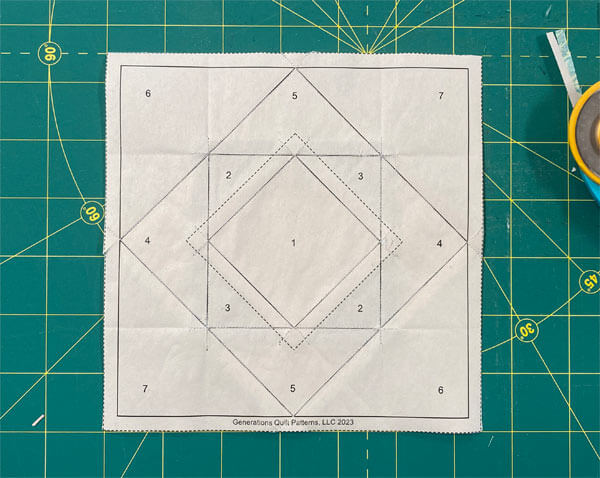
Time to remove the paper. It's easiest to remove the paper pattern in the reverse order of how they were stitched. That means remove #7, then #6, etc.
From the front side, here is our finished Twelve Triangles quilt block. None of the points within the block are cut off. The outside points are all exactly 1/4" in from the cut edge.
Gotta love paper piecing!
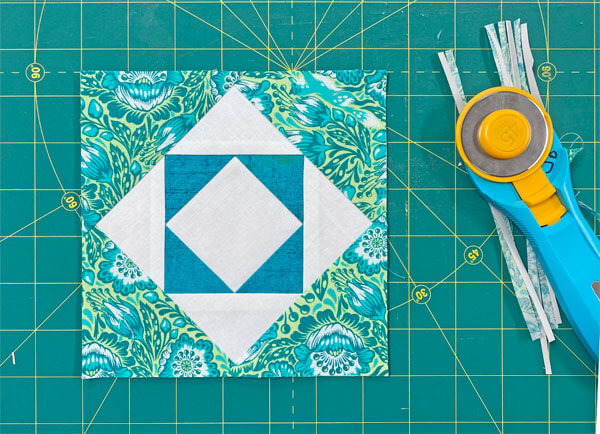
You did the thing!
High-five yourself for piecing the ultimate beginner triangle block—those perfect points prove you've got this!
Happy quilting!
Journey Complete: Perfect Points Achieved! 📍
Look at those crisp points and precise seams—you've officially graduated from the School of Paper-Pieced Perfection! 👩🎓📜✨
Your Twelve Triangles block is a testament to your determination and attention to detail. Time to celebrate your quilting victory and plan your next paper-piecing adventure! 🎉💫
📌 Mark this spot on your quilting map
Perfect points ahead. Pin for future piecing success! 📌✨
💫 Log Cabin Block Buffet (All You Can Make!)
Feast your eyes on these beauties! 🎯 Each one uses the same "master the method, skip the stress" philosophy you just learned. ✨ Time to put those skills to work on something new! 💪
The blocks below are ones where at least a part of the block uses the Log Cabin piecing technique.
Still have a Log Cabin itch that you can't scratch?
Browse through our curated collection of free or paid Log Cabin quilt patterns. These include traditional and modern blocks, Pineapple and Courthouse Steps designs.
Click here for the inspiration.
For even MORE blocks to make… 🧩🎨

...visit our Free Quilt Block Pattern Library, with over 260+ blocks to choose from in multiple sizes.
Free downloads are included in all sizes for any blocks require paper piecing patterns or templates.
- Home
- Free Quilt Block Patterns
- Twelve Triangles Quilt Block
