- Home
- Quilt Design Inspiration
- Triangle Puzzle Quilt
Designing with a Triangle Puzzle Quilt Block
Create stunning quilts with simple design principles
This post contains affiliate links, for which I receive compensation.
Ever stare at your Triangle Puzzle quilt block and think, "Now what?" Don't worry—you're not alone! 🤗
As quilters, we all have those moments where we see the potential in a block, but aren't quite sure how to turn that single group of patches into a stunning quilt. That's exactly what we're going to explore today.
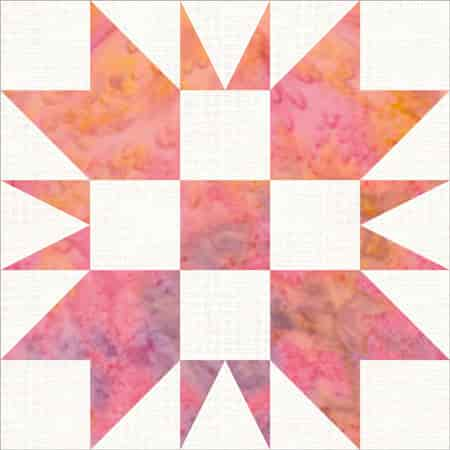 Triangle Puzzle quilt block design
Think of this as your personal playground for quilt design. ✨ We'll take your Triangle Puzzle block and show you how a few simple design principles—particularly repetition in size, value, and shapes—can spark sixteen creative possibilities.
The best part?
You don't need fancy tools or complicated math.
We'll use shapes you already know (and can download for free! 🎁), measurements that already exist in your block, and a dash of "what if?" thinking.
Remember, these designs aren't set-in-stone patterns (so no frantically searching for fabric requirements! 😅). They're jumping-off points for YOUR OWN creativity. Think of them as friendly suggestions that whisper, "Hey, what if you tried this?"
Because every so often, that's all we need to get our creative juices flowing. 💫
Jump to What Interests You! 🦘
Want to explore specific layouts? Use these quick links to hop right to the section that catches your eye. Whether you're drawn to straight sets or feeling adventurous with diagonal arrangements, there's inspiration waiting for you
- Downloadable resources (Triangle in a Square, Square in a Square, and Diamond in a Rectangle paper piecing units in multiple sizes
- Go to the Triangle Puzzle quilt block tutorial to learn to make the block in 5 sizes
The nuts and bolts of drafting these designs
All the designs on this page were created in Electric Quilt 8, the hands-down best software for playing with quilt designs. It's fast and easy to maneuver in.
I like it so much I've got copies loaded on both my PC and iMac.
You'll notice there are no lines around the patches or the blocks. This is a deliberate choice on my part. It's much easier to see alternative piecing plans without those lines.
Much less distracting, too.
More like what's in your head. The quilt designs we carry around in our head never have black lines. :D
Straight Sets
These are the easier designs to piece—there aren't any half or quarter square triangle blocks to stitch to fill in the edges like there are in diagonal block settings.
Look for alternative piecing plans
Here our Triangle Puzzle blocks are set edge-to-edge in a straight set.
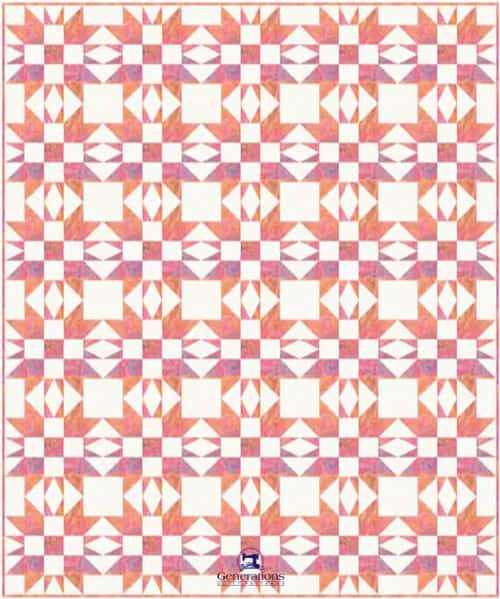
Instead of piecing 30 blocks and then fiddling with matching all those points together—and not cutting any of them off—I'd ditch the single block method of piecing this design.
I believe it'd be much easier to use these units instead.
 While hard to see, there is a solid cut square in the center that is 2x2 grid units—the size of the 4 background corner squares put together.
- On the left is the unit that does all the work. All the HSTs and Triangle in a Squares combined into one unit. Paper piecing means all those points are beautifully matched—all for the price of sewing on a line. Sweet! (It's easy to create the paper pieced unit in Electric Quilt.)
- The solid background square (center, above)—hard to see but it's there—is the size of four corners in the original block design.
- Strip pieced 9-Patches (above, right) complete the piecing plan.
💡 Pro Tip: Always look for alternate, easier piecing plans when you set blocks together in new quilt designs.
When setting our Triangle Puzzles edge to edge, there's not much to change up, either adding more fabrics, or changing the positions of the fabric values.
A common choice among pattern designers is simply to invert the colors in alternate blocks.
With no increase in difficulty, we've created a lot more movement in the design.
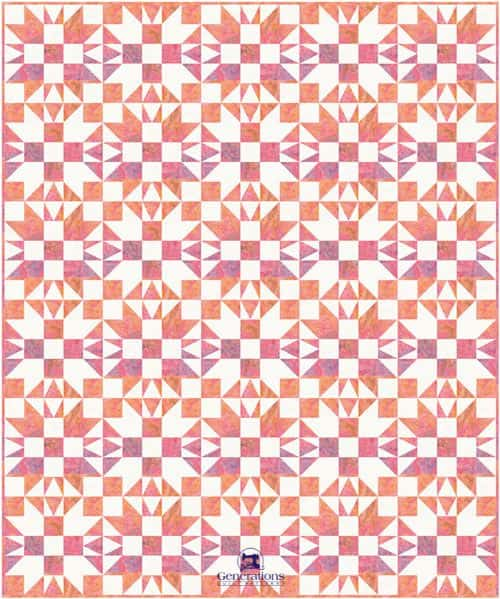
The downside of this variation is that we won't be able to use that new paper piecing unit we created for the previous straight setting.
💡 Pro Tip: When setting blocks edge-to-edge in your designs, spend the time BEFORE you commit to piecing the quilt to modifying the pressing instructions. You'll want at least the majority of seams to nest to avoid lumpy bulk and hard-to-match seams at the edge of your block.
A stitch—er, rather a pressing plan—in time saves nine!
Changing the design with sashing
Let's add a sashing strip and cornerstone to the design. This technique can do a couple of things:
- Give your blocks some space to breathe
- Provide some/more negative space for some fancy quilting
- Enlarge a design to help it fit better on a bed or wall
First up is the easiest to make and quickest to stitch—sashing cut from the background fabric, and cornerstones cut from the darker fabric.
💡 Pro Tip: When choosing a width for sashing, choose one that already exists in your block design. For our 10" Triangle Puzzle block, the design is drawn on a grid of squares that is 5x5. One grid unit in our block equals 2" finished. The sashing in all the following designs is 2" finished.
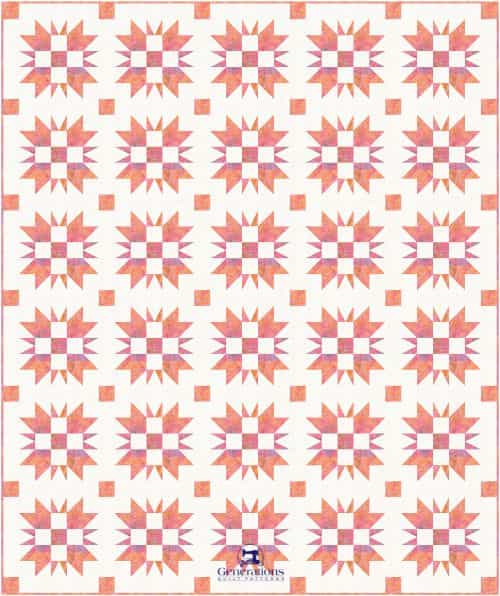
A very standard, familiar design. You've probably seen a lot of quilt designers do this. The benefits include:
- All the blocks are pieced the same with no concern for nesting seams between blocks
- There's a bit of 'fudge' room if your points aren't all exactly where they should be.
- The seams between blocks and sashings are pressed towards the sashings, automatically minimizing bulk.
Building a design with existing shapes
If you've been quilting for very long, you'll know without anyone telling you that quilting is about repetition…heaps of repetition.
When designing a quilt with sashing (or alternate blocks), look for shapes in the blocks to repeat. It's a simple way to create a design that hangs together.
Repeating the 9-Patch
It'll make an interesting cornerstone. Let's then take one of the strata that we use to make the 9-patch with and use that for the sashing.

Here is what that idea looks like:
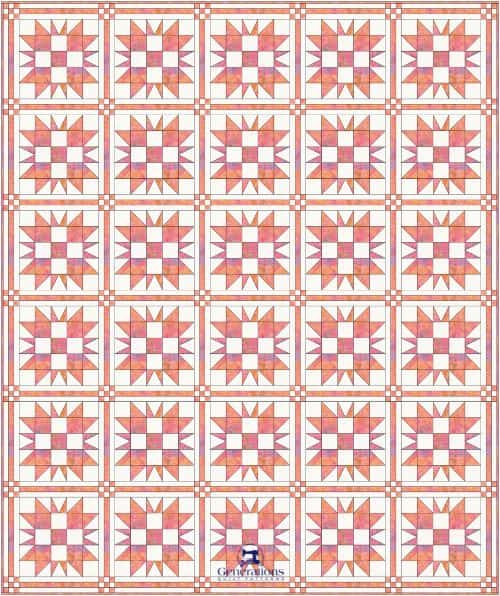 Repeating the 9-patches shape
A little more pizzazz than the previous design, don't you think?
One of the things that comes up in the design process are ideas that aren't so easy to piece or rotary cut. Those little 9-patches are cute, but leave us with a decision. With finished 2" sashing, those 9-patches need to finish at 2", too.
The problem?
The strips would need to be cut 2" ÷ 3 = 0.667" + .5" (seam allowances) = 1.167" wide. Not fun!
You have two options:
- Paper piece the strata for the 9-patches and the sashing, or
- Change the size of the sashing
#1 makes it easy to cut. The paper pattern provides the trim lines. You cut strips that get you close, and then use the lines on the pattern to trim to perfection.
#2 violates our guideline of using an existing dimension from the block.
You could go with either a 1⅞" (cut 1⅛" strips) or a 2¼" (cut 1¼" strips) cornerstone and sashing width if your heart is set on this design. Those 9-patches would finish at 1⅞" or 2¼". Both are rotary-cuttable (is that a word) measurements.
Repeating the Triangle in a Square
This time, instead of a cornerstone, we'll use the Triangle in a Square shapes at both ends of the sashing strip. For simplicity's sake, the cornerstone is cut from the darker fabric.

And the resulting design.
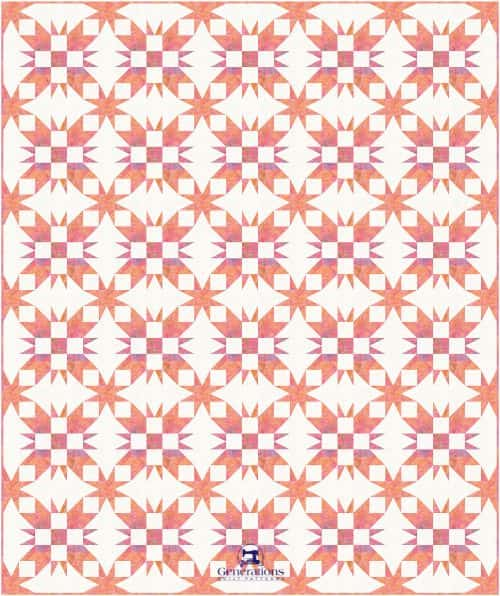
For our 2" sashing, we'll be paper piecing a whole slew of Triangle in a Square units. Simple to piece, simple to trim. Just a nice stretch of uninterrupted time with our sewing machine!
Unexpectedly, this combo blurs the lines between the blocks. A terrific effect without any increased piecing difficulty.
Now replace the solid cornerstone with small 9-patches.

It lightens the impact of the smaller stars, doesn't it?
There's a significant increase in the amount of piecing, with 42 additional smaller 9-patches to piece. As the quilt designer, it's up to you to decide if it's worth it.
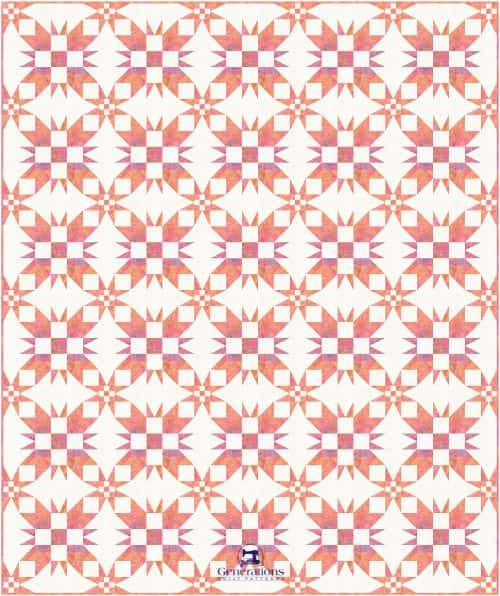
For 10" blocks, we'll be paper piecing the strata to make the little 9-patches.
Or go back to the strip measurements we calculated for a previous design with the strata sashing and 9-patch cornerstones. (Either the 1⅛" or 1¼" cut strips for 1⅞" or 2¼" finished units.)
Adding pizzazz with pieced sashings ✨
If you love to sit at your sewing machine and shove stuff through (my perfect 'Happy Place'), then these next two ideas should tickle your fancy.
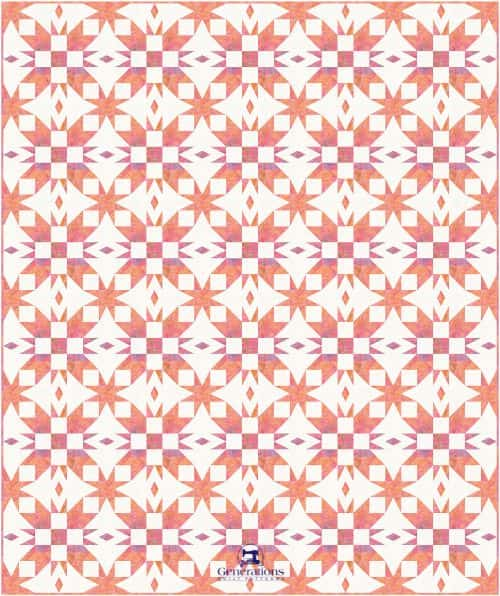
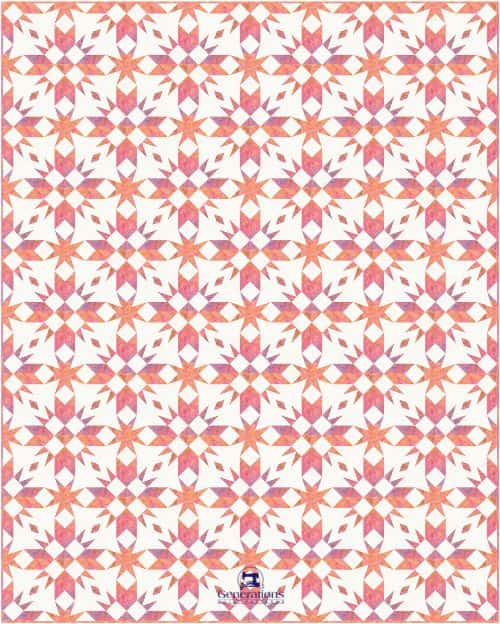
First, we'll add a Diamond in a Rectangle to the center of our sashing. (It's nothing more than 2 TiaS with their bottoms sewn together. Remember, we're repeating shapes.)

In this layout, this diamond shape measures 1"x2" finished.
Tiny, yes, but it adds a certain delicacy to the design. (We're back to the solid cornerstones).
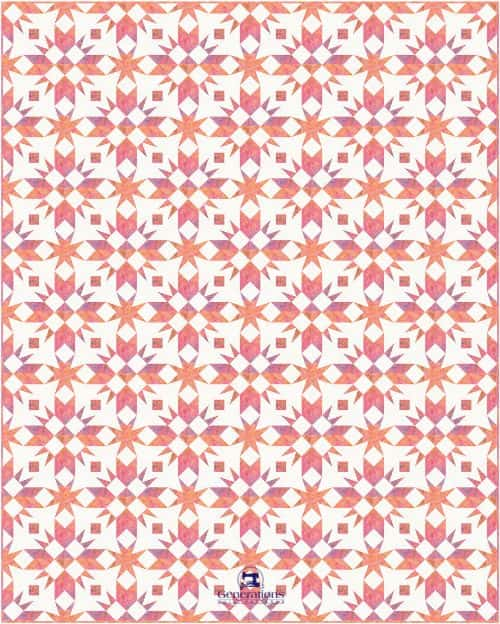
This time, instead of a Diamond in a Rectangle, we swap in a 2" x 2" Square in a Square.

Not quite as light and elegant, but satisfying in its own right.
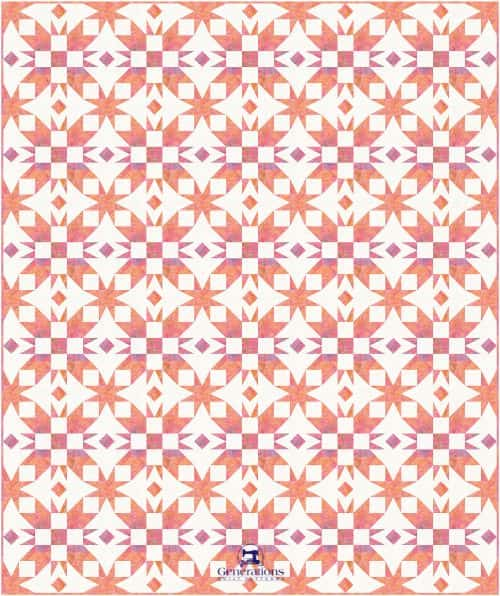
Using the simple guidelines of reusing measurements and shapes already in the blocks, themselves, we've create several interesting designs. The difficulty of each is relatively the same, only the amount of piecing changes.
And we use paper piecing to help us compensate for ideas where the patches aren't necessarily rotary-cut-able.
Diagonal Sets
Diagonal sets are a bit more fussy to piece.
Setting triangles are needed to fill out the sides of the pattern. Deciding on a separate piecing plan for those units, while a bit of extra work, lets you piece units with as much straight of grain fabric on the outside edges of your quilt top as possible.

Straight of grain doesn't stretch like bias does, making for more stable edges that don't get pulled out of shape as you're working sewing the top together or doing the actual quilting,
Below, all the designs we've seen already as straight sets are translated into diagonal sets.
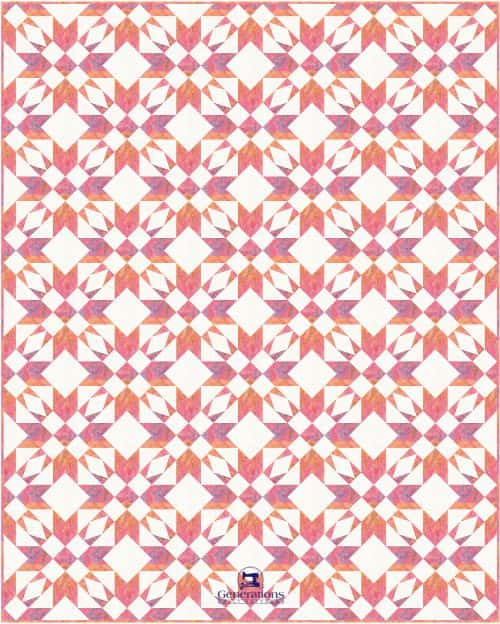 Blocks set edge-to-edge
In this next version, the lights and darks are swapped in the alternate rows. While it produced pleasing results in a straight set. Here it's kind of a hot mess.
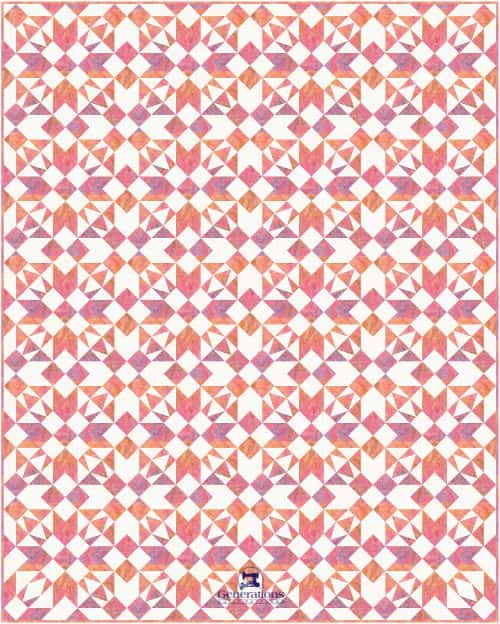
Your eyes have no place to stop and rest while looking at this arrangement.
Simple sashing and cornerstones return organization to the layout.
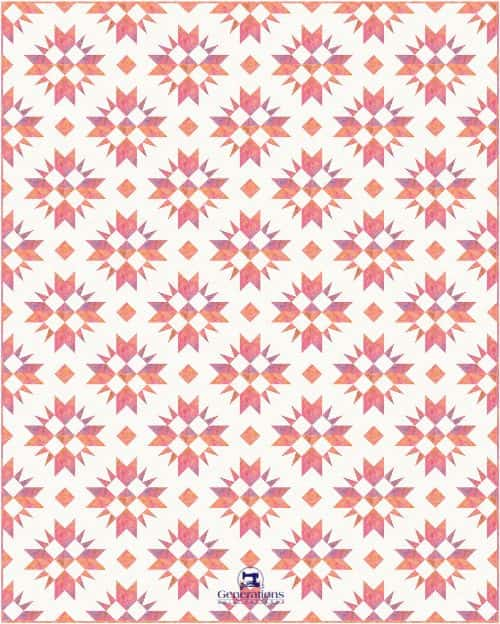 The layout includes sashing cut from the background fabric and dark cornerstones
With 9-patch sashing the pattern takes on a entirely different look on point.
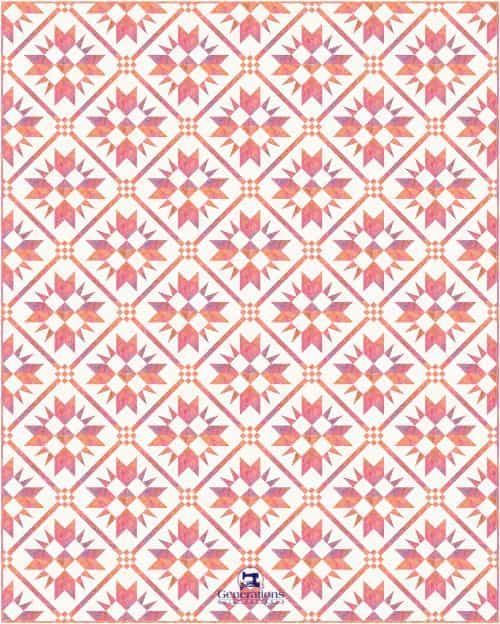
Adding the TiaS shapes to the ends of the sashings changes the smaller stars. Drastically. We've repeated that tall right triangle shape, but it looks entirely different on point.
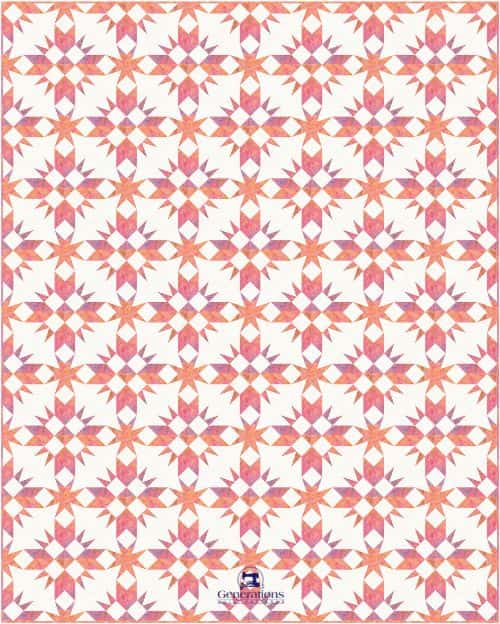
With our pieced cornerstones...
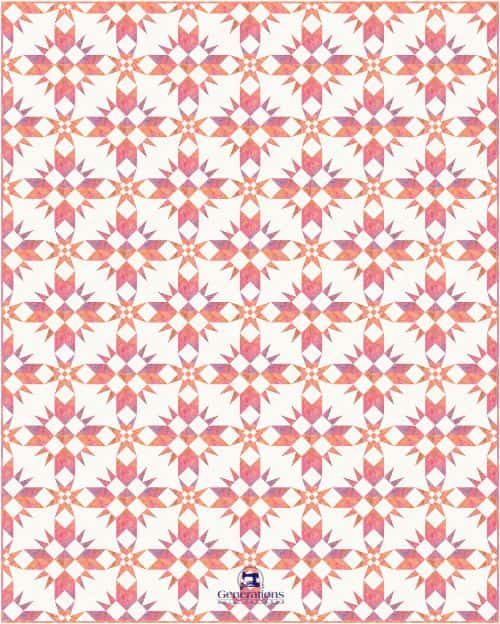
And finally adding either a Diamond in a Rectangle in the sashings...
...or the Square in a Square.
Downloads for Perfect Points ✨
Ready to piece with precision? Get your free paper piecing patterns for all three specialty units in multiple sizes!
- Square in a Square, and
From one block to endless possibilities 🌟

Who knew one block could spark so many possibilities? From simple sashing to playful combinations of familiar shapes, each design builds on what you already know—proving that quilt design doesn't have to be intimidating. 🪄
Remember those shapes we played with? The Square in a Square, Triangle in a Square, and Diamond in a Rectangle? They're all available as free paper piecing patterns right here on the website. Because precision should be fun, not frustrating! 🎯
The real magic happens when you start seeing these designs not as final destinations, but as springboards for your own creativity. Maybe you'll swap out a cornerstone here, change a color there, or discover an entirely new combination that makes your quilter's heart sing. 💝
So go ahead—experiment, play, and most importantly, have fun with your designs. After all, the quilts we carry in our heads never have black lines around them. Why should our creativity have boundaries? ✂️
What design will you create with your Triangle Puzzle blocks? The possibilities are as endless as your imagination! 🌈
- Home
- Quilt Design Inspiration
- Triangle Puzzle Quilt


