- Home
- Free Quilt Block Patterns
- Starburst Quilt Block
Starburst Quilt Block: Precision Without the Fuss 🪐
Just sew on the line for perfect points every time! 🪄
This post contains affiliate links, for which I receive compensation.
✨ The Starburst block showcases two uncommon but surprisingly simple units: a Triangle in a Square and a Corner Beam. ✂️
What? 😱 You avoid these shapes like the plague?
While they aren't typically found in everyday quilting, there's a single technique that makes them achievable for confident beginners.
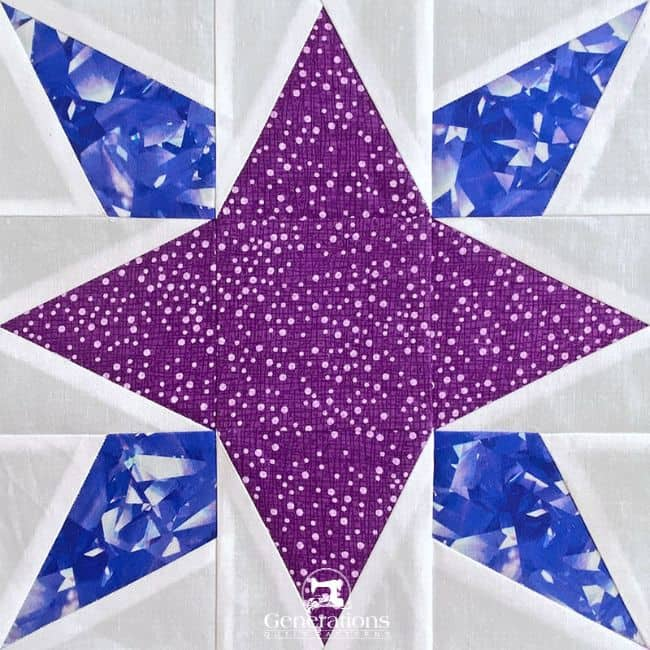
🪄 Paper piecing transforms potentially tricky angles into straightforward stitching—simply follow the line and watch this celestial beauty take form!
🚫 No specialty rulers needed, no complex instructions to master. Just slow, steady stitching on printed lines for perfect points every time. ⭐
🌠 Ready to explore these less-traveled quilting paths with stellar results?
🚀 Celestial Coordinates for Quick Navigation
Find your way through this tutorial with ease, use these quick links to each step of your stellar journey.
📋 General Instructions
⚡ PRINTING TIP: Need help printing this tutorial? Click here for easy instructions!
Several abbreviations are used on this page. They are:
- SA - seam allowance
- RST - right sides together
- CB - Corner Beam
- TiaS - Triangle in a Square
A 1/4" SA is used in this tutorial.
✅ KEY TECHNIQUE: To press efficiently, first press the patches in the closed position as they came off your sewing machine. This sets the seam, melding the fibers of the threads into the fabric. Then press the SA to the dark unless otherwise noted.
To streamline the instructions, ALWAYS press with your iron after adding each patch. Double check to make sure you haven't inadvertently pressed a tuck in the SA. Once you've sewn across both ends of this seam, it's virtually impossible to get that tuck out.
If we're pressing to keep something out of the way, you'll be instructed specifically to fingerpress.
📥 Download and print the paper piecing pattern
To download the pattern, use the most current version of Adobe.
For accurate results, on Adobe's Print Menu page, under 'Page Size and Handling' set 'Custom Scale' to 100%. Then print.
Click here to see what it looks like on the Print Menu page.
Find your finished block size from the chart below. For each block you want to make, print the corresponding number of copies for a total of:
- 4 Triangle in a Square units
- 4 Corner Beams
Download and Print | ||||||
|---|---|---|---|---|---|---|
| Finished Block Size | Corner Beams (CB) | Triangle in a Square (TiaS) | ||||
| # of Copies | Pattern | Template | # of Copies | Pattern | Template | |
| 4½'' | 1 | 1½" | Print 1 | 1 | 1½" | Print 1 |
| 6" | 1 | 2" | 1 | 2" | ||
| 9" | 1 | 3" | 1 | 3" | ||
| 12" | 2 | 4" | Print 1 | 2 | 4" | |
| 18" | 4 | 6" | Print 1 | 4 | 6" | Print 1 |
After printing, use the 1" square graphic on the printed page(s) to double check that your patterns printed at the correct size.
Then cut out the required number of patterns from your copies. A rough cut is good enough—an 1/8"-1/4"-ish away from the outside dashed square.

Not sure which paper to use?
Take a look at my review of several of the most popular brands available to us quilters on the market.
You want a super-easy paper to tear away—less stress on the stitches.
The newest quilt fabrics to tickle your fancy...
Click the images below to see the full collection. We share any commercial and/or free patterns that showcase them, too. (For inspiration, of course!)
✂️ Cutting patches for your Starburst quilt block
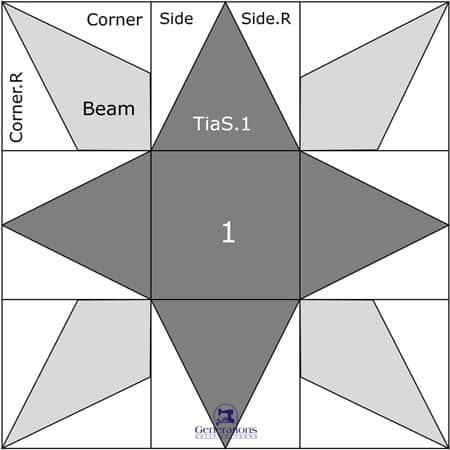
Sample Block Size: 9" finished / 9½" unfinished
Grid: 6x6
Design Type: Star | Paper piecing | Even 9-patch
✏️ Take a moment to label each patch as you cut. These numbers are your guide through the tutorial.
 | Cutting Chart for a~ Includes Paper Piecing~ | ||||||
|---|---|---|---|---|---|---|---|
| Patch | Fabric | Qty | Finished Block Size | ||||
| 4½'' | 6'' | 9'' | 12'' | 18'' | |||
| 1 | Dark | 1 | 2'' x 2'' | 2½'' x 2½'' | 3½'' x 3½'' | 4½'' x 4½'' | 6½'' x 6½'' |
| TiaS.1 | Dark | 4 | 2½'' x 2¼'' | 3'' x 2¾'' | 4'' x 3¾'' | 5'' x 4¾'' | 7'' x 6¾'' |
| Beam | Medium | 4 | 2¼'' x 2¼'' | 2¾'' x 2¾'' | 3¾'' x 3¾'' | 4¾'' x 4¾'' | 6¾'' x 6¾'' |
| Corners, Sides | Bac | 8 | 2⅝'' x 2¾'' | 2⅞'' x 3¼'' | 3⅜'' x 4¼'' | 3⅞'' x 5¼'' | 4⅞'' x 7¼'' |
| Unfinished Block Size | 5'' | 6½'' | 9½'' | 12½'' | 18½'' | ||
| Grid Size | 1'' | 1'' | 1½'' | 2'' | 3'' | ||
✂️✂️ Subcutting
If you didn't print the templates when you downloaded the patterns, click here to go back and print them.
Cut away the excess paper on the top and bottom edges of the Triangle in a Square (TiaS) and the upper-left and lower right corners of the Beam unit. (I've already used the TiaS template many times, which is why all the extra has been cut away from all sizes.)
You only need to cut away some of the excess from the diagonal sides, i.e., the CB. Don't do extra work that doesn't help you.
Match the top and bottom edges of the template to the top and bottom edges of the TiaS patches. If they don't match, turn your patched a 1/4" turn.
Match the corners of the template to the corners of the Beam patches.
I use some tape to hold the paper templates in position.
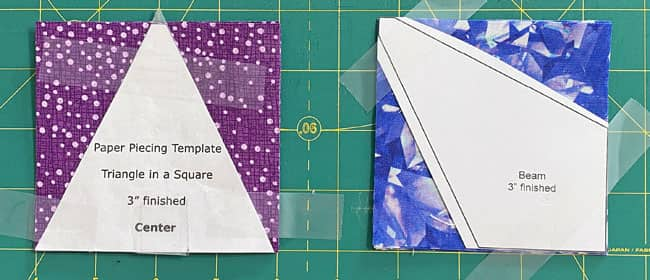 It doesn't matter whether these rectangles are all right or wrong side up. The triangle is symmetrical so it doesn't matter here.
Use a rotary ruler and cutter to trim away the excess for both units.
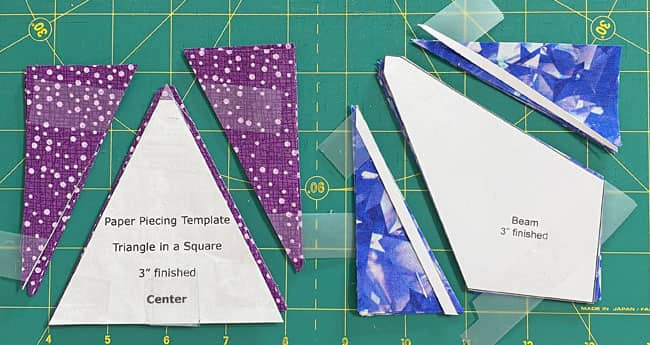
Corner/Corner.R and Side/Side.R are mirror image patches.
✅ KEY TECHNIQUE: Subcutting mirror image patches
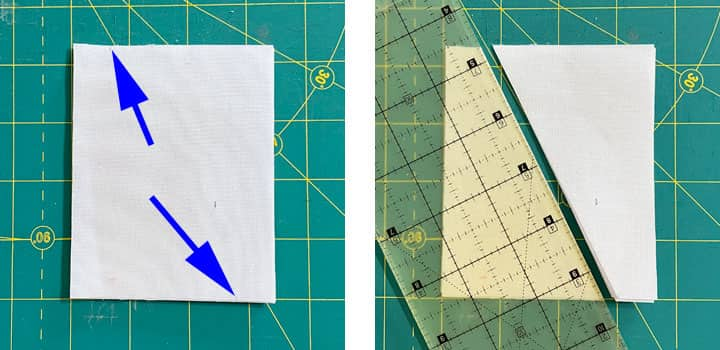
To efficiently cut mirror image shapes, you must layer your patches (before subcutting) in pairs that are layered right sides together.
I made two stacks of 2 pairs RST (4 in each stack) before cutting.
Make a tiny mark on the top left and bottom right 5/8" in from the edge. (blue arrows).
Match your ruler to these marks and cut the stack in half.
🧵Create the units for our Starburst block
Use a dot of Elmer's Washable Glue Stick® to stick the wrong side of the fabric to the unprinted side of your pattern.
From the printed side, you can see how those dashed placement lines help you quickly and accurately position the patch. I find using subcut patches in combination with the dashed guides is a real time-saver. There's no need to fold the pattern back and trim the TiaS patch into a triangle shape, thus saving 2 trims per unit.
Work smarter, not harder!
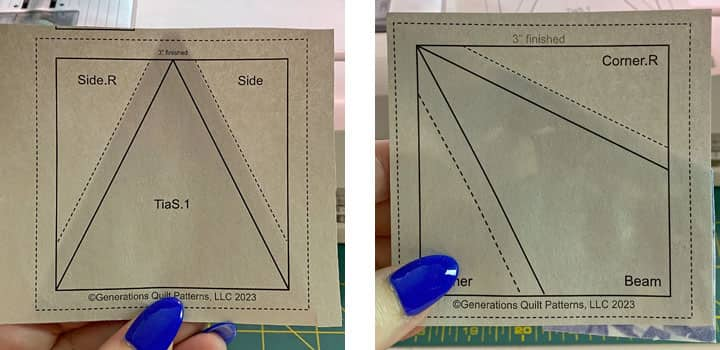
Once all 8 'first' patches (TiaS.1s and Beams) are positioned, you're done with the gluestick. It can be put away, out of the way.
We need to make a few adjustments to our sewing machine settings to paper piece.
- Reduce your stitch length to 16–20 stitches per inch (1.3-1.6 mm). This perforates the paper and stabilizes the seam when you remove the pattern. [Learn more about stitch length here.]
- Reduce your machine's speed or just plain slow down. Sew only as fast as you can AND stay on the solid stitching line.
- Install an open toe appliqué foot (sometimes called an 'embroidery' or 'satin stitch' foot) if you have one (it makes it easier to see where you're stitching).
- Use a larger needle (90/14) IF you have problems removing the pattern. Personally, I use an 80/12 Microtex Sharp for paper piecing without any issues.
Triangle in a Square (TiaS)
Make 4
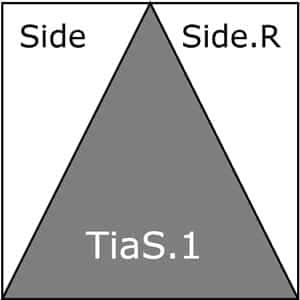
With RST, position the long bias edge of a Side with the long bias edge of the TiaS.1 patch, wide edge to narrow edge at the ends.
✅ KEY TECHNIQUE: Avoid dark fabrics shadowing through lighter ones
In our sample, the background fabric is much lighter than the dark. To keep the darker print from shadowing through the light background in the finished block, nudge the edge of the lighter patch a couple of threads past that of the print. (blue arrow)
A simple technique to prevent a lot of angst later.
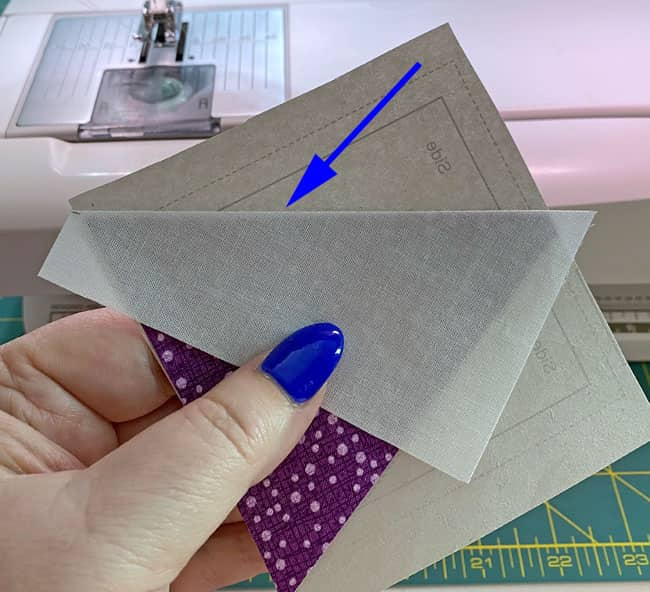
Stitch.
✅ KEY TECHNIQUE: All the seams in paper piecing are stitched by starting a generous 1/4" before the solid line between patches and ending a generous 1/4" after the solid line ends.
If the seam begins/ends at the outside edge of the block, your stitches should start and stop past the outside dashed line surrounding the block.
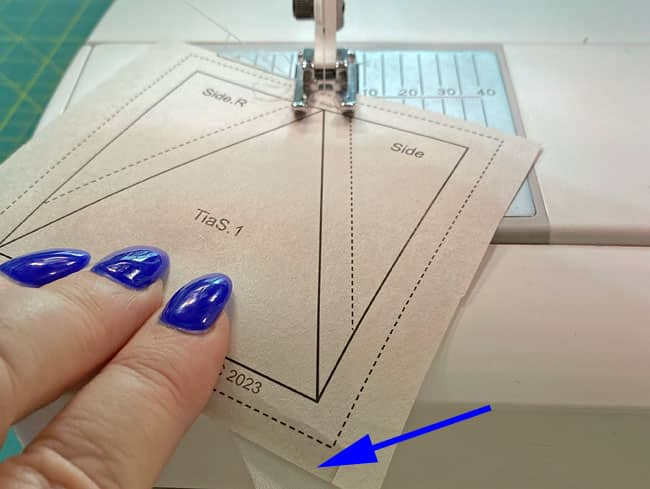 Your stitches should end at the point of the blue arrow.
Press.
With RST, match the edge of Side.R with TiaS.1. Again, I've moved the patch over a couple of threads to prevent shadowing.
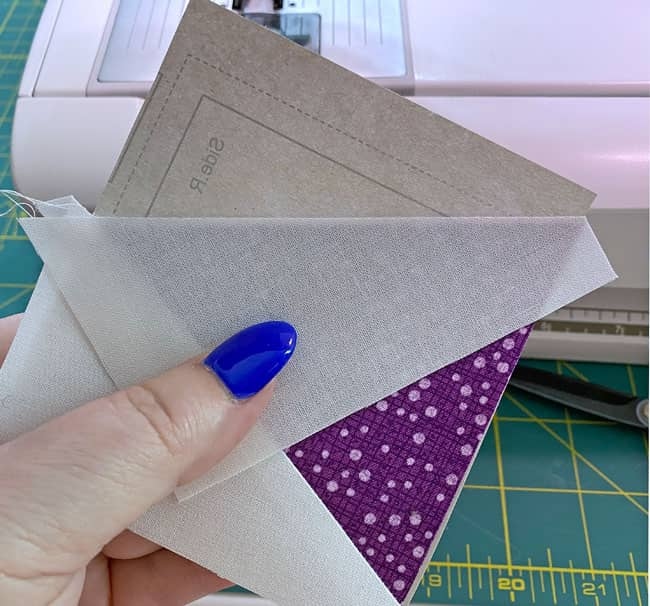
Stitch.
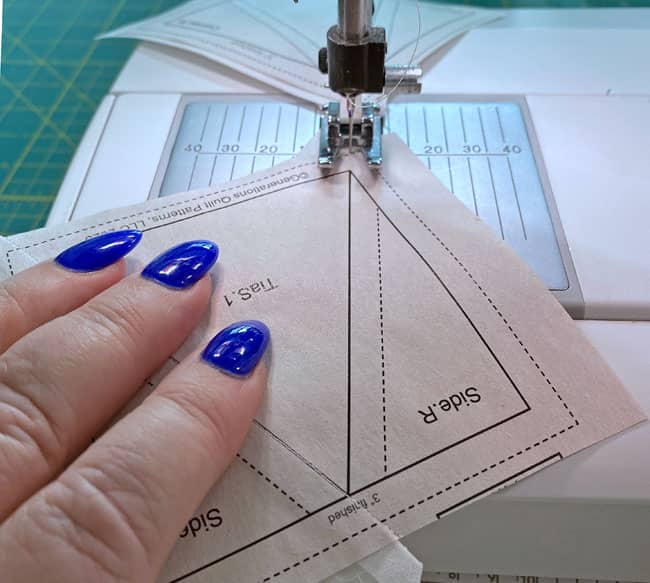
Press. Once all the TiaSs are complete, set them aside. We'll do all the trimming at one time.
Corner Beam CB)
Make 4
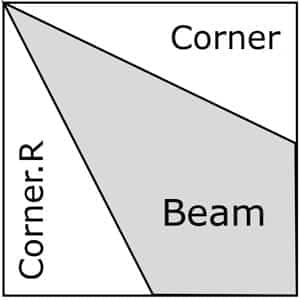
With RST, match the long edge of a Corner with one side of the Beam, narrow edge to narrow edge at the point of the Beam, upper-right corner in the photo below.
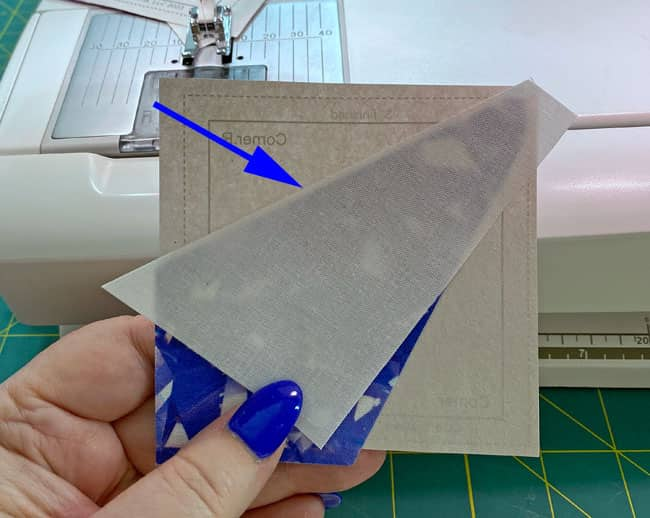 Again, we scooch the patch a few thread past the edge to prevent shadowing. (blue arrow)
Sew the seam and press.
Position the second Corner.
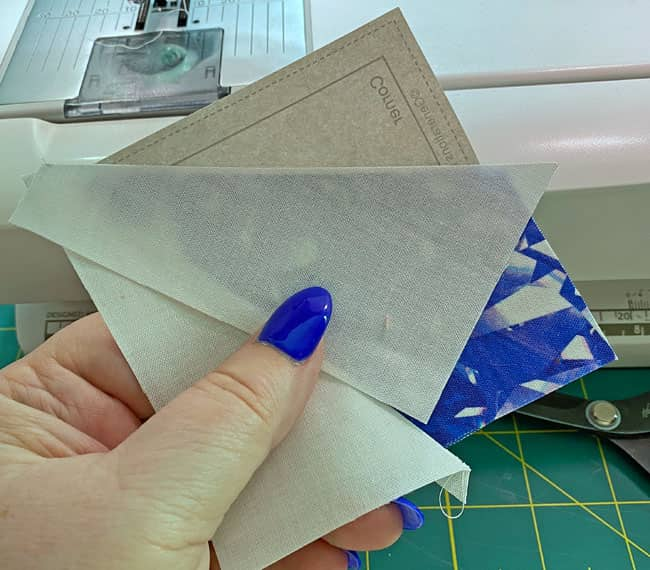
Stitch and press.
Our Corner Beams and Triangle in a Squares are finished.
That was painless wasn't it?!!
For the price of stitching on a line, you were able to avoid the costs of TWO specialty rulers, AND you've got perfect units!
What's not to love?
Trimming to perfection
Here' s where the magic happens. And it's so simple, too.
At your cutting mat, pattern side up, match the 1/4" line on your ruler with one of the solid lines of the square that surround your unit. (We're starting with the TiaSs, but the technique is the same for CBs.)
With your rotary cutter, trim away the excess fabric leaving behind a perfect 1/4" SA.
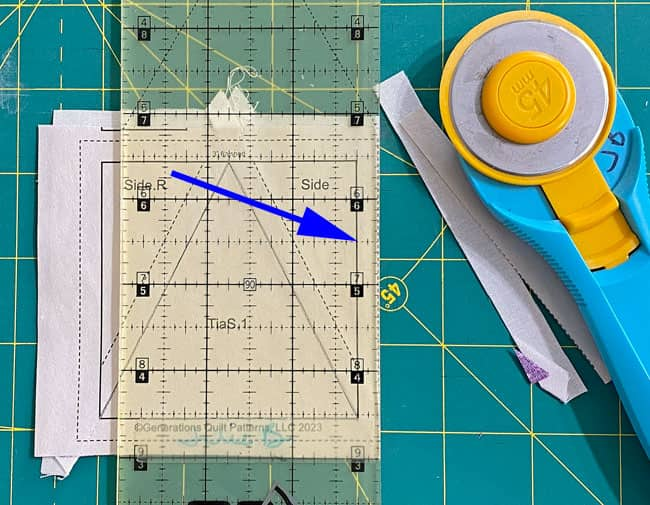
Repeat for each side of each TiaS.
The results are beautiful. The top point is exactly 1/4" away from the edge. The bottom seams of the triangle are in from the edge roughly 1/8" inch...exactly where you need them to be.
No guess work.
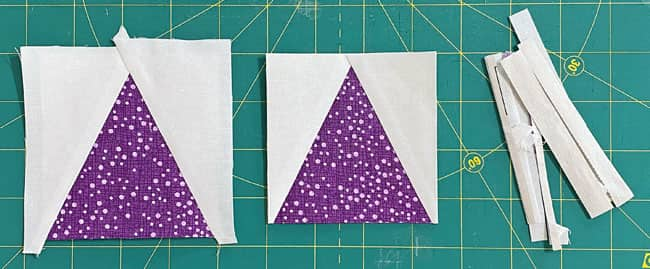
After trimming the CBs, we get the same exact results. The top point is in 1/4" and the seams on the side and bottom edge are positioned just right.
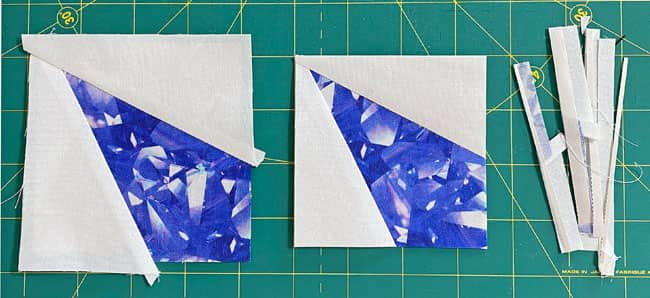
All that's left is to remove the paper pattern.
Remove the paper, you say?
Our patches are calculated so we end up with straight of grain along all the outside edges, just like any traditionally pieced blocks.
The paper's finished its job and no longer serves a purpose. Besides, it's kind of a PITA to remove the paper from a sewn SA. Just sayin'.
If ripping the paper messes with your stitches at the points/edges, try this simple trick.
Rip the paper roughly in half between the edges of the seam, and pull if away from the stitches. Start from the middle and rip to the outside point/edge.
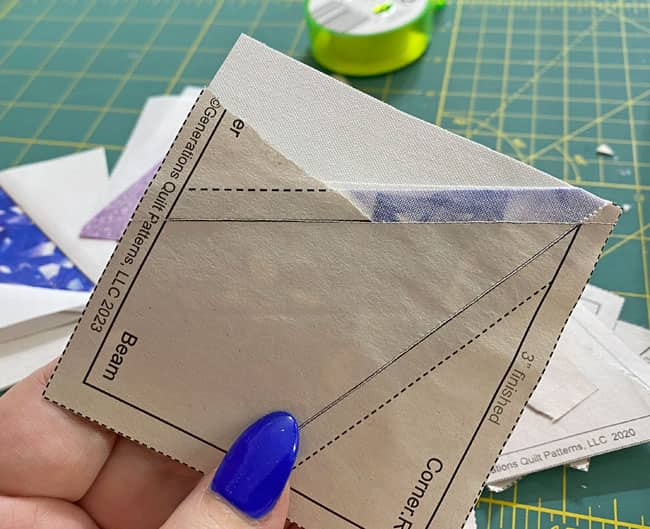
Pull away the pattern from the other side.
It's so satisfying to get to this point.
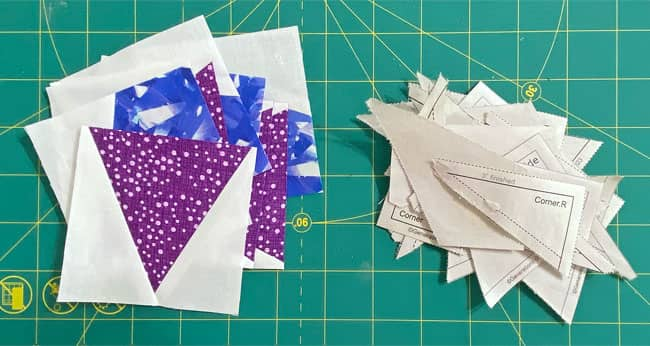
The paper piecing is complete. From this point forward, return your stitch length to the one you regularly use for piecing and install your favorite 1/4" presser foot.
🧩 Final Assembly
Lay out your patched to create the Starburst design. The points and background fabric is at the outside edges.
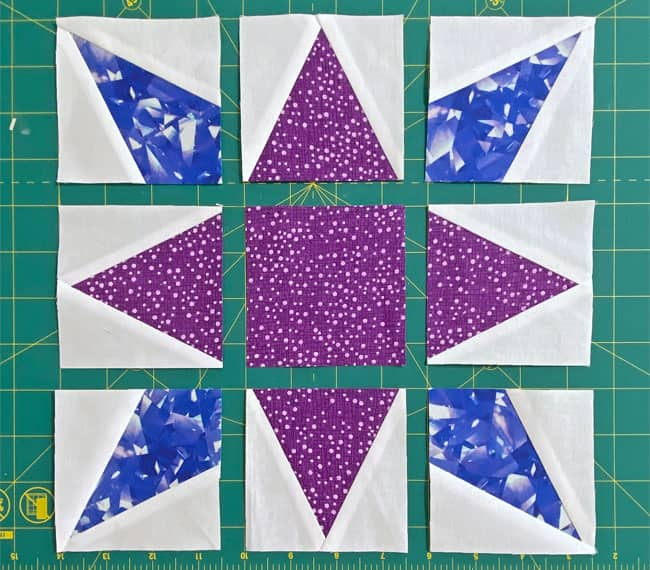
Stitch the units in exact row together. There are no seams to match between the ends of these patches. Sweet!
Press all these seams out away from the purple TiaS.
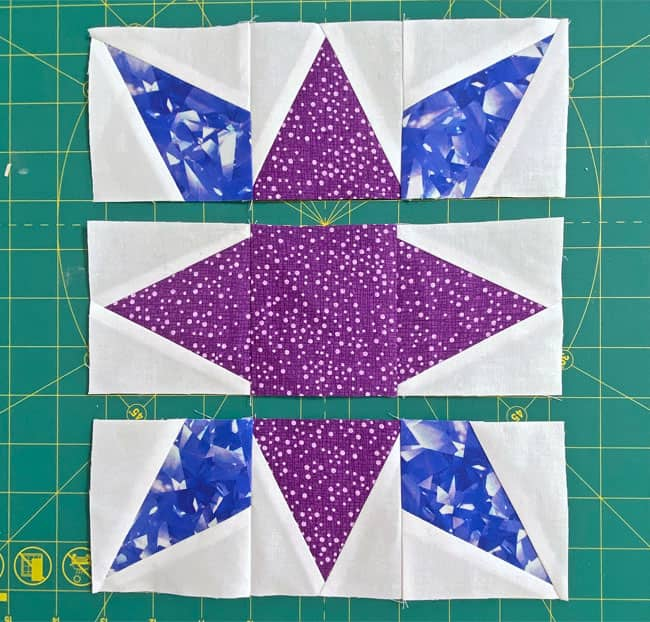
Stitch the rows together, pinning as needed to hold the edges even and matched points in position. If you've done a good job staying on the line, the corners of the TiaSs should just about match themselves.
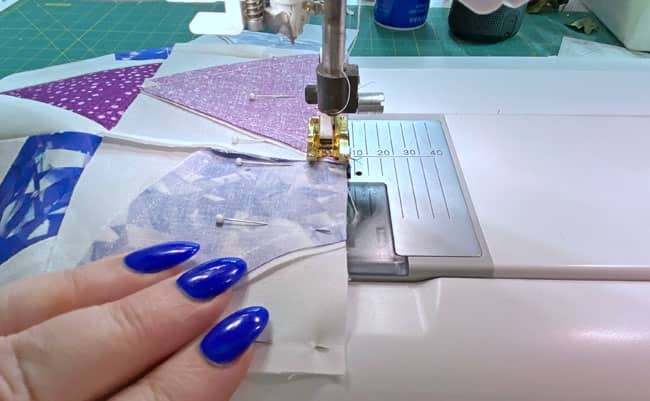
After one final press, this time SAs away the center row, your Starburst is ready to sparkle in your next quilt.
For a super flat block, take a look at my secret (just between friends) pressing technique…no need to purchase any tools to achieve it.
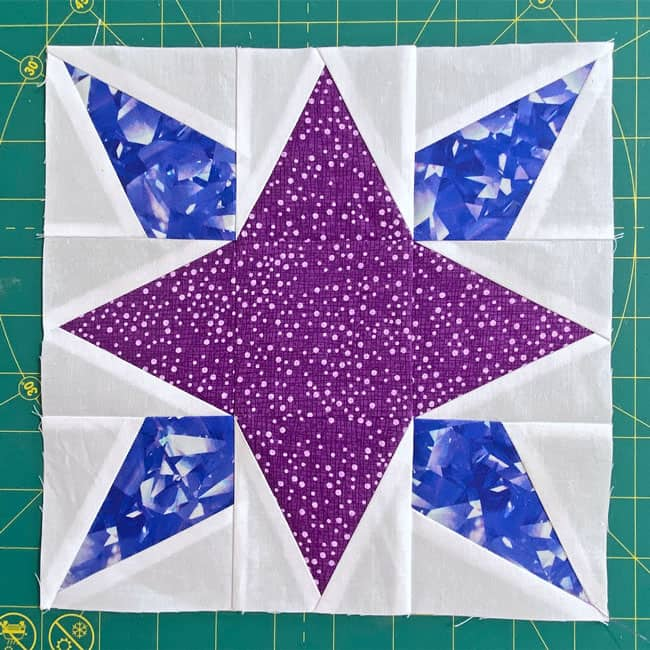
I grew up in a sewing family where I was taught from the beginning that the back or inside should look as neat as the front. The habit has stuck with me since kindergarten, can't see any reason to stop now.
Besides, you can see all the nudging we did and how the SAs all fit together!
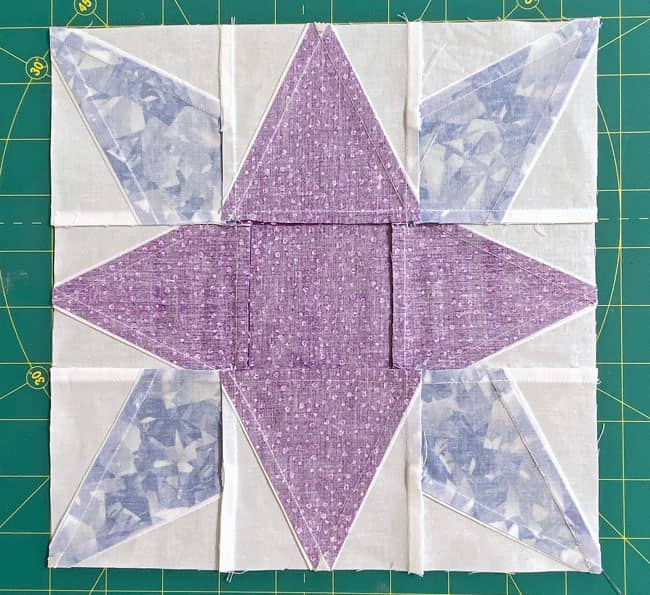
Until next time, may your seams be straight, and your seam ripper be bored!
💫 Look What You Made: From 'No Way!' to 'No Problem!' 💫
💫 And there you have it!
Those once-intimidating Triangle in a Square and Corner Beam units are now twinkling with perfect precision in your finished Starburst block.
Who would have thought that simply stitching on printed lines could transform "quilting kryptonite" ☢️ into cosmic creativity?
Remember this feeling next time a pattern tries to scare you with non-standard units—you're now officially ready to quilt where no quilter has gone before! ✂️
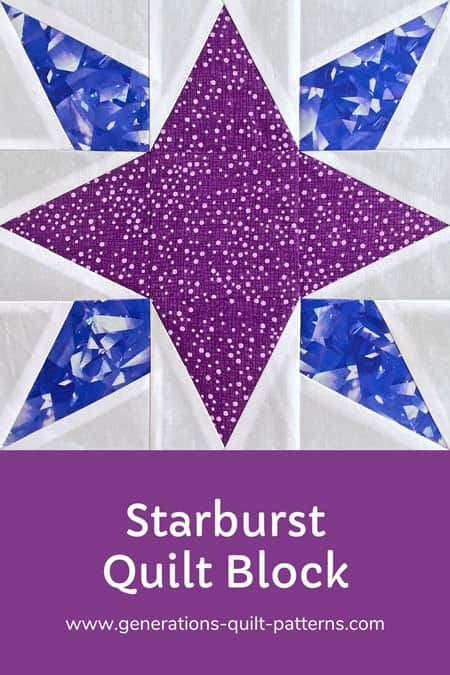
📌 Don't Let This Tutorial Get Lost in the Quilting Cosmos!
Pin this Starburst tutorial for later. When you're ready to boldly stitch where you haven't stitched before, you'll want these cosmic instructions at your fingertips. ✨🧵
🔭 Looking for something truly stellar?
You've finished your star quilt block, and you're ready for more!
Browse our collection of 60 stellar star quilt block patterns. All have instructions and cutting charts in multiple sizes. If templates or paper piecing is used in the tutorial, there's a free download for you of those materials.

Eeny. Meenie. Miney. Moe.
Which star quilt block will you sew?
For a star-studded quilting experience, choose from 100+ bedazzling star quilt patterns—for beginners and beyond—click here.
For even MORE blocks to make... 🧩🎨

...visit our Free Quilt Block Pattern Library, with over 230+ blocks to choose from in multiple sizes.
Free downloads are included in all sizes for any blocks require paper piecing patterns or templates.
- Home
- Free Quilt Block Patterns
- Starburst Quilt Block
