- Home
- Free Quilt Block Patterns
- Spring Fancy Quilt Block
Spring Fancy Quilt Block Tutorial: Bloom Your Skills with Paper & Traditional Piecing! 🌸✂️
Spring into action, piece by piece! 🏃♀️🧩
This post contains affiliate links, for which I receive compensation.
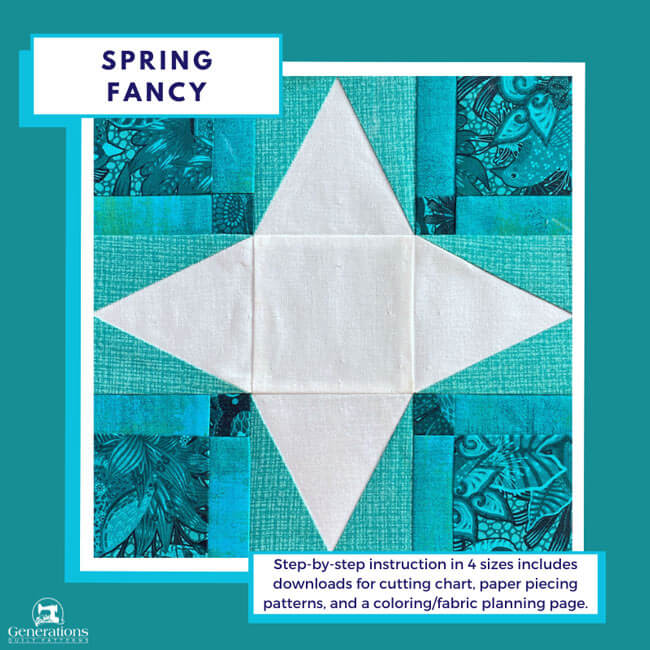
Spring has sprung, and our Spring Fancy Quilt Block is the perfect way to add a little "spring" to your step.
This 4-pointed star quilt block captures perfectly the season's playful spirit with a burst of fresh energy in those perky pointy-points.
But don't worry, creating this fanciful block is easier than you think!
We'll guide you through the process with clear step-by-step instructions, so you can get back to enjoying the sunshine and fresh blooms in no time.
So, what are you waiting for?
Let's hop to it and create something beautiful this Spring!
🧭Ready to spring into action?
Hop, skip, and jump to the section you need with our handy anchor links. Whether you're a "measure twice, cut once" type or a "dive right in" quilter, we've got you covered!
- A cutting chart in four sizes with downloads of the chart and block design
- A coloring or fabric planning page to download and print
- If quilting isn't on the agenda this week, Pin or bookmark this tutorial for later!
Cut. Sew. Press. Watch your quilt block blossom into spring!
📋General Instructions
Several abbreviations are used on this page. They are:
- SA - seam allowance
- RST - right sides together
- TiaS - triangle in a square
A 1/4" SA is used in this tutorial.
Highlighted in yellow, pressing instructions are easy to spot.
First press the patches in the closed position as they came off your sewing machine. This sets the seam, melding the fibers of the threads into the fibers of the fabric.
SA are pressed to the dark unless otherwise noted.
📥 Download and print paper piecing pattern
To download the pattern, use the most current version of Adobe.
For accurate results, on Adobe's Print Menu page, under 'Page Size and Handling' set 'Custom Scale' to 100%. Then print.
Click here to see what it looks like on the Print Menu page.
Choose your Finished Block Size from the chart below.
Print the corresponding number of pages for a total of 4 TiaS units and one template for the TiaS.1.
Print the Triangle in a Square | |||
|---|---|---|---|
| Spring Fancy Finished Block Size | # of copies per block | Finished TiaS Unit Size | Center Templates |
| 6" | 1 | 2" | Print 1 |
| 9" | 1 | 3" | |
| 12" | 2 | 4" | |
| 15" | 4 | 5" | Print 1 |
After printing your pattern and template
Use the 1" square graphic on the printed page(s) to double-check that your patterns printed at the correct size.
Then cut out the required number of patterns from your copies. A rough cut is good enough—an 1/8"-1/4"-ish away from the outside dashed square.
For a TiaS template, cut it out exactly on the top and bottom lines. You don't need to be so picky with the angled sides.

Not sure which paper to use?
Take a look at my review of several of the most popular brands available to us quilters on the market.
You want a super-easy paper to tear away—less stress on the stitches.
The newest quilt fabrics to tickle your fancy...
Click the images below to see the full collection. We share any commercial and/or free patterns that showcase them, too. (For inspiration, of course!)
✂️Cutting fabrics for your Spring Fancy quilt block
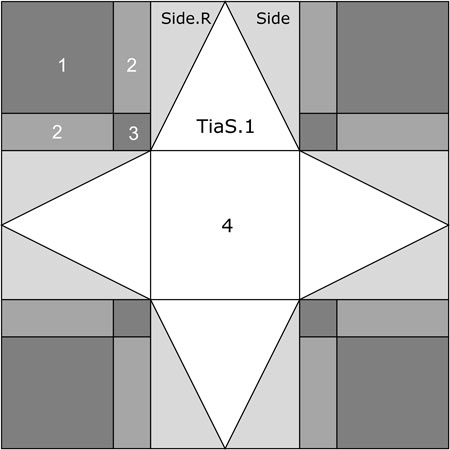 Spring Fancy patchwork design
Sample Block Size: 9" finished /9 ½" unfinished
Grid: 12x12
Attribution: Doris Sprecher (Traditional Quilter)
To keep things organized and easy to follow, label your patches. We'll be referring to them by number throughout this tutorial.
When I picked fabrics for this block, my original idea was to choose gradated, hand-dyed fabrics to represent the different shades from light to dark.
To my surprise, I ended up with a fun, deep hued tone-on-tone print(#1), Grunge (#2), and another tone-on-tone turquoise for the Side/Side.R.
The combination of textures added depth and intrigue to an otherwise straightforward design.
To print a copy of the block design and cutting chart to use at your cutting table, click here.
 | Cutting Chart for a~ Paper PLUS Traditional Piecing ~ | |||||
|---|---|---|---|---|---|---|
| Patch | Fabric | Qty | Finished Block Size | |||
| 6'' | 9'' | 12'' | 15'' | |||
| 1 | Dark | 4 | 2'' x 2'' | 2¾'' x 2¾'' | 3½'' x 3½'' | 4¼'' x 4¼'' |
| 2 | Medium | 8 | 1'' x 2'' | 1¼'' x 2¾'' | 1½'' x 3½'' | 1¾'' x 4¼'' |
| 3 | Dark | 4 | 1'' x 1'' | 1¼'' x 1¼'' | 1½'' x 1½'' | 1¾'' x 1¾'' |
| TiaS.1 | Bac | 4 | 3'' x 2¾'' | 4'' x 3¾'' | 5'' x 4¾'' | 6'' x 5¾'' |
| Side, Side.R | Light | 4 | 2⅞'' x 3¼'' | 3⅜'' x 4¼'' | 3⅞'' x 5¼'' | 4⅞'' x 7¼'' |
| 4 | Bac | 1 | 2½" x 2½" | 3½" x 3½" | 4½" x 4½" | 5½" x 5½" |
| Unfinished Block Size | 6½'' | 9½'' | 12½'' | 15½'' | ||
| Grid Size | ½" | ¾'' | 1'' | 1¼'' | ||
Subcutting the Triangle in a Square patches
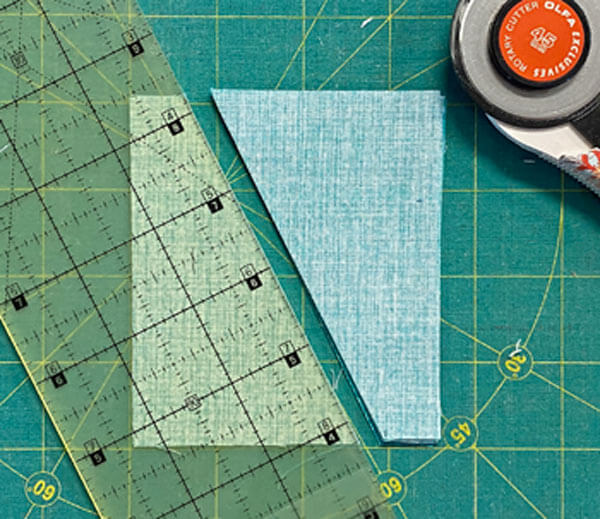
Group the four Side/Side.R rectangles in pairs with right sides together. We do this so that with one cut, we have the required 4 pairs of mirror imaged patches.
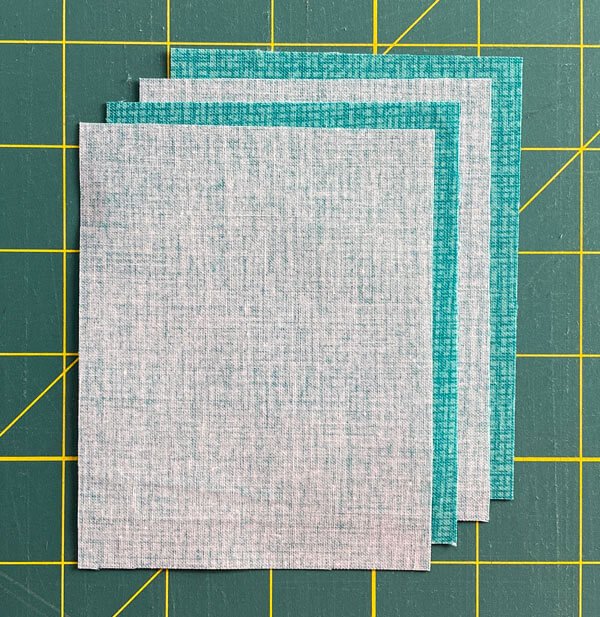 2 pairs layered right sides together. Their edges need to be aligned before cutting.
Then push those two pairs together, all edges even.
With a pencil, make a mark 5/8" in from the top-left side and 5/8" in from the lower bottom-right side.
Line up your ruler with these marks where they meet the edge of the patches and cut in half.
Next, stack the four TiaS.1 rectangles, edges even.
Since this patch is symmetrical left and right, it doesn't matter if the rectangles are right side up or down.
Position your trimmed TiaS.1 template so the top and bottom edges are even with the fabric. (The width or wider side of these cut rectangles must be on the top and bottom edges.) If the template top and bottom isn't even with the cut edges, turn the patches a 1/4 turn and realign the template.
Cut away the excess. The cutting doesn't need to be exactly perfect. Close is good enough.
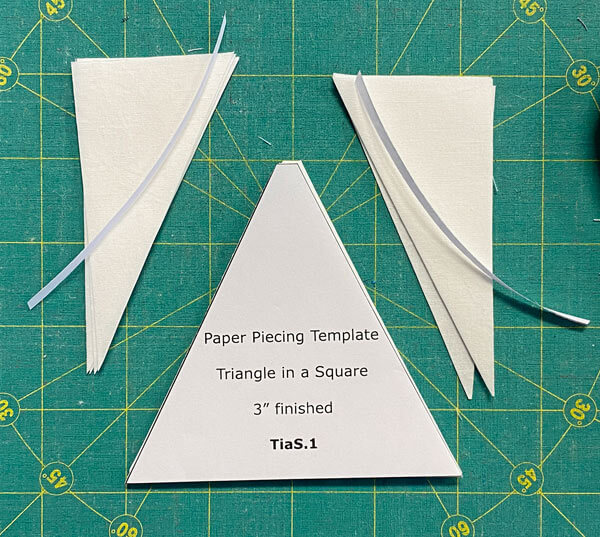 When we cut the sides of this shape, the template is trimmed at the same time.
🪡Create the units for your Spring Fancy block
TiaS
Make 4
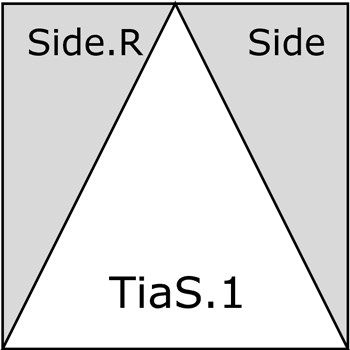 The TiaS unit
First let's get our sewing machine ready for some paper piecing.
We need to make a few adjustments to our sewing machine settings to paper piece.
- Reduce your stitch length to 16–20 stitches per inch (1.3-1.6 mm). This perforates the paper and stabilizes the seam when you remove the pattern. [Learn more about stitch length here.]
- Reduce your machine's speed or just plain slow down. Sew only as fast as you can AND stay on the solid stitching line.
- Install an open toe appliqué foot (sometimes called an 'embroidery' or 'satin stitch' foot) if you have one (it makes it easier to see where you're stitching).
- Use a larger needle (90/14) IF you have problems removing the pattern. Personally, I use an 80/12 Microtex Sharp for paper piecing without any issues.
Position the wrong side of a TiaS.1 patch on the unprinted side of the pattern between the dashed guidelines.
A dab of Elmer's Washable Glue stick holds it in place nicely. (Just a dab, it's a temporary hold.)
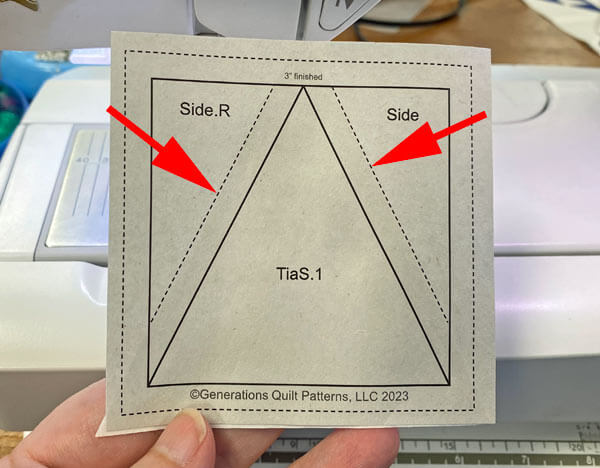
With RST, align the long bias edge of the Side with the TiaS.1. For our TiaS, the wide end of the Side is paired with the top of the triangle-shape, the narrow end at the base.
With these oversized patches, match the point on the short end of the Side with the point at the base of the TiaS.1. (red arrow)
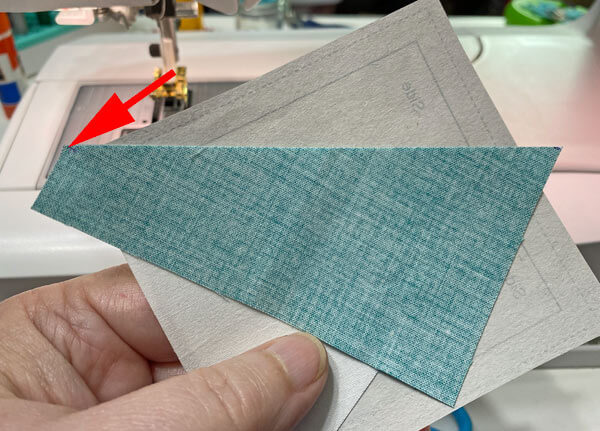 Flip the patch open for a quick check that the patch is aligned correctly.
Sew on the solid line between TiaS.1 and Side, starting and stopping past the outside dashed edges of the block.
In fact, you can chain piece this seam on all four TiaSs to save time because the seam runs clear across the TiaS pattern.
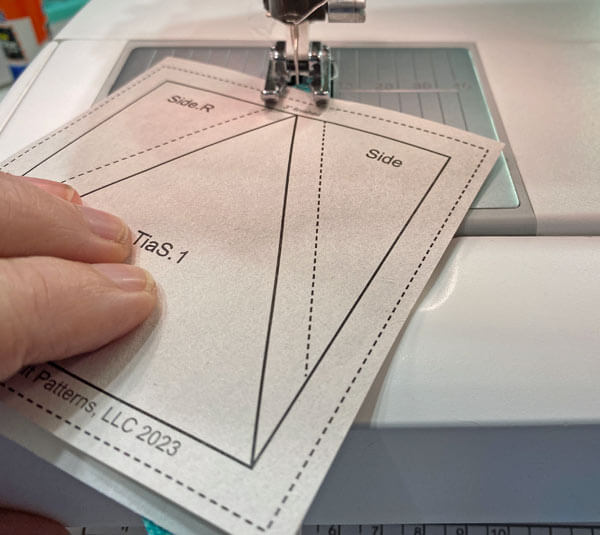
Press.
Repeat the process for the Side.R patch.
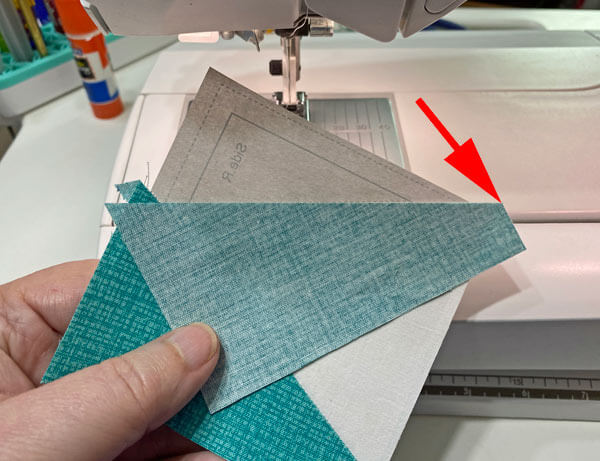 Again, match the points at the base of the triangle.
Yep, that side can be chain pieced, too.
Didn't know there'd be chain piecing in paper piecing, eh? Surprise! Surprise!
Here's one of the untrimmed TiaSs.
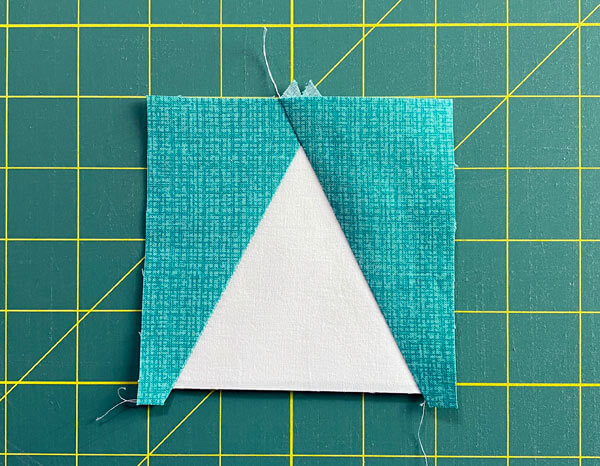 Waiting to be trimmed to the perfect size
With our Magic Wand—AKA rotary cutter—with a couple of passes we'll have the perfect unit.
Line up the 1/4" line of your ruler with one side of the solid square. (red arrow)
I find it so much more accurate to do it this way, instead of trying to align the edge of the ruler with the outside dashed edge of the block. More than my far-sighted eyes need to strain to do.
Trim away the excess from all sides of all the TiaSs.
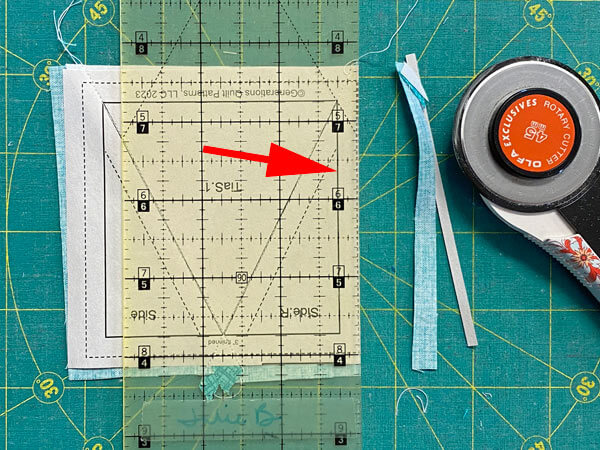 The one side of our TiaS is trimmed.
Our TiaSs are trimmed to perfection, with the top point precisely 1/4" from the top edge.
Plus, the seams at the base of TiaS.1 are approximately 1/8" in from the bottom sides, just as they should be.
Remember, taking your time to stitch directly on the line makes all the difference in the world when it comes to creating the perfect block.
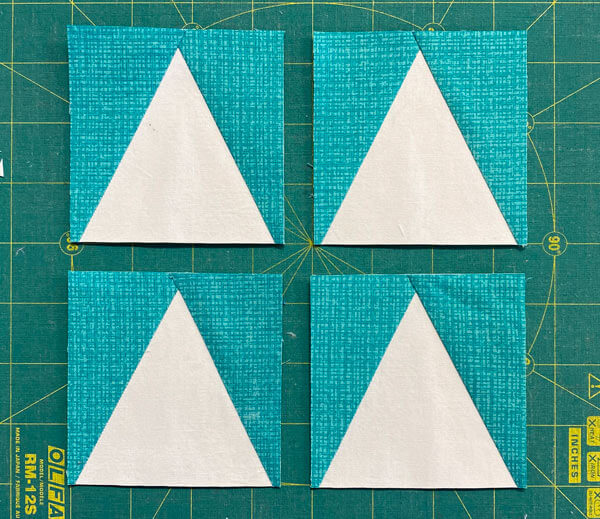
The paper piecing is complete. From this point forward, return your stitch length to the one you regularly use for piecing and install your favorite 1/4" presser foot.
Now it's time to ditch the paper pattern.
Our patches were cut to ensure all edges have a straight grain, just like traditional piecing. Don't wait until later and struggle to remove the paper from your seam allowances.
Remove it now and let's get on with our Spring Fancy block.
Corners
Make 4
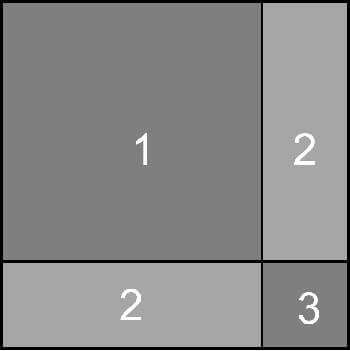 Corner design
With RST, stitch a #2 to the right side of a #1 and stitch a #3 to the short side of a #2. Use the photos below for reference.
Press the SAs towards the darker #1 and #3 in each group.
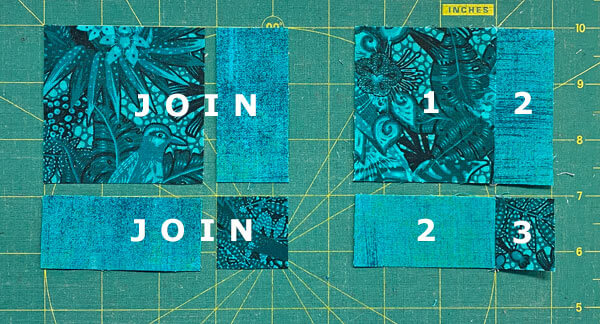
Next stitch the #1/#2 to the #2/#3. The seam nests to make matching easier.
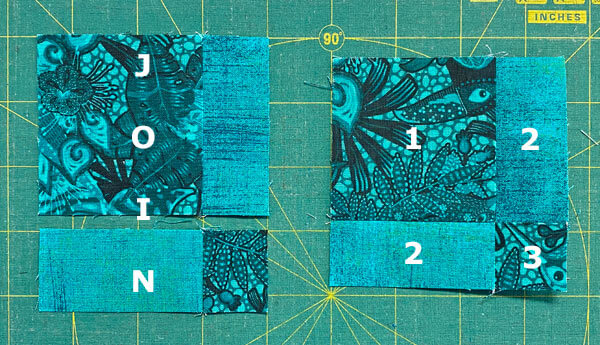
Press towards #1.
Use the chart below for a quick check that your Corners are accurate. Make any adjustments now.
After sewing, the Corners measure... | |
|---|---|
| Finished Block Size | Edge-to-edge Measurement |
| 6" | 2½" x 2½" |
| 9" | 3½" x 3½" |
| 12" | 4½" x 4½" |
| 15" | 5½" x 5½" |
🧩Stitching your Spring Fancy quilt block together
Arrange your patches with the TiaS in the center on the sides and the Corners in...well...the Corners with their large dark #1 patches on the outside.
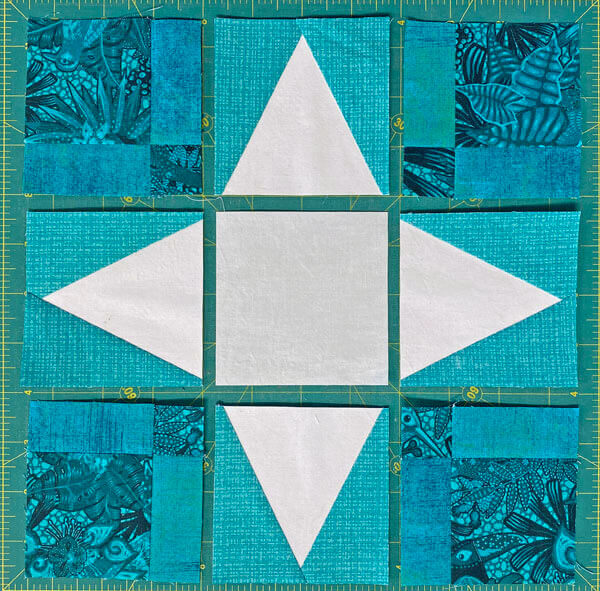
Sew the units in each row together.
If you were deliberate when you stitched those TiaSs, and keep the edges aligned as you stitch the units into rows, the bottom points of the triangles end up right 1/4" in from the edge.
It's a beautiful thing.
Pin to help keep those edges even as you stitch.
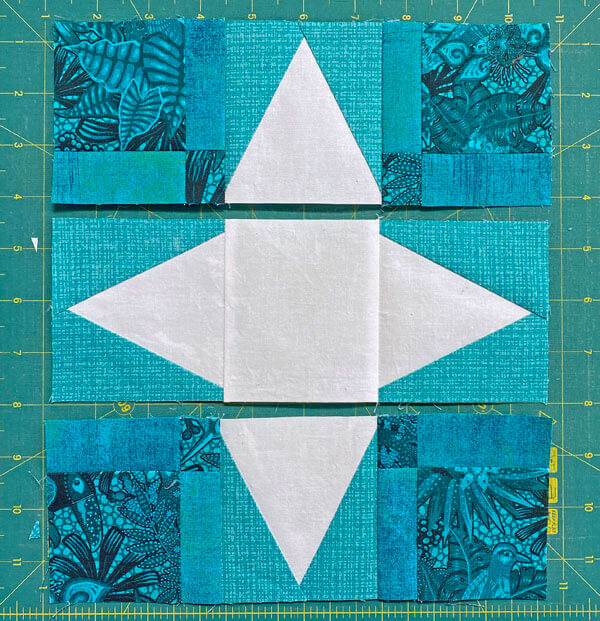
The SAs are pressed AWAY from the TiaS in all the rows.
Stitch the rows together, pinning as needed.
Press the SA TOWARD the center row.
This is a pretty dynamic block for such simple piecing, don't you think?
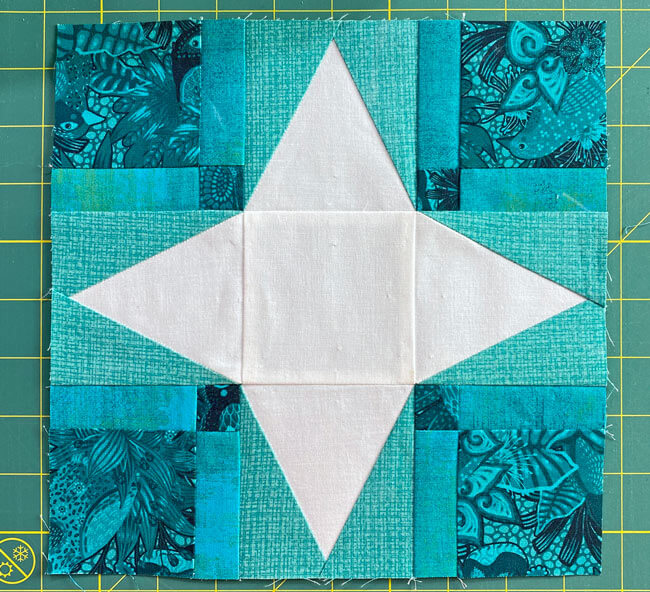
Finally, a quick look at the backside to see how all that pressing works together.
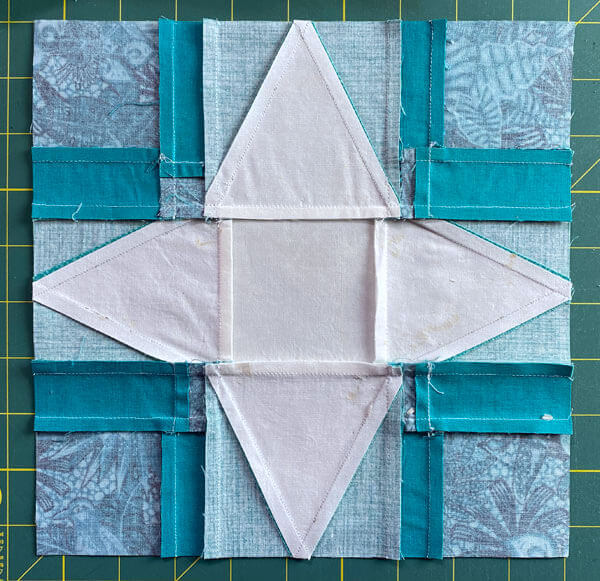
Piecing it All Together: Your Spring Fancy Triumph 🧩🏆
You've mastered the Spring Fancy block, conquering paper and traditional piecing like a pro. 🌸🧵
Remember, quilting is like gardening. It takes patience, love, and a bit of fancy footwork. 🌱👣 So keep nurturing those skills, and before you know it, your quilting talents will be in full bloom! 🌻
As you press the final seam, here's to threads that never tangle, seams that always match, and quilts that warm both body and soul! 🧡🔥
📌Pin now, spring into action later!
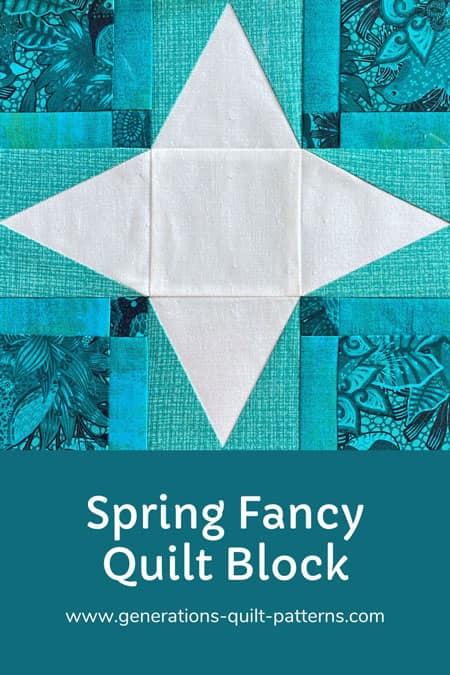
🌸 Save this Spring Fancy quilt block tutorial for your next fabric adventure.
🔭 Looking for something truly stellar?
You've finished your star quilt block, and you're ready for more!
Browse our collection of 60 stellar star quilt block patterns. All have instructions and cutting charts in multiple sizes. If templates or paper piecing is used in the tutorial, there's a free download for you of those materials.

Eeny. Meenie. Miney. Moe.
Which star quilt block will you sew?
For a star-studded quilting experience, choose from 100+ bedazzling star quilt patterns—for beginners and beyond—click here.
For even MORE blocks to make... 🧩🎨

...visit our Free Quilt Block Pattern Library, with over 230+ blocks to choose from in multiple sizes.
Free downloads are included in all sizes for any blocks require paper piecing patterns or templates.
- Home
- Free Quilt Block Patterns
- Spring Fancy Quilt Block
