- Home
- Free Quilt Block Patterns
- Sparkling Star Quilt Block
Heavenly Handiwork!
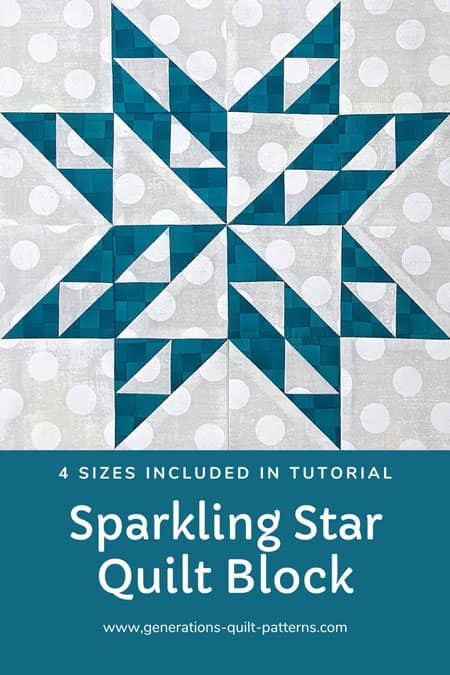
Sparkling Star Quilt Block Tutorial in 4 Sizes
From our Free Quilt Block Patterns Library
This post contains affiliate links, for which I receive compensation.
💫 Attention star-gazers of the quilting world! Get ready to be starstruck by the mesmerizing Sparkling Star quilt block.
Whether you're a paper piecing prodigy or a traditional technique enthusiast, this tutorial will have you seeing stars—in the best possible way! 🚀
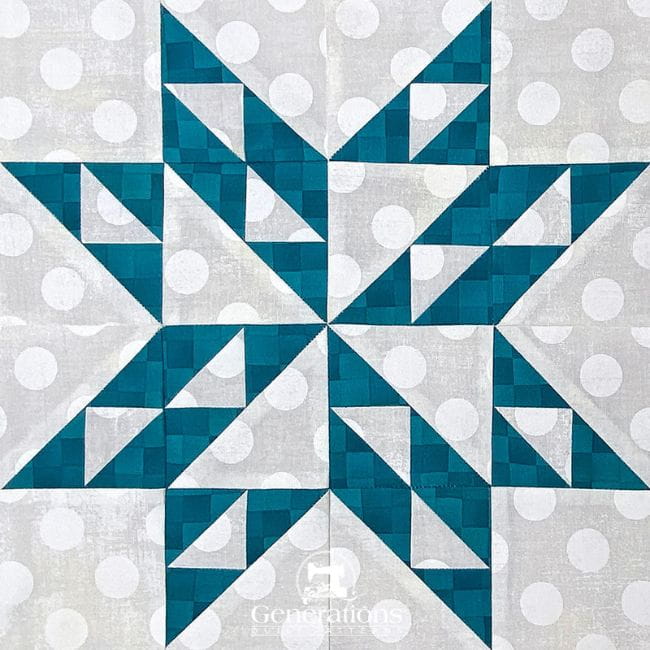
With free patterns that twinkle in four sizes, you'll be creating your own constellations of fabric faster than you can say 'supernova'.
Use these links to quickly move around the tutorial:
Are you ready to stitch your way through the Milky Way of quilting possibilities? Your celestial craft awaits! 🌟🧵
📋 General Instructions
Several abbreviations are used on this page. They are:
- SA - seam allowance
- RST - right sides together
- HST - half square triangles
- BitA - Bird in the Air unit(s)
1/4" SA are used through this tutorial.
Highlighted in yellow, pressing instructions are easy to spot.
To press, first press the patches in the closed position as they came off your sewing machine. This sets the seam, melding the fibers of the threads into the fibers of the fabric.
Then press the SA to the dark unless otherwise noted.
Optional: Download and print paper piecing patterns
NOTE: If you intend to use traditional piecing to make this block, skip this step and go straight to those cutting instructions.
To download the pattern, use the most current version of Adobe.
For accurate results, on Adobe's Print Menu page, under 'Page Size and Handling' set 'Custom Scale' to 100%. Then print.
Click here to see what it looks like on the Print Menu page.
Choose your finished block size from the chart below and print the corresponding number of pages for a total of 12 units.
Print the Birds in the Air Patterns |
||
|---|---|---|
| Finished Block Size |
# of copies | BitA Unit Size |
| 8" | 2 | 2" |
| 10" | 3 | 2½" |
| 12" | 3 | 3" |
| 16" | 6 | 4" |
After printing, use the 1" square graphic on the printed page(s) to double check that your patterns printed at the correct size.

Not sure which paper to use?
Take a look at my review of several of the most popular brands available to us quilters on the market.
You want a super-easy paper to tear away—less stress on the stitches.
The newest quilt fabrics to tickle your fancy...
Click the images below to see the full collection. We share any commercial and/or free patterns that showcase them, too. (For inspiration, of course!)
✂️ Cutting patches for a Sparkling Star quilt block
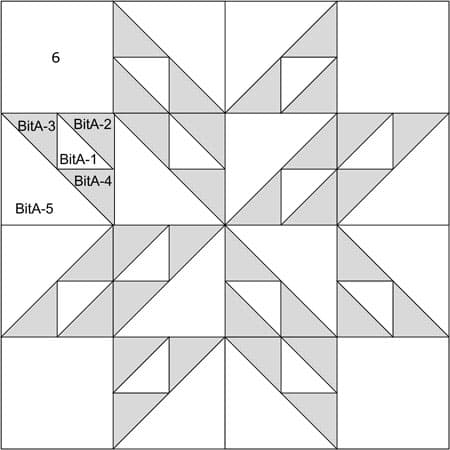 Sparkling Star quilt block design
Sample Block Size: 12" finished / 12½" unfinished
Grid: 8x8
Design Type: 4-patch | Star | Pinwheel | Paper Piecing
Please label all your patches. We use their numbers throughout this tutorial. They are the same for both techniques.
Paper piecing
You'll notice the BitA-1 patch is cut considerably smaller than the BitA2, BitA3, and BitA4 triangles whose finished size is the same.
Why is this?
The BitA-1 on the pattern is surrounded by dashed guidelines to make placement as foolproof as possible. These guidelines show us how big the patch is EXACTLY and EXACTLY where to position it to cover the space. We don't have to guess how much extra 'insurance' we'll need for 'rip-less' piecing.
And now you know! :)
 | Cutting Chart for a~ Paper ~ | ||||||
|---|---|---|---|---|---|---|---|
| Patch | Fabric | Qty | Finished Block Size | Sub Cut | |||
| 8'' | 10'' | 12'' | 16'' | ||||
| BitA-1 | Bac | 6 | 1⅞'' x 1⅞'' | 2⅛'' x 2⅛'' | 2⅜'' x 2⅜'' | 2⅞'' x 2⅞'' | |
| BitA-2, BitA3, BitA-4 | A | 18 | 2⅜'' x 2⅜'' | 2⅝'' x 2⅝'' | 2⅞'' x 2⅞'' | 3⅜'' x 3⅜'' | |
| BitA-5 | Bac | 6 | 3⅜'' x 3⅜'' | 3⅞'' x 3⅞'' | 4⅜'' x 4⅜'' | 5⅜'' x 5⅜'' | |
| 6 | Bac | 4 | 2½'' x 2½'' | 3'' x 3'' | 3½'' x 3½'' | 4½'' x 4½'' | --- |
| Unfinished Block Size | 8½'' | 10½'' | 12½'' | 16½'' | na | ||
| Grid Size | 1'' | 1¼'' | 1½'' | 2'' | na | ||
Traditional method
These patches are cut exactly to size. With its bias edges, there's not a lot of wiggle room in the piecing for a traditional BitA.
 | Cutting Chart for a~ Traditional Piecing ~ | ||||||
|---|---|---|---|---|---|---|---|
| Patch | Fabric | Qty | Finished Block Size | Sub Cut | |||
| 8" | 10" | 12" | 16" | ||||
| BitA-1 | Bac | 6 | 1⅞'' x 1⅞'' | 2⅛'' x 2⅛'' | 2⅜'' x 2⅜'' | 2⅞'' x 2⅞'' | |
| BitA-2, BitA3, BitA-4 | A | 18 | 1⅞'' x 1⅞'' | 2⅛'' x 2⅛'' | 2⅜'' x 2⅜'' | 2⅞'' x 2⅞'' | |
| BitA-5 | Bac | 6 | 2⅞'' x 2⅞'' | 3⅜'' x 3⅜'' | 3⅞'' x 3⅞'' | 4⅞'' x 4⅞'' | |
| 6 | 0 | 4 | 2½'' x 2½'' | 3'' x 3'' | 3½'' x 3½'' | 4½'' x 4½'' | --- |
| Unfinished Block Size | 8½'' | 10½'' | 12½'' | 16½'' | na | ||
| Grid Size | 1'' | 1¼'' | 1½'' | 2'' | na | ||
Subcutting
For either piecing method, #BitA-1 through #BitA-5 are all subcut once on the diagonal to create HSTs.
While the sizes differ between the two methods, the shapes do not. These are the resulting patches.
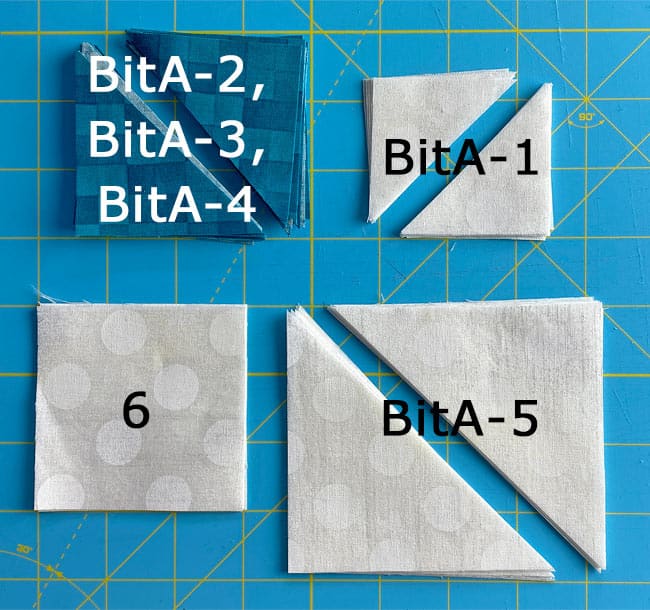
Continue on if you're paper piecing, or skip to the traditional instructions if you cut from the green chart.
🪡 Piecing the Bird in the Air units (BitA)
Choose your favorite technique to make these units. Use the blue cutting chart for paper piecing and the green for traditional piecing. The numbering of the patches is the same for both.
Paper Piecing
Make 12
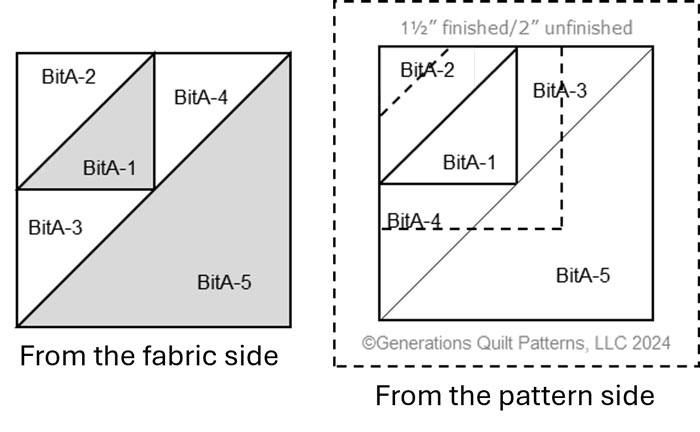
Notice when you look at the stitched unit from the fabric side, BitA-3 and BitA-4 switch positions. This usually doesn't affect your piecing, but it's important to be aware of it if they are cut from different fabrics.
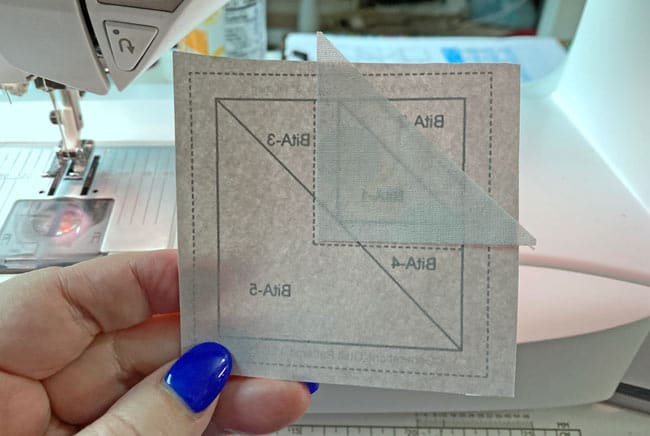
Use a dot of Elmer's Washable Glue stick to hold the BitA1 patch in place between the dashed lines on the unprinted side of the paper pattern. It is the only patch cut exactly to size. The rest of the BitAs are all oversized to make positioning quicker and easier.
General Sewing Machine Setup for Paperpiecing
- Reduce your stitch length to 16–20 stitches per inch (1.3-1.6 mm). This perforates the paper and stabilizes the seam when you remove the pattern. [Learn more about stitch length here.]
- Reduce your machine's speed or just plain slow down. Sew only as fast as you can stay on the stitching lines.
- Install an open toe appliqué foot (sometimes called an 'embroidery' or 'satin stitch' foot) if you have one (it's easier to see where you're stitching with one installed).
- Use a larger needle (90/14) if you have problems removing the pattern.
- If your machine has a needle stop up, use it. The stitching goes faster when you don't have to lift the presser foot with every seam.
- As you stitch each seam, start and stop a generous 1/4” before and after the solid stitching lines. ALWAYS. Future lines of stitching secure the ends.
After adding each patch, press the unit as it was sewn to set the seam and then open. The SA is automatically pressed towards the last patch added.
Before adding the next patch, take a look to make sure the one you just added covers the space plus seam allowance that it is supposed to.
Steam is optional and usually curls the pattern.
If that bothers you, don't use steam. Sometimes I do. Sometimes I don't.
It truly depends on my mood.
Remember, as you follow this paper piecing tutorial, the printed and the fabric sides of this block are mirror-images of each other.
At last!
Let's sew!
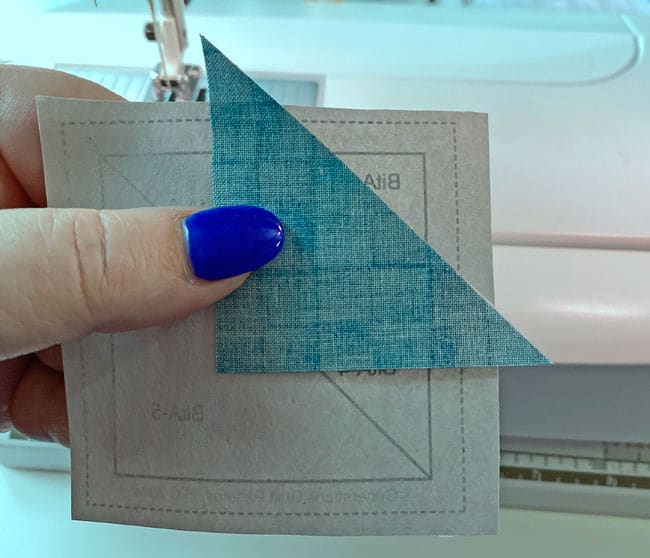
With RST, align the long bias edges of #BitA1 and #BitA2.
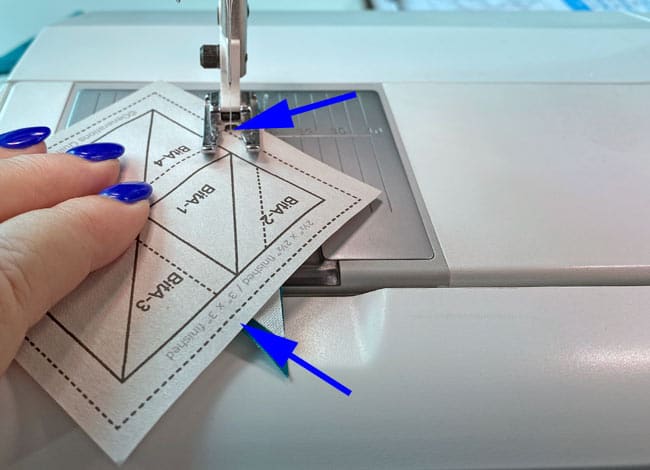
Stitch on the solid line, starting and stopping a good 1/4" before and after the line. (blue arrows)
Press.
Add #BitA3, this time short edges aligned.
You may want to flip open the patches before sewing to make sure they cover the space on the pattern completely.
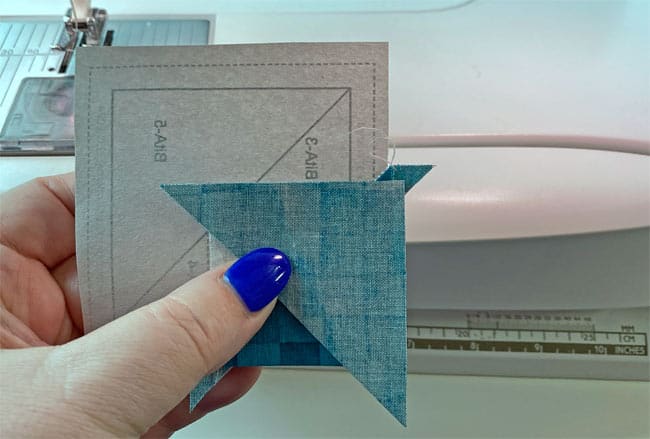
Press.
Add BitA4 in the same manner.
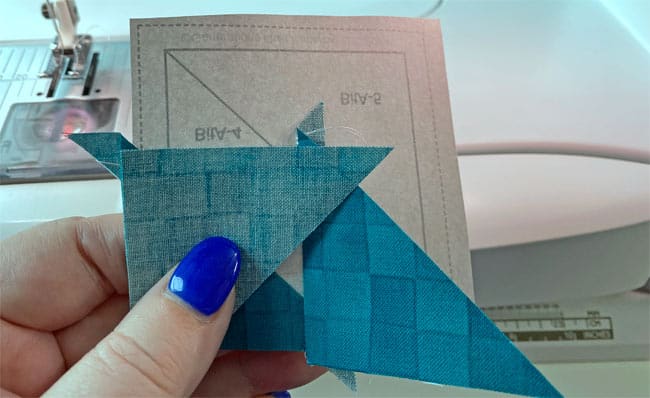
Press.
Move to your cutting mat and trim the edges of #BitA3/4 to a 1/4" SA.
To do this, pull back the paper from the stitche—just far enough to have room to fold on the line. The paper's going to tear a bit—this is normal. (red arrow)
IF the tear is too much for you, repair it from the paper side with a piece of Scotch Brand Magic Tape®. Then remember NOT to press on the paper side. You'll gunk up your iron.
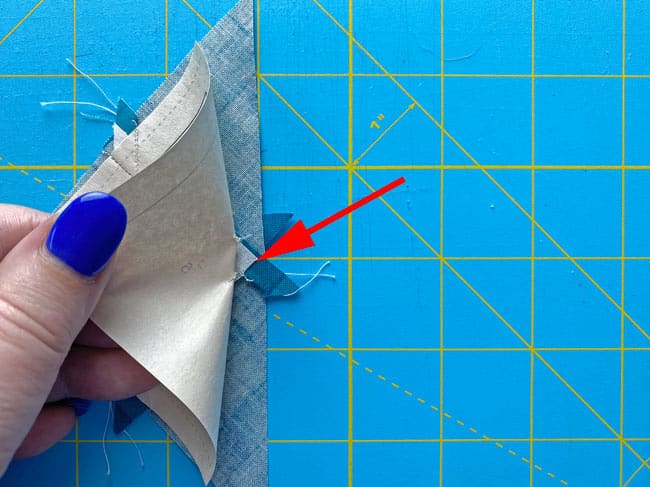
Fold back the paper pattern on the solid line between #BitA3/4 and #BitA5. Use your fingers to get a good crease.
Line up the 1/4" marking on your ruler with the folded edge (red arrow below) and cut away the excess fabric.
If you're into gadgets, an Add-A-Quarter PLUS Ruler is a terrific tool for this job. It makes getting that 1/4" virtually foolproof.
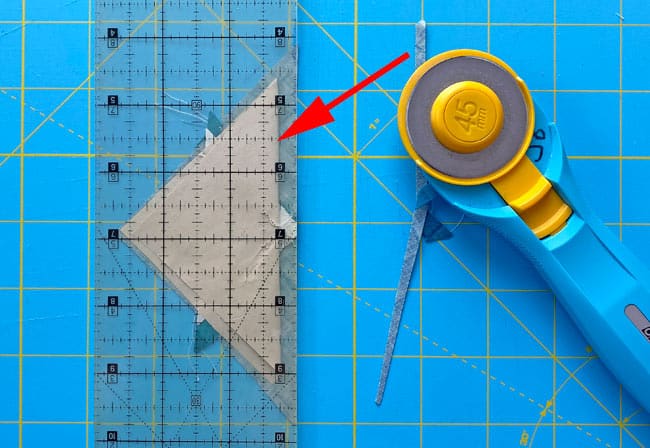 After trimming away the excess fabric, leaving behind a perfect 1/4" seam
Back at the sewing machine, align the long edge of BitA5 with BitA3/4.
Since I'm adding a very light fabric over a very dark one, I'm concerned about the darker fabric shadowing through the lighter one.
To prevent a problem, I nudge the light BitA5 patch a few threads past the freshly cut edge.
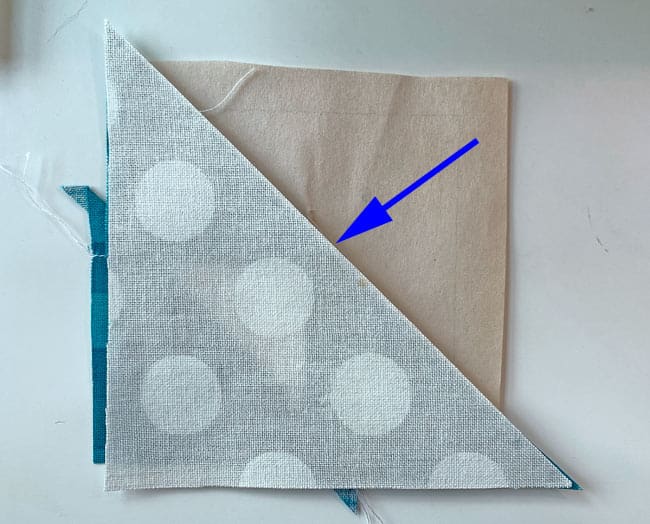
You can just make out a bit brighter white along the edge below, right?
That's how much it's 'nudged' over—just the tiniest of bits.
Stitch this time past the outside dashed edges on the pattern.
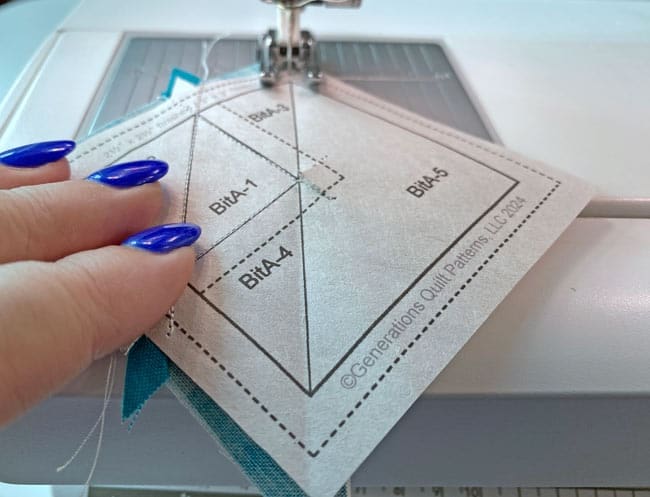
Since the seam runs completely across the unit, it can be chain pieced. A big time saver if you're working on more than one block.
Press.
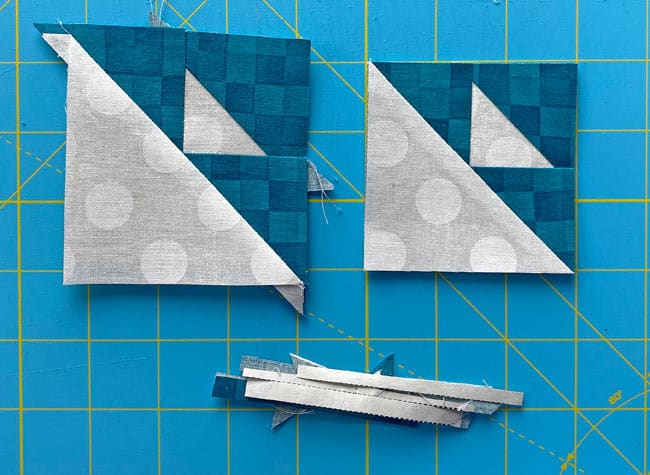 For hot mess to the perfect size—all with swipes of your rotary cutter.
After all the units are pieced and pressed, trim them to perfection.
At your cutting mat, pattern side up, line up the 1/4" mark on your ruler with a solid outside line (red arrow). Trim away the excess.
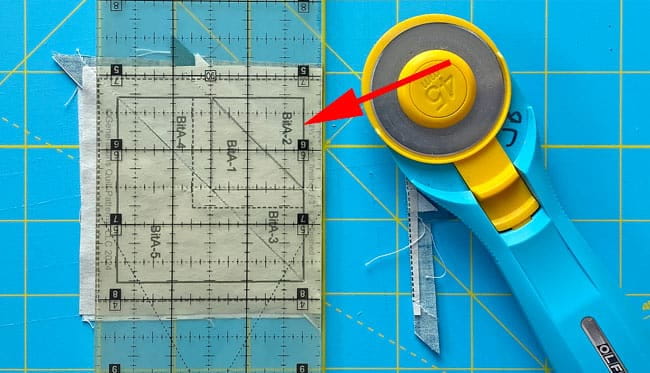
The paper piecing is complete. From this point forward, return your stitch length to the one you regularly use for piecing and install your favorite 1/4" presser foot.
All the outside edges are on the straight of grain—that's what precutting patches will do for you <Wink! Wink!>.
Remove all the paper now.
Surprise! Usually, I recommend removing the pattern starting with the last patch added (5 below). However, for this block, it was much easier to remove in this order: 2, 1, 3&4 and finally 5.
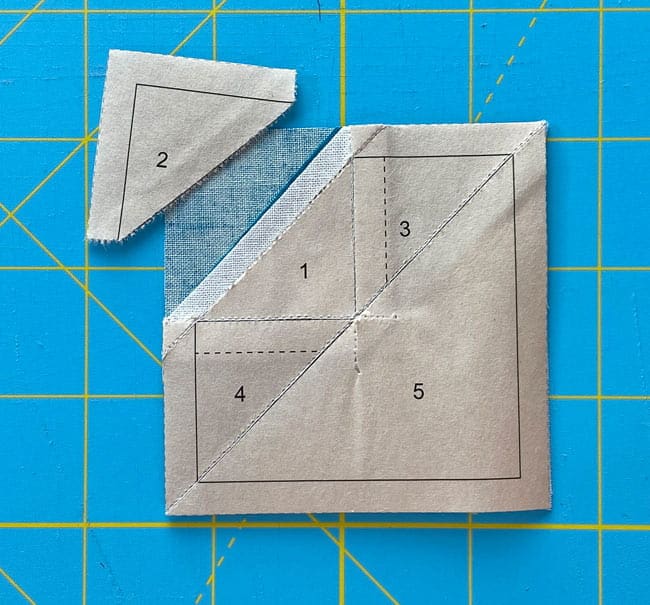 Starting with the smaller BitA2 made it a lot easier...it was a surprise!
This is an older version of the BitA that I'm using up. You'll have patches labeled with BitA - FYI).
Traditional construction
Make 12
If paper piecing isn't your thing, these are the instructions to make the BitA with traditional methods. All the patch numbers are the same regardless of the method you choose to make them with.
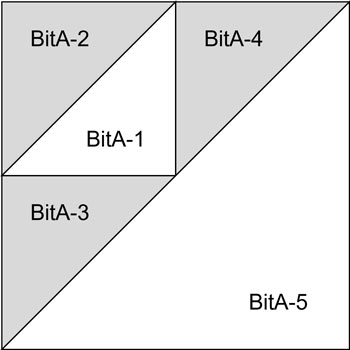 Birds in the Air unit
Since you are piecing several bias edges, do take the time to take a Sewing Test with scraps of the fabrics you're using to check the accuracy of your seam allowance.
Starching your quilt fabrics before cutting is always beneficial when there's lots of bias edges about. Consider it for your blocks. {Learn more about starching here.]
If you cut your patches with the GREEN cutting chart, click here for the traditional instructions for the Birds in the Air units here.
This opens in a new window. Once you are finished piecing, simply close that window and this tutorial will still be open for you.
Once you are finished with all 12, use the chart below to check for accuracy.
Birds in the Air edge-to-edge dimensions after stitching | |
|---|---|
| Finished Block Size | Edge-to-edge Measurement |
| 8" | 2½" x 2½" |
| 10" | 3" x 3" |
| 12" | 3½" x 3½" |
| 16" | 4½" x 4½" |
🧵 Create the Corners
Make 4
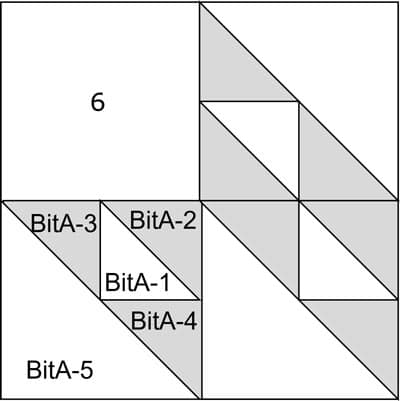 Corner unit made from three BitA and one #6 square
Arrange your patches into 4 groups of 4 as shown below left.
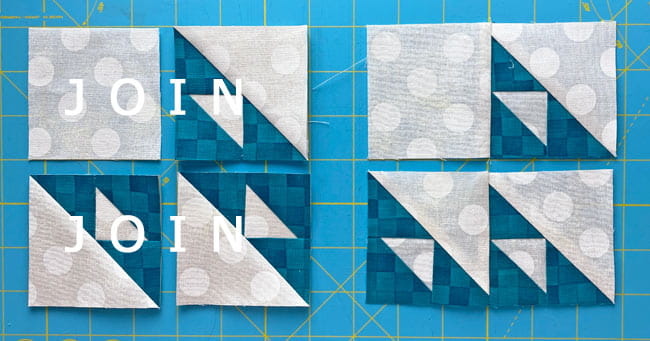
Stitch the units together in each row— a #6 to a BitA in one and two BitAs in the other, above right.
The SAs are pressed towards the #6 in the top row, and towards the right BitA in the second.
Sew the two rows together, pressing that SA toward the row with the #6.
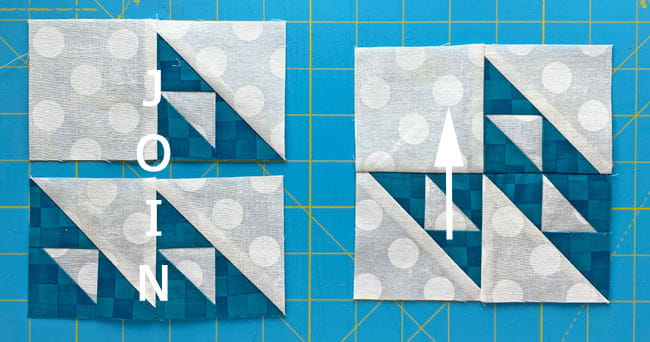 The seams in the BitA where the HST points are designed to nest together for easier matching. If you've been diligent about sewing directly on the line, these points will almost match themselves.
Make 4 identical Corners.
🧩 Assemble your Sparkling Star quilt block
Arrange your stitched BitA plus #6 square units to create the Sparkling Star design. Each Corner is turned 90° as you move clockwise around the block.
Remember, this is nothing more than a Sawtooth Star filled with Birds in the Air to form the star points.
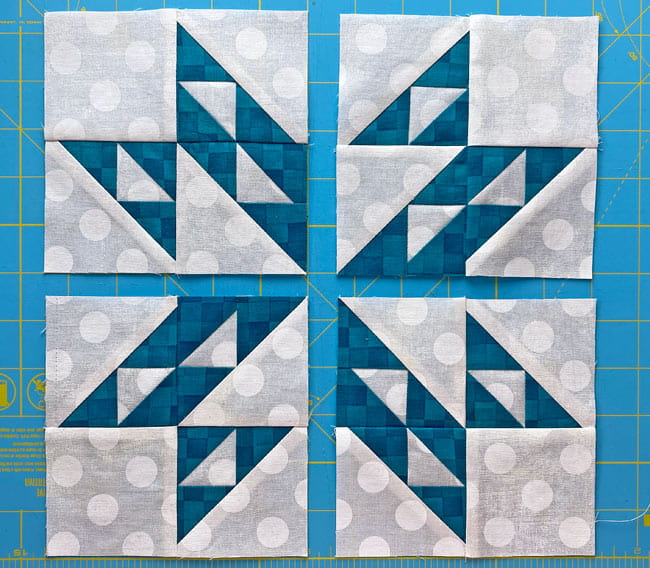
Stitch the units in each row together. SAs are pressed to the right in the top row and to the left in the bottom.
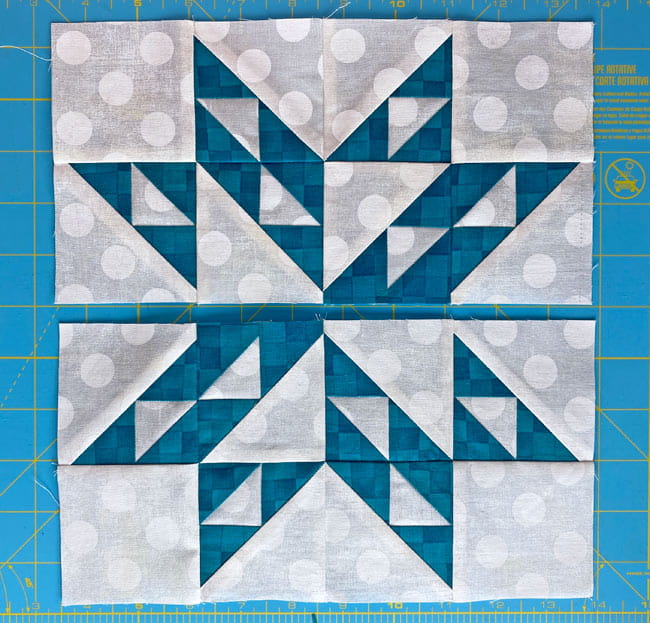
Sew the final seam, matching points as you go.
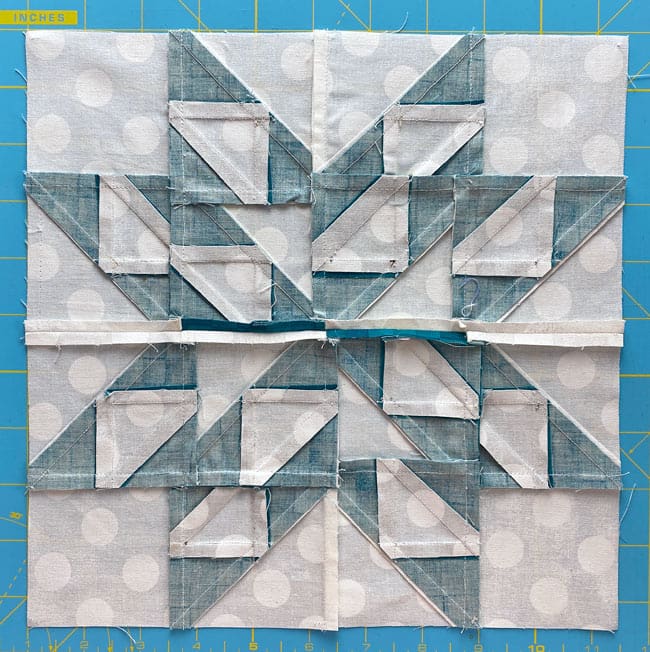
Here we have the finished Sparkling Star quilt block.
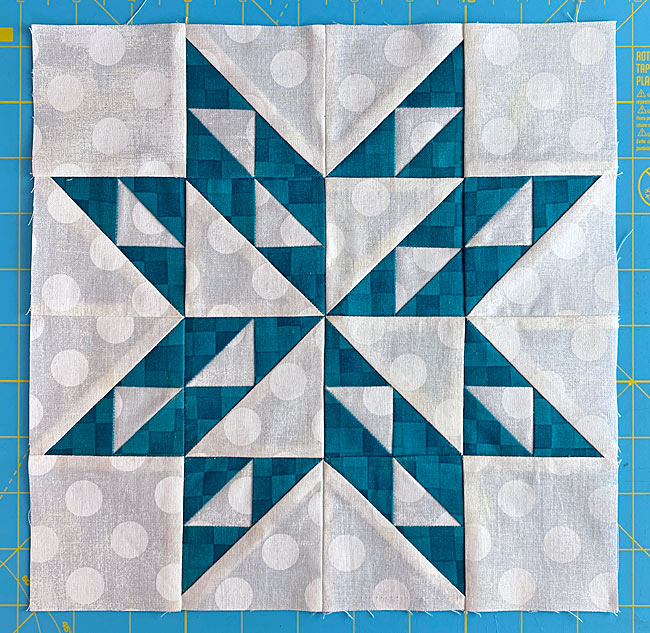
From the backside, you can see where I pressed the final seam open. This is to avoid all the bulk in the center of the pinwheel.
Ready, set, pin for the win! 🚀📌
This Sparkling
Star block is your ticket to the galaxy of amazing quilts. Pin 📌 this post faster
than you can say 'supernova,' and you'll always have the blueprint for stellar
creations right at your fingertips. 🌟
More playful and dynamic pinwheel quilt blocks!
Your pinwheel-inspired quilt block is done. But you're not!
Our pinwheel quilt blocks are a delightful blend of playful interlocking patterns and vivid, eye-catching color. The interlocking patterns dazzle your eyes and inspire your creativity, while our step-by-step instruction ensures that you can create these stunning blocks with ease.
🔭 Looking for something truly stellar?
You've finished your star quilt block, and you're ready for more!
Browse our collection of 60 stellar star quilt block patterns. All have instructions and cutting charts in multiple sizes. If templates or paper piecing is used in the tutorial, there's a free download for you of those materials.

Eeny. Meenie. Miney. Moe.
Which star quilt block will you sew?
For a star-studded quilting experience, choose from 100+ bedazzling star quilt patterns—for beginners and beyond—click here.
For even MORE blocks to make... 🧩🎨

...visit our Free Quilt Block Pattern Library, with over 230+ blocks to choose from in multiple sizes.
Free downloads are included in all sizes for any blocks require paper piecing patterns or templates.
- Home
- Free Quilt Block Patterns
- Sparkling Star Quilt Block
