- Home
- Free Quilt Block Patterns
- Souvenir Quilt Block
Souvenir Quilt Block
From our Free Quilt Block Patterns Library
This post contains affiliate links, for which I receive compensation.
Skill Level: Beginner
The Souvenir quilt block is a simple block, perfect for framing a favorite focus fabric.
Better yet, use it to showcase your hand-stitched redwork or a special machine embroidery collection.
With nothing more than squares and half square triangles, it's quick to piece with little matching to worry about.
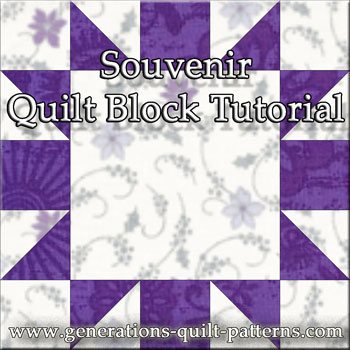
My instructions include center squares that measure 3", 4-1/2", 6" and 9" finished for blocks that finish 5", 7-1/2", 10" and 15".
Let's get started!
📋 General Instructions
These abbreviations are used on this page:
- SA - seam allowance
- RST - right sides together
- HST - half square triangle
SA are 1/4" and are pressed to the dark fabric unless otherwise noted.
Press the unit, first flat to set the seam, and then open with the SA in the direction indicated.
As always, I use prewashed and starched fabrics because I believe they are easiest to work with. The final choice is up to you!
The newest quilt fabrics to tickle your fancy...
Click the images below to see the full collection. We share any commercial and/or free patterns that showcase them, too. (For inspiration, of course!)
Step 1: Cutting for a Souvenir quilt block
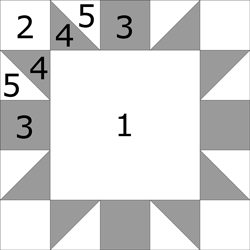 Souvenir design
Sample Size: 7½" finished / 8" unfinished
Grid: 5x5
Design Type: Uneven 9-patch large center
I've used a polka-dot in the sample Souvenir block to jazz it up a bit, but seriously, this block would be terrific to frame embroidery—hand or machine.
Just enough piecing to enhance your handiwork; not enough to distract from the focus of the quilt.
The embroidered square would be swapped in for Patch #1 in the chart below.
 |
Cutting Chart for an~ Traditional Piecing ~ | |||||
|---|---|---|---|---|---|---|
| Patch | Fabric | Qty | Finished Block Size | |||
| 5” | 7½" | 10” | 15” | |||
| 1 | A | 1 | 3½" x 3½" | 5” x 5” | 6½" x 6½" | 9½" x 9½" |
| 2 | A | 4 | 1½" x 1½" | 2” x 2” | 2½" x 2½" | 3½" x 3½" |
| 3 | B | 4 | 1½" x 1½" | 2” x 2” | 2½" x 2½" | 3½" x 3½" |
| 4 | B | 4 | 4¼" x 4¼" | 5¼" x 5¼" | 6¼" x 6¼" | 8¼" x 8¼" |
| 5 | A | 4 | 4¼" x 4¼" | 5¼" x 5¼" | 6¼" x 6¼" | 8¼" x 8¼" |
| Unfinished Block Size | 5½" | 8” | 10½" | 15½" | ||
| Grid Size | 1” | 1½" | 2” | 3” | ||
Step 2: Assemble the units for your Souvenir quilt block
First we create the units contained in the block.
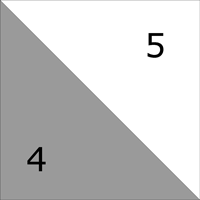
HSTs
Make 8
To simplify the sewing, we'll use the 8 at a time method for making half square triangles. (Click here for complete instructions on this method.)
With a Quick Quarter Ruler mark pairs of diagonal lines (each a 1/4" from the center diagonal) across each pair of corners.
 My trusty 8" Quick Quarter Ruler
Stitch on the line. I prefer an open toe applique foot for this because it's easier to see the marking.
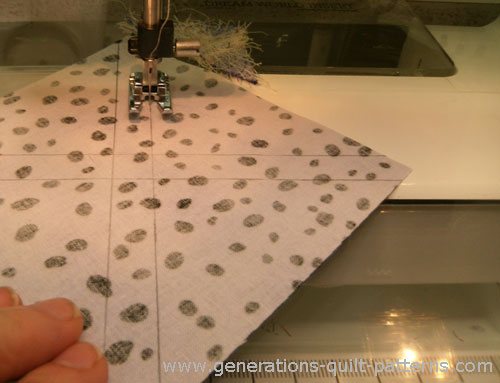 The drawn lines form 90 degree angles where they cross.
No Quick Quarter Ruler? No problem.
With your everyday rotary ruler, mark a single diagonal in each direction with a mechanical pencil following the directions included on our Techniques Page—Make 8 Triangle Squares in a Jiffy. (Steps 1 & 2)
Press the sewn patches flat.
Now find the 'Center or Midpoint' measurement in the Cutting Chart below.
HST Dimensions | ||
|---|---|---|
| Finished Block Size | Center or Midpoint Measurement | Trim HST to… |
| 5" | 2-1/8" | 1-1/2" |
| 7-1/2" | 2-5/8" | 2" |
| 10" | 3-1/8" | 2-1/2" |
| 15" | 4-1/8" | 3-1/2" |
For this 7-1/2" sample block, this measurement is 2-5/8".
Cut the sewn #1/#2 into four squares equal to this midpoint measurement. Then cut these squares apart between the stitching lines to create 8 HST units. (See Steps 4-6 on the Technique Page for a quick review.)
Press.
We started with slightly oversized patches, so we need to cut these HSTs down to the 'Trim HSTs to' measurement in the chart.
After trimming, these HST are ready for the next step.
Side Units

Make 4
With RST, add a HST to each side of a #3 square.
SA are pressed toward the center, #3 patch.
Set two aside for the left and right sides.
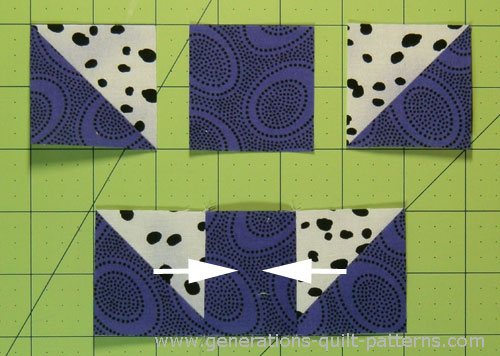 Make 4. Press SA to the center. Set aside 2.
Top and Bottom Units
Make 2
With RST, add a #2 square to each end of two of the Side Units made in the previous step.
Press with SA to the outside.
 Make 2. Press SA in the direction of the arrows.
Step 3: Assemble your Souvenir quilt block
Arrange the sides and top and bottom units and center square into rows.

With RST, stitch the side units to the center square. Press SA in the direction of the white arrows.
 Press the SA in the direction of the arrows.
Stitch the rows together, pinning if it helps you make good matches at the seams. (There's no shame in being a pinner...I know...I am one!) The SA nest to make matching easier.
Give your block a good press. Check out our best pressing technique. It can tame the lumpiest of patchwork.
And your finished Souvenir quilt block looks like this.
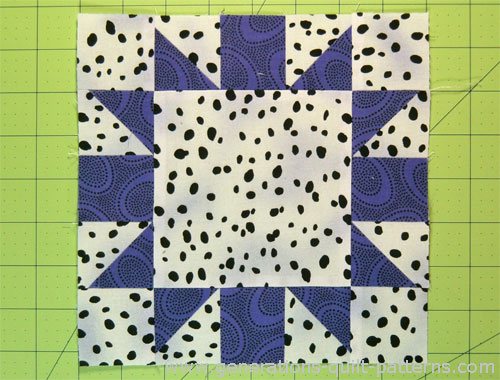 Souvenir quilt block
Which came first?
The block or the embroidery?
If you choose 'Souvenir' to showcase a machine embroidery collection or your own redwork stitches, you'll need to decide when to do the fancy stitching.
My personal preference has always been to stitch out the embroidery design first on a piece of fabric larger than needed. Then trim to the exact size needed. The risk is that you accidentally cut the block too small.
The alternative is to piece the block first and then embroider it. The risk, then, is that the embroidery distorts the block. Or perhaps the stitchout somehow goes awry.
Now you've got no wiggle room. The block is un-salvageable and you must start over.
Choose the order that works best for your needs.
What about a different quilt block?
For a list of all the 220+ quilt block patterns on this site, start here.
If you know the name of the block, shorten your search by using these links:
Click here if you're looking for blocks with at least some paper piecing.
Click here if you're looking for the basic building blocks of quilting, i.e., Flying Geese, half square triangles, quarter square triangles, etc., along with several techniques to make each.
And finally, use these links to find blocks in these finished sizes:
For even more blocks to make...
For you, are quilt block designs like potato chips...
...you can't have just one?!!
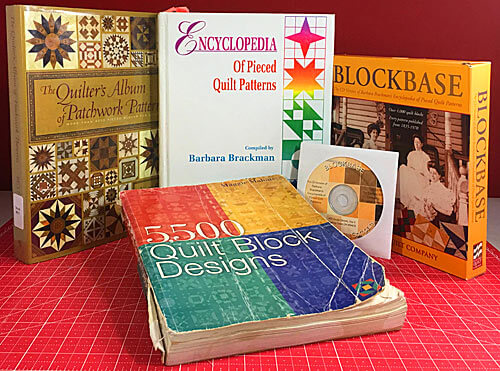
Check the amazing resources I rely on for all the quilt block designs you see on this website.
To see if they're worthy of a spot in YOUR quilting library, CLICK HERE.
