- Home
- Best Sewing Machine
- Sewing Machine Tension
Adjusting Sewing Machine Tension
to Prevent Problems
Skip the two aspirin! You CAN avoid tension headaches
This post contains affiliate links, for which I receive compensation.
Setting sewing machine tension correctly helps you save time and avoid problems. You'll learn how to here with these quick and easy guidelines.
You find out why you have tension problems.
Then you'll learn what to do BEFORE you touch that tension dial.
We'll discuss how to diagnose your tension problems and then which adjustments to make.
Finally, there is general adjusting for thread types and the bobbin case.
Now let's get to it.

Understand Sewing Machine Tension
Did you know that the tension is preset at the factory?
Our domestic S-E-W-I-N-G machines are designed to make a good, quality stitch...
...when threaded with the same light to medium
weight thread in the needle AND bobbin.
The result is a stitch with balanced tension. And that is exactly what sewers and quilters do when sewing a garment or home dec project or piecing a quilt.
So What Causes Tension Problems?
We quilters are an adventurous lot!
We choose thread for our quilt top for its effect. We choose another thread for the bobbin so our quilting stitches disappear on the quilt back.
Sometimes these threads are the same, but many times not.
Sewing machine tension problems arise when we use one thread in the needle and a different thread in the bobbin.
We add to the tension imbalance by simply putting batting in our quilts. Batting adds drag to the needle thread as it stitches through the layers of your quilt sandwich.
Add to the equation, fabrics of different thread counts or densities...say a scrumptious set of batiks for the top, a low loft cotton batting and then a quilters' cotton for the backing.
With all these variables, adjusting sewing machine tension is inevitable.
Review this Checklist before Adjusting Tension
You can and should make tension adjustments to create a balanced stitch. If suddenly it goes wonky, before you make any adjustments to your sewing machine tension, be sure to:
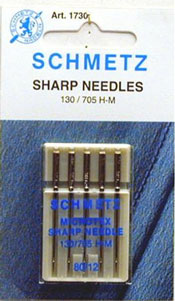
Replace your needle
If this is a new quilting project, always replace the needle. It is the cheapest and simplest thing to fix, and yet the easiest to overlook. A damaged or bent needle effects stitch quality.
Keep plenty on hand and stock up when they are on sale. A new needle is often the culprit of the most aggravating sewing machine problems.
Rethread your sewing machine
Remember to have the presser foot up while threading. That way your thread will lay in the tension guides.
Your needle thread may have jumped the take up lever. This really messes up the tension.
Your bobbin thread may be out of its tension spring in the bobbin case.
Check that the thread is flowing off the spool and isn't catching anywhere
Remove lint or thread caught in the needle or bobbin tension disks
Refer to your instruction manual if you don't know where these disks are located.
Just these few simple things will fix many sewing machine tension problems.
Tension Adjustments for Your Sewing Machine
First locate the sewing machine tension gauge.
Sometimes its called a knob or a button or found on your Touch Screen if you have a computerized machine.
Refer to your manual if you can't find it.
Tension adjustments fall into two categories; it is either too loose or too tight.
The symptoms and remedies are:
Needle thread shows on the backing
Either your needle thread is too loose or your bobbin thread is too tight.
Increase your needle tension by 1 number. Test by stitching several inches on your small quilt sandwich. Keep increasing the tension until no needle thread is visible on the backing.
Bobbin thread shows on the quilt top
Either your needle thread is too tight or your bobbin thread is too loose.
First check that your bobbin thread hasn't slipped out of its tension spring in the bobbin case.
If the bobbin thread is correctly threaded through the tension spring, then decrease your needle tension by 1 number.
Test by stitching several inches on your small quilt sandwich. Keep decreasing the tension until no needle thread is visible on the quilt top.
If sewing machine tension problems occur during the middle of a quilting session, again, first refer to the checklist above.
Once you're satisfied that your sewing machine is threaded properly and your needle is not the culprit, then adjust the tension as outlined above.
If you have just started testing your quilting thread choices and you are using different threads for the needle and bobbin, you will in all probability make adjustments to your tension.
Make a small quilt sandwich from the materials used in your quilt to make this sandwich. It doesn't have to be pretty or even pin basted. It should be just big enough to test some of the stitching you plan to do on your quilt.
General Adjustments for Specialty Threads
Once you start using something other than medium weight threads in your sewing machine, you'll regularly be adjusting your tension.
Threads with stretch
Threads like monofilament or hologram have stretch in them.
Prove it to yourself.
Take a length of monofilament and give it a pull. You can feel
the stretch. Now do the same with a length of cotton thread. Did you
feel the difference?
Threads with stretch create their own tension as they flow from the spool through all the various guides until they get to the needle. That is why if you wind a bobbin with monofilament thread that it is recommended that you wind the bobbin slowly. That way you won't stretch the thread as it's being wound onto the bobbin.
For my sewing machine, when stitching with monofilament thread in the needle and a 50 wt cotton in the bobbin, I reduce my preset tension by 2 numbers. Then test on a small quilt sandwich. I'll fine tune the adjustments until I'm satisfied that I have a balanced stitch.
Decorative threads
Many decorative threads are larger than the 50 wt cotton that we piece with.
For these threads be prepared to reduce your tension.
A larger, thicker thread creates tension as it winds its way through your machine. Reduce and test until you've arrived at a balanced stitch.
Metallics
Because of the weight and composition of metallic threads, usually a lower needle tension is required.
Test, adjust, and test again until you've achieved a balanced stitch.
Tension Adjustments for Free Motion Quilting
After establishing a balanced tension for the combination of quilt sandwich and thread you've chosen, once in a while you'll find ‘eye lashing’ on the back of your quilt.
This is almost always due to pulling the fabric too fast while going around a curve.
If there have been no other problems with your tension settings up to this point, then go back to your practice sandwich.
Practice the type of stitching pattern where the ‘eye lashing’ occurred. Slow down your hand speed.
A Word About Bobbin Tension
While it is possible that your bobbin tension is the culprit, 99% of the time adjustments to your needle tension will fix the problem.
Quilters find bobbin adjustments most necessary when quilting with very large threads in the bobbin for bobbin drawing.
To adjust bobbin tension, refer to your sewing machine manual.
Locate the bobbin case and bobbin tension screw. This is a very small screw without a lot of threads on it.
If necessary, adjust by making very small turns(less than a quarter, closer to an eighth) of the screw following the “right tighty, lefty loosey” rhyme.
It is helpful to mark on the bobbin case itself where your original tension was set so that you can return to it without difficulty.
I recommend that under normal circumstances, adjustments to the bobbin tension be your last resort, because so rarely is it needed for quilting.
Helpful Hint
I keep a spare bobbin case on hand for those times when I need to make adjustments to the bobbin tension. The other case I NEVER touch the screw on.
Eureka!
It's easy to see when your sewing machine tension is balanced.
The stitch forms within the layers of the quilt sandwich.
No needle thread shows on the backing. No bobbin thread shows on the quilt top.
This balanced stitch is the strongest stitch and this is our goal.
Good job!
Now it's time to quilt.


