- Home
- Free Quilt Block Patterns
- Salem Quilt Block
Behold the Bewitching Beauty of the Salem Quilt
Block 🧙♀️🧹
From our Free Quilt Block Patterns Library
This post contains affiliate links, for which I receive compensation.
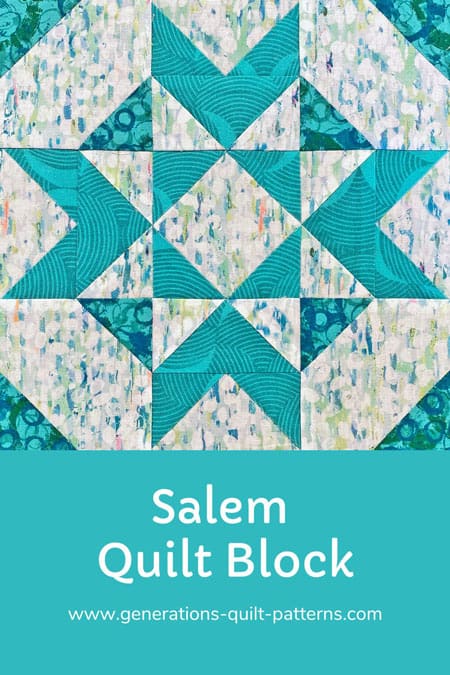
Quilt up a storm with the spellbinding Salem Quilt Block! 🌪️
This bewitching design is a captivating twist on the classic 9-patch, featuring a dazzling display of Flying Geese Chevrons that will have your fellow quilters swooning.
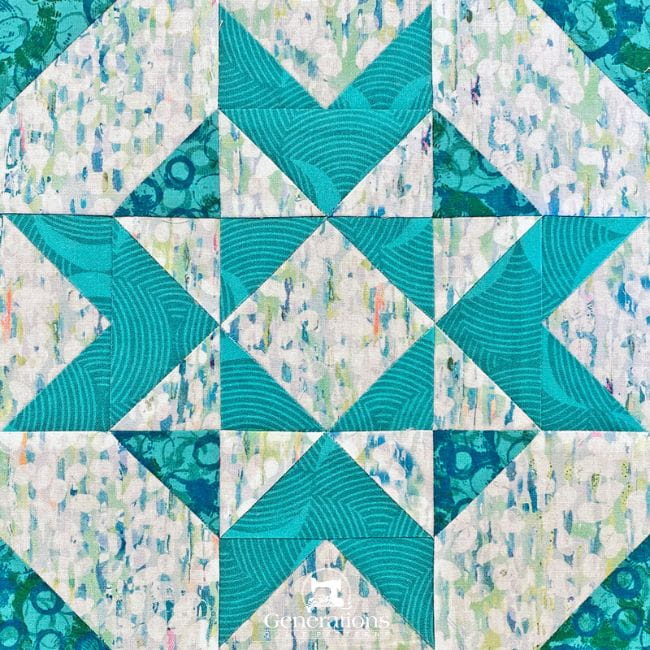
Conjure up quilting magic with this mesmerizing masterpiece. 🪄⚡
Use these links to quickly move around this tutorial:
- A cutting chart in four sizes, with downloads of the chart and block design
Cut. Sew. Press. Weave a web of quilting wonder with your fabric as you conjure up the beguiling Salem Quilt Block. 🕸️✨
General Instructions
Several abbreviations are used on this page. They are:
- SA - seam allowance
- RST - right sides together
- HST - half square triangles
- QST - quarter square triangles
- FG - Flying Geese pairs
- SiaS - square in a square
- FC - Folded Corners
A 1/4" SA is used in this tutorial.
Highlighted in yellow, pressing instructions are easy to spot.
To press, first press the patches in the closed position as they came off your sewing machine. This sets the seam, melding the fibers of the threads into the fibers of the fabric.
Then press the SA to the dark unless otherwise noted.
Download and print the paper piecing pattern
To download the pattern, use the most current version of Adobe.
For accurate results, on Adobe's Print Menu page, under 'Page Size and Handling' set 'Custom Scale' to 100%. Then print.
Click here to see what it looks like on the Print Menu page.
Find your finished block size from the chart below. Print the corresponding number of pages for a total of four Flying Geese Pairs and one Square in a Square for each block you want to make.
Download and print paper piecing patterns | ||||
|---|---|---|---|---|
| Finished Block Size | FG Pairs | Sias | # of copies to print | Download Link | # of copies to print | Download Link |
| 6" | 1 | 2" | 1 | 2" |
| 9" | 1 | 3" | 1 | 3" |
| 12" | 2 | 4" | 1 | 4" |
| 15" | 4 | 5" | 1 | 5" |
After printing, use the 1" square graphic on the printed page(s) to double check that your patterns printed at the correct size.
Then cut out the required number of patterns from your copies. A rough cut is good enough—an 1/8"-1/4"-ish away from the outside dashed square.

Not sure which paper to use?
Take a look at my review of several of the most popular brands available to us quilters on the market.
You want a super-easy paper to tear away—less stress on the stitches.
The newest quilt fabrics to tickle your fancy...
Click the images below to see the full collection. We share any commercial and/or free patterns that showcase them, too. (For inspiration, of course!)
✂️ Cutting patches for a block
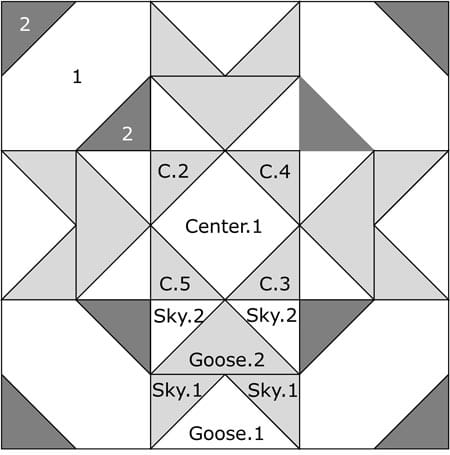
Sample Block Size: 9" finished / 9½" unfinished
Grid: 6x6
Design Type: Star | Paper piecing | Even 9-patch
Please label all your patches. We use their numbers throughout this tutorial.
 | Cutting Chart for a~ Paper PLUS Traditional Piecing ~ | ||||||
|---|---|---|---|---|---|---|---|
| Patch | Fabric | Qty | Finished Block Size | Sub Cut | |||
| 6'' | 9'' | 12'' | 15'' | ||||
| Center.1 | Bac | 1 | 1⅞'' x 1⅞'' | 2⅝'' x 2⅝'' | 3⅜'' x 3⅜'' | 4⅛'' x 4⅛'' | --- |
| C2, C3, C4, C5, Sky.1 | Med | 6 | 2⅜'' x 2⅜'' | 2⅞'' x 2⅞'' | 3⅜'' x 3⅜'' | 3⅞'' x 3⅞'' | |
| Goose.1 | Bac | 1 | 3¾'' x 3¾'' | 4¾'' x 4¾'' | 5¾'' x 5¾'' | 6¾'' x 6¾'' | |
| Goose.2 | Med | 1 | 3¾'' x 3¾'' | 4¾'' x 4¾'' | 5¾'' x 5¾'' | 6¾'' x 6¾'' | |
| Sky.2 | Bac | 4 | 2⅜'' x 2⅜'' | 2⅞'' x 2⅞'' | 3⅜'' x 3⅜'' | 3⅞'' x 3⅞'' | |
| 1 | Bac | 4 | 2½'' x 2½'' | 3½'' x 3½'' | 4½'' x 4½'' | 5½'' x 5½'' | --- |
| 2 | Dark | 8 | 1½'' x 1½'' | 2'' x 2'' | 2½'' x 2½'' | 3'' x 3'' | --- |
| Unfinished Block Size | 6½'' | 9½'' | 12½'' | 15½'' | na | ||
| Grid Size | 1'' | 1½'' | 2'' | 2½'' | na | ||
Subcutting
The Sky.1, Sky.2 and C.2 through C.5 are all cut in half once on the diagonal to create HST shapes.
Goose.1 and Goose.2 are cut in half twice on the diagonal, making QST shapes.
That was easy!
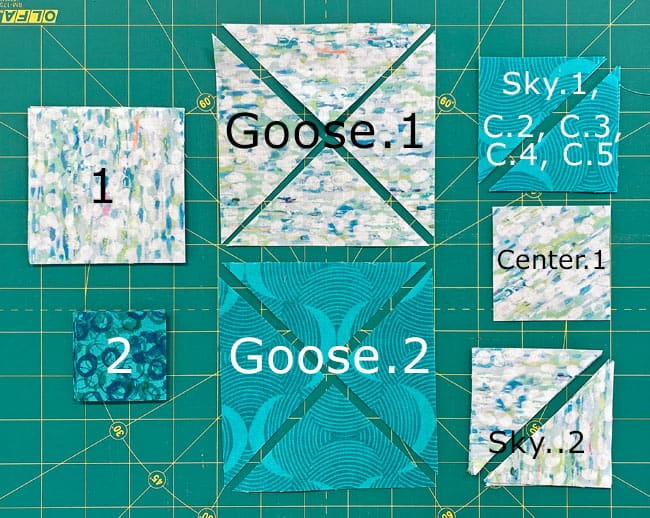
Tips for working with directional prints
The background fabric has a distinct pattern that runs from top to bottom. When cutting the Center.1 piece, I made sure to align the pattern so it also runs top to bottom.
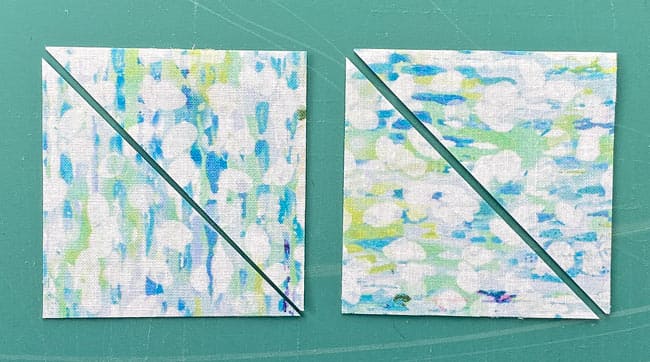
Option 1
For the Sky.2 patches, all but 2 of them should be cut diagonally with the pattern running top to bottom. (below left)
The other 2 patches should be cut diagonally but with the pattern running left to right. (below right) This ensures that all the Half-Square Triangles (HSTs) and Flying Geese Pairs (FG) have the design going in the same direction.
An additional benefit to turning two of the patches a 1/4 turn, is that you can stack all 6 of them and subcut with one stroke.😊
Option 2
Otherwise, you can position your patches all with the design running top to bottom.
Cut one stack upper left to lower right (below left) and the other lower left to upper right (below right) to get the desired patches.
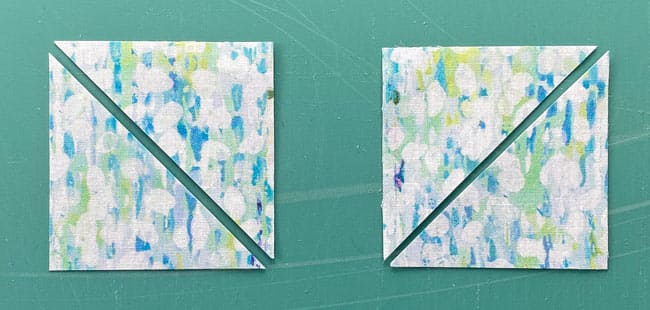
The choice is yours which option you choose...IF you are working with directional prints and want to control the direction of the print in your block or quilt.
Subcutting the Goose patches automatically gives you all the patches you need. I've marked the sample paper piecing pattern with orientation guides (top, bottom, etc.) to help me remember to pay attention when positioning patches.
The key is carefully aligning the fabric patterns to create a cohesive, visually striking design across the entire quilt block. 🎨🧵✨
Of course, you could always choose to ignore the direction of a directional print. What is most important is what YOU want.
🪡 Assemble the units for your Salem block
Let's get all the gluing out of the way first.
Use a dot of Elmer's Washable Glue Stick to hold the Goose.1s and Center.2 in position between the dashed guidelines.
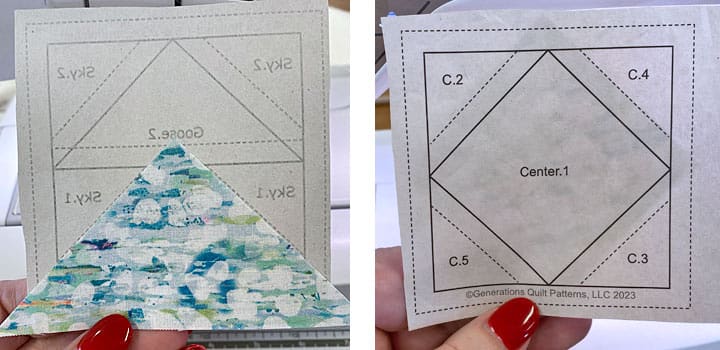
The gluestick can be put away. We're done with it for this block.
We need to make a few adjustments to our sewing machine settings to paper piece.
- Reduce your stitch length to 16–20 stitches per inch (1.3-1.6 mm). This perforates the paper and stabilizes the seam when you remove the pattern. [Learn more about stitch length here.]
- Reduce your machine's speed or just plain slow down. Sew only as fast as you can AND stay on the solid stitching line.
- Install an open toe appliqué foot (sometimes called an 'embroidery' or 'satin stitch' foot) if you have one (it makes it easier to see where you're stitching).
- Use a larger needle (90/14) IF you have problems removing the pattern. Personally, I use an 80/12 Microtex Sharp for paper piecing without any issues.
Square in a Square (SiaS)
Make 1
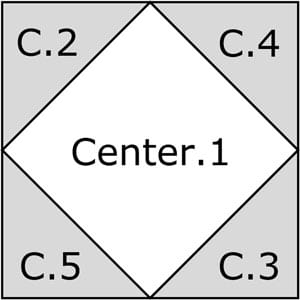
With RST, align the long bias edge of C.2 with the edge of Center.1
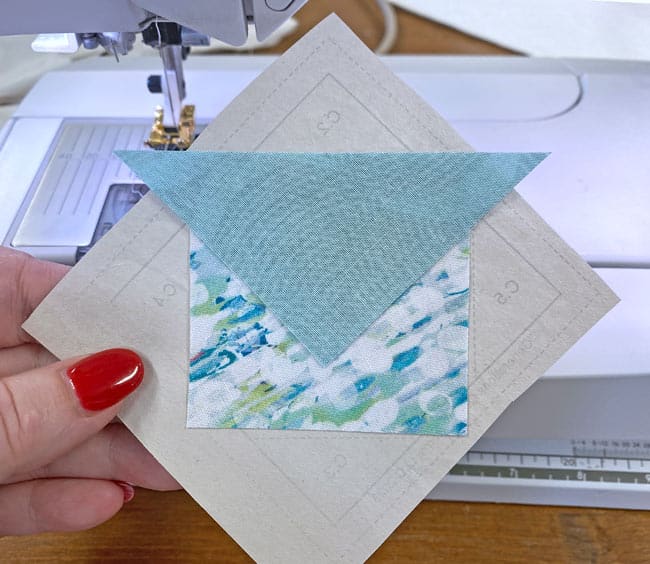
Sew the seam, starting and stopping past the outside dashed edges of the block.
Press.
Position the edge of C.3 with Center.1 and stitch.
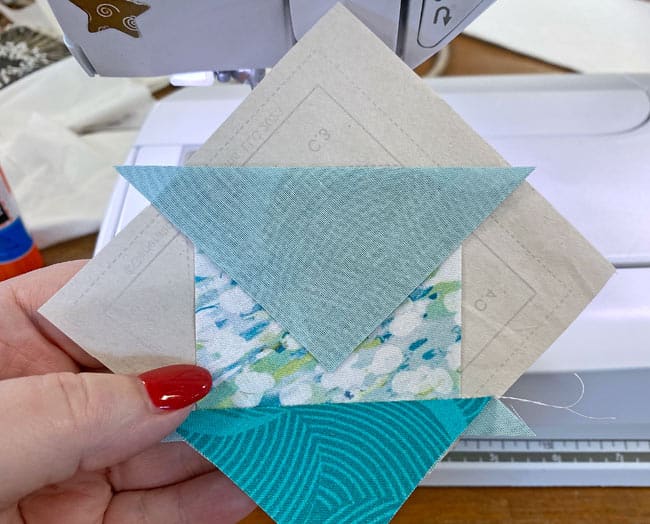
Press.
Position C.4 with Center.1 after clipping away the dog ears to remove some bulk. (The blue arrows point to dog ears that still need to be trimmed away.)
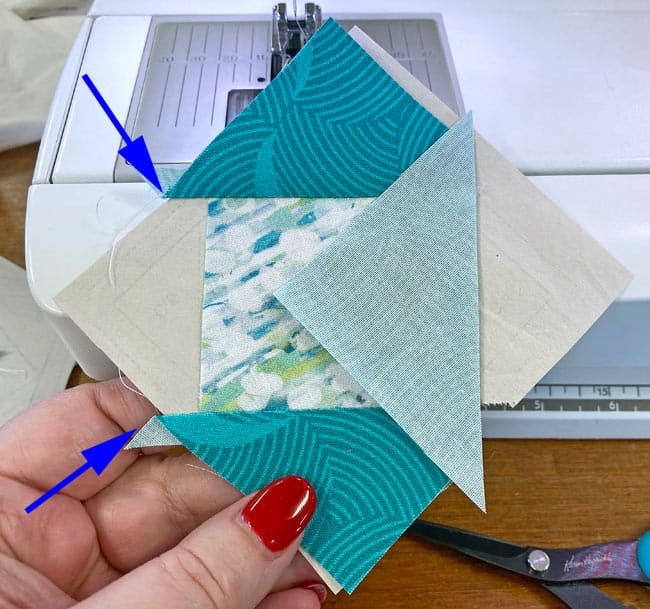
After pressing, finish up with C.5 in the same manner.
After a quick turn at the ironing board, place the SiaS paper side up on your cutting mat.
Line up the 1/4" mark on your ruler with one of the solid lines surrounding the block.
Trim away the excess.
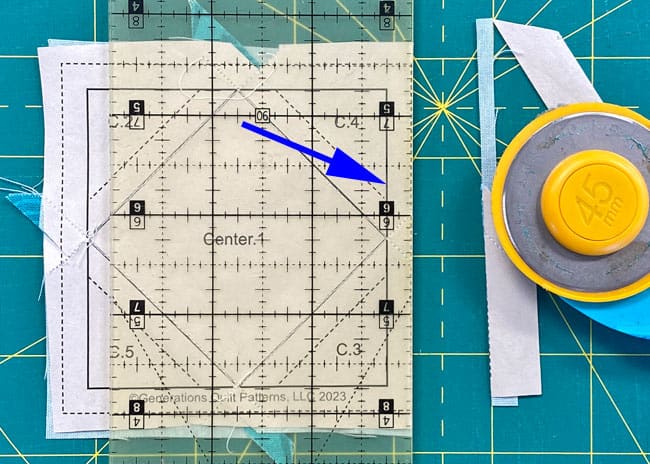
Turn the mat a 1/4 turn and trim again. Repeat for the third side. And finally the fourth.
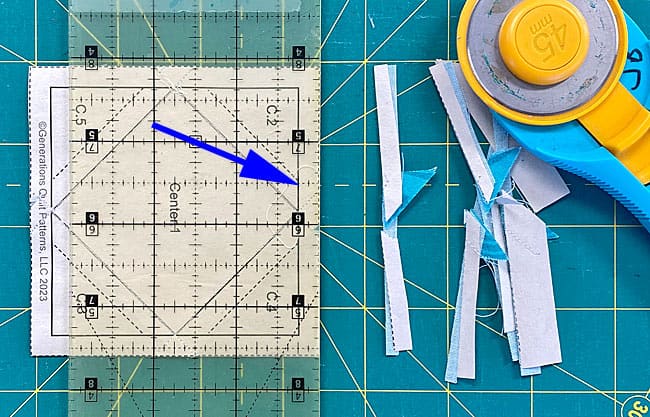
From the front side, a perfect SiaS.
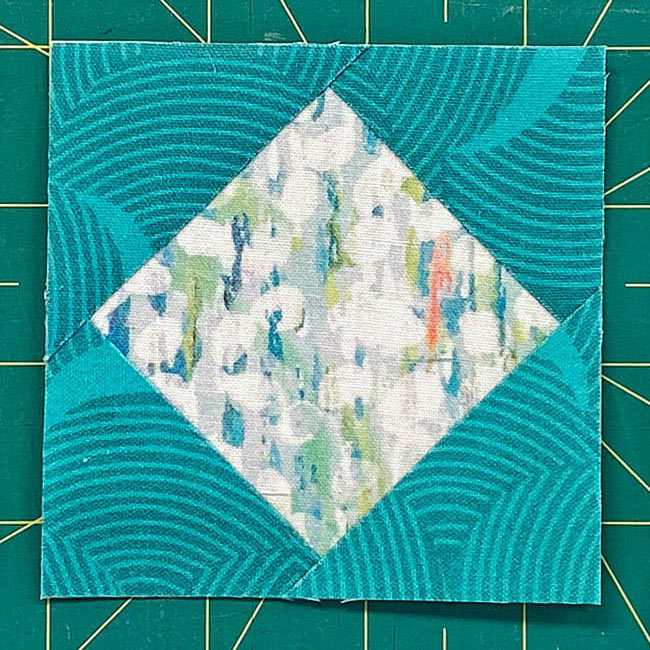 You can see the results of my going back and re-cutting the Center to make the pattern line up from top to bottom
Flying Geese Pairs (FG)
Make 4
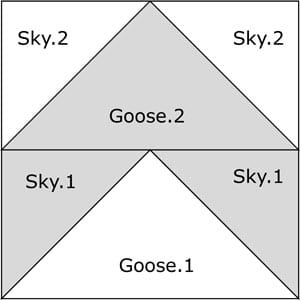
With RST, align the long bias edge of the first Sky.1 with one side of Goose.1.
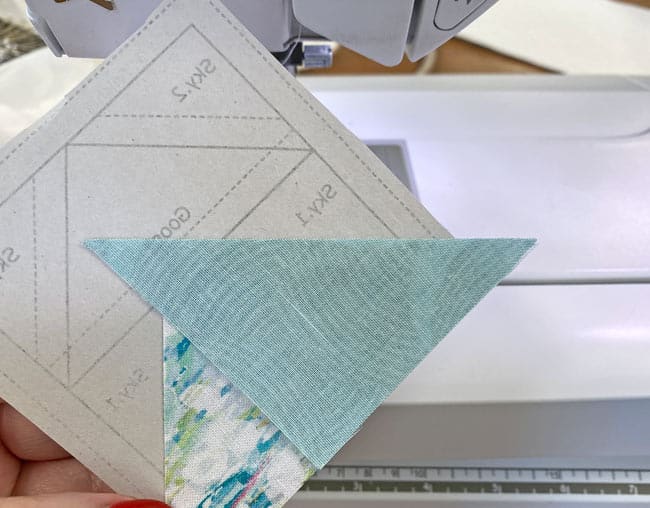
Stitch the seam, again starting and stopping a good 1/4" before and after the solid line. Press.
Add the second Sky.1 in the same manner.
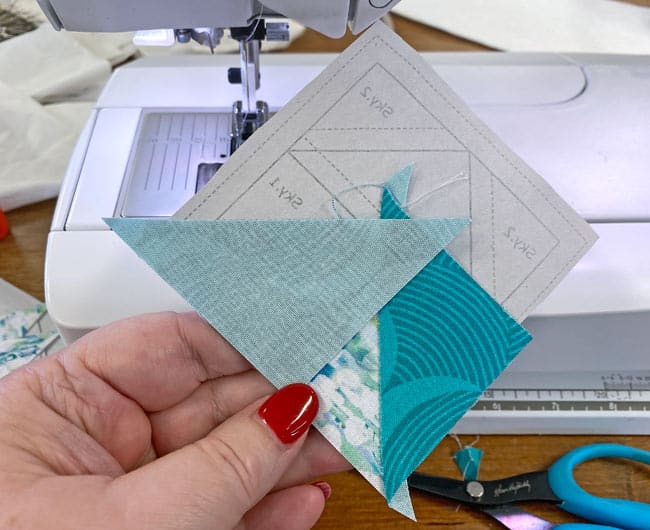
Below you can see how those seams are stitched. (You can also see where I've marked the pattern with 'top' to help me manage the directional background print.)
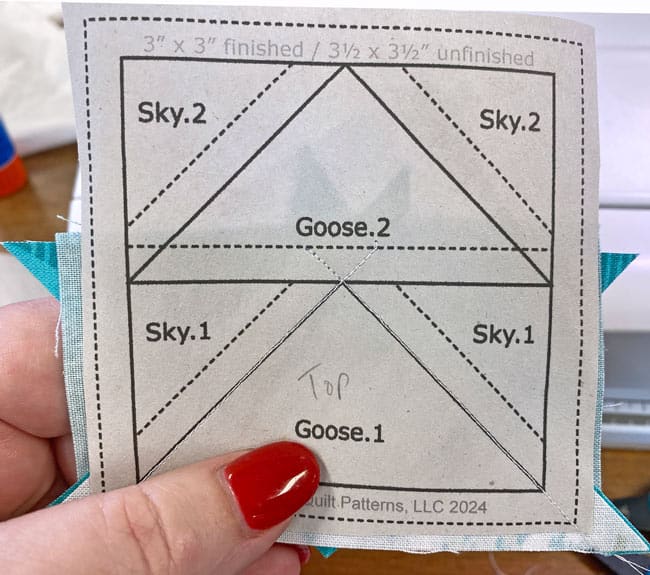 Those stitches extend well past the solid lines
At your mat, pull the pattern away from the stitches so we can fold it back on itself.
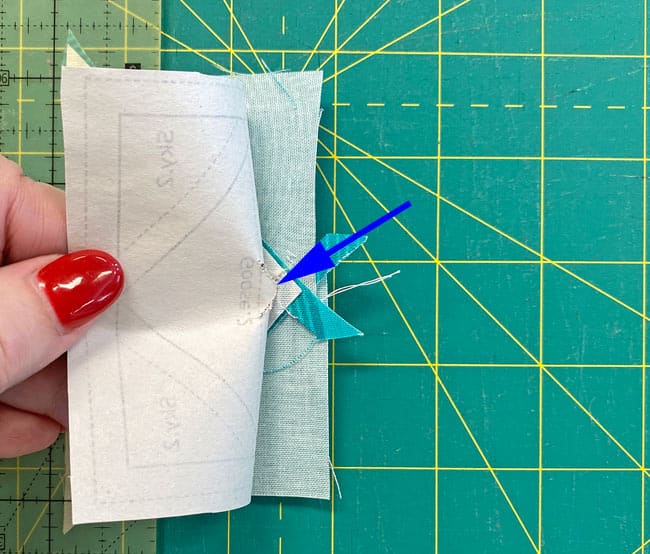 Later, you'll see where I had to tape the pattern after mangling it.
 Line up your ruler with the solid line between the Sky.1s and Goose.2. Crease on the line with your thumbnail.
Fold the pattern back on this line and align the 1/4" mark of the ruler with the fold.
Trim away the excess.
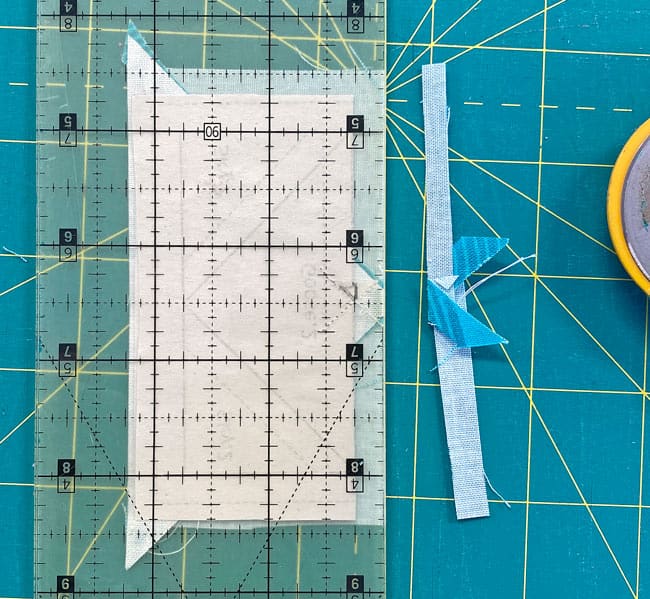
Match the raw edges of Goose.2 with the fresh cut, centering the Goose so its point is directly across from the point on the pattern.
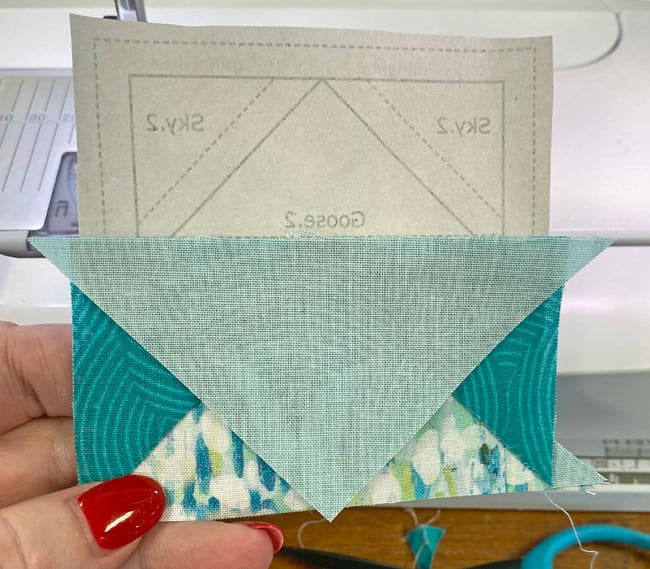
Stitch the seam and press.
At the cutting mat, fold the pattern back on itself on the line between Goose.2 and Sky.2, and trim to 1/4". Repeat for the other side.
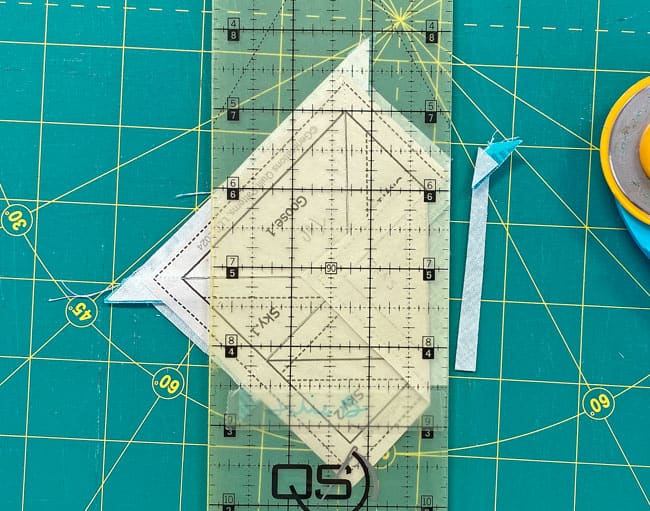
This is the Goose after the trim job.
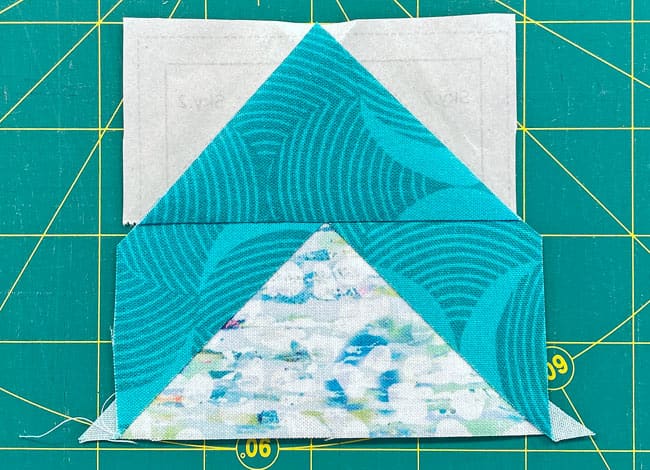
Now add your Sky.2s, pressing in between to ensure there are no tucks at the SA.
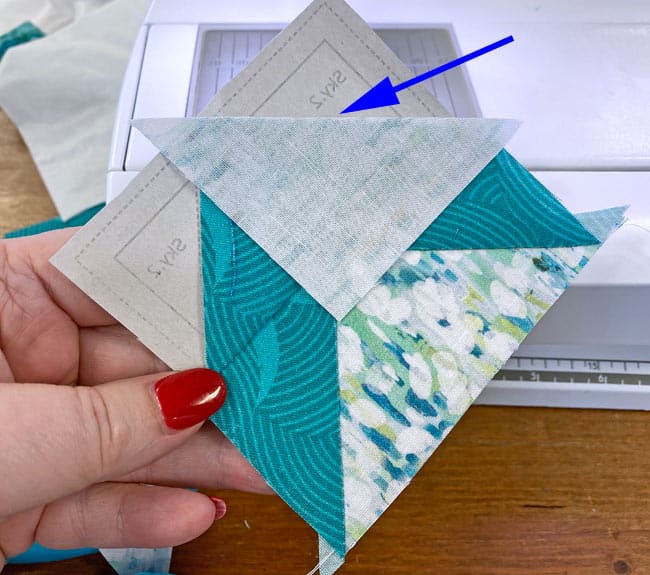
After pressing and trimming (just like you did the SiaS) your FGs should look like this.
In my humble opinion…
There is no better way to do pairs (or Trios) of FG. Paper piecing makes it easy:
- To match its seams with other units because every point is precisely where it should be
- To have perfect points
- To reduce the trimming from 8 cuts on 2 geese to a total of 4 for the unit
All this perfection for simply sewing on a line and a bit of extra fabric. It's a deal!
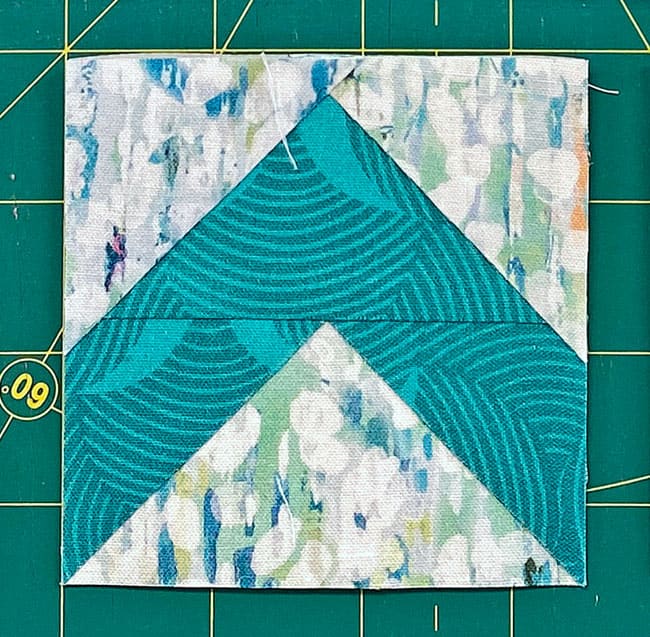
From this point on, we stitch the block with traditional techniques.
Return your stitch length to what you normally use and adjust your needle position if needed.
Remove all the paper, too. All the outside edges of your units are on the straight of grain, so there's no worry about them stretching. Just like it'd be if you'd used traditional piecing methods.
Folded Corners Unit (FC)
Make 4
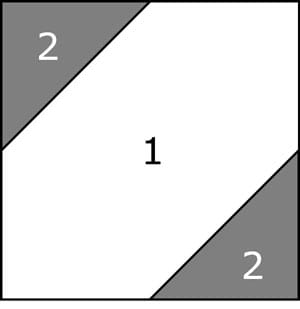
Use a mechanical pencil (chalk or lead—whichever is easier to see) and draw a line from corner to corner on the backside of the eight #2 squares. Take the time to make sure the lines run exactly to the point of each corner.
Layer a #2 with a corner of #1, outside edges even.
Sew on the side of the line closest to the corner. This tiny bit off the center of the line will make up for the 'turn of the cloth' taken up in the SA.
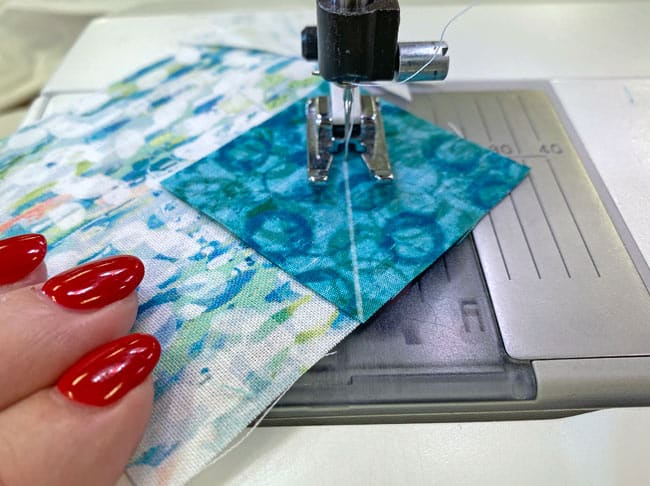 An open toe appliqué foot is the perfect tool for the job, there's nothing between your eyes and the drawn line.
Repeat for the opposite diagonal corner.
Here's our unit before pressing.
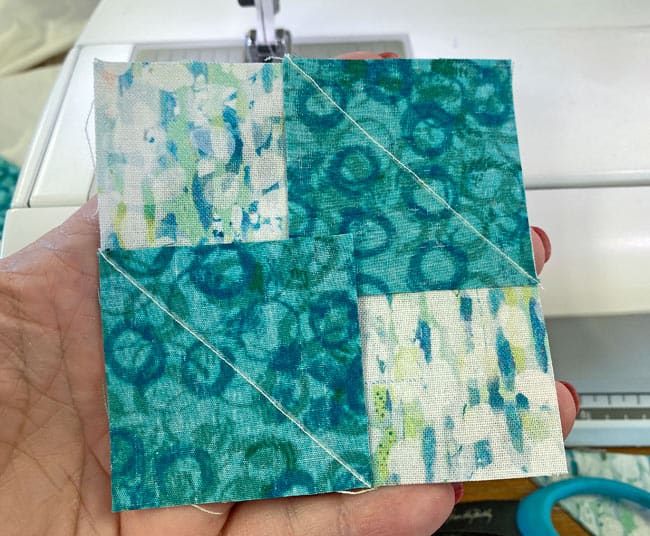
After pressing the patches towards the corners, check that the patches are even along the outside edges.
If they meet as shown below, you're ready to trim the SAs.
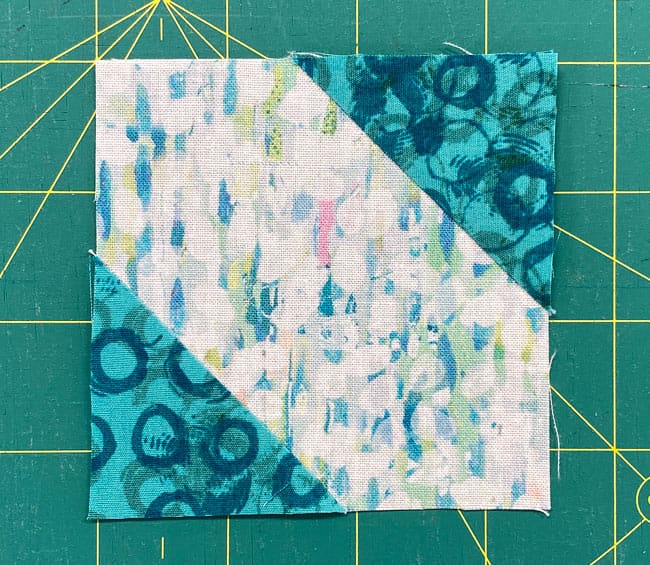
From the backside, match the 1/4" line on your ruler with the seam line and trim away the excess.
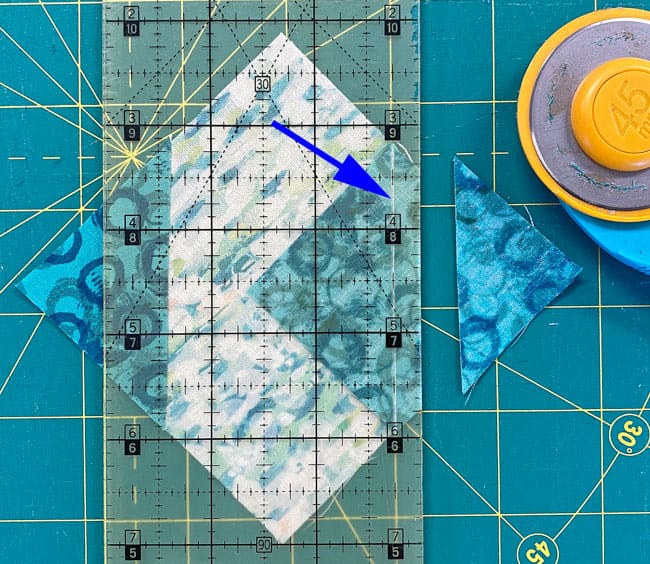
Repeat for the other side.
🧩 Assemble your Salem quilt block
Arrange your patches with the FC in the corners, the FG pointing in toward the center and the SiaS in the very center.
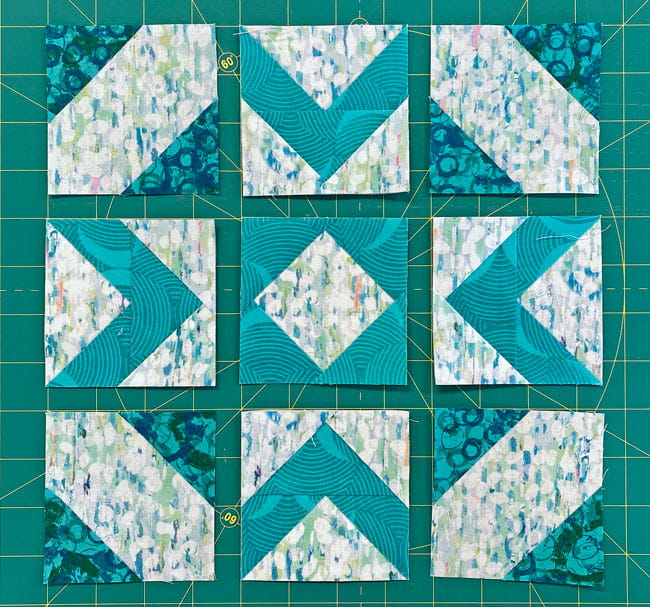
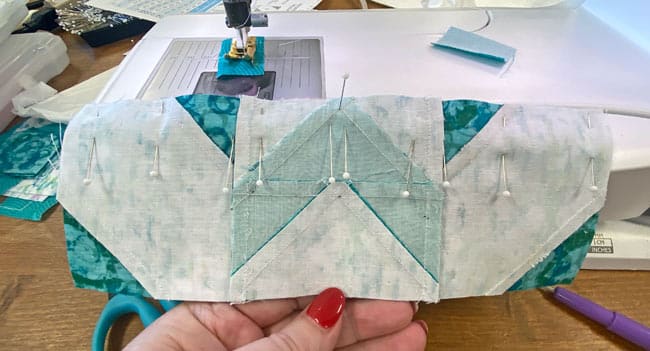
With RST, stitch the units together to form the rows. Use pins to hold the points together and edges even as needed. (My favorites are the IBC Super Fine pins.)
[Click here for a review of 'Pinning for perfect points' for a refresher.]
These seams are all pressed away from the FG units.
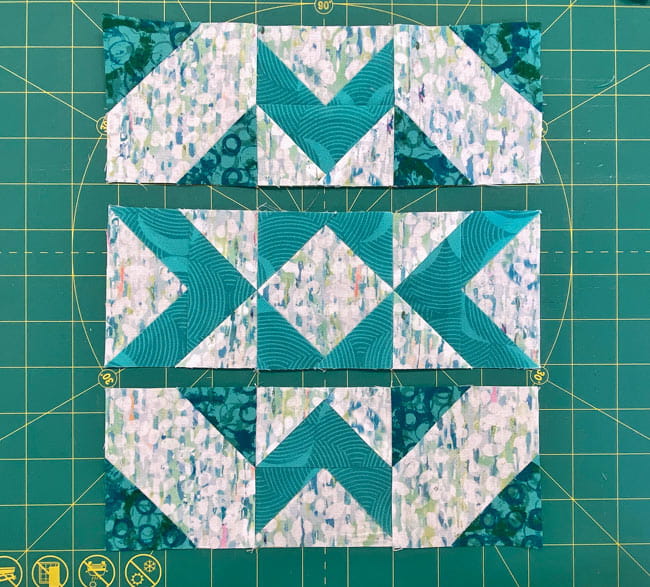
With RST, sew the rows together. Again, pin as needed to hold the edges and points together.
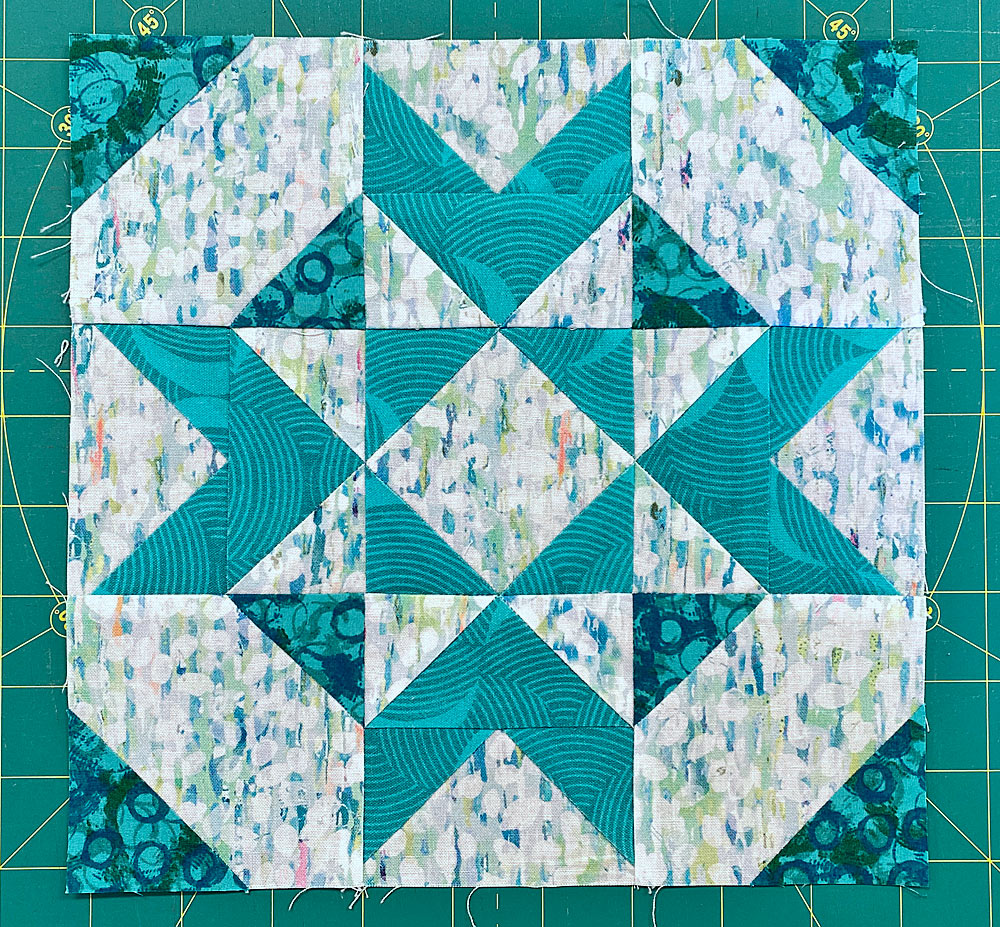
After we've pressed for the last time, our sample Salem quilt block looks like this from the front side.
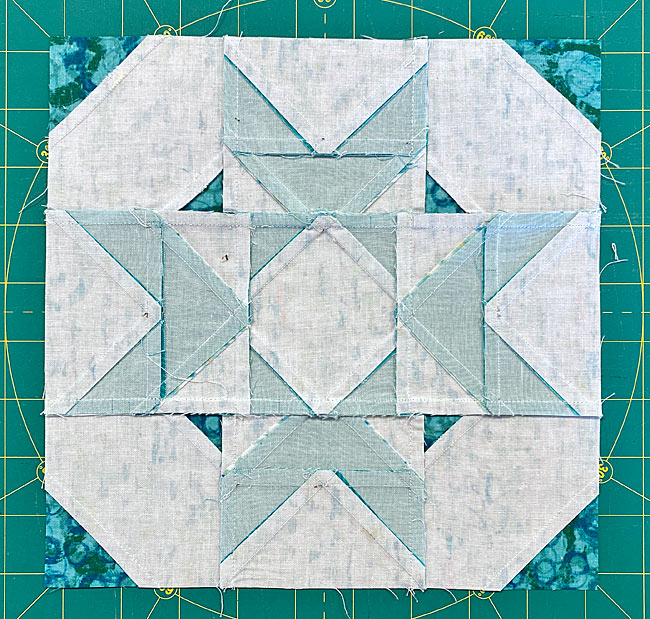
A quick look at the backside shows the trimming we did and how it all fits together.
Quilters, prepare to be hexed! 🔥 📌📌
This beguiling Salem Quilt Block is too good not to pin for later. Your inner quilting witch is calling. 🧠🪄
🔭 Looking for something truly stellar?
You've finished your star quilt block, and you're ready for more!
Browse our collection of 70 stellar star quilt block patterns. All have instructions and cutting charts in multiple sizes. If templates or paper piecing is used in the tutorial, there's a free download for you of those materials.

Eeny. Meenie. Miney. Moe.
Which star quilt block will you sew?
For a star-studded quilting experience, choose from 100+ bedazzling star quilt patterns—for beginners and beyond—click here.
For even MORE blocks to make… 🧩🎨

...visit our Free Quilt Block Pattern Library, with over 260+ blocks to choose from in multiple sizes.
Free downloads are included in all sizes for any blocks require paper piecing patterns or templates.
- Home
- Free Quilt Block Patterns
- Salem Quilt Block
