- Home
- Free Quilt Block Patterns
- Sailboat Quilt Block
Sailboat Quilt Block Pattern
From our Free Quilt Block Patterns Library
This post contains affiliate links, for which I receive compensation.
Skill Level: Beginner
This Sailboat quilt block pattern is perfect for a little boy's quilt—and not nearly the number of half square triangles to make as most Sailboat blocks.
Here we'll use a couple of quick pieced triangle squares, a couple of connector corners and join them all together. It's that simple.
Ahoy there, me-matey!
It's time for our Sailboat block to set sail!
 Click 'Save' to PinIt for later!
📋 General Instructions
These abbreviations are used in this tutorial:
- SA - seam allowance
- RST - right sides together
- HST - half square triangle
All SA are 1/4" and pressed towards the darker fabric unless otherwise noted.
The newest quilt fabrics to tickle your fancy...
Click the images below to see the full collection. We share any commercial and/or free patterns that showcase them, too. (For inspiration, of course!)
Step 1: Cut patches for your Sailboat
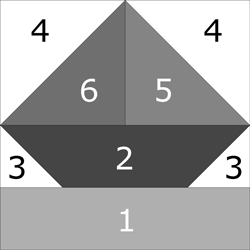 Sailboat design
Sample Size: 6" finished 6½" unfinished
Grid: 4x4
Design Type: 4-patch
Two different fabrics are used for the sail, a lighter and a darker version of the same color. After stitching the sample, I wish I'd used two reds with a little bit more contrast.
I like to cut my patches larger than needed for HST and then trim them to size after stitching.
For my 6" sample block I cut the HST patches at 4-1/8" instead of the exact measurement of 3-7/8"square. (These patches are noted with an asterisk—*.)
Finally, one of each of the HST units created is not used. Save them for a future project or use them in another Sailboat block.
 |
Cutting Chart for a~ Traditional Piecing ~ | |||||
|---|---|---|---|---|---|---|
| Patch | Fabric | Qty | Finished Block Size | |||
| 4” | 6” | 8” | 12” | |||
| 1 | Water | 1 | 1-1/2” x 4-1/2” | 2” x 6-1/2” | 2-1/2” x 8-1/2” | 3-1/2” x 12-1/2” |
| 2 | Boat | 1 | 1-1/2” x 4-1/2” | 2” x 6-1/2” | 2-1/2” x 8-1/2” | 3-1/2” x 12-1/2” |
| 3 | Sky | 2 | 1-1/2” x 1-1/2” | 2” x 2” | 2-1/2” x 2-1/2” | 3-1/2” x 3-1/2” |
| 4* | Sky | 2 | 2-7/8”sq | 3-7/8”sq | 4-7/8”sq | 6-7/8”sq |
| 5* | L.Sail | 1 | 2-7/8”sq | 3-7/8”sq | 4-7/8”sq | 6-7/8”sq |
| 6* | D.Sail | 1 | 2-7/8”sq | 3-7/8”sq | 4-7/8”sq | 6-7/8”sq |
| Unfinished Block Size | 4-1/2” | 6-1/2” | 8-1/2” | 12-1/2” | ||
| Grid Size | 1” | 1-1/2” | 2” | 3” | ||
Step 2: Assemble the units
Half Square Triangles (HST)
One for each sail
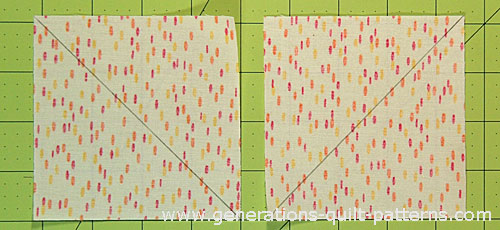
Mark the back of each #5 square with a diagonal. If you're using a directional fabric—one that you'd like the design to go in all the same direction—use the photo below to help you determine how to mark them.
(An alternate way to mark the diagonals is to use a Quick Quarter Ruler. If you have one and need a refresher, click here.)
For the fabric's design to run top to bottom in the block, layout the squares with the pattern moving in the same direction. Then draw the line from upper left to lower right on one, and from lower left to upper right on the other.
With right sides together (RST), layer a #4/#5 and a #4/#6.
Stitch a quarter inch away from both sides of the line for both sets.
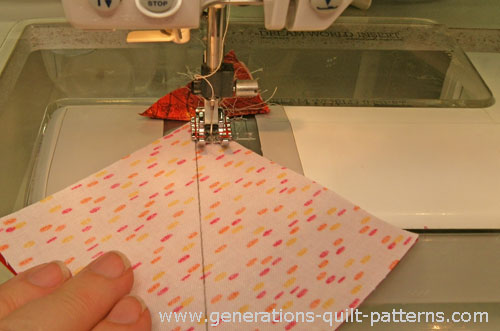
Cut each in two between the stitching. Set one of each pair aside for use in another quilt.
Press with the SA to the #5 or #6 patch.
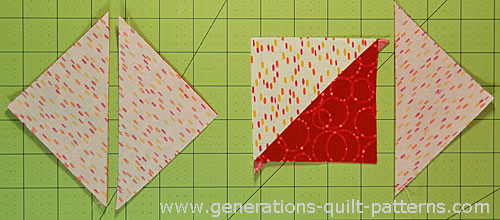 Cut apart (left), press to the dark (middle), set aside the extra HST (right).
At this stage your HST should measure the size indicated in the chart below. Trim down to size if you started with oversized patches as I did for this sample Sailboat quilt block.
| Finished Block Size | Trim HST to... |
|---|---|
| 4” | 2-1/2” x 2-1/2” |
| 6* | 3-1/2” x 3-1/2” |
| 8” | 4-1/2” x 4-1/2” |
| 12” | 6-1/2” x 6-1/2” |
Your finished HST look like this, the #6 dark sail on the right, the #5 light sail on the right. In retrospect, I wish I'd have chosen two reds with more contrast.
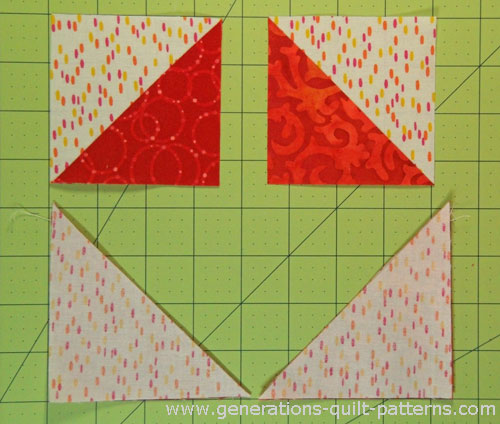 The two HST in the bottom are excess and can be saved for another project.
Stitch these two HST together along the #5 and #6 sides.
Since the SA are pressed in the same direction (see arrows), it is EXTREMELY helpful to use pins.
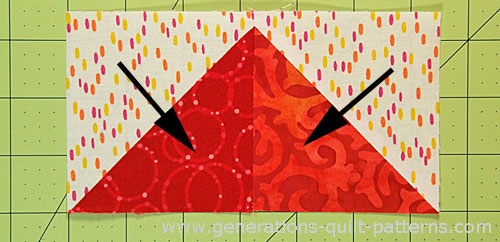 Seams were pressed in the direction of the arrows before stitching.
After stitching the pair together, I chose to press this SA open to reduce bulk.
The Boat
Make 1
Using the Connector Corner technique, draw a diagonal line on the back of both #3 squares.
To keep the design of the background fabric running in the same direction as the previous HST, layout the squares with the pattern moving in the same direction. Then draw the line from upper left to lower right on one, and from lower left to upper right on the other.
With RST, layer the #3 and #2. Flip back the #2 to see that once sewn, the pattern moves in the correct direction.
Stitch ON the line this time for Connector Corners.
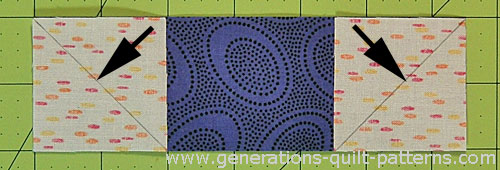
Press. Trim away the excess fabric closest to the corner, leaving a quarter inch SA. You can do this with scissors (which is what I usually use) or rotary cutter and ruler.
SA are pressed to the #3.
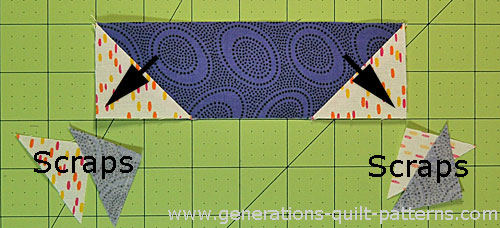
Step 3: Assemble the Sailboat quilt block
Arrange the pieced units and cut rectangle to create your Sailboat.
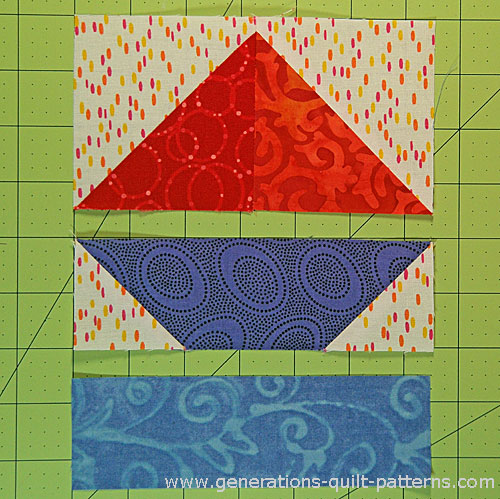
Stitch the rows together with a quarter inch seam. The diagonal seams in the boat and sail nest to make matching the points easier.
Please feel free to use pins if they help you.
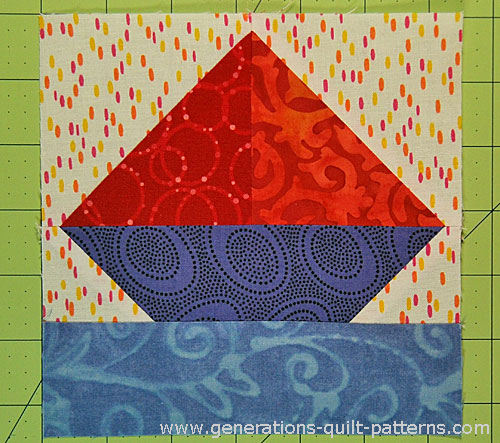
Give your Sailboat quilt block one last press—try our simple pressing technique for wonderfully flat quilt blocks. Click here to see just how simple it is.
Your Sailboat block is ready to sail off into your next quilt!
What about a different quilt block?
For a list of all the 220+ quilt block patterns on this site, start here.
If you know the name of the block, shorten your search by using these links:
Click here if you're looking for blocks with at least some paper piecing.
Click here if you're looking for the basic building blocks of quilting, i.e., Flying Geese, half square triangles, quarter square triangles, etc., along with several techniques to make each.
And finally, use these links to find blocks in these finished sizes:
For even more blocks to make...
For you, are quilt block designs like potato chips...
...you can't have just one?!!
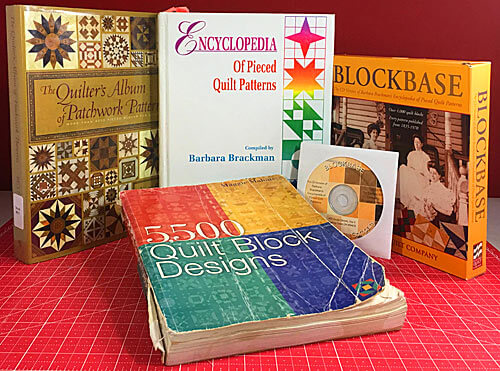
Check the amazing resources I rely on for all the quilt block designs you see on this website.
To see if they're worthy of a spot in YOUR quilting library, CLICK HERE.
