- Home
- Free Quilt Block Patterns
- Sailboat Quilt Block Pattern
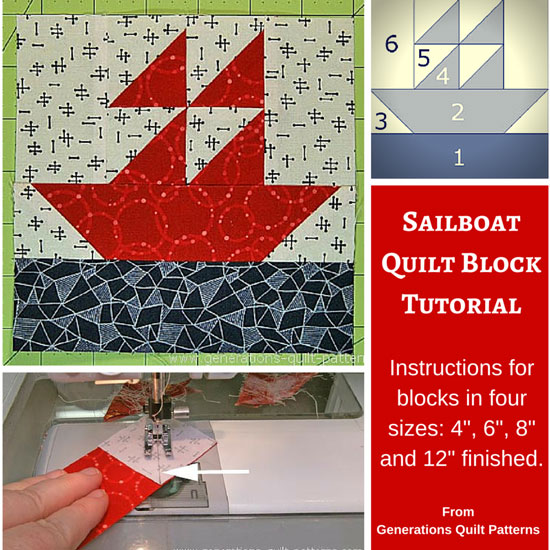
An Easy Sailboat Quilt Block Pattern
From our Free Quilt Block Patterns Library
This post contains affiliate links, for which I receive compensation.
Skill Level: Beginner
Grid: 4x4
This Sailboat quilt block pattern combines cut patches with simple pieced units: connector or folded corners and quick pieced half square triangles.
If you would prefer, click here for another sailboat quilt block pattern.
📋 General Instructions
These abbreviations are used in the tutorial:
- SA - seam allowance
- RST - right sides together
- HST - half square triangle
SA are 1/4" and pressed to the darker fabric unless otherwise noted.
The newest quilt fabrics to tickle your fancy...
Click the images below to see the full collection. We share any commercial and/or free patterns that showcase them, too. (For inspiration, of course!)
Step 1: Cut the Sailboat patches
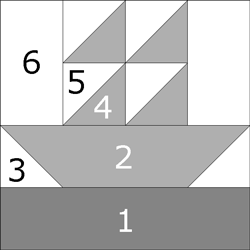 Sailboat pattern
Sample Size: 6" finished / 6½" unfinished
Grid: 4x4
The sample block has our Sailboat sailing during the daylight hours, but you could just as easily choose a night-time starry sky.
Choose fabrics with enough contrast so that the points on your half square triangles don't get lost.
I prefer patches for half square triangles (#4 and #5, noted with ** in the chart below) that are oversized by 1/4", sew the units and then cut down to perfection.
So for a #4 listed as 2-3/8"x2-3/8", I actually cut it at 2-5/8"x2-5/8".
 |
Cutting Chart for a~ Traditional Piecing ~ | |||||
|---|---|---|---|---|---|---|
| Patch | Fabric | Qty | Finished Block Size | |||
| 4” | 6” | 8” | 12” | |||
| 1 | Water | 1 | 1-1/2” x 4-1/2” | 2” x 6-1/2” | 2-1/2” x 8-1/2” | 3-1/2” x 12-1/2” |
| 2 | Boat | 1 | 1-1/2” x 4-1/2” | 2” x 6-1/2” | 2-1/2” x 8-1/2” | 3-1/2” x 12-1/2” |
| 3 | Sky | 2 | 1-1/2” x 1-1/2” | 2” x 2” | 2-1/2” x 2-1/2” | 3-1/2” x 3-1/2” |
| 4** | Boat | 2 | 1-7/8” x 1-7/8” | 2-3/8” x 2-3/8” | 2-7/8” x 2-7/8” | 3-7/8” x 3-7/8” |
| 5** | Sky | 2 | 1-7/8” x 1-7/8” | 2-3/8” x 2-3/8” | 2-7/8” x 2-7/8” | 3-7/8” x 3-7/8” |
| 6” | Sky | 2 | 1-1/2” x 2-1/2” | 2” x 3-1/2” | 2-1/2” x 4-1/2” | 3-1/2” x 6-1/2” |
| Unfinished Block Size | 4-1/2” | 6-1/2” | 8-1/2” | 12-1/2” | ||
| Grid Size | 1” | 1-1/2” | 2” | 3” | ||
Step 2: Assemble the units for your Sailboat
Half Square Triangles (HST)
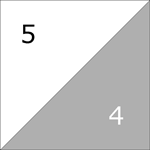
Make 4
Our Sailboat quilt block pattern needs 4 of these units. We'll use the quick pieced method to make them.
With a pencil draw a single diagonal line on the lighter of either the #4 or #5 squares. (If you are making a sailboat at night, it's possible that your sky fabric will be darker than your boat fabric.)
With right sides together (RST) layer a #4 and #5 together. Stitch a quarter inch away from it on both sides.
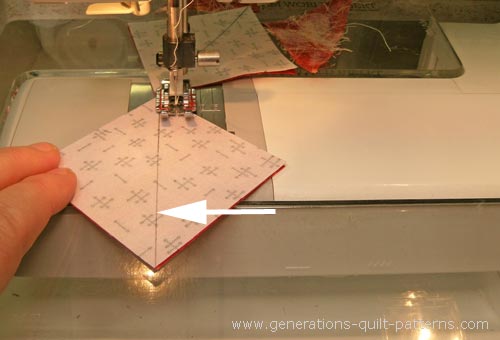 The arrow points to the drawn diagonal. I like a mechanical pencil for this because the line is always the same width.
Cut the two pairs apart on the drawn line. Press with the SA toward the darker fabric.
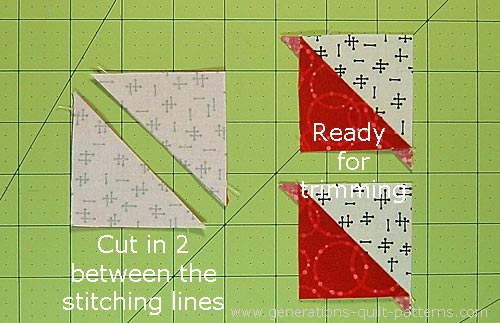
If you cut your patches the exact size, confirm they measure the correct size from the chart below. Then trim away the dog ears—those little points sticking out at the corners.
If you cut oversized patches like I do, trim the HST down as indicated.
For our 6" sample, the HSTs are trimmed to 2" x 2".
| Finished Block Size | Trim HST to... |
|---|---|
| 4” | 1-1/2” x 1-1/2” |
| 6” | 2” x 2” |
| 8” | 2-1/2” x 2-1/2” |
| 12” | 3-1/2” x 3-1/2” |
After trimming, you have four perfect patches.

Sew these into two pairs of HSTs with the diagonal seam moving from upper right to lower left.
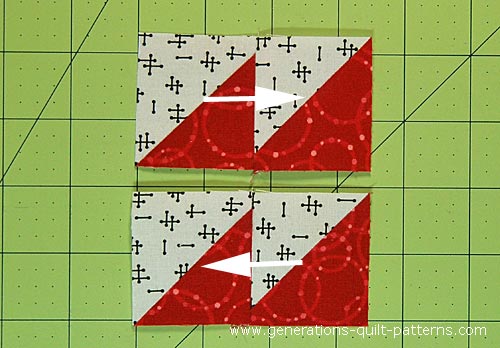 Press the SA in the direction of the arrows
Stitch the pairs together, nesting the SA. This seam can be pressed to one side, open, or as I chose, twirled.
With RST, add a #6 to the left and right sides of this unit.
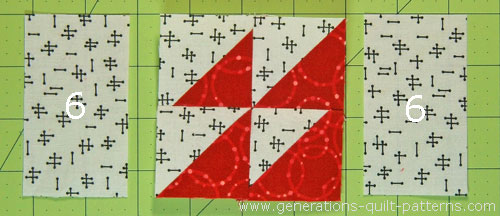
Connector or Folded Corners

Make 1
Draw a diagonal line on the back of both #3 patches.
With RST, line up the edges of one #3 with the right side of #2. The line should bisect the corner of #2.
This time, stitch ON the line.
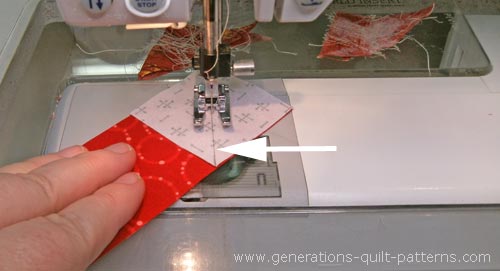 That little messy thing behind my needle is a 'spider'. I start my stitching on one. There's less change my machine will 'eat' the corner!
Position the second #3 on the left side of #2. Make sure the drawn lines both bisect the upper corners of #2 as you look at them. (see arrows)
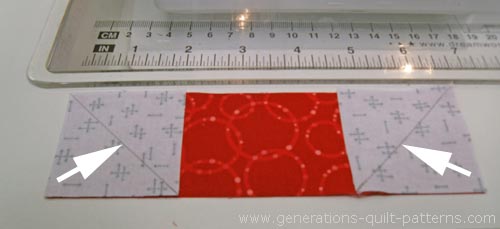 The drawn line is the stitching line
Trim away the excess fabric between the stitching and the lower corner, leaving behind a quarter inch SA. Press to the dark.

Step 3: Assemble the Sailboat block
Arrange the units into rows.
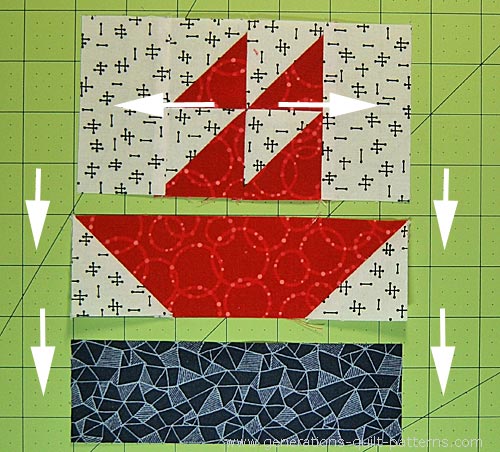 Press the SA in the direction of the arrows
Stitch the rows together.
Ahoy 'me-maties! Your Sailboat quilt block pattern is finished and ready to set sail!
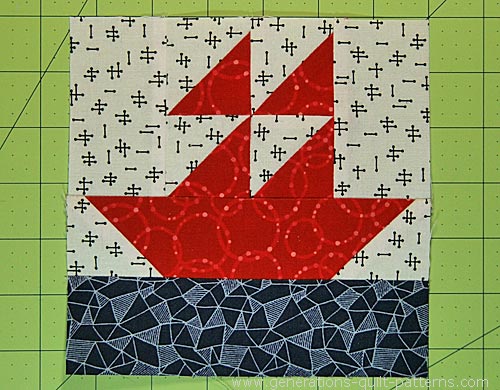 Our finished Sailboat quilt block
What about a different quilt block?
For a list of all the 220+ quilt block patterns on this site, start here.
If you know the name of the block, shorten your search by using these links:
Click here if you're looking for blocks with at least some paper piecing.
Click here if you're looking for the basic building blocks of quilting, i.e., Flying Geese, half square triangles, quarter square triangles, etc., along with several techniques to make each.
And finally, use these links to find blocks in these finished sizes:
For even more blocks to make...
For you, are quilt block designs like potato chips...
...you can't have just one?!!
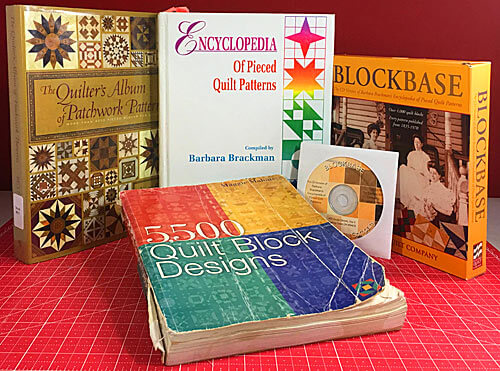
Check the amazing resources I rely on for all the quilt block designs you see on this website.
To see if they're worthy of a spot in YOUR quilting library, CLICK HERE.

