- Home
- Free Quilt Block Patterns
- Ruins of Jericho Quilt Block
Ruins of Jericho Quilt Block
From our Free Quilt Block Patterns Library
This post contains affiliate links, for which I receive compensation.
Skill Level: Beginner
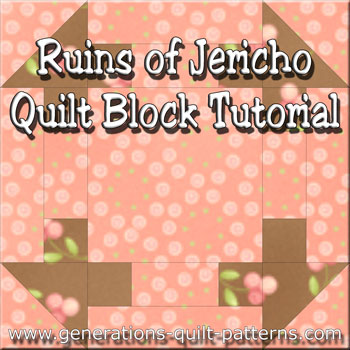
The Ruins of Jericho quilt block is a snap to cut. It stitches up even faster!
Simple half square triangles, a bit of strip piecing and a handful of solid squares—this block practically sews itself.
Add a bit of embroidery, by either hand or machine, or perhaps a simple applique to up the 'WOW' factor of this uncomplicated patchwork design.
Let's get started before the walls of Jericho come a-tumblin' down!
📋 General Instructions
These abbreviations are used in this tutorial:
- SA - seam allowance
- RST - right sides together
- HST - half square triangle
- BAC - background fabric
Seam allowances (SA) are 1/4" and are pressed to the dark unless otherwise noted.
The newest quilt fabrics to tickle your fancy...
Click the images below to see the full collection. We share any commercial and/or free patterns that showcase them, too. (For inspiration, of course!)
Step 1: Cutting a Ruins of Jericho quilt block
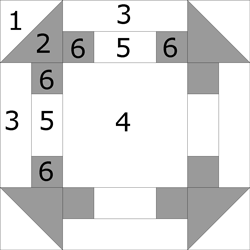 Ruins of Jericho design
Sample Size: 8" finished / 8½" unfinished
Grid: 8x8
Attribution: Nancy Cabot
Design Type: Uneven 9-patch, large center
Patches #1 and #2 are used to make the half square triangle units (HST). The measurements are exact in the chart.
Since making HSTs bores me to tears, I prefer to cut patches larger than needed, stitch, and then trim to size. So I add a 1/4" extra before cutting.
For the 8" finished sample block that means I cut 3-1/8" squares (instead of 2-7/8" squares) for both #1 and #2.
If you choose to use this block to frame applique or hand/machine embroidery, look for background fabrics that either are, or read as, solids. Use a lower contrasting 'A' fabric. That way your handiwork is the focus of the block.
 |
Cutting Chart for a~ Traditional Piecing ~ | ||||
|---|---|---|---|---|---|
| Patch | Fabric | Qty | Finished Block Size | ||
| 8” | 12” | 16” | |||
| 1* | BAC | 2 | 2-7/8” x 2-7/8” | 3-7/8” x 3-7/8” | 4-7/8” x 4-7/8” |
| 2* | A | 2 | 2-7/8” x 2-7/8” | 3-7/8” x 3-7/8” | 4-7/8” x 4-7/8” |
| 3 | BAC | 4 | 1-1/2” x 4-1/2” | 2” x 6-1/2” | 2-1/2” x 8-1/2” |
| 4 | BAC | 1 | 4-1/2” x 4-1/2” | 6-1/2” x 6-1/2” | 8-1/2” x 8-1/2” |
| 5 | BAC | 1 | 2-1/2” x 7” | 3-1/2” x 9” | 4-1/2” x 11” |
| 6 | A | 2 | 2-1/2” x 7” | 2” x 9” | 2-1/2” x 11” |
| Unfinished Block Size | 8-1/2” | 12” | 16” | ||
| Grid Size | 1" | 1 1/2" | 2" | ||
Step 2: Assemble the units
Our Ruins of Jericho quilt block is made from half square triangles, pieced sides and finished with a solid center square. To start we need to stitch the pieced units.
Half Square Triangles (HST)
Make 4
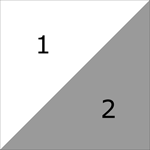
Using the quick pieced method of making HST, the first step is to draw a diagonal line on the back of the four #1 patches.
If you have a Quick Quarter Ruler, you can choose to mark with that instead. Click here for a quick refresher on using the Quick Quarter ruler.
You can see the difference in the marking below.
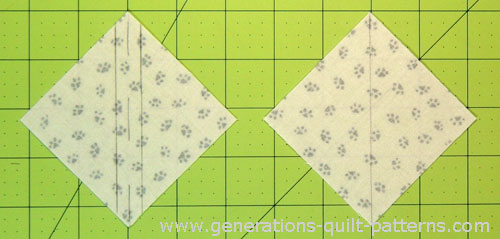 Sewing lines marked with a Quick Quarter Ruler (left), guide line marked with a standard ruler (right)
With right sides together (RST), stitch on the line if you marked with a Quick Quarter or a 1/4" away from the line if you marked with a regular ruler.
For more details on this method, check out Technique #1: Quick Pieced Half Square Triangles.
Press.
If you cut generously sized patches, now you'll need to trim the HST down to size. Use the chart below. If you cut your triangles exactly, they should measure this same size.
| Finished Block Size | Trim HST to... |
|---|---|
| 8” | 2-1/2” x 2-1/2” |
| 12” | 3-1/2” x 3-1/2” |
| 16” | 4-1/2” x 4-1/2” |
After trimming, you have four perfect HST.

Click here for more detailed instructions using this method to make HST is you need them.
Sides
Make 4

With RST, stitch a #6 to both long edges of a #5.
Press.
Straighten the short side of this strip set by aligning a line on your ruler with one of the seams (black arrow) and remove a small amount with your rotary cutter and ruler.
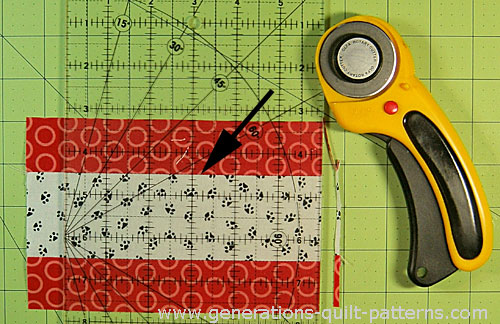 Though this strip set is extra long, make your straightening cut only as big as necessary.
Subcut, starting from the trimmed edge, into four units. Find your finished block size below to determine the width to cut these units.
| Finished Block Size | After stitching, stripset measures | Subcut 4 this width |
|---|---|---|
| 8” | 4-1/2” x 7” | 1-1/2” |
| 12” | 6-1/2” x 9” | 2” |
| 16” | 8-1/2” x 11” | 2-1/2” |
After cutting you have four side units like this.
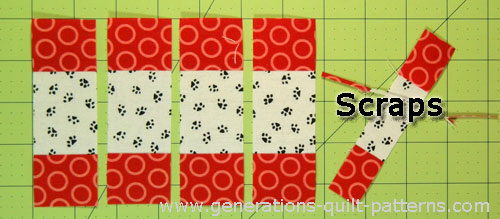
To complete each of the sides, with RST, attach a #3 rectangle, pressing the SA toward the #3.
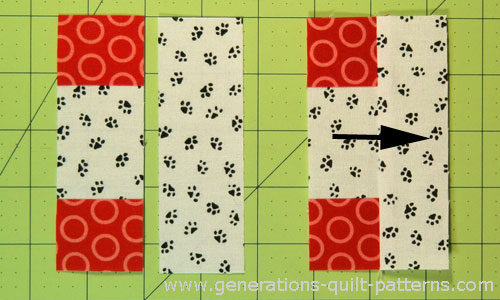 Make 4 sides
Step 3: Assemble your Ruins of Jericho quilt block
Arrange your pieced units and solid squares into rows like this.
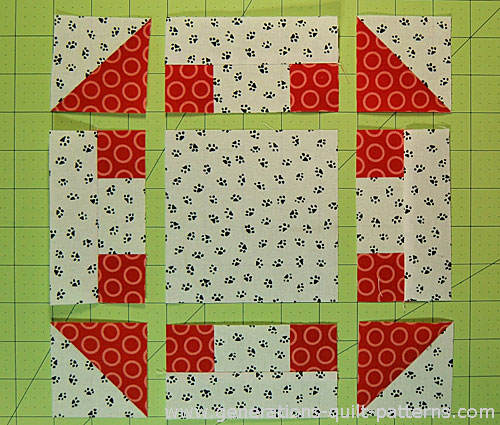 The dark patches are all closest to the center.
With RST, stitch the units in each row together.
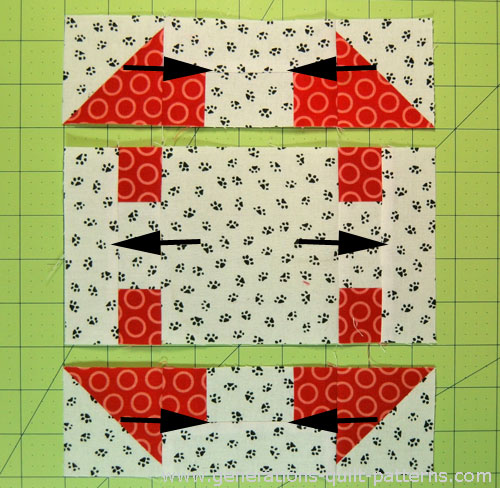
Press the SA toward the side units in all rows as shown by the black arrows.
Stitch the rows together. Use pins to help insure a good match at the seam lines if it helps you. (It helps me, too!)
Give your Ruins of Jericho quilt block one final press. You might try our best pressing technique if you feel your block is a bit lumpy. It works wonders and is so simple to do!
After that's done, this is your finished Ruins of Jericho block.
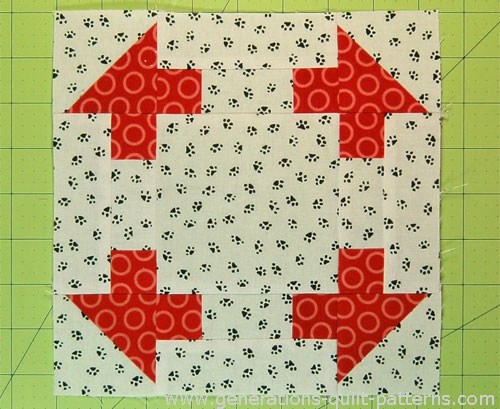 Voila! Our Ruins of Jericho is complete!
What about a different quilt block?
For a list of all the 220+ quilt block patterns on this site, start here.
If you know the name of the block, shorten your search by using these links:
Click here if you're looking for blocks with at least some paper piecing.
Click here if you're looking for the basic building blocks of quilting, i.e., Flying Geese, half square triangles, quarter square triangles, etc., along with several techniques to make each.
And finally, use these links to find blocks in these finished sizes:
For even more blocks to make...
For you, are quilt block designs like potato chips...
...you can't have just one?!!
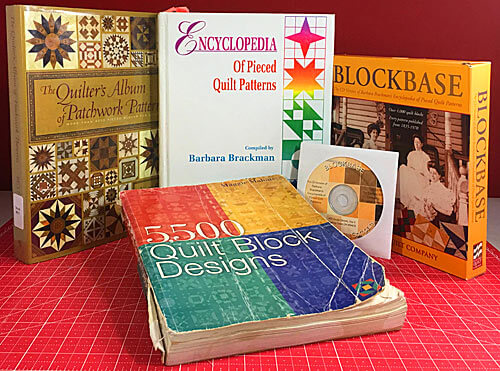
Check the amazing resources I rely on for all the quilt block designs you see on this website.
To see if they're worthy of a spot in YOUR quilting library, CLICK HERE.
