- Home
- Free Quilt Block Patterns
- Rolling 9-Patch Quilt Block
Rolling 9-Patch Quilt Block: Choose Your Path to Perfect Points
Let the good times (and seams) roll! 🪢
This post contains affiliate links, for which I receive compensation.
You've mastered the 9-patch, and now you're ready to roll! The Rolling 9-Patch quilt block is your next step up the quilting ladder, bringing together classic charm and fresh flair.
With two techniques to choose from and four sizes to explore, this block is your passport to quilting confidence! 🌟
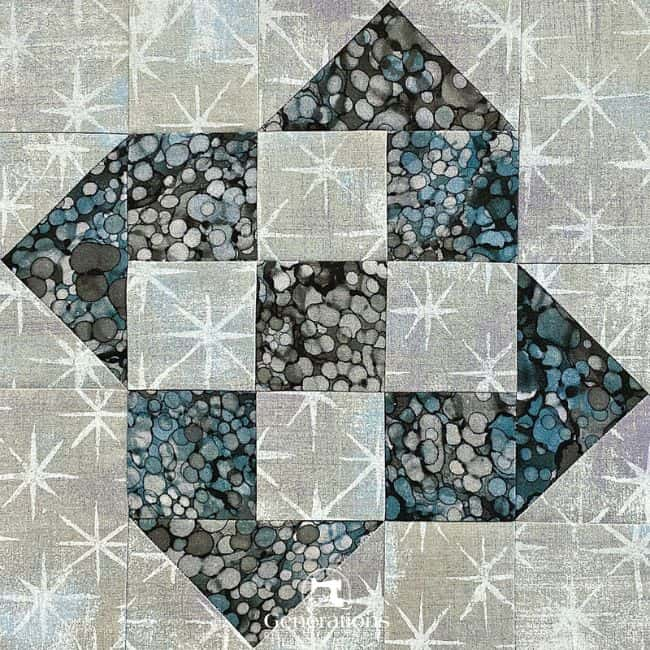
🧭 Why scroll when you can roll?
These quick links take you exactly where you want to be! 💫
- A cutting chart in 4 sizes, with downloads of the chart and block design
Cut. Sew. Press. Roll your way to quilting success!
📋 General Instructions
Several abbreviations are used on this page. They are:
- SA - seam allowance
- RST - right sides together
- FG - Flying Geese
- FC - Folded Corners
A 1/4" SA is used in this tutorial.
Highlighted in yellow, pressing instructions are easy to spot.
To press, first press the patches in the closed position as they came off your sewing machine. This sets the seam, melding the fibers of the threads into the fibers of the fabric.
Then press the SA to the dark unless otherwise noted.
📥 Download and print the paper piecing pattern
To download the pattern, use the most current version of Adobe.
For accurate results, on Adobe's Print Menu page, under 'Page Size and Handling' set 'Custom Scale' to 100%. Then print.
Click here to see what it looks like on the Print Menu page.
Find your finished block size from the chart below. For each block you want to make, print the corresponding number of copies for a total of:
- 4 Flying Geese
Print the Flying Geese Units | ||
|---|---|---|
| Finished Block Size | # of Copies to Print | PDF Download Link |
| 5" | 1 | 1" x 2" |
| 7½'' | 1 | 1½" x 3" |
| 10" | 1 | 2" x 4" |
| 15" | 2 | 3" x 6" |
After printing, use the 1" square graphic on the printed page(s) to double check that your patterns printed at the correct size.
Then cut out the required number of patterns from your copies. A rough cut is good enough—an 1/8"-1/4"-ish away from the outside dashed square.

Not sure which paper to use?
Take a look at my review of several of the most popular brands available to us quilters on the market.
You want a super-easy paper to tear away—less stress on the stitches.
The newest quilt fabrics to tickle your fancy...
Click the images below to see the full collection. We share any commercial and/or free patterns that showcase them, too. (For inspiration, of course!)
✂️ Cutting patches for a Rolling 9-Patch block
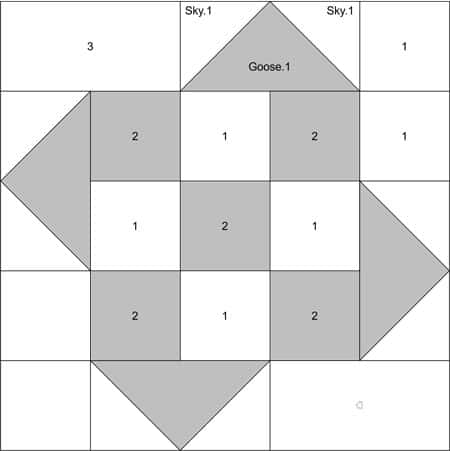
Sample Block Size: 10" finished / 10½" unfinished
Grid: 5x5
Attribution: Aunt Kate's Quilting Bee
Brackman ID: 2088
Design Type: Unequal 9-Patch Large Center | Paper piecing
Success starts with organization. Take a moment to label each patch—we'll reference these numbers as we roll through the tutorial.
Paper piecing

 | Cutting Chart for a~ Paper Piecing ~ | ||||||
|---|---|---|---|---|---|---|---|
| Patch | Fabric | Qty | Finished Block Size | Sub Cut | |||
| 5'' | 7½'' | 10'' | 15'' | ||||
| 1 | Bac | 8 | 1½'' x 1½'' | 2'' x 2'' | 2½'' x 2½'' | 3½'' x 3½'' | --- |
| 2 | A | 5 | 1½'' x 1½'' | 2'' x 2'' | 2½'' x 2½'' | 3½'' x 3½'' | --- |
| 3 | Bac | 2 | 1½'' x 2½'' | 2'' x 3½'' | 2½'' x 4½'' | 3½'' x 6½'' | --- |
| Goose.1 | A | 1 | 2⅝'' x 3⅝'' | 3⅛'' x 4⅝'' | 3⅝'' x 5⅝'' | 4⅝'' x 7⅝'' | |
| Sky.1 | Bac | 4 | 2⅜'' x 2⅜'' | 2⅞'' x 2⅞'' | 3⅜'' x 3⅜'' | 4⅜'' x 4⅜'' | |
| Unfinished Block Size | 5½'' | 8'' | 10½'' | 15½'' | na | ||
| Grid Size | 1'' | 1½'' | 2'' | 3'' | na | ||
Traditional piecing
 | Cutting Chart for a~ Traditional Piecing w/Folded Corners ~ | |||||
|---|---|---|---|---|---|---|
| Patch | Fabric | Qty | Finished Block Size | |||
| 5'' | 7½'' | 10'' | 15 '' | |||
| 1, Sky | Bac | 16 | 1½'' x 1½'' | 2'' x 2'' | 2½'' x 2½'' | 3½'' x 3½'' |
| 2 | A | 5 | 1½'' x 1½'' | 2'' x 2'' | 2½'' x 2½'' | 3½'' x 3½'' |
| 3 | Bac | 2 | 1½'' x 2½'' | 2'' x 3½'' | 2½'' x 4½'' | 3½'' x 6½'' |
| Goose | A | 4 | 1½'' x 2½'' | 2'' x 3½'' | 2½'' x 4½'' | 3½'' x 6½'' |
| Unfinished Block Size | 5½'' | 8'' | 10½'' | 15½'' | ||
| Grid Size | 1'' | 1½'' | 2'' | 3" | ||
Subcutting
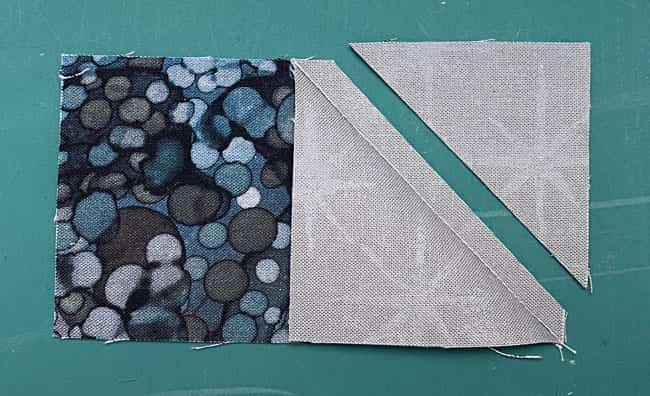
For the paper pieced version (blue cutting chart) of our Rolling 9-Patch, subcut Goose.1 twice on the diagonal. Subcut Sky.1 once on the diagonal.
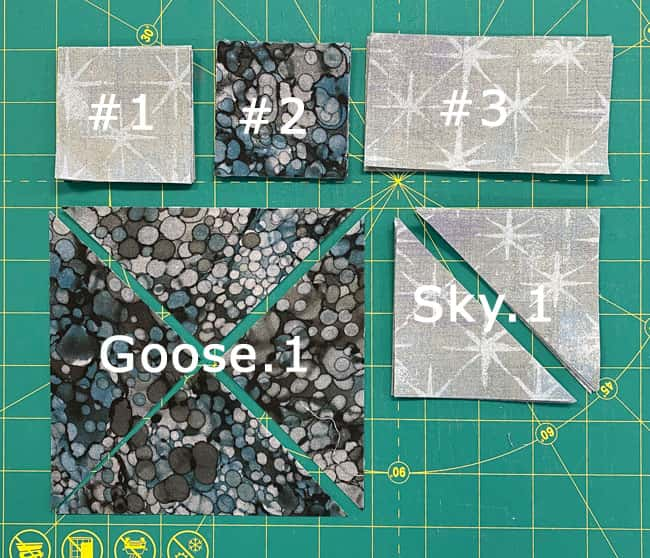
There is no subcutting involved for our traditionally pieced block. (green cutting chart)
🧵 Create the patches for your Rolling 9-Patch
Otherwise, continue here for the paper pieced version.
Flying Geese (FG) - Paper Pieced
Make 4
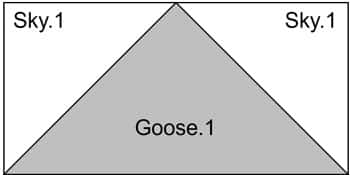
Use a dot of Elmer's Washable Glue Stick to hold the Goose.1 in position between the guidelines on the unprinted side of the pattern. The bottom cut edge extends roughly a 1/4" past the outside dashed lines. This is so we've got something to trim.
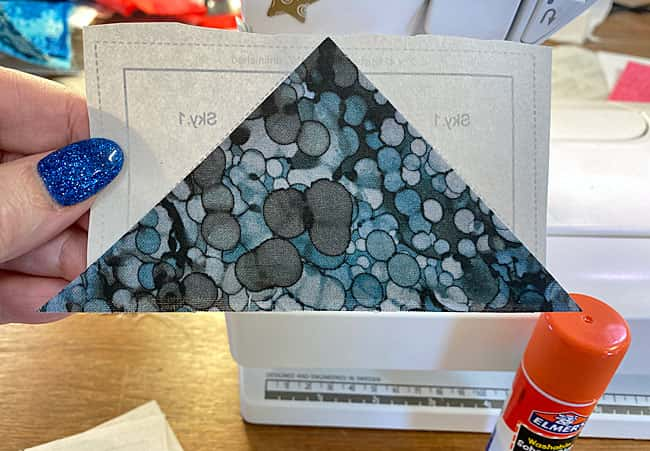
We need to make a few adjustments to our sewing machine settings to paper piece.
- Reduce your stitch length to 16–20 stitches per inch (1.3-1.6 mm). This perforates the paper and stabilizes the seam when you remove the pattern. [Learn more about stitch length here.]
- Reduce your machine's speed or just plain slow down. Sew only as fast as you can AND stay on the solid stitching line.
- Install an open toe appliqué foot (sometimes called an 'embroidery' or 'satin stitch' foot) if you have one (it makes it easier to see where you're stitching).
- Use a larger needle (90/14) IF you have problems removing the pattern. Personally, I use an 80/12 Microtex Sharp for paper piecing without any issues.
With RST, match the long bias edge of a Sky.1 to that of Goose. 1. It really doesn't matter which side you start on. I do recommend stitching all the same side at one time.
Since the seam runs clear across the whole unit, the seams can be chain pieced for efficiency.
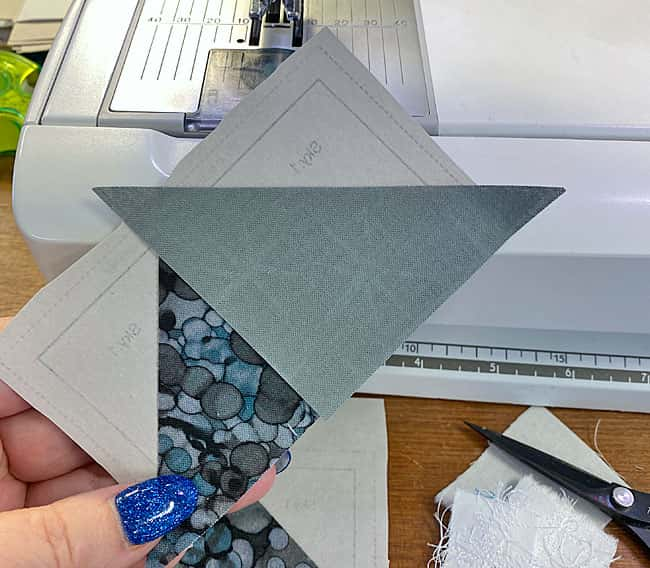
This seam can only be pressed toward the outside edge.
Repeat the process for the second Sky.1 patch.
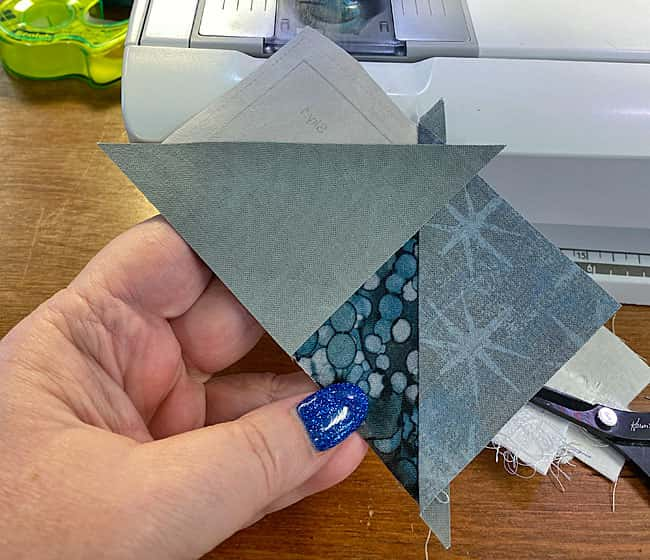
Here, I haven't cut the threads from chain piecng yet after adding the second Skys.
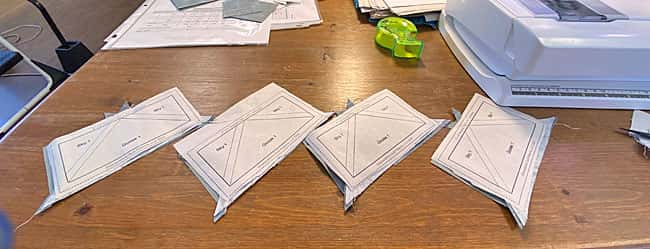
After a good press at the ironing board, move all the FGs to your cutting mat.
Line up the 1/4" mark on your ruler with one of the sides of the solid rectangle (red arrow). Trim away the excess with your rotary cutter.
Repeat for all the sides of all the Flying Geese.
When there's a bunch of trimming to do, I like to line up the units on my cutting mat for a little 'assembly line' trimming.
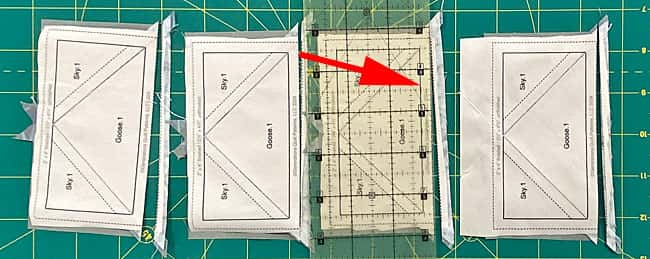
A rotating cutting mat is a nice addition to your quilting tool box for this type of trim-job—you spin the mat instead of each block or unit.
The paper piecing is complete. From this point forward, return your stitch length to the one you regularly use for piecing and install your favorite 1/4" presser foot.
Flying Geese - Folded Corners method
Make 4

With a light touch, use a pencil to mark a diagonal line on the backside of the Sky.1s.
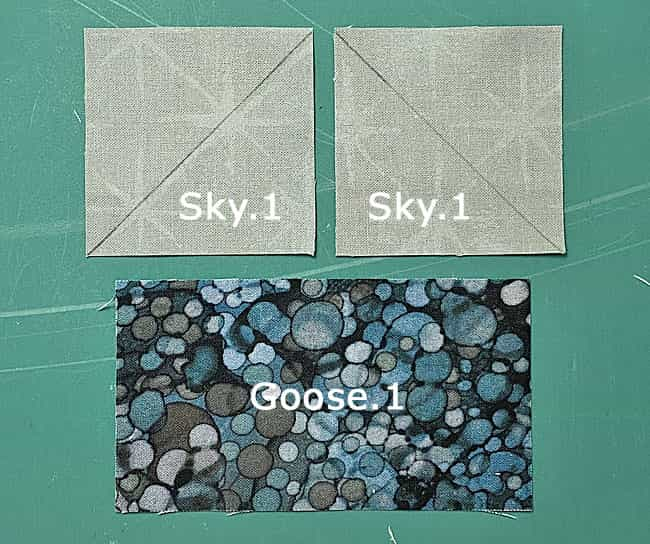
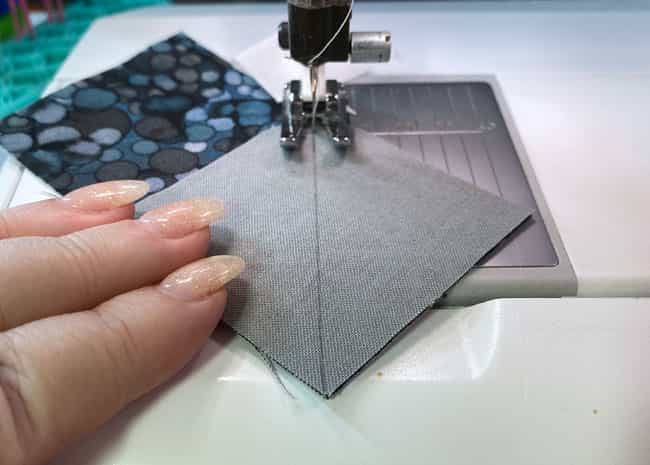
With RST, line up 3 edges of the Sky with the Goose, and stitch on the side of the line closest to the corner. This tiny adjustment to your stitching should accommodate the 'turn of the cloth' that uses up a smidge from your patch.
Press the Sky open and towards the corner. Check to see that the edges match (red arrows, below right). Make any adjustments now.
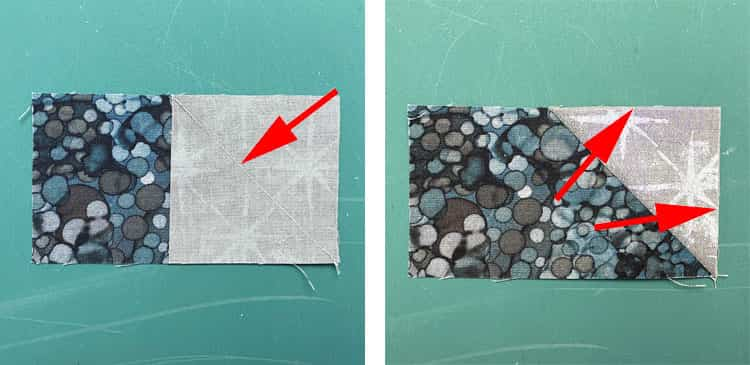 The stitching line (red arrow, left) and checking that the edges are even (red arrows, right)
When they match, trim away the excess two layers leaving behind a 1/4" SA. After trimming, press the Sky back into place.
Repeat for the second Sky making sure that the drawn line crosses your previous stitches on one long edge to form the point of the Goose.
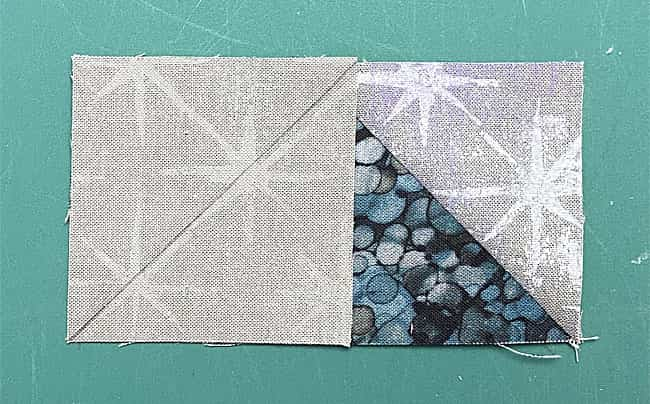 Ready to repeat the process for the second Sky patch on our FG unit
Repeat the pressing and trimming for this second seam.
9-Patch
Make 1
With RST, piece 3 pairs of #1 and #2 to together. Press these seams away from the lighter #1 patches.
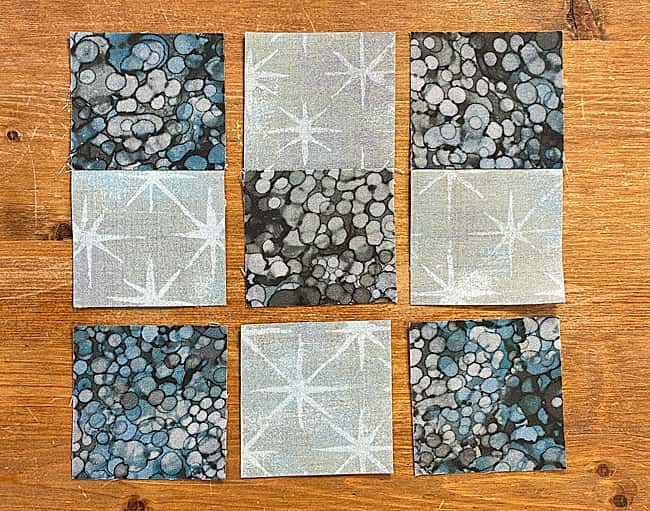
Add the remaining #1 and #2 to the pairs. These SAs are also pressed toward the #12.
Sew the rows together so you have the darker #2s in all 4 corners. Pin as needed to help you match the nesting seams.
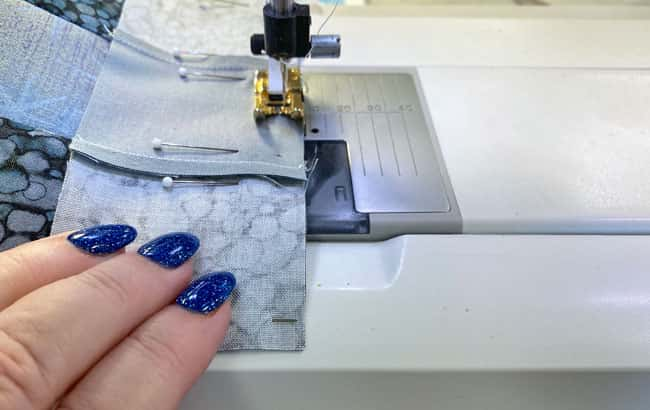
The final two SAs are pressed toward the center.
It's a little disconcerting from the back side. The dark #2s look lighter on the back than our light #1s. Weird, but true.
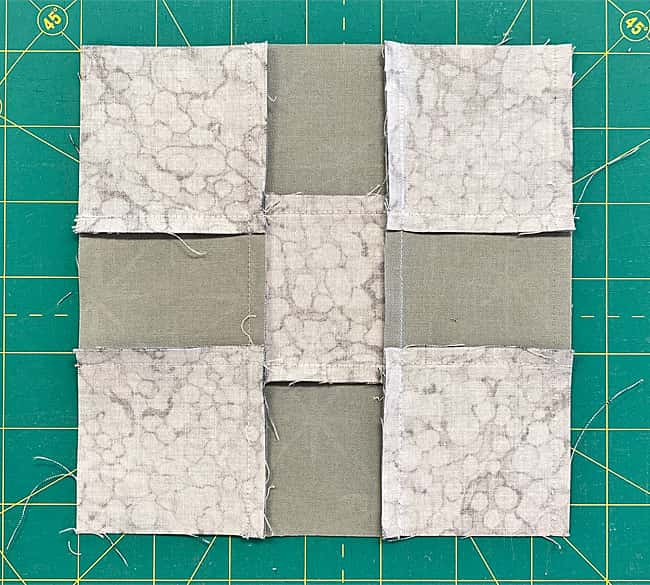
📏Check for Accuracy
It's always a good idea to measure your finished units before proceeding onto the next step—you're more likely to fix something if it's out of whack in the moment. If you wait until right before you plan to assemble the quilt top, it's a lot harder to stop to fix something. You're just so close to the end.
For our 9-patches the edge-to-edge measurements for each finished block size are:
- 5" - 3½"
- 7½' - 5"
- 10" - 6½"
- 15" - 9½"
Sides
Make 4
With RST, add a #1 to the right side (below, top) of 2 FG, and to the left side (below, bottom) the remaining 2 FG.
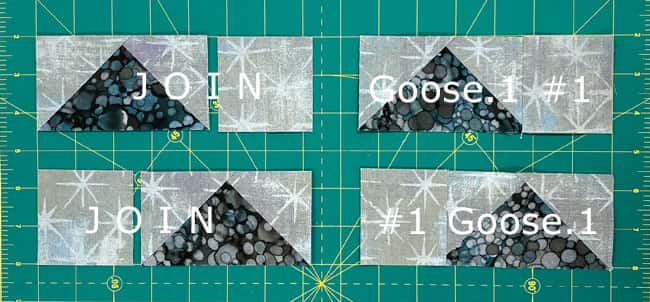
Press the SAs away from the FG to minimize bulk.
📏Check for Accuracy
At this point, the edge-to-edge measurement is:
- 5" - 1½" x 3½"
- 7½" - 2" x 5"
- 10" - 2½" x 6½"
- 15" - 3½" x 9½"
Top and bottom rows
With RST, add a #3 to the left side of the FG/#1 unit.
This seam is also pressed away from the FG.
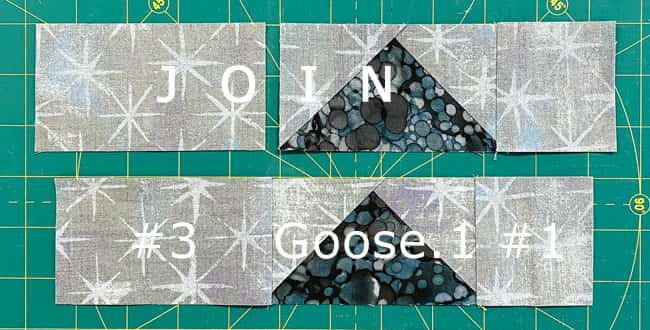
The top and bottom rows should measure:
- 5" - 1½" x 5½"
- 7½" - 2" x 8"
- 10" - 2½" x 10½"
- 15" - 3½" x 15½"
🧩 Bringing It All Together—Your Moment to Shine!
You've come so far—now let's bring this beauty home in style! 🎯 Take a look at all these gorgeous pieces you've created. Let's get everything in its perfect spot:
- That stunning 9-patch center (those seams are looking sharp!)
- Your side units with those perfectly pointed geese
- Those beautiful top and bottom rows, ready for their moment
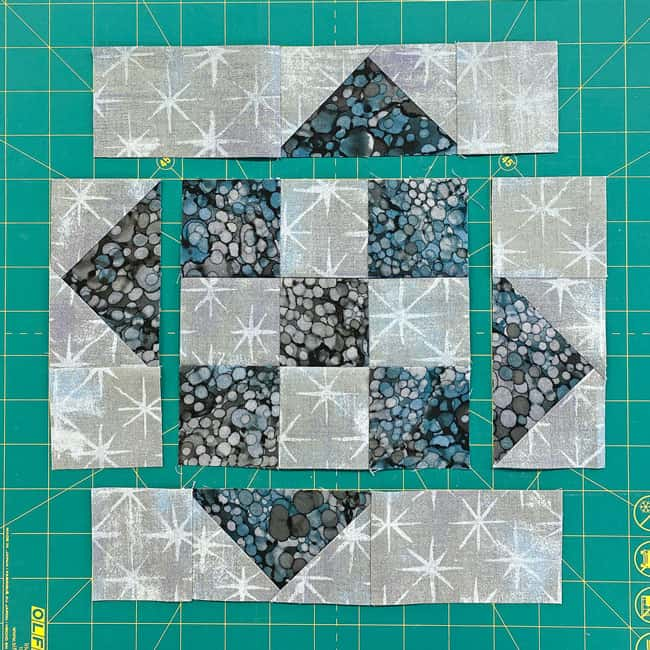
Ready to turn these pieces into one spectacular block? You know you are!
Grab those side units and, with RST, stitch them to your 9-patch center. Those seams are going to nest together like they were meant to be. Press them toward the center.
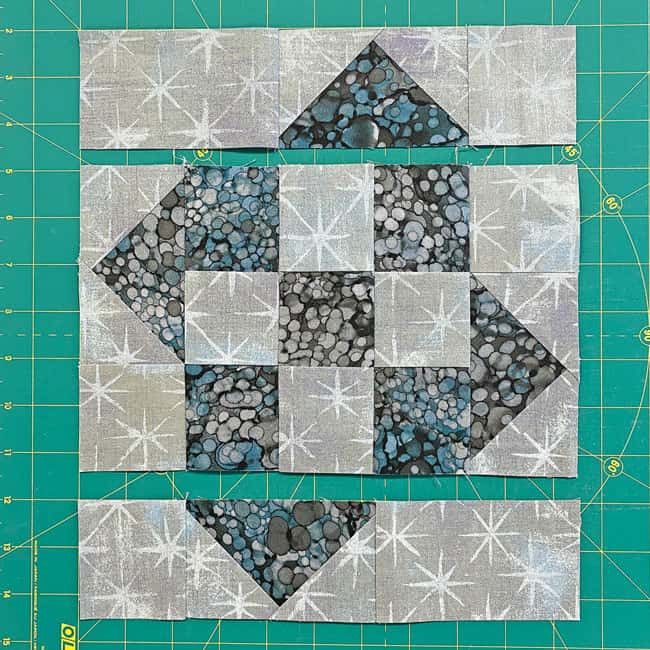
Now for the moment we've been waiting for!
Add those top and bottom rows to complete your masterpiece.
Press these final seams toward the center too—'we're going for 'flat as a quilter's cutting table' here!
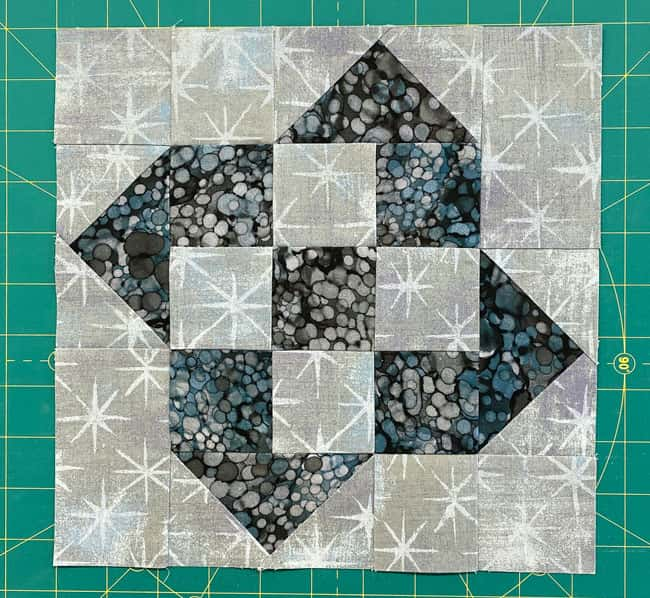
💫 Quick Confidence Check! Flip your block over and admire those perfectly nested seams. That's not luck, my friend. That's pure quilting skill right there!
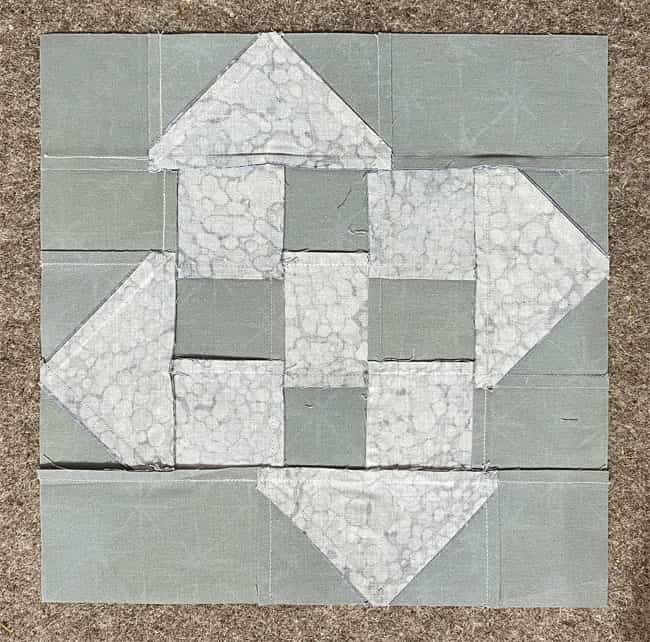
Quilter's Note: Spot that wool pressing mat in the background? It's my 60" favorite because, well, who doesn't love perfectly pressed seams?
From basic to beautiful - that's your quilting journey rolling right along! ⭐
Look at you! 🎯 From basic 9-patch to Flying Geese master, you're cruising into confident quilter territory with style. 🌟 This Rolling 9-Patch block is more than just fabric and thread. It's proof that you're ready to level up your quilting game! ⭐
Whether you chose to paper piece your FG or roll with the Folded Corners method, you've added some serious skills to your quilting toolkit. 🎲 Those crisp points and perfectly nested seams? That's all you, quilting friend! 💫
Time spent mastering new techniques is never wasted, and this block is the perfect stepping stone to even more amazing quilting adventures. 🌈 You're not just making blocks—you're building confidence one seam at a time! ✨
Until next time, may your seams be straight, and your seam ripper gather dust! 🧵
📌 Ready to Roll? Pin First!
Save this Rolling 9-Patch tutorial for when your fabric stash is calling. Let's keep those creative wheels turning! 🎸
For even MORE blocks to make... 🧩🎨

...visit our Free Quilt Block Pattern Library, with over 230+ blocks to choose from in multiple sizes.
Free downloads are included in all sizes for any blocks require paper piecing patterns or templates.
- Home
- Free Quilt Block Patterns
- Rolling 9-Patch Quilt Block
