- Home
- Free Quilt Block Patterns
- Rocky Mountain Chain, Part 2
Rocky Mountain Chain Quilt Block, Part 2
From our Free Quilt Block Patterns Library
This post contains affiliate links, for which I receive compensation.
If you've accidentally come to this page first, click the 'Back' button above to find the cutting instructions, free paper piecing pattern downloads and the beginning of the piecing instructions.
Several abbreviations are used throughout this tutorial (and website):
- HST - half square triangle(s)
- SiaS - Square in a Square unit(s)
- SA - seam allowance(s)
- RST - right sides together
Below we finish up the sides units, continue on to the HSTs and then assemble our block.
And finally, a link to several design ideas using our Rocky Mountain Chain quilt block.
That about covers it. Let's get back to our Rocky Mountain sewing high!
🪡Constructing the Rocky Mountain Chain units, con't…
Half Square Triangles (HST)
Make 8
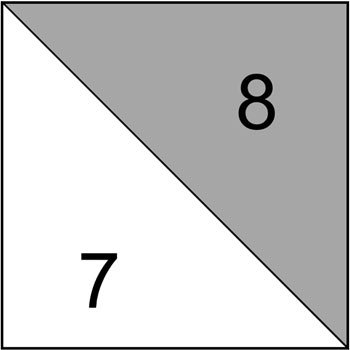
The 8-at-a-time method for making our HST is precisely what we need.
To insure accurate units, the patches are cut oversized. After sewing, we trim them to perfection.
I made this sample while quilting with friends and forgot to bring my 1/4" foot, so I used my Quick Quarter Ruler and my Bohin mechanical chalk pencil to draw pairs of diagonal lines from both sets of opposite corners on the backside of the lighter #7 square.
Click here if you'd like more details on using the Quick Quarter Ruler.
 The Quick Quarter Ruler
I stitched on each of those four lines with an open toe applique foot using my usual 2.0 mm stitch length, and pinned to keep the squares from shifting as I stitched.
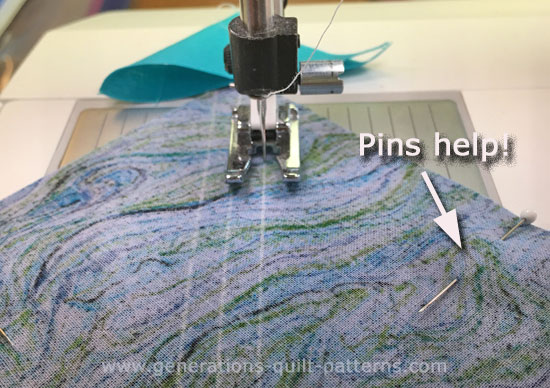 Sewing with an open toe applique foot on the drawn line. Makes the line easy to see, doesn't it!
If you don't have a Quick Quarter ruler...
…mark a diagonal from both pairs of corners instead with your everyday ruler.
Install your
favorite quarter inch foot and stitch a 1/4" away from both sides of the
two lines you drew for a total of four lines of stitching.
Again, pin to keep the layers together if it helps you.
Either technique gets you to the same place. Easy Peasy!
After stitching, use the chart below to find the Center or Midpoint Measurement that corresponds to the finished size of your Rocky Mountain Chain block. We use this number to cut the sewn unit in half diagonally and vertically to create four equal squares.
| Finished Block Size | Center or Midpoint Measurement |
|---|---|
| 10" | 3¼" |
| 15" | 4¼" |
| 20" | 5¼" |
For our 10" sample block, the Center, or Midpoint, is at 3-1/4".
I prefer to do my cutting on a smaller 12"x18" mat for this unit. Then I can turn the mat and not disturb the patches.
Align that mark on your ruler with the edge of your block to cut it in half vertically. (below)
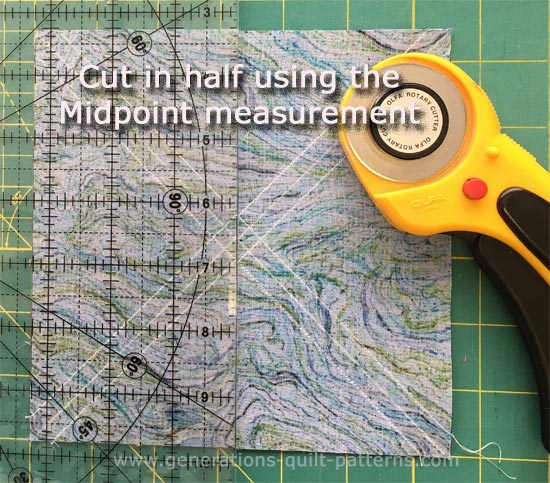 The 3-1/4" mark in the ruler is aligned with the left-hand edge to cut the block in half north to south. (It'd be on the right-hand side if you cut left-handed.)
Turn your mat and repeat to cut it in half again using that same 3-1/4" measurement. At this point, you have four equal-sized 3-1/4" squares.
Now cut each in half diagonally to create 8 oversized HST.
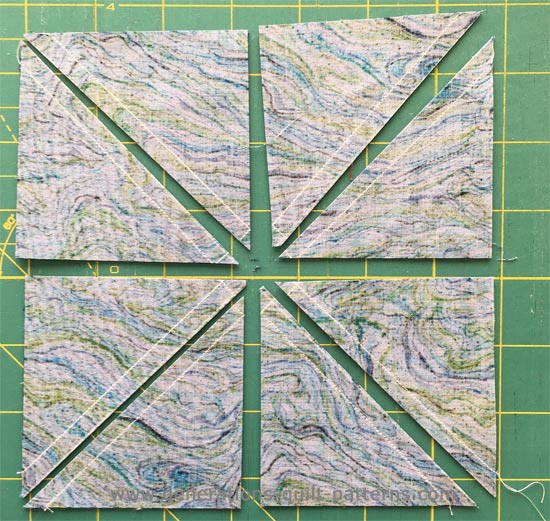
Press these units with the SA toward the dark fabric.
| Finished Block Size | Trim HST to... |
|---|---|
| 10" | 2½" x 2½" |
| 15" | 3½" x 3½" |
| 20" | 4½" x 4½" |
Trim all 8 to size using the chart above.
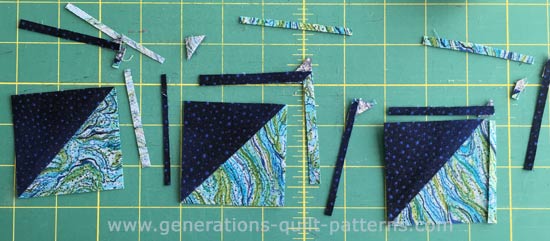 Happiness is a perfect-size HST. Makes assembly a breeze!
Helpful Hint
For more in depth instruction on this 8-at-a-time method of making half square triangles, click here. (This link opens in a new window so you can get back to this spot in the tutorial easily.)
From this point forward, you need only your 1/4" foot.
Corners
Make 4
Now to assemble the units for the corners.
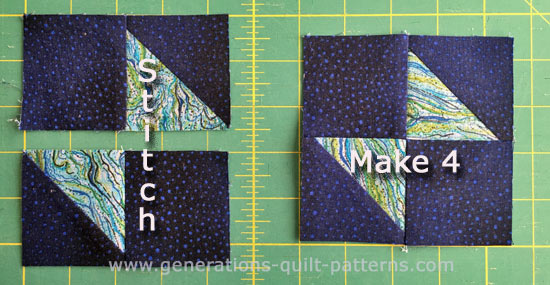
Pair each #9 with an HST (below). Stitch. Press SA toward #9.
 Pressing toward the #9 solid square helps to reduce bulk.
Stitch pairs together as shown below. The seams nest to make matching the center SAs much easier. Pin if needed.
And finally, to reduce bulk, twirl the seams by releasing a few of the stitches in the SA at the center.
Press.
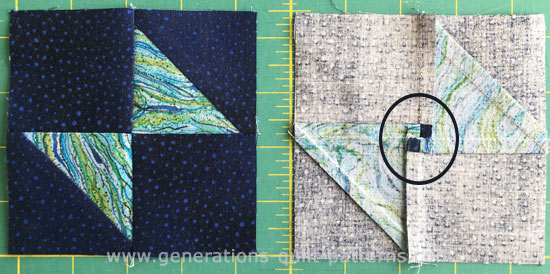 Our twirled SA forms a four patch on the back of this unit.
Side Units
Make 4
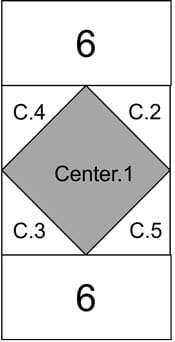 Make 4
To complete the sides for your Rocky Mountain Chain quilt block, with
RST add a #6 rectangle to a pair of opposite sides as shown.
Repeat for the 3 remaining SiaS.
Press with SA toward #6 to reduce bulk.
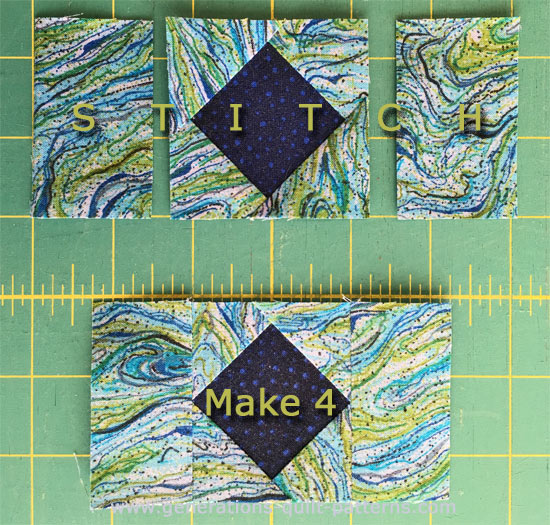 I prefer to remove the paper BEFORE adding the #6s.
🧩Stitching your Rocky Mountain Chain quilt block together
Arrange the units as shown below. Dark #9 squares are in the outside corners and touching the inside center square (see arrows).
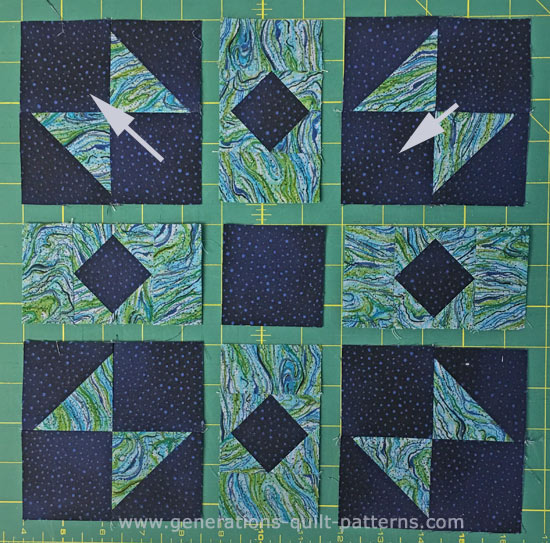 Double check that the units are laid out properly—it's too easy to get them switched when you sew.
Sew the units into rows. Press SA towards the SiaS side units. This simple trick for pressing will help you tame the lumpiness.
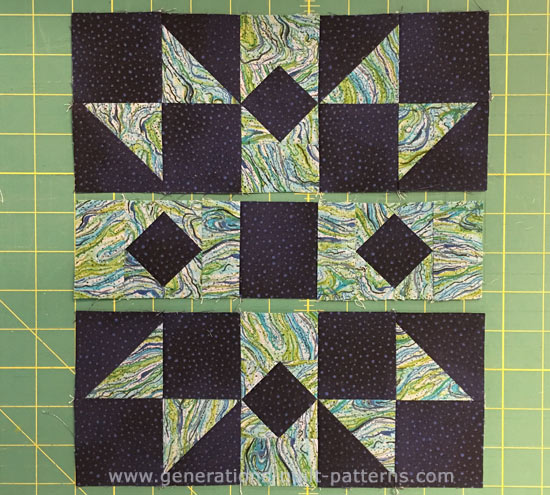 Use pins to help hold the patches together and get a good match at the seams.
Sew the rows together. I use pins to help control the patches while stitching.
There are detailed instructions here to help you pin for perfect points.
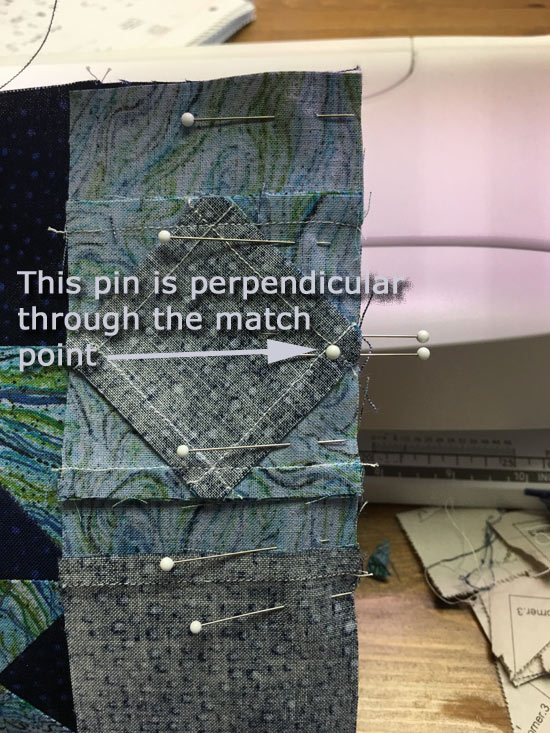 All you see is the head of the perpendicular pin in this picture.
This time, press the SA away from the SiaS unit. That way, if you choose to make an entire quilt out of this block, the SA between blocks will nest for easier assembly.
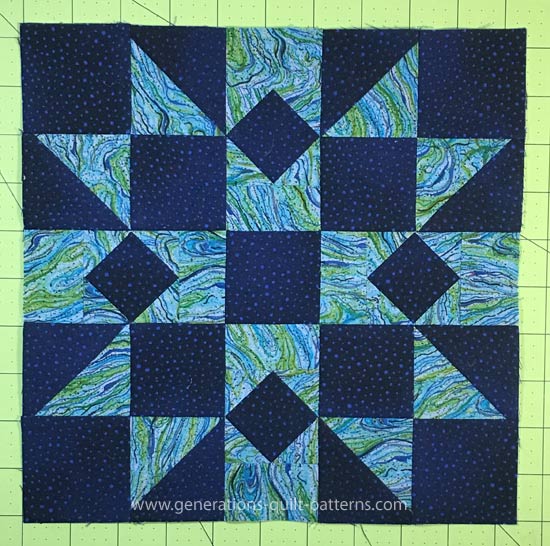
Here is the finished Rocky Mountain Chain quilt block.
Spectacular, isn't it!
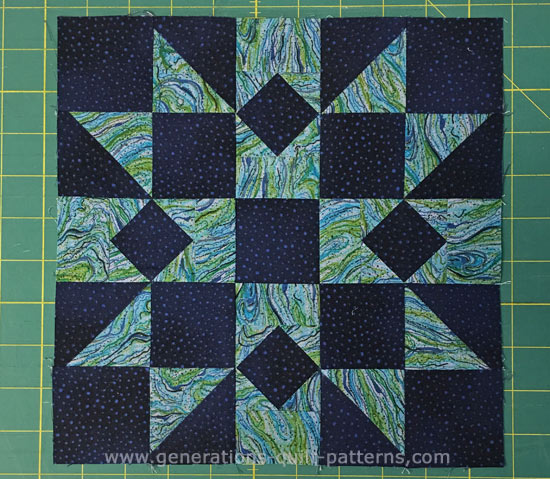 Voila! It's Done!
…and a view from the backside…
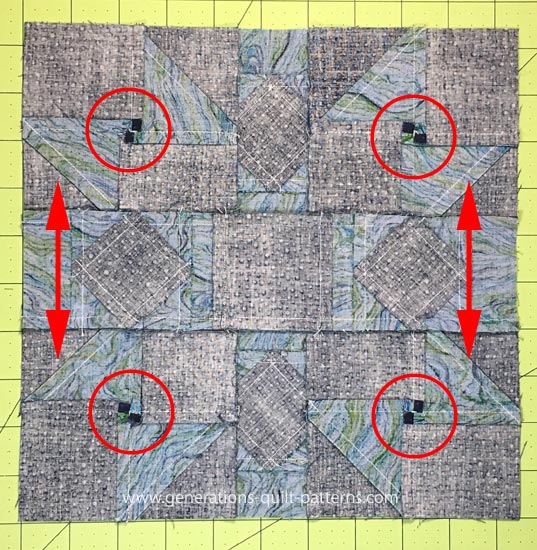
You can see the twirled SAs as well as the direction of the SAs that join the rows together.
If you choose to make a Rocky Mountain Chain quilt with blocks set edge to edge, all the seams will nest. That makes matching all those SAs easy as pie!
Did you notice?????
Several of the pictures for this tutorial look as if they were taken in a few different places.
They were—sort of.
This block was made during a Sunday-Sew-In with my bee—a terrific group of gals if I do say so myself.
There was more difference in the light between the front and back cutting tables than I noticed.
My bad!
Then the last picture in the tutorial was taken after I got home…yet another cutting mat.
Now you know my secret! :D
Let's get some ideas for how to set these Rocky Mountain Chain blocks together, click 'NEXT' below.
Is your to-quilt list as tall as the Rockies?
No worries!
Pin this Rocky Mountain Chain block guide for later. When you're ready to elevate your quilting game, you'll have the perfect pattern waiting in your base camp!
- Home
- Free Quilt Block Patterns
- Rocky Mountain Chain, Part 2


