- Home
- Free Quilt Block Patterns
- Red Cross Quilt Block
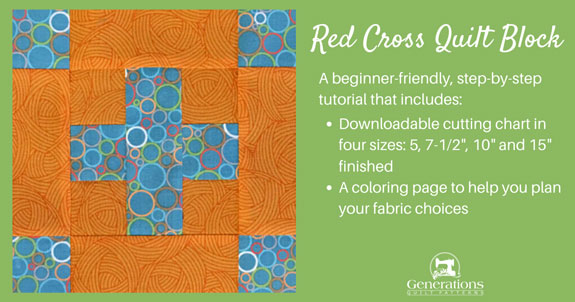
Red Cross Quilt Block
From our Free Quilt Block Patterns Library
This post contains affiliate links, for which I receive compensation.
The Red Cross quilt block is constructed with basic quilting techniques. A sweet design for a beginning quilter.
Simple. Quick.
Just squares and rectangles to stitch. No bias to mess around with!
In this tutorial you'll find:
- A coloring page to download and print
- No time to quilt? Pin this for later.
It's time to cut up and sew!
📋 General Instructions
Several abbreviations are used on this page. They are:
- SA - seam allowance
- RST - right sides together
- BAC - background fabric, it can be any value
1/4" SA are used through this tutorial.
Pressing instructions are highlighted in yellow throughout this tutorial to make them easy to find.
When instructed to press, first press the patches in the closed position just as they came off your sewing machine. This sets the seam, melding the fiber in the threads into the fiber of the fabric.
Then press the SA to the dark unless otherwise noted.
The newest quilt fabrics to tickle your fancy...
Click the images below to see the full collection. We share any commercial and/or free patterns that showcase them, too. (For inspiration, of course!)
Step 1: Cut patches for a Red Cross block
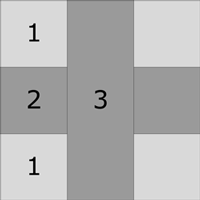
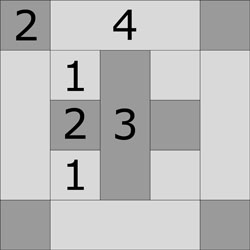 Red Cross block design
Sample Block Size: 7-1/2" finished / 8" unfinished
Grid: 5x5
Attribution:Nancy Page
Design Type: Uneven 9-patch, large center
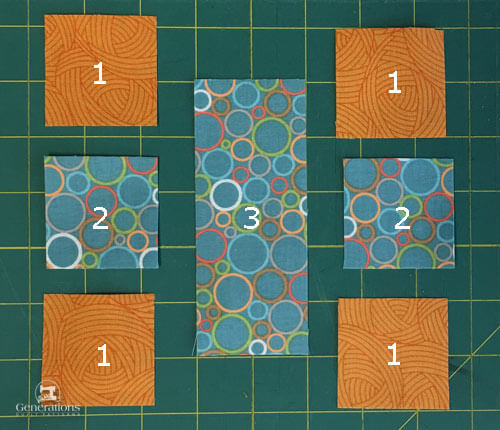
Please label your patches. We refer to their numbers throughout this tutorial.
To print a copy of just the block design and the cutting chart (below) to use at your cutting table, click here.
NOTE: I've starched all my fabrics before cutting with a 50/50 mix of Sta Flo concentrated liquid starch and water.
Learn how to starch your fabrics here.
 | Cutting Chart for a~ Traditional Piecing ~ | ||||||
|---|---|---|---|---|---|---|---|
| Patch | Fabric | Qty | Finished Block Size | ||||
| 5'' | 7 1/2'' | 10'' | 15'' | ||||
| 1 | BAC | 4 | 1½'' x 1½'' | 2'' x 2'' | 2½'' x 2½'' | 3½'' x 3½'' | |
| 2 | A | 6 | 1½'' x 1½'' | 2'' x 2'' | 2½'' x 2½'' | 3½'' x 3½'' | |
| 3 | A | 1 | 1½'' x 3½'' | 2'' x 5'' | 2½'' x 6½'' | 3½'' x 9½'' | |
| 4 | BAC | 4 | 1½'' x 3½'' | 2'' x 5'' | 2½'' x 6½'' | 3½'' x 9½'' | |
| Unfinished Block Size | 5 1/2'' | 8'' | 10 1/2'' | 15 1/2'' | |||
| Grid Size | 1'' | 1 1/2'' | 2'' | 3'' | |||
Step 2: Assemble the units for a Red Cross
Center
Make 1
With RST, stitch a #1 to two opposite sides of a #2.
Seam allowances can be pressed open or towards the dark, the choice is up to you. None of the seams in this center unit nest with any other.
Sweet and simple!
For this sample block I've chosen to press towards the darker 'A' fabric (#2 patch).
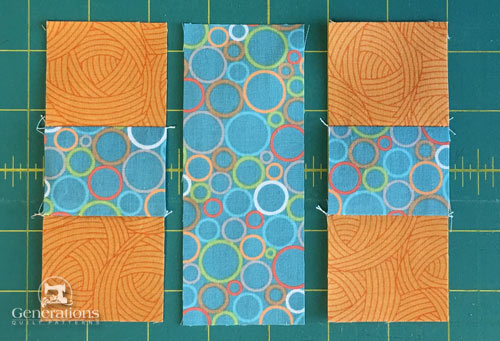
With RST stitch a #1/#2/#1 unit to each long side of the center #3.
Press towards the #3 patch to reduce any bulk.
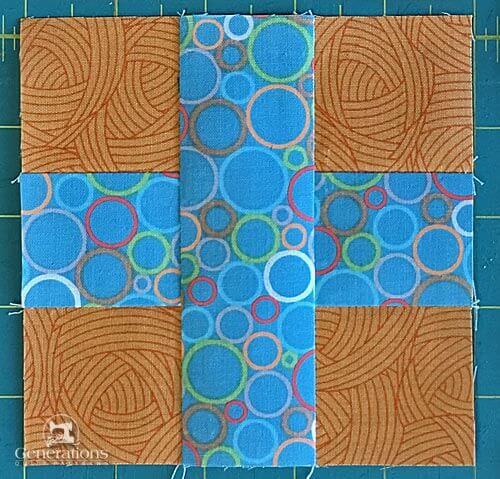
Your center is complete.
Block Measurement at this Point | |
|---|---|
| Finished Block Size | Edge-to-Edge Measurement |
| 5" | 3-1/2" x 3-1/2" |
| 7-1/2" | 5" x 5" |
| 10" | 6-1/2" x 6-1/2" |
| 15" | 9-1/2" x 9-1/2" |
Sides
Make 2

Construct just 2 of this unit.
With RST sew a #2 to both short sides of a #4.
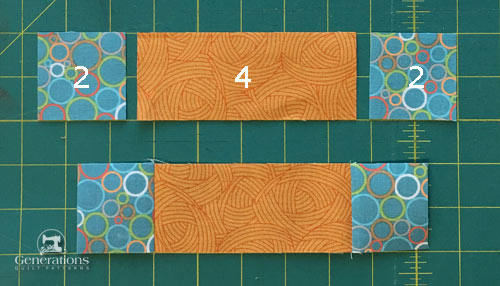 Make 2
Press SAs toward #4 to help the seams nest as the units are added to the center.
Step 3: Assemble the Red Cross block
Arrange the center, sides and remaining two #4's to create the Red Cross design.
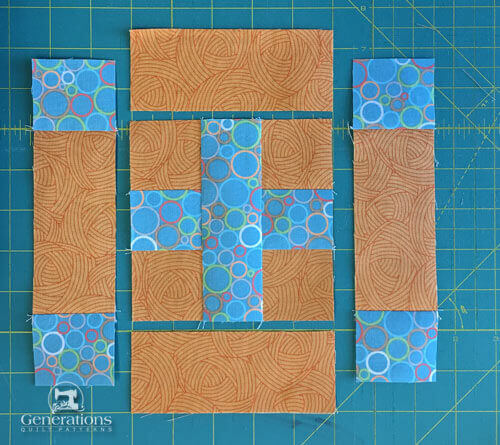
Add a #4 rectangle to two opposite sides of the center. Stitch.
Press the SA toward #4 to reduce bulk.
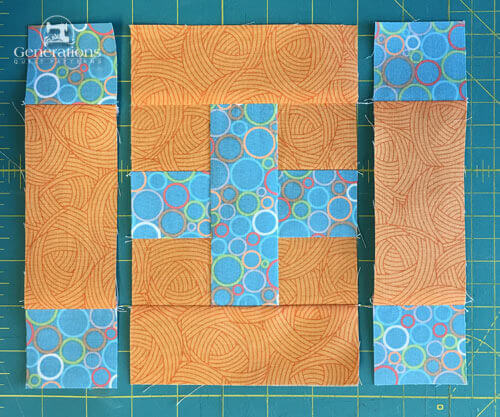
Add the #2/#4/#2 pieced sides as shown below. The SA nest at the corners.
Press this last pair of seams away from the center.
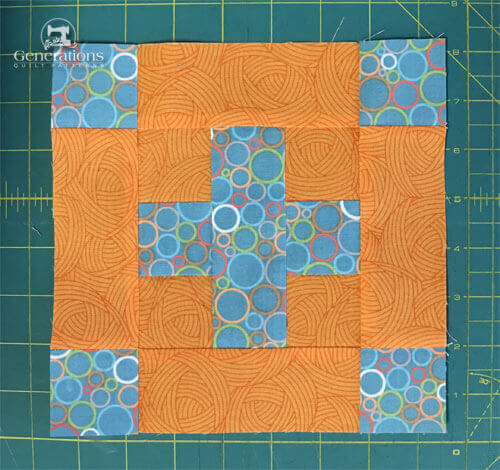 Our Red Cross is complete!
Using the Red Cross block in a quilt
A simple block.
So what do Red Cross blocks look like set into a quilt?
To separate the blocks, a simple sashing strip in white and a red cornerstone are added. (The center of the 9-patch that's formed is the cornerstone.) The only thing to match in the construction of this quilt are at the corners of the sashing.
The blocks are laid out in a straight set, 5 across and 7 down.
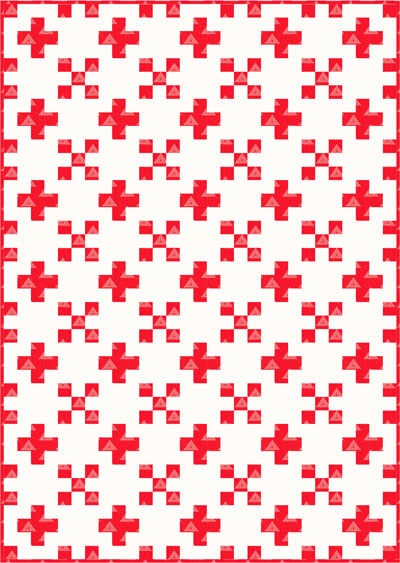 I've removed the block outlines from this drawing so that you can better see the quilt design.
What will you make with your Red Cross blocks?
Return to the Free Quilt Block Pattern Library for more blocks to make.
What about a different quilt block?
For a list of all the 220+ quilt block patterns on this site, start here.
If you know the name of the block, shorten your search by using these links:
Click here if you're looking for blocks with at least some paper piecing.
Click here if you're looking for the basic building blocks of quilting, i.e., Flying Geese, half square triangles, quarter square triangles, etc., along with several techniques to make each.
And finally, use these links to find blocks in these finished sizes:
