- Home
- Machine Quilting 101
- Quilt Basting Spray
How to Use Quilt Basting Spray
and other Tools...
...to make layering and basting faster and easier!
This post contains affiliate links for which I receive compensation
Using a quilt basting spray can take the pain out of making your sandwich. As we learned in the previous lesson, pin basting is the traditional method.
But for most, that means crawling around on a hard floor or waiting for tables to free up in the church basement or at your local quilt shop. Who's got the time...or the knees?
If you have the space for it, using a quilt basting spray can speed up the process of getting from finished top to machine-quilting...and all without a creaky back and poked fingers.
If you decide that a quilt basting spray isn't your cup of tea, further down on this page is another technique that uses covered boards to baste at a table.
Spray basting your sandwich
With quilt basting spray, you do not need to use thread or pins in the quilt sandwich. However, if you baste on a design wall, you will need
pins to hold the backing in place and the larger pieces of
batting...kind of like an extra hand.
Just like pin basting, you need an area large enough to lay out your patchwork and have room to work.
Unlike pin basting, you can spray baste on a design wall. So much easier on the body...though with a really big quilt you may need a second person to help you maneuver the layers.
I don't use quilt basting spray for large sandwiches (just small ones), but one of our readers, Jo Goranson (artist and quilt teacher), explained how she sprays all of her quilts here on our page "Basting my quilt".
Her description is the first one in the 'Comments' section.
She bastes on a design wall which eliminates crawling around on the floor.
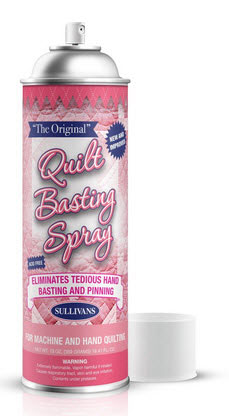
The product she uses is Sullivan's Basting Spray in the pink can (right).
In this video by Patsy Thompson (quilter extraordinaire!), she takes you step-by-step through the process of spray basting on a design wall.
The biggest problem that I see with this technique is having a wall area large enough to do the job. (But if you pin baste you need a big open floor space...kind of six of one, half a dozen of the other...)
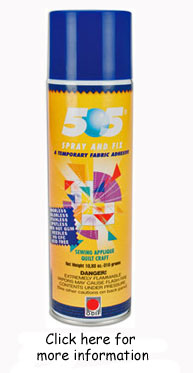
I agree with Patty about the use of the 505 Basting Spray.
I really like that product as opposed to the KK2000.
KK2000 is used with machine embroidery and is intended as a temporary
spray adhesive. It is absorbed into the fabric in about a day to a day
and half. It is designed to disappear in 2 to 5 days. It is not water
soluble, so you need to let several days pass before washing your quilt.
Leftover KK2000 in your fabric can turn into a sticky glob when it gets
wet.
505 is intended to last (as per the manufacturer) for about
4 months on cotton or cotton blends fabrics (about 2 months on
polyester). Once your quilt is quilted, wash to remove the product from
your quilt.
The 505 spray is an acid free product, a good quality for products that will touch our fabrics. 505 Spray and Fix is also available from Amazon.com.
There is one other basting technique that I recommend that is...
Layering and basting a quilt on 2 boards
Sharon Schamber, award-winning quilter, designer and author, has devised a pretty slick way of using two boards to aid in layering and basting a quilt sandwich. It's based on the same idea as a long arm machine, it's just that you are in charge of moving the boards.
The advantage to this method is two-fold:
- You need much less open space to baste, about 3 feet (or a tabletop width) by the dimension of one of the sides of your quilt, and...
- You
can get up off the floor. (My tile kitchen floor, while I love the built
in lines, in a total pain in the butt, literally, to work on. Cold in
the winter and HARD all the time.
I'm using this method more and more in my own work with one major difference.
I am not a big fan of thread basting. It's too easy to quilt
right over the basting thread, making a big mess to pick out later,
but safety pins?
Those I stop for.
So when I use this method, I use my safety pins. For your own quilts, you'll have to decide for yourself.
Be aware, that if
you choose and like layering and basting a quilt this way and you make many different
sized quilts, you'll end up with several different sized
pairs of boards. Something extra to make and store.
Now to see how it's done, watch the two-part video below.
Part 1
Part 2
So there you have it, three different ways of creating your quilt sandwich—traditional layering with safety pins, using quilt basting spray, and then using a pair of boards to control the layers.
Once your layers are basted, it's time to quilt!
Table of Contents
for Beginning Machine Quilting 101
Introduction
Beginning Quilting 101: Quilting Instructions for the Beginner


