- Home
- Beginner Quilt Blocks
- Quarter Square Triangle
Easy Quarter Square Triangle Instructions
Technique #1 - Rotary Cut Patches
This post contains affiliate links, for which I receive compensation.
The easiest way to make a quarter square triangle (QST) unit is to simply rotary cut the patches.
No templates. No marking. No paper to remove.
Just cut the patches and sew them together.
Simple.
This method is particularly useful for scrappy blocks.
Let's get started!

The newest quilt fabrics to tickle your fancy...
Click the images below to see the full collection. We share any commercial and/or free patterns that showcase them, too. (For inspiration, of course!)
The Technique
In this example, we'll make a 2-1/2"" finished quarter square unit from two fabrics.
Once the patches are cut, two of the edges are on the bias. Since bias is stretchy (and every time you touch it is an opportunity for the fabric to stretch), I like to starch my fabric. It provides from stability and tames and minimizes the 'stretch'.
You can either starch your quilt fabric ahead of time or keep a bottle of spray starch handy and do it as you go. Just remember that you must wash it out once your quilt is finished.
Let's begin...
The Formula
The finished block size plus 1-1/4".
Step 1
For a 2-1/2" finished quarter square triangle, the patch size is determined as...
2-1/2" finished plus 1-1/4" = 3-3/4" square
I prefer to add a bit extra and trim my QSTs to size after stitching, so I add an extra 1/4" to this number...
3-3/4" + 1/4" = 4" square
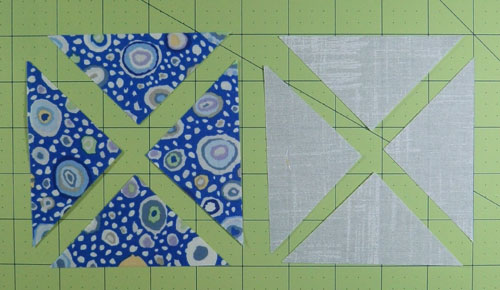
Cut one 4" square from each of two fabrics.
Layer the two squares on top of each other.
Cut diagonally twice, from corner to corner.
You
now have a total of 8 quarter squares of fabric whose short sides are
bias edges. The long sides are on the straight of grain.
Step 2
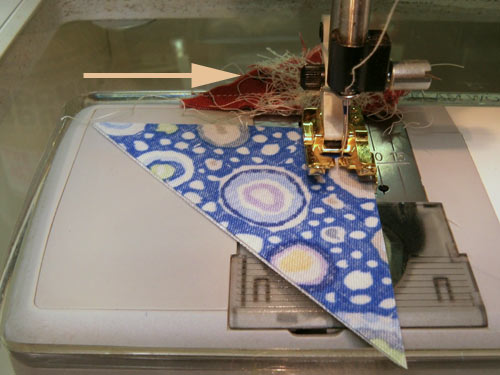
With RST, align two of the patches and sew the seam along one of the short, bias edges.
Start your stitching on an 'anchor cloth' or 'spider'. (That's the gnarly-looking scrap behind the presser foot.) There's less chance your sewing machine will eat the fabric. The first stitch, in my humble opinion, is a better stitch, too.
Notice that the darker of the two fabrics is on top and that the squared edge (not the point) is fed into the machine first. This orderly method of piecing produces identcial units.
Repeat for the remaining pairs.
Step 3
Press the seams flat to set the seam.
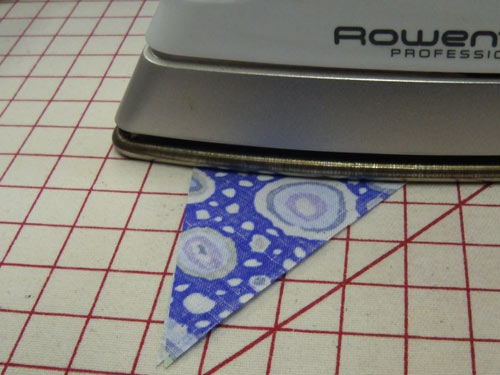
Then press the patches open with the seam allowances towards the darker fabric.
If you start with the dark fabric on top, you automatically press to the dark.
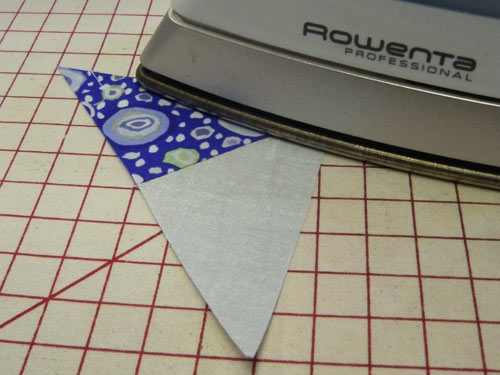
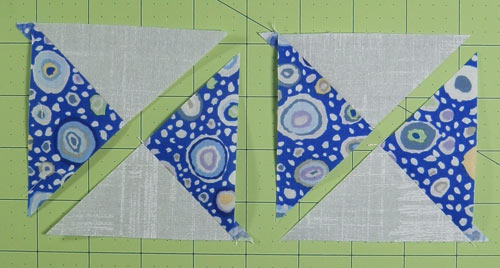
And these are the pressed units ready for the next step.
Step 4
With RST, align the edges of two sewn units, dark fabric to light fabric, and nest the seam allowance. You can pin if needed.
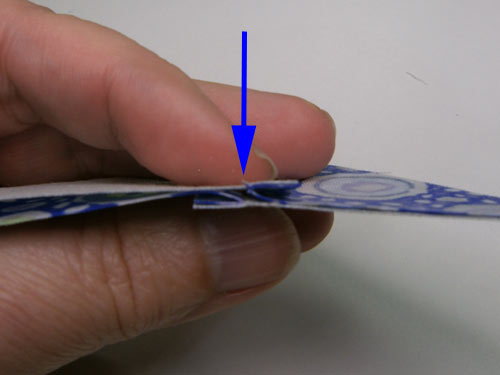
Sew with a quarter inch seam.
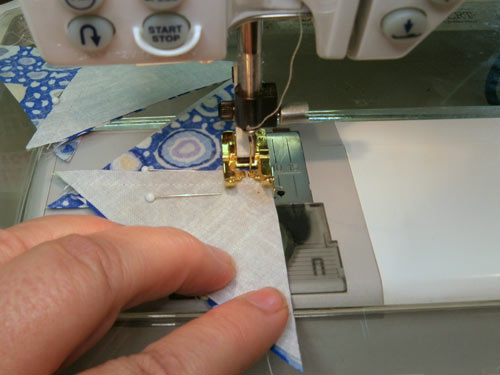
Repeat for the remaining pair.
Step 5
Press again as in Step 3. Your blocks look like this.
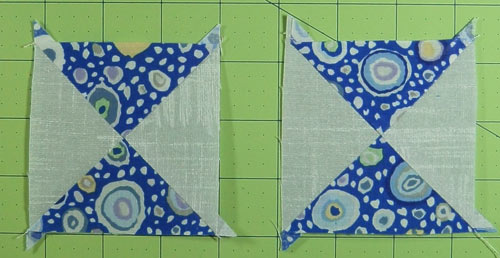
Step 6
If you chose the 'Exact Size' from our cutting chart, all that's left is to trim the dog ears and measure your blocks to check that they are accurate.
If you started with over-sized patches, it's time to trim to size.
Find the center measurement of the unfinished unit. For our 2-1/2" finished block the math is...
(2-1/2" + 1/2") divided by 2 = 1-1/2"
The 1/2" above is the seam allowance for the finished blocks. (If you download the cutting chart this is computed for you.)
Locate the intersection of the vertical and horizontal 1-1/2" line on your ruler. Align this point with the center of your block where all the seams intersect.
Align the 45 degree line of your ruler with the diagonal seam of the block.
Take an extra second or two here to line everything up...measure twice, cut once!
Once everything is aligned, trim the two exposed edges even with the ruler.
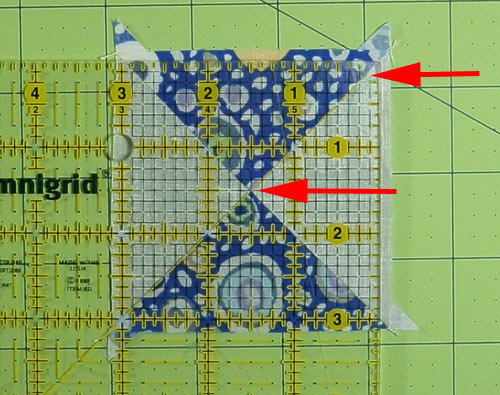
Step 7
Flip your block and align the 1-1/2" lines with the center of your block. The cut edges are even with the 3" lines (the unfinished block size) on your ruler. The 45 degree line is aligned with the diagonal seam.
Once everything is in position trim the two exposed edges.
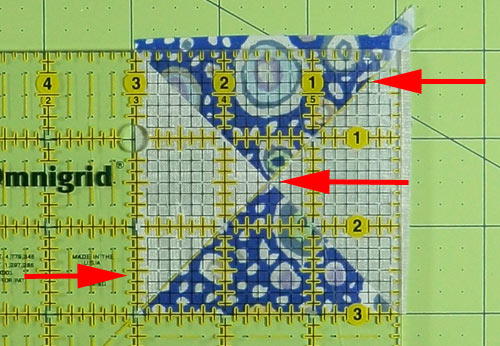
After trimming your quarter square triangle blocks look like this...
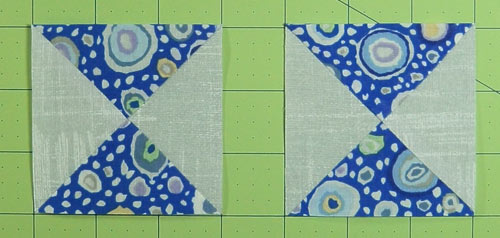
And from the back side...
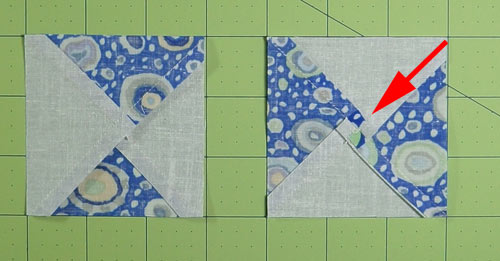
Notice that on the left, the seam allowance is pressed to one side. On the right the seam has been 'twirled' around the center to reduce bulk.
Download and print cutting charts
To download and print your 'Quarter Square Triangle Rotary Cutting Chart', just click on the 'Stamp Out Math' logo to the right.
Wherever you see this logo on this site there's a new chart to print for your reference notebook.
You need to have Adobe installed on your computer to do this. (Click here for the most recent version of Adobe--this link opens in a new window.)
