- Home
- Free Quilt Block Patterns
- Prairie Queen Quilt Block
Prairie Queen Quilt Block
From our Free Quilt Block Patterns Library
This post contains affiliate links, for which I receive compensation.
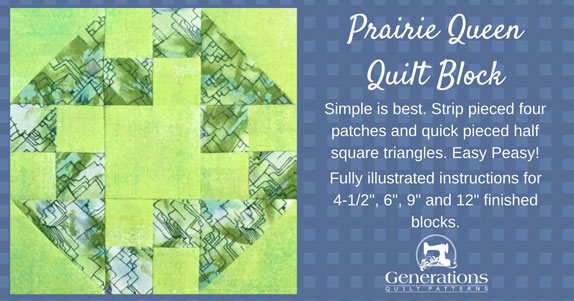
Simple is best for a Prairie Queen quilt block.
Quick pieced HST.
Strip pieced four patches.
Easy Peasy.
On this page you'll find instructions to make this as a 4-1/2", 6", 9" or 12" finished block.
You may also know this patchwork design as 'True Blue'.
It's time to cut up and sew!
Construction Instructions
These abbreviations are used in this tutorial:
- SA - seam allowance
- RST - right sides together
- HST - half square triangle
All SA are 1/4" and pressed towards the darker fabric unless noted otherwise.
For the best pressing results, first press the seams as they were sewn, in the closed position.
This sets the seam and melds the fibers of the thread into the fibers of the fabric. Then open the patch and press again.
To create the flattest blocks ever, try my 'secret' technique.
The newest quilt fabrics to tickle your fancy...
Click the images below to see the full collection. We share any commercial and/or free patterns that showcase them, too. (For inspiration, of course!)
Step 1: Cutting for a Prairie Queen
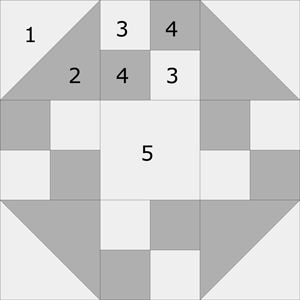 Prairie Queen design
Sample Block Size: 4-1/2" finished / 5" unfinished
Grid: 6x6
Attribution: Ruth Finley
AKA: True Blue (Hearth & Home)
Design Type: Even 9-patch
The value contrast in my fabrics is more between the pattern in the fabric than the actual value.
For clarification, I'm treating the green print fabric in the sample as my 'dark'.
As usual, the fabrics were starched before cutting.
I prefer diluted StaFlo (1:1 water: to starch) over Best Press because I can control the stiffness of the fabric.
Best Press makes them crisp.
StaFlo makes them stiff.
While just two fabrics are used in the sample block, there's no reason that you couldn't make it scrappy.
Simply separate your scraps into two piles—lights and darks. Just make sure that each fabric is definitely a light or definitely a dark.
 | Cutting Chart for a~Traditional Piecing ~ | |||||
|---|---|---|---|---|---|---|
| Patch | Fabric | Qty | Finished Block Size | |||
| 4½" | 6" | 9" | 12" | |||
| 1** | L | 2 | 2⅜" x 2⅜" | 2⅞" x 2⅞" | 3⅞" x 3⅞" | 4⅞" x 4⅞" |
| 2** | D | 2 | 2⅜" x 2⅜" | 2⅞" x 2⅞" | 3⅞" x 3⅞" | 4⅞" x 4⅞" |
| 3 | L | 1 | 1¼" x 11" | 1½" x 13" | 2" x 17" | 2½" x 21" |
| 4 | D | 1 | 1¼" x 11" | 1½" x 13" | 2" x 17" | 2½" x 21" |
| 5 | L | 1 | 2" x 2" | 2½" x 2½" | 3½" x 3½" | 4½" x 4½" |
| Unfinished Block Size | 5" | 6½" | 9½" | 12½" | ||
| Grid Size | 3/4" | 1" | 1½" | 2" | ||
| **I prefer to cut my patches extra large for HSTs, stitch, and then trim them to size. If you prefer to do the same, add a bit extra to the measurements for Patches #1 and #2 above. There is a chart further down in these instructions where you need it for trimming them to size. | ||||||
Step 2: Create the Prairie Queen units
HSTs
Make 4
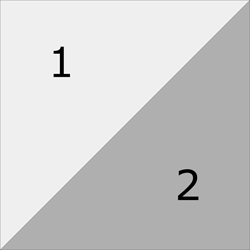
We'll use the Quick Pieced method for making HSTs for our Prairie Queen block. (For more detailed instructions on this technique, click here.)
If you plan to make many blocks, you may want to use another half square triangle method like 8-at-a-time or triangle paper.
Mark a diagonal line from corner to corner on the backs of the two #1 squares.
Here are the #1s after marking. (I used my favorite Bohin Mechanical Chalk Pencil for marking.)
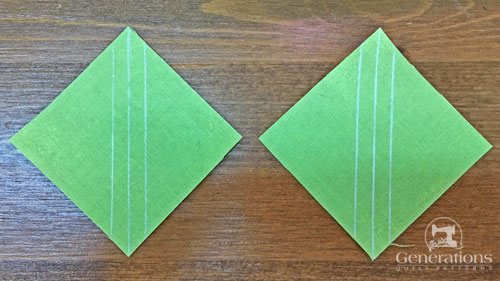 See my note below...
A funny thing happened on the way to making this block...
Seriously. I must have had a brain-fart, for when I set up my sewing machine my quarter inch foot was nowhere to be found. And since this was made on my Sunday Sew-In with my bee, there was no going home to retrieve the foot.
So I just marked the stitching lines a 1/4" away from the center line on both sides and went about my business.
Always remember! There's more than one way to get things done in quilting.
With RST, layer the #1 and #2 squares. Sew a 1/4" away from the center marked line. Repeat for the second pair.
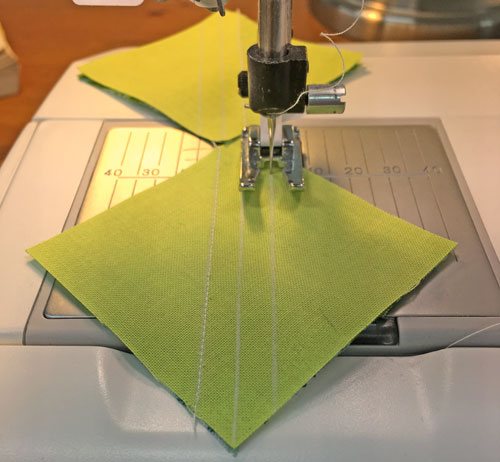 An open toe applique foot makes it easy to see the sewing line.
Press flat to set the seam.
Cut both pairs apart along the center line (pink arrow).
Press with the SA toward the darker #2.
Here one pair of squares is cut in half and pressed.
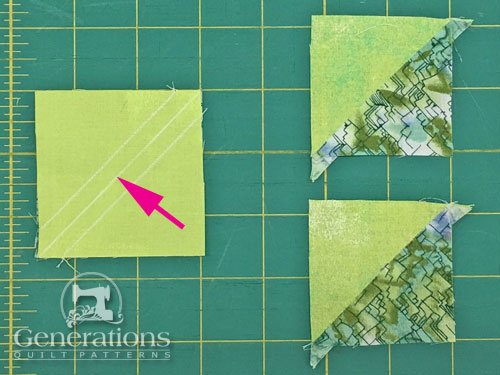 One pair cut in half, one more to go!
Now check that your HST are the correct size using the chart below. If they're not (either because your stitching was a bit off or you cut larger patches as I did) trim them to the size shown in the chart below.
If your stitching is perfect, simply trim off the dog ears for neater patchwork.
HST Dimensions | |
|---|---|
| Finished Block Size | Trim HST to… |
| 4½" | 2" |
| 6" | 2½" |
| 9" | 3½" |
| 12" | 4½" |
After trimming, your HST look something like this.
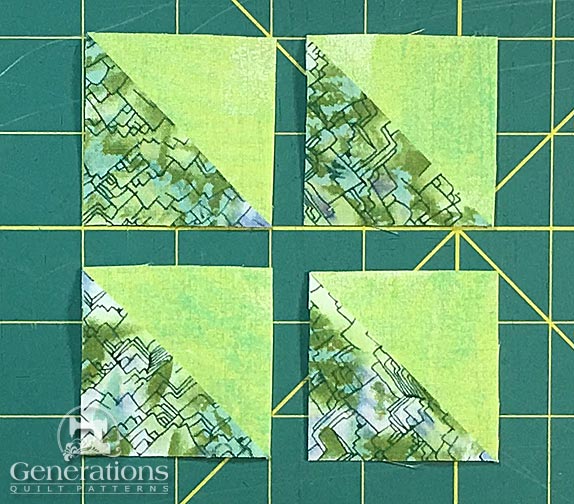 Look, Ma! No more dog ears.
Four-Patch Side Units
Make 4
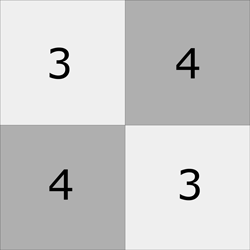
The four patches are strip pieced—so much faster (and more accurate) than stitching four individual squares together!
With RST, sew a #3 strip to a #4 along the long edge.
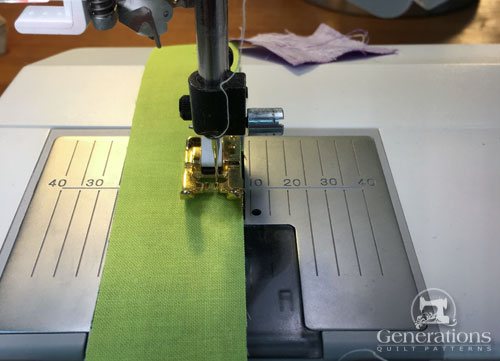
Press, first flat to set the seam and then open with SA to the dark #4.
StripSet Widths | ||
|---|---|---|
| Finished Block Size | Stripset Width after stitching | SubCut Width Cut 8 |
| 4½" | 2" | 1¼" |
| 6" | 2½" | 1½" |
| 9" | 3½" | 2" |
| 12" | 4½" | 2½" |
Using the chart just above, check that your stripset is the correct width after stitching. Make any necessary adjustments now.
Straighten one short edge of the stripset by aligning a line on your ruler with the seamline (pink arrow). Cut off no more than a 1/4".
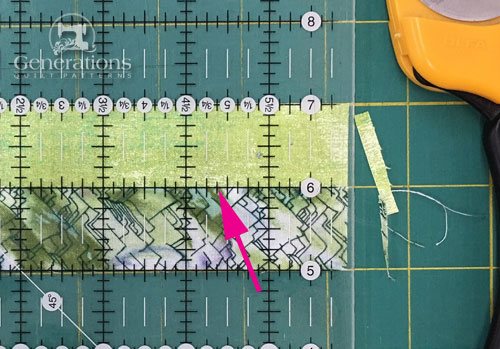
Subcut eight units from it at the width that corresponds to chosen block's finished size.
For the 4½" finished sample block, the subcuts are 1¼" wide. There's approximately 1" of scrap leftover.
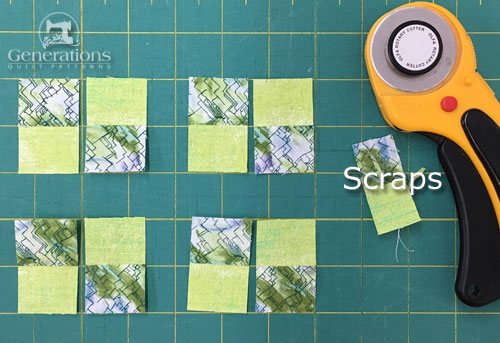 After subcutting...
With RST, sew each pair together. Feed them all through the sewing machine the same way—dark #4 patch on top through the machine first.
You get a better match if the cut edge of the SA on the top patch feeds into your sewing machine first. It tends to push the seams together.
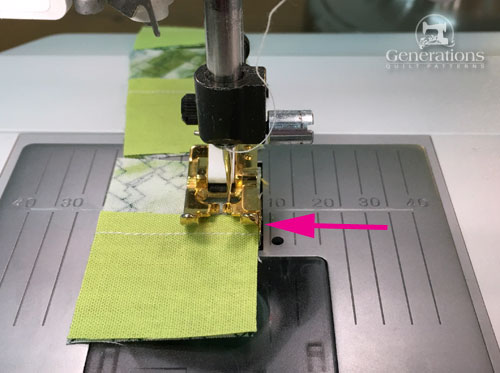 The pink arrow points to the SA as if feeds into the machine
After chain stitching them together...
 ...all fed through the machine the same way!
Press the four patches flat to set the seam.
Then twirl or spin the seam allowance. This reduces the bulk in the center of the patch.
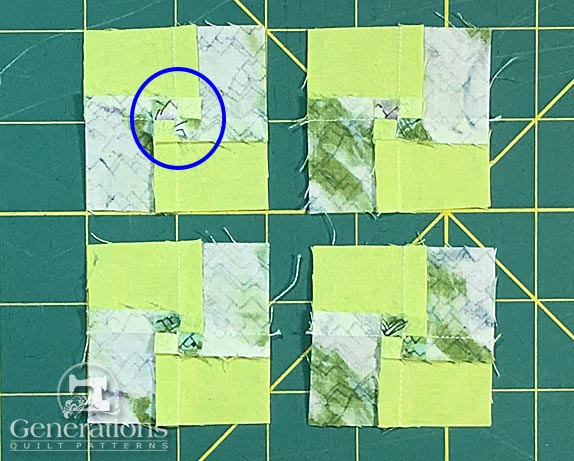 The SA all 'twirl' or 'fan' in a clockwise direction around the block. This creates a little four patch in the center (blue circle) of the unit.
If you feed all your units into the machine the same way, the seams all twirl exactly the same.
The 'twirl' direction (clockwise or counterclockwise) doesn't make much difference in a single block like our sample.
It's a whole other story if you choose to make a quilt of nothing but Prairie Queen blocks and set them edge to edge.
In that scenario, seams that twirl all in the same direction will all nest. Putting that quilt top together is so much quicker. So much easier.
Step 3: Assemble your Prairie Queen quilt block
Arrange the patches into the Prairie Queen design. The light side of each HST is in the corner.
Lay out the four patches with the light #3:
- In the upper LEFT corner in the top and bottom row.
- In the upper RIGHT corner twice in the middle row.
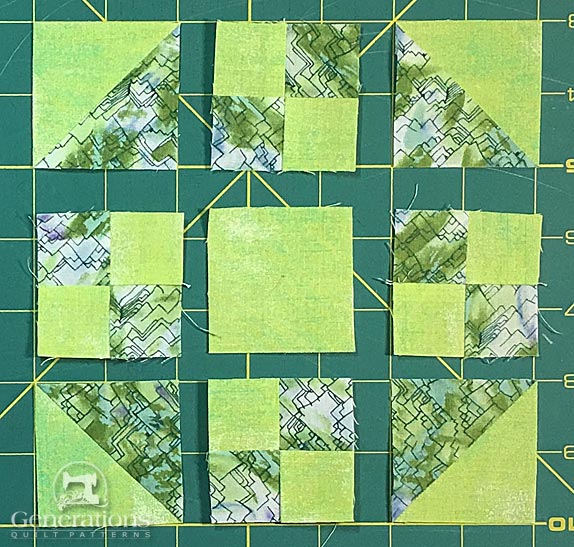
With RST, stitch the HST and four patches in each row together, pressing SA in the direction of the arrows—away from your four patches.
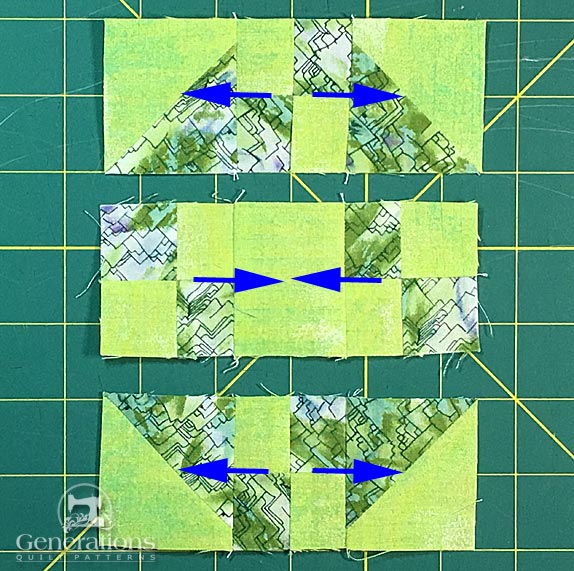 SA are pressed in the direction of the arrows
To finish the block, stitch the rows together. Use pins to help match the seams if you need them.
From the front our Prairie Queen quilt block looks like this...
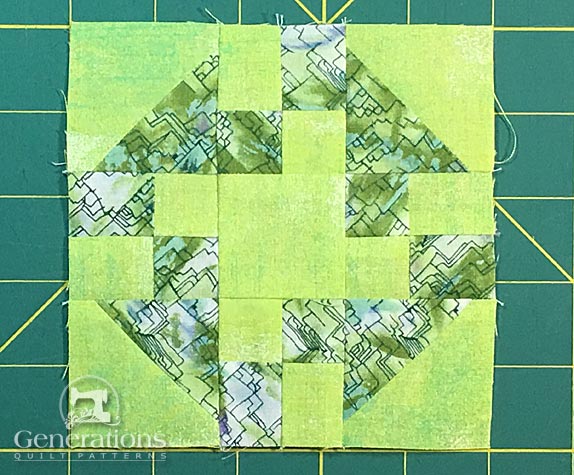
...and like this from the back. See how all the SAs nest.
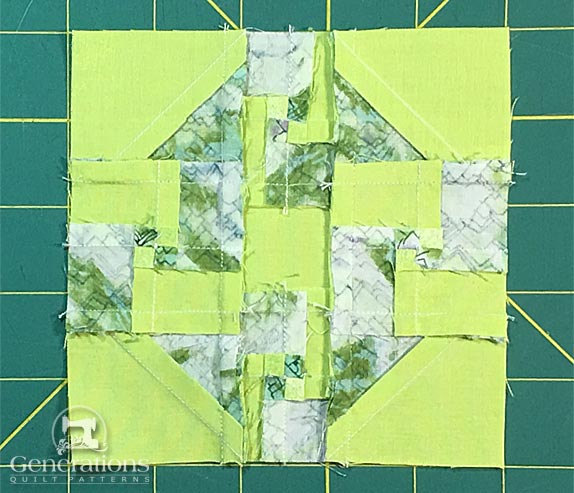
The immediate result of twirling or fanning the SA is reduced bulk in the center of the four patches.
An additional benefit reveals itself if you choose to make a quilt of only Prairie Queen blocks. The SA of the four patches automatically nest with adjacent ones when blocks are set edge-to-edge.
Nested SA make assembling the quilt top a breeze!
Behind every quilter is a huge pile of fabric...
The only way to whittle it down is to MAKE MORE QUILTS!!!
Look to our free Quilt Block Patterns Library for inspiration for your next quilting project!
What about a different quilt block?
For a list of all the 220+ quilt block patterns on this site, start here.
If you know the name of the block, shorten your search by using these links:
Click here if you're looking for blocks with at least some paper piecing.
Click here if you're looking for the basic building blocks of quilting, i.e., Flying Geese, half square triangles, quarter square triangles, etc., along with several techniques to make each.
And finally, use these links to find blocks in these finished sizes:
For even more blocks to make...
For you, are quilt block designs like potato chips...
...you can't have just one?!!
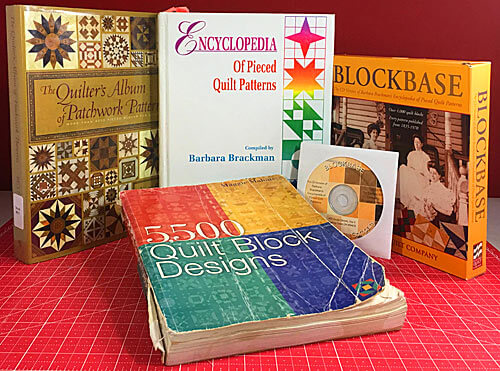
Check the amazing resources I rely on for all the quilt block designs you see on this website.
To see if they're worthy of a spot in YOUR quilting library, CLICK HERE.
