- Home
- Free Quilt Block Patterns
- Pinwheel Quilt Block
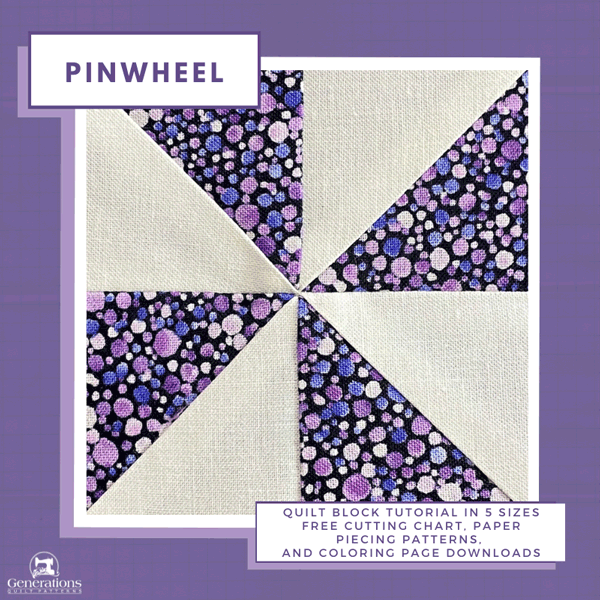
Pinwheel Quilt Block Tutorial: Whirl away your worries with paper piecing😌
Love ❤️ is to life 🌱 like the wind 💨 is to the Pinwheel 🎡
This post contains affiliate links, for which I receive compensation.
Ready to give your quilting projects an awe-inspiring boost? Try this classic pinwheel quilt block made with a twist - paper piecing!
You'll get all the charm of traditional patchwork designs, but with a lot less trimming.
Plus, you can still chain piece all the units. Perfect for when you're looking for something fabulous with minimal effort.
In this tutorial, you'll find:
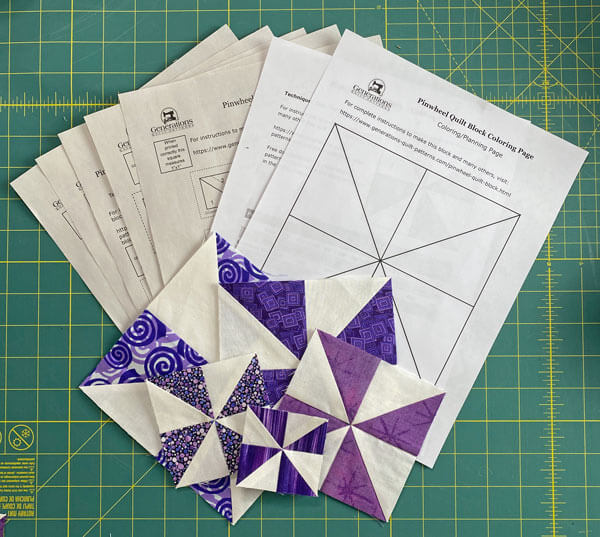
- A cutting chart in five sizes with downloads of the chart and block design
- Paper piecing patterns free to download and print for 2", 3", 4", 5", and 6" finished blocks
Ready? Cut. Sew!
📋 General Instructions
Several abbreviations are used on this page. They are:
- SA - seam allowance
- RST - right sides together
- HST - half square triangles
1/4" SA are used through this tutorial.
Pressing instructions are highlighted in yellow throughout this tutorial to make them easy to spot.
Download and print paper piecing pattern
You'll need the most current version of Adobe installed on your computer to download the pattern.
On the Adobe Print Menu page, under 'Page Size and Handling' set 'Custom Scale' to 100% before printing for accurate results. Click here to see what it looks like on the Print Menu page.
Choose your finished block size from the chart below and print 1 copy. You'll need 2 units for each block.
Print the Pinwheel Quilt Block | |
|---|---|
| Finished Block Size | |
| 2" | |
| 3" | |
| 4" | |
| 5" | |
| 6" | |
After printing, use the 1" square graphic on the printed page(s) to double check that your patterns printed at the correct size.
Cut 2 units from the copies. Don't worry about cutting on the dashed outside lines...just a bit further out from the outside dashes. There's no points for neatness in this step.

Not sure which paper to use?
Take a look at my review of several of the most popular brands available to us quilters on the market.
You want a super-easy paper to tear away—less stress on the stitches.
The newest quilt fabrics to tickle your fancy...
Click the images below to see the full collection. We share any commercial and/or free patterns that showcase them, too. (For inspiration, of course!)
✂️Cutting patches for a Pinwheel quilt block
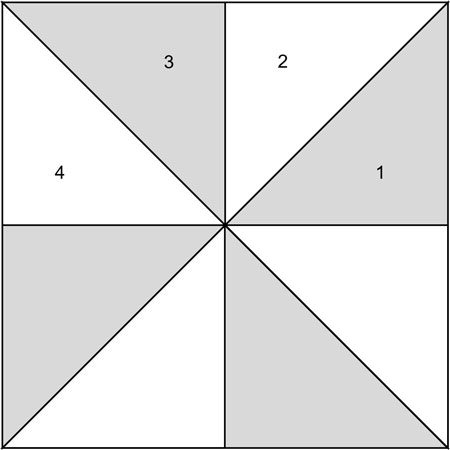 Pinwheel quilt block design
Sample Block Size: 4" finished / 4½" unfinished
Grid: 2x2
AKA: A popular quilt block is bound to go by lots of other names. If the name is blue and underlined, click it to go to the tutorial for a different block with that name. Pinwheel, Broken Wheel, Corn Design, Crow's Foot, Fan Mill, Four Leaf Clover, Fly, Kathy's Ramble, Millwheel, Mosaic #9 (Ladies Art Company), Old Crow, Sugarbowl, Watermill, Water Wheel, Windmill (Ohio Farmer, 1898)
Design Type: Pinwheel
To print a copy of the block design and cutting chart to use at your cutting table, click here.
After cutting, SUB-CUT all the squares on the diagonal from corner to corner, forming triangles.
 | Cutting Chart for a~ Paper PLUS Traditional Piecing ~ | ||||||
|---|---|---|---|---|---|---|---|
| Patch | Fabric | Qty | Finished Block Size | ||||
| 2'' | 3 '' | 4'' | 5 '' | 6'' | |||
| 1 | Dark | 2 | 2⅜'' x 2⅜'' | 2⅞'' x 2⅞'' | 3⅜'' x 3⅜'' | 3⅞'' x 3⅞'' | 4⅜'' x 4⅜'' |
| 2 | Light | 2 | 2⅜'' x 2⅜'' | 2⅞'' x 2⅞'' | 3⅜'' x 3⅜'' | 3⅞'' x 3⅞'' | 4⅜'' x 4⅜'' |
| Unfinished Block Size | 2½'' | 3½'' | 4½'' | 5½'' | 6½'' | ||
| Grid Size | 1'' | 1½'' | 2'' | 2½'' | 3'' | ||
Read this if you're using a directional print in your block
If you want the design to run all in one direction, sub-cut one square with the design positioned North/South (right), and one with it positioned East/West (left) as shown below.
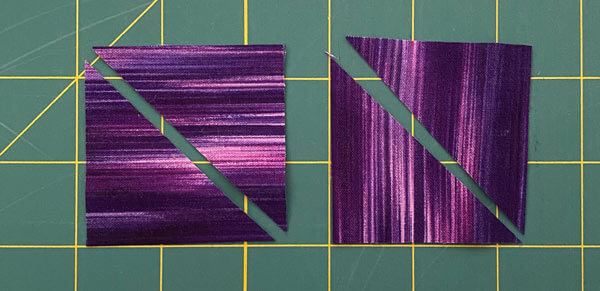
Then arrange the patches so that the prints in the #1 and #3 patches are all positioned in the same direction.
🪡Piecing the Pinwheel
It might seem strange to paper piece such a basic quilt block.
But if you're a 'sew them oversized and trim to perfection' like I am, you'll avoid a lot of trimming with this simple technique. Instead of checking and/or trimming 4 HSTs for a total of 16 cuts, you'll trim 2 units for a total of 8.
Each unit has two seam allowances to trim for a total of 4—and personally these are a lot faster to trim than the HST—still 4 less cuts than if you made the block from individual HSTs.
If you're making a bushel of pinwheels, that's a bunch of trim-time you're saving—not to mention the accuracy you'll get with paperpiecing.
Finally, all the seams in each unit cross the entire width of the pattern. You can chain piece all the seams if you'd like.
Pinwheel Unit
Make 2
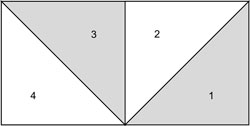
This image (right) shows the pinwheel unit from the fabric side after piecing.
Compare it to the paper pattern you printed. Notice how the numbers on the pattern start with 1 on the left-hand side of the unit?
Don't worry. This is correct because the unit isn't symmetrical color-wise,
General Sewing Machine Setup for Paperpiecing
- Reduce your stitch length to 16–20 stitches per inch (1.3-1.6 mm). This perforates the paper and stabilizes the seam when you remove the pattern. [Learn more about stitch length here.]
- Reduce your machine's speed or just plain slow down. Sew only as fast as you can stay on the stitching lines.
- Install an open toe appliqué foot (sometimes called an 'embroidery' or 'satin stitch' foot) if you have one (it's easier to see where you're stitching with one installed).
- Use a larger needle (90/14) if you have problems removing the pattern.
- If your machine has a needle stop up, use it. The stitching goes faster when you don't have to lift the presser foot with every seam.
- As you stitch each seam, start and stop a generous 1/4” before and after the solid stitching lines. ALWAYS. Future lines of stitching secure the ends.
After adding each patch, press the unit as it was sewn to set the seam and then open. The SA is automatically pressed towards the last patch added.
Before adding the next patch, take a look to make sure the one you just added covers the space plus seam allowance that it is supposed to.
Steam is optional and usually curls the pattern.
If that bothers you, don't use steam. Sometimes I do. Sometimes I don't.
It truly depends on my mood.
Remember, as you follow this paper piecing tutorial, the printed and the fabric sides of this block are mirror-images of each other.
At last!
Let's sew!
Use a little dab of Elmer's Washable Glue stick to position the darker #1 triangle on the unprinted side of the pattern. Use the dashed line (that runs through #2 on the pattern) to quickly and accurately line up this first patch. This dashed line represents the 1/4" seam allowance.
Patch #1 extends past the outside dashed lines of the unit by roughly 1/4". Since we're going to trim to perfection, we want something to trim.
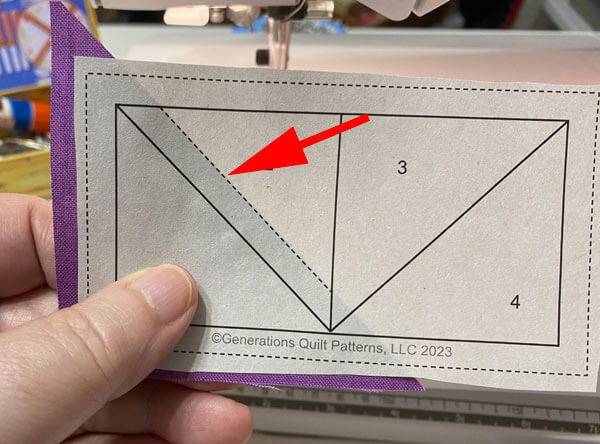 #1's long bias edge aligns with the dashed line running through #2 and extends past the outer edges of the block.
With RST, align the long bias edge of a #2 with that of #1.
Piecing Tip: Are you concerned about a dark fabric shadowing through a lighter one like our #1 and #2 patches?
When you're adding a light triangle over a dark one, simply nudge the lighter one a couple of threads past the edge of the dark one. (red arrow) That way you won't need to go back and trim away any of the darker fabric.
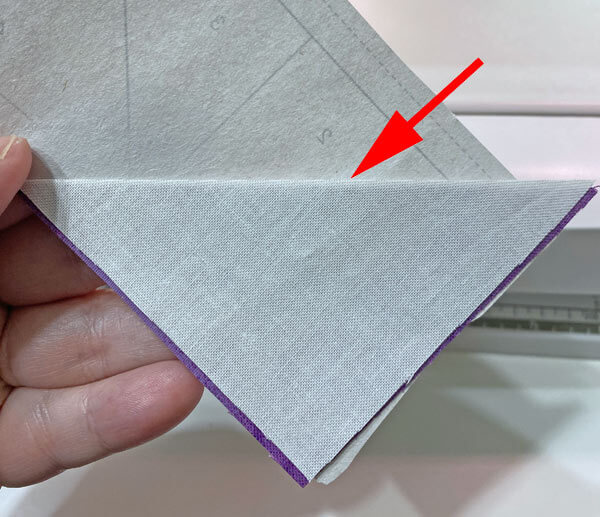
Sew the seam starting and ending past the outside dashed edges of the unit.
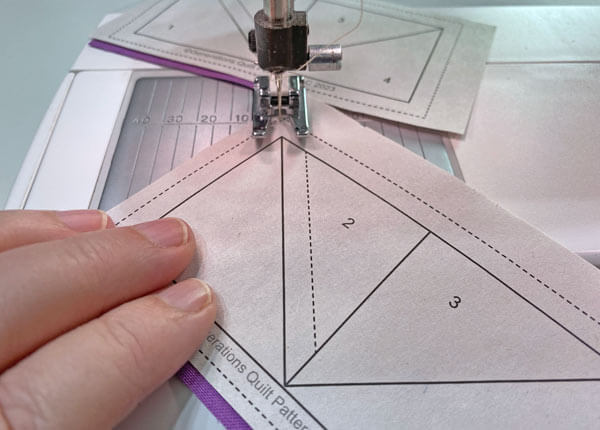 Chain piecing the seams between #1 and #2
Press.
To establish the perfect positioning for #3, at your cutting mat with the unit paper side up, fold the pattern back on itself along the seamline between #2 and #3.
You will be pulling the paper away from the seam at the outside edge—at the bottom of the unit (at the '4' on the ruler you can see it).
This is normal.
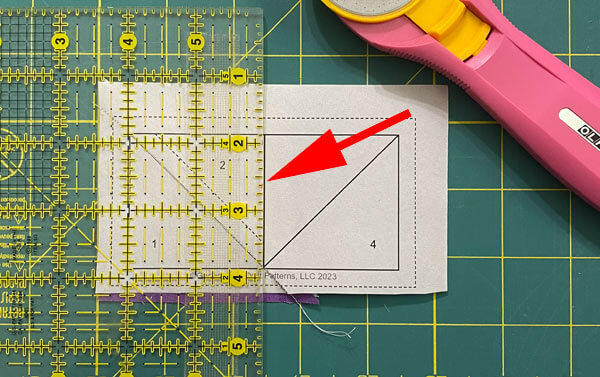 Position your ruler over the solid stitching line and fold back on the line.
Position the 1/4" marking on your ruler directly over the fold and trim away the excess fabric.
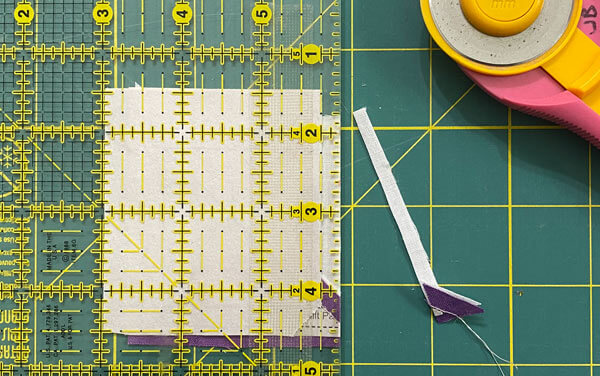 At the bottom, it was necessary to pull the paper away from the stitches to fold the paper back.
You've now created the perfect 1/4" placement (red arrow) for the #3.
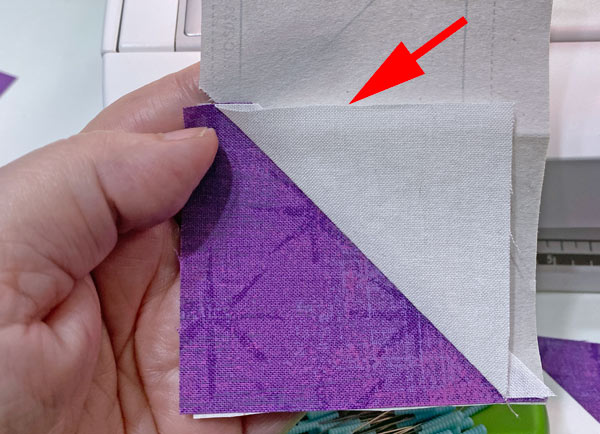 A perfect placement edge is a beautiful thing!
Back at your sewing machine, with RST, line up #3 with the just-trimmed edge of #2.
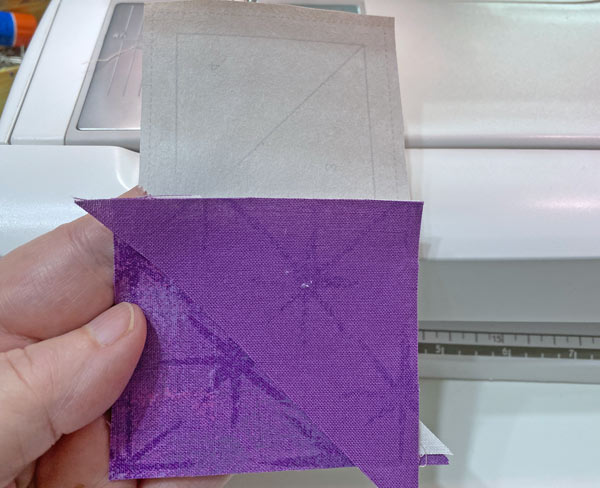
Hold the patch in place with your fingers to check that it opens and covers the #3 space. Once you're in your rhythm you won't need to check every time. At the start it's helpful 'cause who wants to start out a session of paper piecing by ripping out the first couple of patches.
Again, start and end the stitches for this seam past the outside dashed lines.
Press.
And trim just like we did after adding #2.
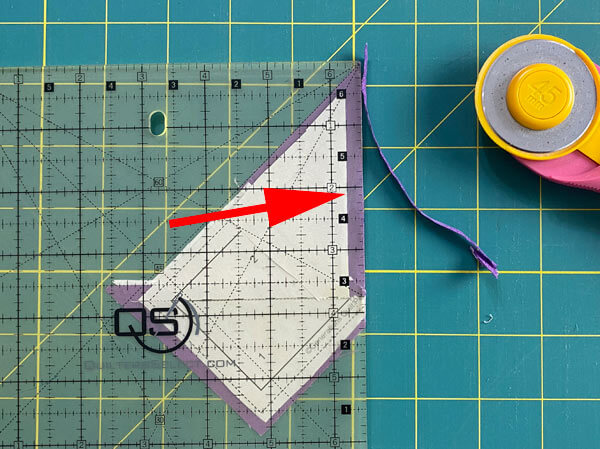 Align the 1/4" line on the ruler with the folded edge of the pattern
With RST, position the long edges of #4 with #3 and stitch just like we've stitched every SA.
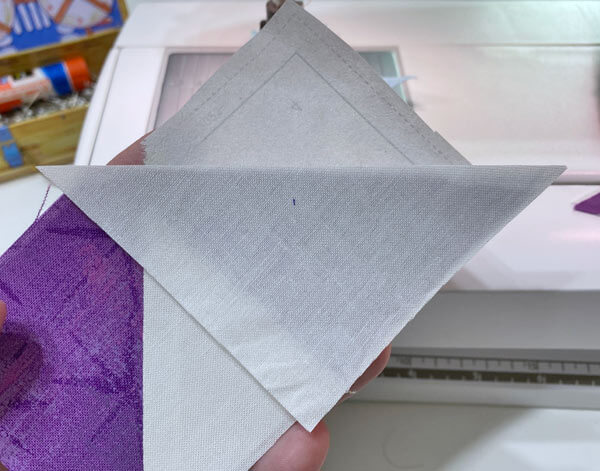 I've nudged the edge of #4 a bit to avoid this any shadowing of the darker #3
Press.
Repeat these steps for the second unit.
All that's left is to trim these little beauties to the perfect size.
Back to the cutting mat, paper side up, line up the 1/4" marking with the inner solid line and trim away the excess.
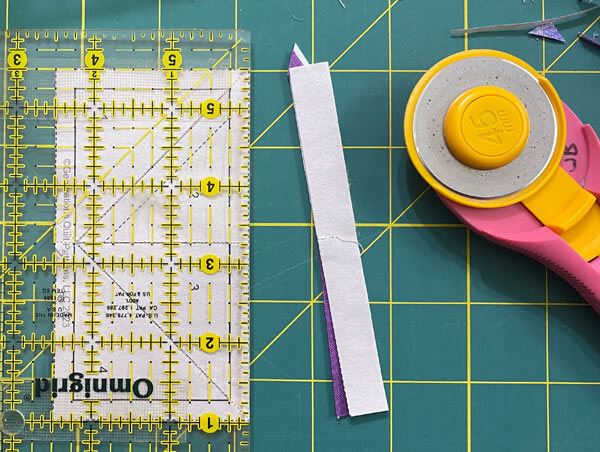
After trimming the hot mess of a unit (left), you've got perfection (right)!
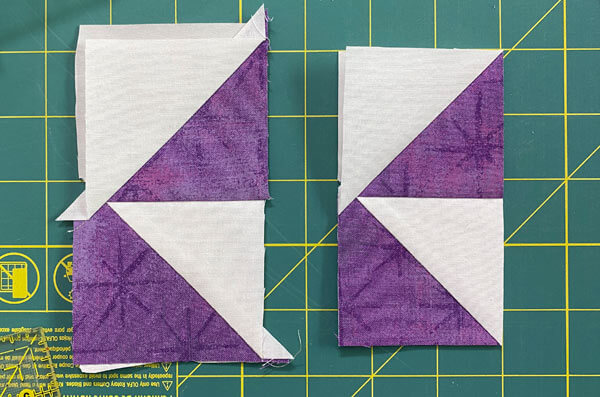 Paper pieced blocks always clean up so nice, don't they?!!!
Repeat for the second unit.
We cut our patches, so that the outside edges are all on the straight of grain. That means we can remove the paper pattern now—no bias to worry about stretching out of shape. It's so much easier to remove the paper without that final SA in the way.
Use a tweezer if you need to remove any bits that are left in the angles.
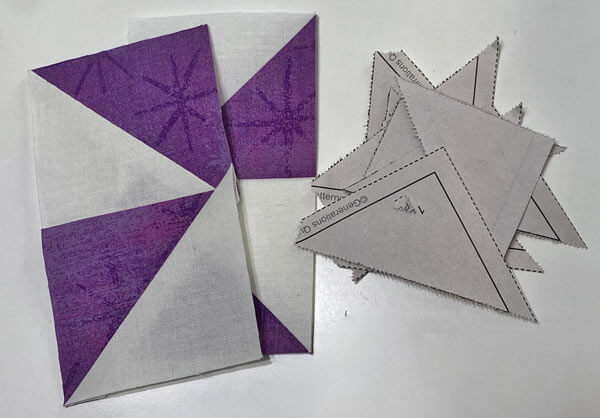

The paper piecing is complete. From this point forward, return your stitch length to the one you regularly use for piecing and install your favorite 1/4" presser foot.
🧩Assemble your Pinwheel quilt block
Arrange your units to make sure you've got the center points in the center.
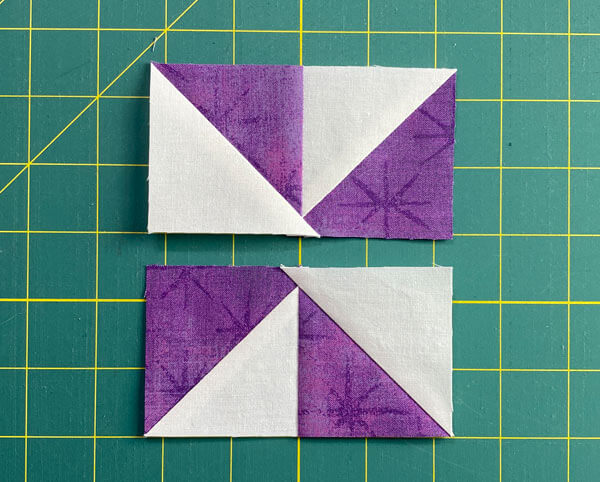
Use a pin through the points in the centers to line everything up. The seams will nest for a bit of extra help.
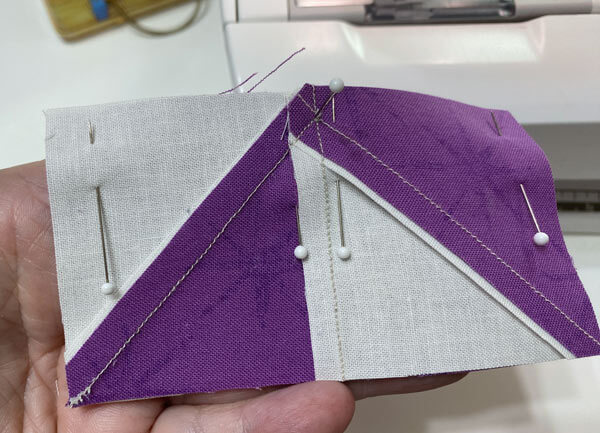 When you pin, try to avoid catching the seam allowances in your pinning. The unit lays flatter and is easier to stitch.
After sewing, open the block to check for a good match. When you're satisfied, give your Pinwheel quilt block one last good pressing.
And here is our finished Pinwheel.
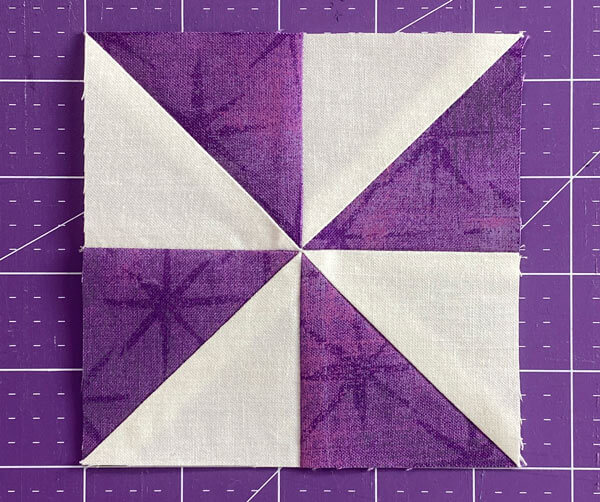 Voila!
Here it is from the backside.
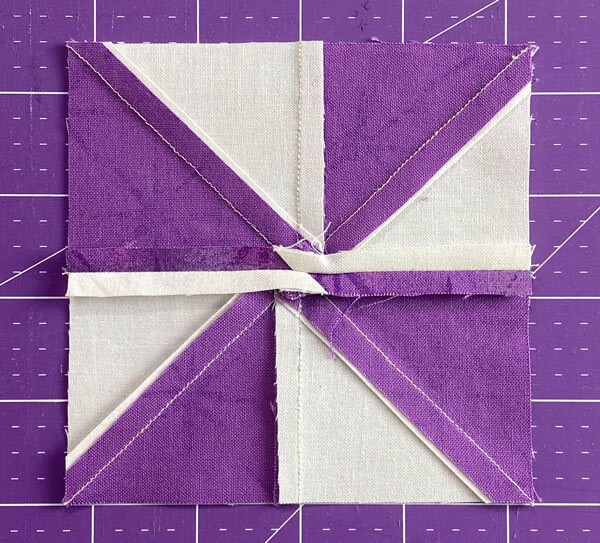 You can see how I've nudged out the white patches so that the darker purple won't shadow through the quilt top.
Remember to go back and download all the free goodies in this tutorial!
A little trick to do with this pattern
If you've been quilting for a while, you've probably come across the idea of taking parts of quilting stencils to make new quilting designs.
There are opportunities to do the same thing with paper piecing patterns.
Do you make scrappy Flying Geese...ones that are made from 2 HST pieced together?
Then this is your pattern!
The only thing to be aware of is the direction of the seam allowance. Renumber the order of piecing to meet the needs of your pattern.
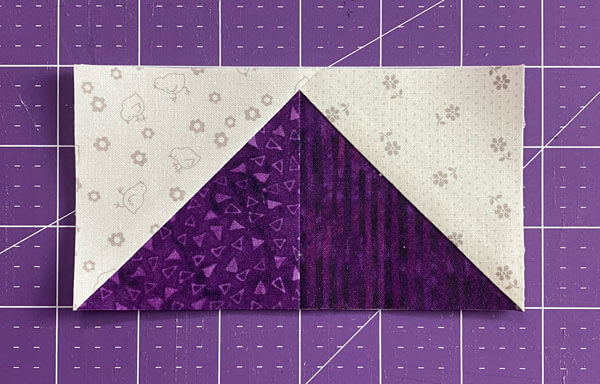
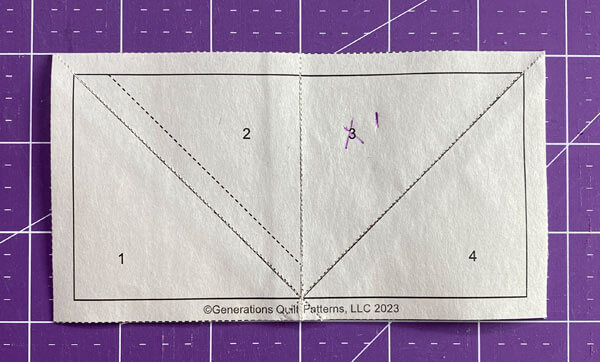 If you're making a lot of these, note the new #1 patch and ignore the dashed placement guide that goes through #2. This sample is fully stitched and trimmed to size.
Here's our scrappy Flying Geese sample from the front. I used 2 low volume backgrounds for the sky and 2 dark purples for the Goose.
Whirl Wind Winner: Celebrating Your Pinwheel Progress! 🏆💨
You've mastered the Pinwheel quilt block with paper piecing precision. 🎯🧵From 2" to 6", your quilting journey is spinning into high gear. 🌀
Keep that creative breeze blowing and watch your skills unfold! 💨✨
Until next time, may your fat quarters multiply and your UFOs diminish. 🧺📉
📌Caught in a creative whirlwind?
Pin this tutorial for later and let the inspiration keep spinning! 🎡📍

🌀More playful pinwheel quilt blocks to stitch!
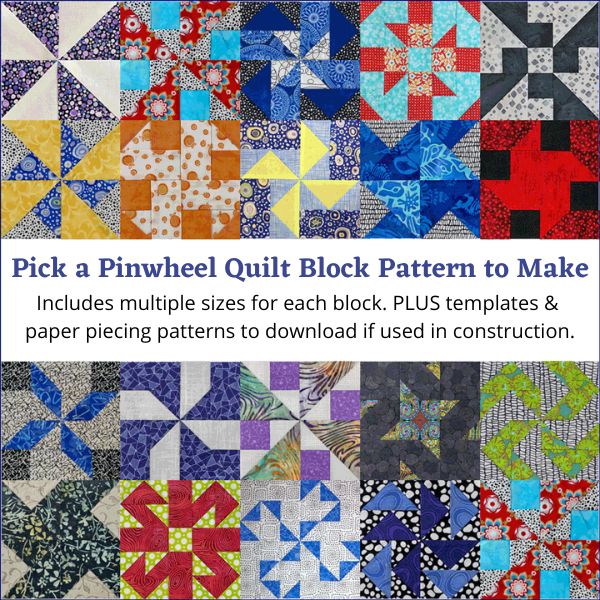
You've finished your pinwheel quilt block, and you're ready for more!
Our pinwheel quilt blocks are a delightful blend of playful interlocking patterns and vivid, eye-catching color. The interlocking patterns dazzle your eyes and inspire your creativity, while our step-by-step instruction ensures that you can create these stunning blocks with ease.
Click here to dive in and turn your fabric into MAGIC!
For even MORE blocks to make… 🧩🎨

...visit our Free Quilt Block Pattern Library, with over 260+ blocks to choose from in multiple sizes.
Free downloads are included in all sizes for any blocks require paper piecing patterns or templates.
- Home
- Free Quilt Block Patterns
- Pinwheel Quilt Block
