Perfect Points for Impeccable Patchwork
Quilting like a Pro—Surefire techniques to piece, pin and press perfect points
This post contains affiliate links, for which I receive compensation.
A reader writes asking:
"What techniques are there to match all the points in a Storm at Sea patchwork design (or other pattern with lots of points)? How do I get the points in the diamond pieces perfect and even?"
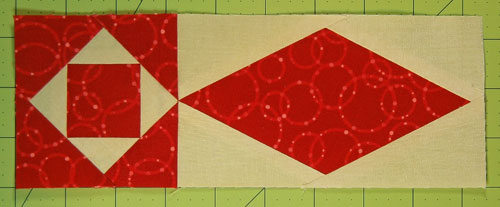
The answer to her question...
...comes in three parts:
- Do a good job piecing the units in the quilt block so that the points are exactly where they should be
- Pin consistently to match those points, and
- Press to fine tune your perfect points.
I speak directly from my own experience.
Others, I'm sure, will have different answers. Testing what works for you is the best way to find out what works best for you.
In general, I have very few blocks of time to spend quilting. I must grab the little bits of found time and stitch them together to make a quilt these days.
When you don't have regular practice—and quilting is all about practice—you may need to compensate for lack of honed skills.
The following tips and techniques are how I compensate. Maybe they'll work for you, too!
Piecing for Perfect Points
No matter how tired I might be or discombobulated my quilting time is, one thing that I CAN DO
reliably is sew on a printed line. The more consistently I'm on that
line—especially at the beginning and ending of it—the easier it will be
to piece either the units of a block together or the blocks, themselves,
into a top.
So I do a lot of paper piecing.
On
this website, you'll find a fair number of 'building block' units for
which I've provided paper piecing patterns. That's because I use them
regularly in my own quilting projects, substituting them into patterns
that I've either purchased or designed myself.
That's why the Storm at Sea block patterns on this site are paper pieced.
I've
used the Tri-Recs rulers (shown here) in the past and really liked them. I use
connector corners frequently, but don't care for the waste of fabric in
general, and rarely sew out the 'bonus' half square triangle from the
excess (I mean, seriously, who needs more 'stuff' in a box to save and
sort).
So paper piecing (for me) is the one way that I can make perfect units
regardless of how tired or distracted or seriously out of practice I may
be. Perfect units make for blocks that go together slick as a whistle.
I'm also willing to trade 'mindless-idiot' time in front of the ol' boob-tube ripping off the paper for that accuracy.
To help myself even more, I'm a huge fan of heavily starching my fabric
before cutting.
I believe my cuts are more accurate.
I love that I can frequently fingerpress my seams instead of jumping back and forth to the iron all the time—saving time with less interruptions.
And I get perfect points almost always the first time.
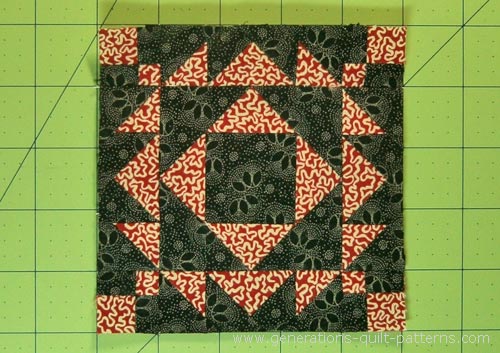 This finished block measures 4-1/2"
For blocks with lots of half square triangles in them, like the Eva's Garden above, I'll paper piece those HST borders, too. The accuracy of the units and the ease with which they go together more than compensates me for the time spent removing the paper pattern.
I have Electric Quilt 8 software and regularly use it, so quickly creating a pattern isn't a time-suck for me.
What about traditional piecing techniques?
While I prefer paper piecing, when it comes to traditional techniques my three biggies for creating accurate blocks with perfect points are:
- Prewashing my fabric:
Then I know exactly what the fabric is like that I'm choosing to spend
time with. If it doesn't wash well, or bleeds a lot, it will never make
it into one of my quilts. [Learn more about prewashing...]
- Heavily starching my fabric before cutting: This makes cutting more accurate. Since I prefer a quarter inch foot with a guide, the heavily starched fabric butts up against that guide perfectly, making for a better 1/4" seam. [Learn more about starching...]
- Pinning: I pin virtually everything. A sewing machine, by nature, wants to pull the two layers through at slightly different rates. Pinning insures that the ends meet—always.
- Pressing: I press as I go using this amazing technique. Flat units and blocks are much easier to work with.
Pinning for Perfect Points
So now that I've created as perfectly pieced a unit or block as possible, where it's important that the points match, I pin.
My two tips are:
- Use fine pins to minimize any distortion during pinning. My favorites are IBC Super Fine Pins (shown here). Magic Pins also makes a super fine pin, even finer than IBC, but they are too rich for my pocketbook.
- Make sure the 'matching' pin is inserted perpendicular to the fabric layers and not at an angle.
For
our Storm at Sea block, you are repeatedly matching the point of a
Square in a Square (or Economy Block) to the point of a diamond in a
rectangle.
I generally don't care which unit is on top when pinning, though I prefer that the same unit is on top for a session of pinning.
It's more efficient that way.
Remove the paper before sewing units together. Using starch and pre-cut patches ensures that the outside edges are on the straight of grain and won't stretch.
There's no benefit to leaving the paper in place.
Install your favorite 1/4" foot and adjust the needle position as necessary to ensure a perfect seam allowance.
With the two units to sew together, from the back side of one, insert a pin perpendicularly through the unit so that the point comes out on the front exactly at the deepest point of the valley of the patches.
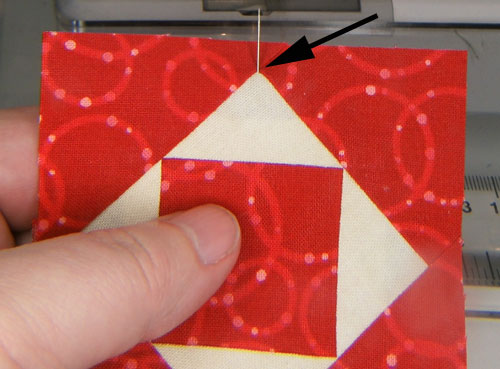
It must be perpendicular and it must be coming out the right side at this point. Where it goes in on the back side—not so important, though in the photo below, it does look pretty good.
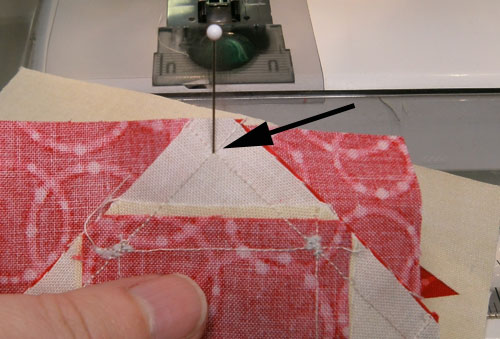
Now insert the point exactly in the deepest point of the valley on the second unit.
It should pierce this point so that the pin is perpendicular to the fabric.
This might seem nit-picky, but when being off by a couple of threads can effect your perception of how good the match is, it's these little things that make all the difference.
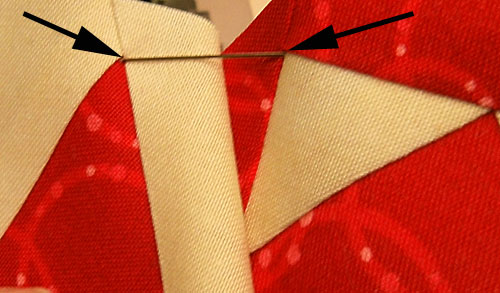 The pins are at an angle here so that you can see them.
Pull the two units together on the pin, again making certain the pin is perpendicular to the layers.
Why all the fuss about 'perpendicular'?
If the pin is perpendicular, that means the points are exactly lined up on top of each other and you'll have a perfect match after you stitch.
If they're not lined up when you stitch, nothing will make it perfect except for ripping out the seam and trying again.
Insert pins on both sides of the original one through the fabric layers. It's important to catch the layers of the unit, but if you can avoid pinning through the seam allowances, do so. There's less distortion that way.
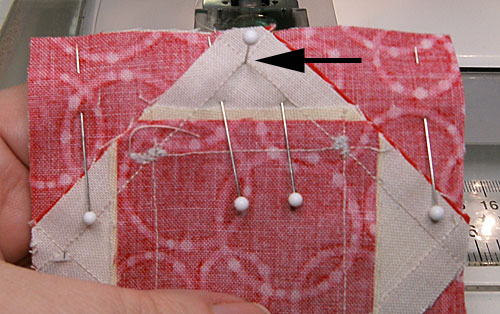
Match the edges of the units and pin, adding more if you need them. (This is about what makes you comfortable in your stitching.)
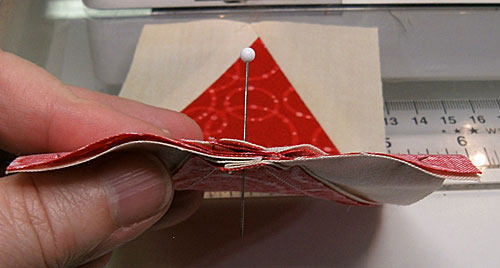 The pin is perpendicular to the patches.
Sew the quarter inch seam with your favorite foot. (Some quilters prefer to baste the match point first and check it. If it's a good one, then they restitch the seam at a normal stitch length. I prefer to just go for it.)
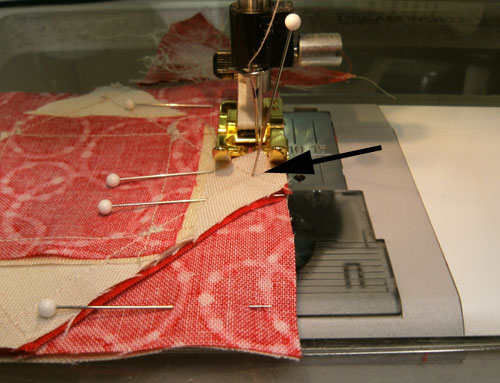
After stitching, check your match at the sewing machine.
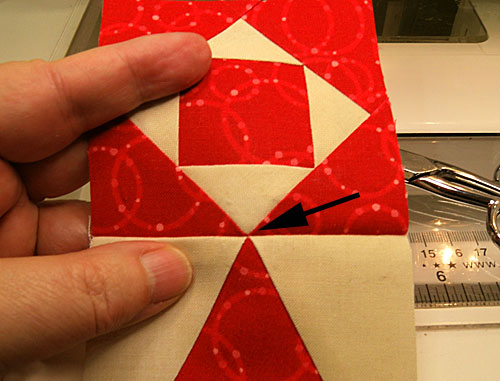
So if the units are so perfect with paper piecing, why do I pin?
Quite simply, I'd rather pin than rip.
A certain number of matchings are going to be off enough that this ol' perfectionist is going to re-do the seam even if they're paperpieced.
Anything, simply ANYTHING that minimizes this makes me feel better about my quilting.
And honestly. When I know that I've done a terrific job sewing on the line, I will pin the units together, nesting seam allowances where possible, skip the points and just go for it.
When everything is matching as I want, there's not reason to add extra steps. But it's good to know how to get things to match when you need it.
Do only as much as you need to get the results you want to achieve.
If you came to this page from Essential Paper Piecing Skills for the Savvy Quilter click here to return to that Table of Contents.
Pressing for Perfect Points
After I've decided if the match passes muster and the points are perfect, it's time to press.
First press with the patches as they were sewn, in the closed position. Then I open the patches, pressing either to one side or open.
Early
on in any project I decide on the pressing directions of the seam
allowances, preferably in my practice blocks.
Generally, press to avoid bulk if you'll be quilting the finished patchwork on your home sewing machine.
Frequently this means pressing seams open. Here, however, the seam allowance is pressed toward the red/darker fabric.
 Seam allowances are press towards the Economy block
Sometimes the difference between good-looking perfect points or an iffy match is whether the seams were pressed open to to one side. Sometimes it's which side the seam is pressed towards. That's just how quilting is.
And finally, use this pressing technique for impeccably flat patchwork.
And that's all there is to it.
Piece accurately, use pins to match point to point and press to perfection.
Practice these techniques and you'll be stitching perfect points in no time!

