Essential Paper Piecing Skills for
Beginning Quilters
An Introduction
Practical techniques for the savvy Quilter!
This post contains affiliate links, for which I receive compensation.
Paper Piecing doesn’t have to suck.
It's true!
Learn the simple techniques and tricks to add this infinitely helpful skill to your traditional or modern or art quilting arsenal.
These are the paper piecing techniques I use to streamline the process and avoid unnecessarily ripping out patches that were either too skimpy or poorly positioned.
No matter what pattern I'm using.
It really is that simple
No matter how simple or complex the paperpiecing design, one patch is always added to another with a straight seam.
Over and over and over again.
Until the block or unit is finished.
These techniques are applicable to every single paperpiecing pattern—from those you download freely from this site to those you purchase elsewhere.
First let's foster the proper mindset—whether you're a committed paperpiecer, or considering using the technique, or have a love/hate relationship with it already.
If you're already primed and in a 'paper-piecing-state-of-mind', then click here to skip to the Table of Contents and choose your topic.
Or go straight to the Free Paper Piecing library (that include at least some paper piecing) found here on this site and choose a pattern to play with.
Otherwise, let's get into the proper head-space for your paper piecing breakthrough!
Getting into the proper head space
Let the power of paper piecing work for you!
Many quilters shudder at the idea of paperpiecing—they HATE and RESIST removing the paper!

It wastes time.
It wastes fabric.
Blah. Blah. Blah.
Think instead of this technique as a trade-off—a problem solver—that for an extra bit of fabric and paper and possibly some time, it helps you to:
1. Make more intricate quilts...
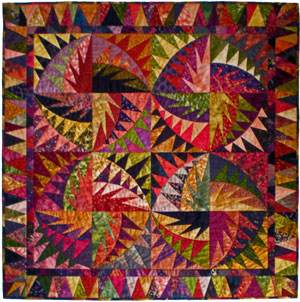
...(i.e. Mariner's Compass, New York Beauty) that most wouldn't dream of attempting with rotary cutting and templates. Would you?
It'd be just too much darned work.
In Untitled below, all the arcs are paper pieced, as is the border. Simple curved piecing to fit the arcs together and VOILA! ;)
That's the power of paper piecing.
2. Compensate for a 'tired mind'

Most of my quilting time is stolen from the end of a day—not the beginning when the brain is fresh—how about you?
No matter how tired, we CAN stitch on a line by setting our machines' speed a bit slower—slow enough that you are always in control.
Voila!
Sewing time is reclaimed.
Ripping is banished.
It makes for a much happier quilter who gets stuff done that STAYS done!
That's the power of paper piecing.
3. Save time, especially if you're a 'sew it bigger, then trim to perfection' kind of quilter...
...for standard units like Flying Geese and half square triangles. You eliminate a lot of the bo-o-oring trimming.
Need a bunch of half square triangles (HST) sewn together?
Try paperpiecing them in a continuous strip. Then trim the whole group of them just once—not individually for each half square triangle.
 Perfection!
The patches for the 6-HST unit above are cut oversized, then stitched and pressed.
Only after all six HSTs are pieced together in one continuous strip are the outside four edges trimmed—not each individual HST's four edges—4 cuts vs. 24 cuts.
That's 20 fewer cuts per strip of 6!
And the six are already stitched together.
Perfectly.
The first time.
A HUGE time savings.
That's the power of paper piecing.
And the technique isn't limited to HSTs
Here's FOURTEEN Flying Geese paperpieced as a single unit—it's so much faster and more accurate to trim once around the outside of the 14-Geese unit instead of 4 cuts around each single Flying Geese AND THEN have to pin and stitch them all together.
To make things even better since you sewed slow enough to stay on the stitching line, ALL the points are perfect.
Perfect units are sew much easier to stitch into a quilt top.
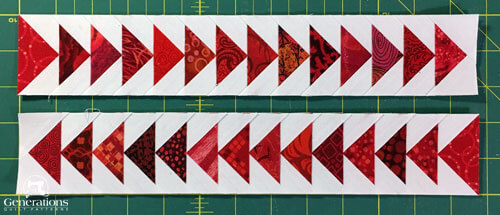 Love the ease of perfect points with this technique
This particular pattern has 64 of these 14-unit Flying Geese.
If you make those Flying Geese individually, that's a total of 896 Geese to trim with 4 sides each for a total of 3,584 trims (64 x 14 x 4 = 3,584).
With paper piecing, only 64 units (like the 2 shown above) are trimmed on four sides for 256 (64 x 4 sides) swipes of the ruler.
That's quite a time and 'wear-and-tear-on-the-old-chicken-wing' savings!
And seriously.
There's no way I could keep my mind on the task for 896 of the little beauties.
Could you?
All that pointy, quilty-goodness in exchange for a bit of extra fabric, sewing on a line and ripping off a pattern.
What's not to love???
That's the power of paper piecing.
4. Sew more accurately in exchange for some paper removal
Rip paper—that's what I do during the mindless-idiot time spent in front of the ol' boob-tube.
Or when I'm waiting for my husband's surgery to finish.
Or when I don't feel like thinking/concentrating/sewing at Sew-In Sundays with my quilting-sisters-in-crime.
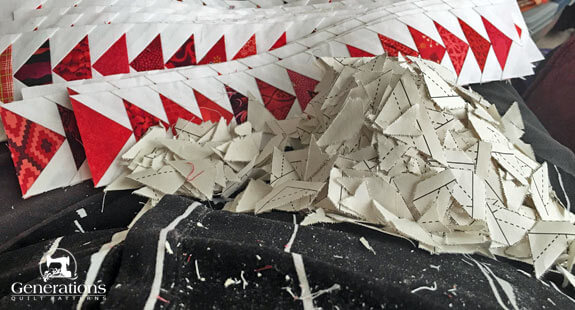 A fresh latte, some paper to remove and a new 'Shetland' series on Amazon Prime—the makings of a perfect afternoon!
Now that's something to show for my time.
Sweet!
And painless!
That's the power of paper piecing.
5. Make pictorial-type quilts
Unless you want to applique the whole thing or spend your life cutting templates, it's the perfect method for pictorial quilts like "English Roses"...
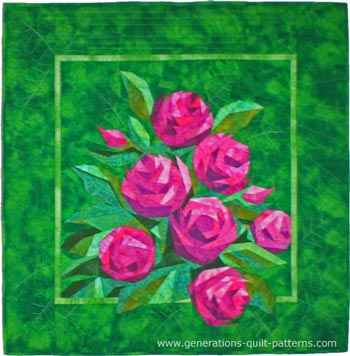 "English Roses"
Pattern by Eileen Sullivan of The Designer's Workshop
Quilt pieced and quilted by Julie Baird
...hands down.
And, that's the power of paper piecing.
My wish for you...

...is that you see this technique as simply a trade-off, too, so that you add this versatile technique to your own quilting bag-o-tricks!
Our Perfect Your Paper Piecing series is meant to help you learn how to make your quilting time more efficient.
More productive.
More gratifying.
Are you in the mood now?
Finding your way around...
Essential Paper Piecing Skills for Beginning Quilters is a series of articles that breakdown paper piecing into bite-size, consumable 'knowledge bombs'.
As pages are uploaded to this section, the titles below turn into bold, blue, underlined links that are clickable.
Use them to skip around to the various techniques as you need them. (For your convenience, a link to this Table of Contents is found at the bottom of each page in this continuing series of articles.)
- Pattern preparation
- Precutting paper piecing patches
- Preparing for the first patch
- Sewing a sturdy seam
- Chain piecing
- Backstitching
- Trimming seams to create placement guides
- Ripping/mending
- Pressing
- Pinning for Perfect Points (opens in a new window)
- Practice your new found skills on one of the blocks from our Free Paper Piecing Library
A word about the free printable downloads...
...for you on this website.
For blocks that contain at least a bit of paper piecing, check out our Free Paper Piecing Block library.
Look for the cute blue graphic (shown below) on each tutorial page if you need helping printing the patterns correctly.
You are free to print as many copies of each pattern as you'd like for your own personal use.
Mix and match to your heart's desire!
If your friends would like copies, please send them back to this site to print their own. (The traffic to this website provides the income to continue to provide these free-to-you resources.)
It is my experience copies printed directly from the computer are way more accurate than Xeroxed copies—and paper piecing is all about achieving reliable, reproducible accuracy.
My Favorite Quilt Design Software
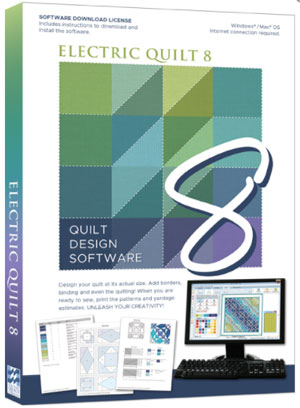
All the free patterns and block/quilt illustrations on this site were created in either EQ7 or EQ8—my favorite quilt design software.
This program makes it so easy to audition different
colors and values with just a few mouse clicks.
Rotate and flip the blocks with another series of clicks.
I can't imagine going back to graph paper and colored pencils.
Or worse yet—simply keeping my fingers crossed. Fabric is much too expensive!
The box contains a software download license—License ID and Password—and a booklet to get you through installation and get you started. There is no disk as in the past.
Download the software onto your computer from the EQ website using the ID and password as directed. At the time of download you can choose either PC or MAC.
I LOVE Electric Quilt!
I hope you do to.
Return to the Essential Paper Piecing Skills for Beginning Quilters Table of Contents to choose your next topic.
OR
For blocks to try paper piecing, check out for Free Paper Piecing Block Library where each design is at least partially paper pieced.
