- Home
- Free Quilt Block Patterns
- Paper Pieced Flying Geese
Paper Pieced Flying Geese: A Beginner's Guide to Perfect Points
Includes Singles, Pairs, and Trios of Geese
This post contains affiliate links, for which I receive compensation.
You can't argue with perfect points. Every. Single. Time.
That's why paper pieced Flying Geese are at the top of my techniques list for this unit.
And if you trim after stitching, there's a lot less of that, too. Only once around a flock of three, instead once around three individuals.
That's 8 fewer cuts.
For each trio.
It's my preferred method of choice ANY TIME there's Flying Geese to make.
A specialty ruler?—Tried them. Just another ruler to store and instructions to keep track of.
Another creative technique?—4-at-a-time is great, I've even added instructions to make them oversized to cut to perfection, but you've still got angles and points to measure when you're trimming. That just takes extra time. More to remember.
I don't know about you, but there's more quilts in my head than there's time to make them.
Cutting patches with your rotary cutter?—I'm pretty good stitching up the first few, but then my accuracy flies out the window and heads south for the winter.
Folded corners?— Same thing…and there's the extra bulk unless you trim it out.
Now, if one or more of these techniques is a favorite method of yours, then, by all means, do it with gusto!
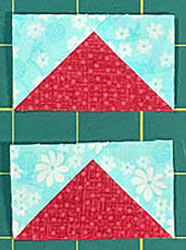
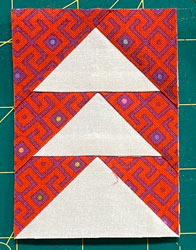 Flying Geese Trio, the tutorial and patterns are on this page
It's important you use techniques that are comfortable and make sense in your workflow.
And if paper piecing just isn't your thing?
You'll find lots more ways to make Flying Geese here—even a little 3-D beauty—if you're interested.
The purpose of this tutorial
To provide a quilter—who isn't happy with her current Flying Geese results—with another option to achieve the accuracy and efficiency that she craves.
Another tool in the ol'quilters toolbox is always a good thing.
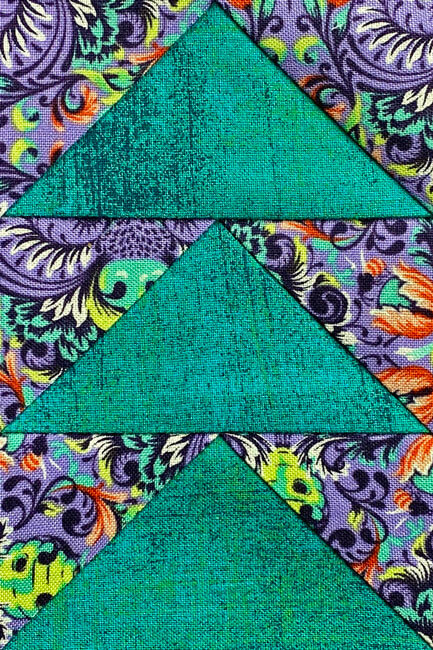 Three Flying Geese...a trio!
Beginner-friendly, illustrated instructions are the backbone of the tutorial. But there's more free goodies available for you to help. They are:
- A cutting chart in five sizes, with downloads of the chart and block design
- Quilting on hold for now? Bookmark or Pin this and flock back when you can!
Cut. Sew. Press. Abracadabra your fabric!
General Instructions
Several abbreviations are used on this page. They are:
- SA - seam allowance
- RST - right sides together
- HST - half square triangles
- QST - quarter square triangles
A 1/4" SA is used in this tutorial.
Highlighted in yellow, pressing instructions are easy to spot.
To press, first press the patches in the closed position as they came off your sewing machine. This sets the seam, melding the fibers of the threads into the fibers of the fabric.
They are then pressed towards the last patch you added.
Consider starching your quilt fabric before cutting
It makes your cuts more accurate. You can fingerpress seams, so you needn't bounce up and down to the iron so much.
I like a 50/50 solution of StaFlo Liquid Starch Concentrate to water. Starch in a spray can is more convenient but costs more.
Download and print paper piecing pattern
To download the pattern, use the most current version of Adobe.
For accurate results, on Adobe's Print Menu page, under 'Page Size and Handling' set 'Custom Scale' to 100%. Then print.
Click here to see what it looks like on the Print Menu page.
Find your finished block size from the chart below. Find the corresponding number of units on each page. Compute how many pages you'll need.
Download and Print | |
|---|---|
| # of units per page | Finished Size |
| 6 | 2" x 3" |
| 4 | 2½" x 3¾" |
| 3 | 3" x 4½" |
| 2 | 4" x 6" |
| 1 | 5" x 7½" |
| 1 | 6" x 9" |
After printing 1 copy, use the 1" square graphic on the printed page(s) to double-check that your patterns printed at the correct size. Continue printing the rest.
Then cut out the required number of patterns from your copies. A rough cut is good enough—an 1/8"-1/4"-ish away from the outside dashed rectangle.
I store any leftover patterns in plastic sheet protectors in a notebook. Filed by size, it makes them easy to find the next time I have a need for them.
Not sure which paper piecing paper to use?
Click here for "Does it really matter which paper piecing paper you use?" to help you make the best decision for your needs.
The newest quilt fabrics to tickle your fancy...
Click the images below to see the full collection. We share any commercial and/or free patterns that showcase them, too. (For inspiration, of course!)
Step 1: Cutting patches for this Flying Geese unit
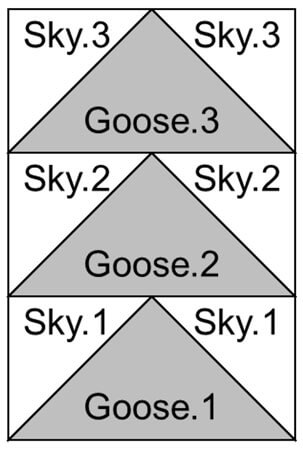 FG Trio unit
Sample Block Size: 3" x 4½" finished / 3½" x 5" unfinished—this is marked on the individual patterns
Grid: 2×3
Design Type: Paper Piecing | Basic units
Please label all your patches. We use their numbers throughout this tutorial.
Like any other quilt unit with points, watch the contrast between your fabrics.
For instance, a large floral might be perfect for one fabric. Should the other fabric contains some, or all, of the same color, some of those points might accidentally disappear.
If you only need a few units, you could fussy cut to avoid this problem. If you're cutting a whole quilt of blocks, that might be too much work for the result.
Only you can decide.
To print a copy of the block design and cutting chart to use at your cutting table, click here.
NOTE: For a single Trio, you'll have one leftover subcut patch from the Goose fabric.
 | Cutting Chart for a~ Paper Piecing ~ | |||||||
|---|---|---|---|---|---|---|---|---|
| Patch | Fabric | Qty | Finished Block Size | Sub Cut | ||||
| 2" x 3" | 3" x 4½" | 4" x 6" | 5" x 7½" | 6" x 9" | ||||
| Goose | A | 1 | 3¾'' x 3¾'' | 4¾'' x 4¾'' | 5¾'' x 5¾'' | 6¾'' x 6¾'' | 7¾'' x 7¾'' | |
| Sky | B | 3 | 2⅜'' x 2⅜'' | 2⅞'' x 2⅞'' | 3⅜'' x 3⅜'' | 3⅞'' x 3⅞'' | 4⅜'' x 4⅜'' | |
| Unfinished Block Size | 2½" x 3½" | 3½" x 5" | 4½" x 6½" | 5½" x 8" | 6½" x 9½" | na | ||
| Grid Size | 1'' | 1½'' | 2'' | 2½'' | 3'' | na | ||
Subcutting
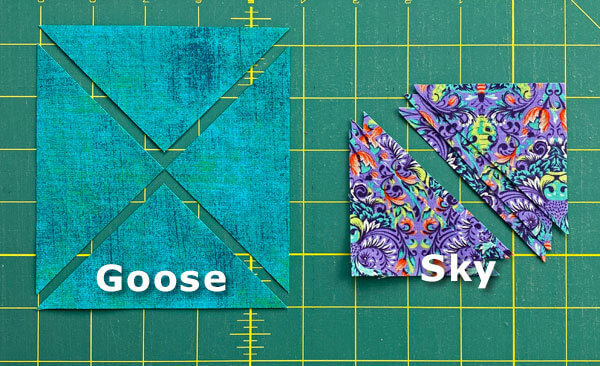
The Goose square is cut twice on the diagonal (below left). Just like a QST.
The Sky squares are cut once on the diagonal (below right), just like HST.
With these cuts, straight of grain is always on the outside edges of your finished FG.
Step 2: Assemble the Flying Geese Trio
All paper piecing starts with getting your sewing machine adjusted.
General Sewing Machine Setup for Paperpiecing
- Reduce your stitch length to 16–20 stitches per inch (1.3-1.6 mm). This perforates the paper and stabilizes the seam when you remove the pattern. [Learn more about stitch length here.]
- Reduce your machine's speed or just plain slow down. Sew only as fast as you can stay on the stitching lines.
- Install an open toe appliqué foot (sometimes called an 'embroidery' or 'satin stitch' foot) if you have one (it's easier to see where you're stitching with one installed).
- Use a larger needle (90/14) if you have problems removing the pattern.
- If your machine has a needle stop up, use it. The stitching goes faster when you don't have to lift the presser foot with every seam.
- As you stitch each seam, start and stop a generous 1/4” before and after the solid stitching lines. ALWAYS. Future lines of stitching secure the ends.
After adding each patch, press the unit as it was sewn to set the seam and then open. The SA is automatically pressed towards the last patch added.
Before adding the next patch, take a look to make sure the one you just added covers the space plus seam allowance that it is supposed to.
Steam is optional and usually curls the pattern.
If that bothers you, don't use steam. Sometimes I do. Sometimes I don't.
It truly depends on my mood.
Remember, as you follow this paper piecing tutorial, the printed and the fabric sides of this block are mirror-images of each other.
At last!
Let's sew!
A tiny dot of Elmer's Washable Glue Stick is the perfect thing to hold the first Goose patch in position. The dashed lines help you quickly and accurately position it.
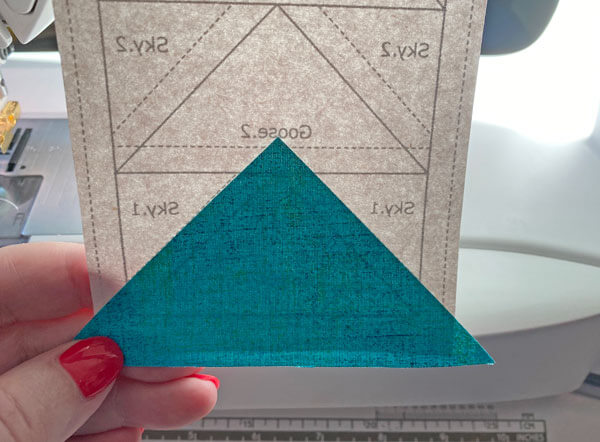
With RST, match the long bias edge of a Sky.1 with one of the sides of Goose.1.
It doesn't matter which side you start on, though I do recommend always starting with the same one. You'll get a flow going as you piece these. We would rather not do anything to interrupt the fun.
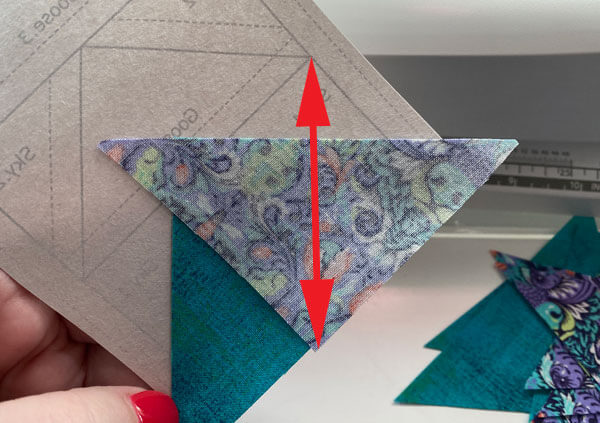 For reliable positioning, the point of the patch should be directly opposite the point on the pattern shape (red arrow)
Stitch on the solid line, starting and stopping a good 1/4" past the beginning and end of the line. (Subsequent lines of stitching will secure this seam.)
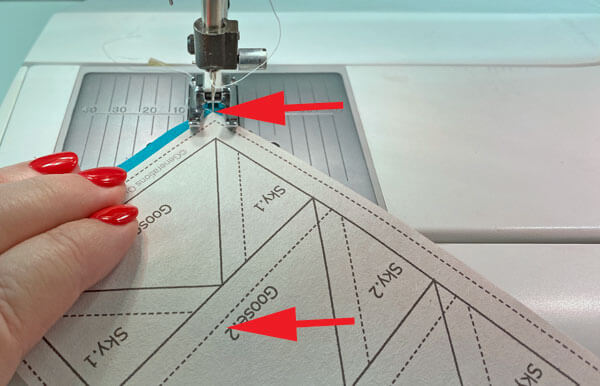
Press. (If you've starched your fabric before cutting, a fingerpress should do here.)
Repeat for the second Sky.1.
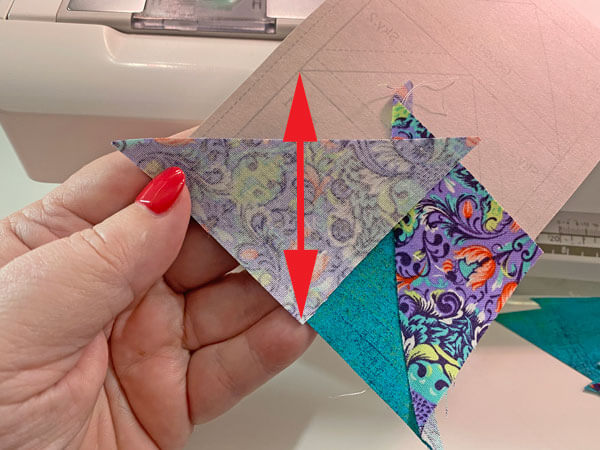
When the next step is trimming, press your unit at the iron. Do that now.
At your cutting mat, paper side up. Pull the pattern away from a few stitched at the point of the Goose.
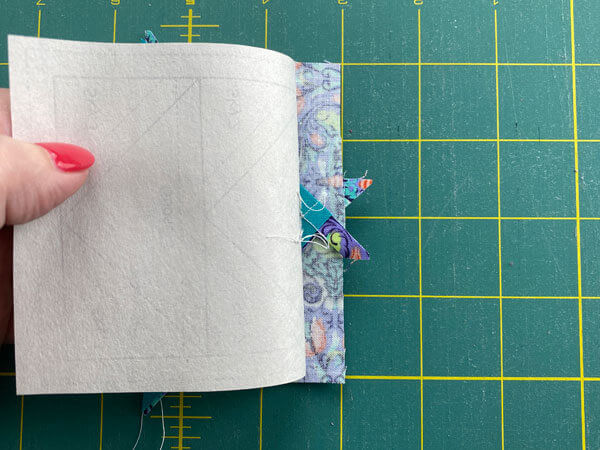
Position the ruler on the solid line between Goose.2 and Sky.1. (below, left)
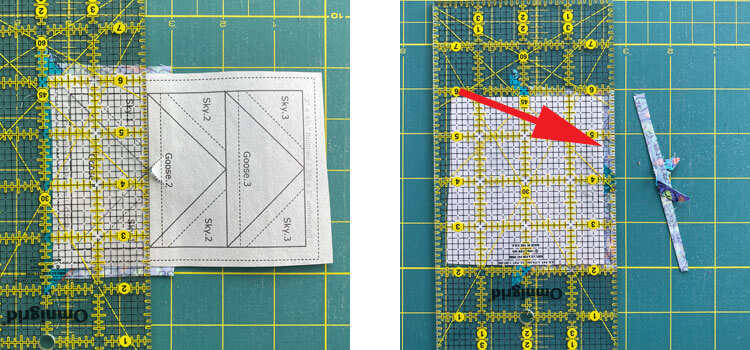
Use your thumbnail to crease the pattern on the line.
Fold the paper back on itself.
With the 1/4" mark on your ruler directly over the folded edge (red arrow above), use your rotary cutter to trim away the excess fabric.(above, right)
You've created the perfect positioning for your Goose.2.
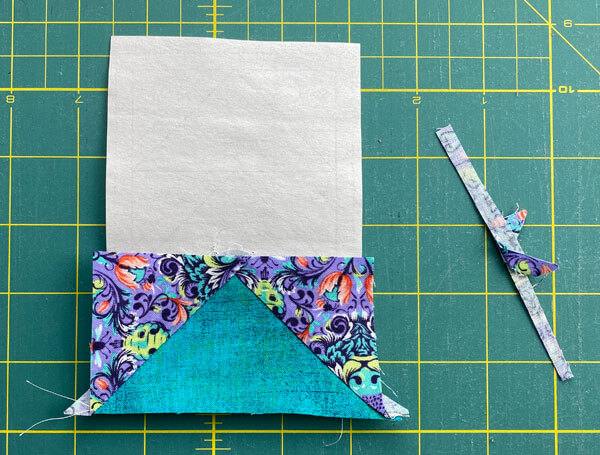
Press. One Goose down. Two to go.
With RST, match the long bottom of Goose.2 with the freshly trimmed edge.
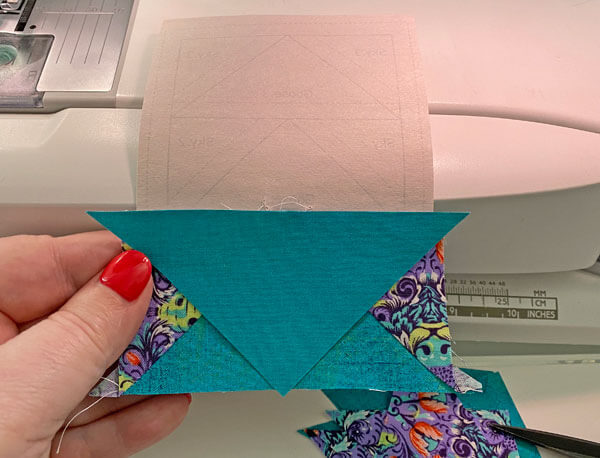
Didn't know there was chain piecing in paper pieced FG? Surprise!
Since we cut oversized patches to make positioning them foolproof, we need to trim the sides of this Goose.2.
Using the same technique as before, fold the pattern back on itself on the solid line. Position the ruler. Trim away the excess past a 1/4" SA. Repeat for the other side. (below. left and right)
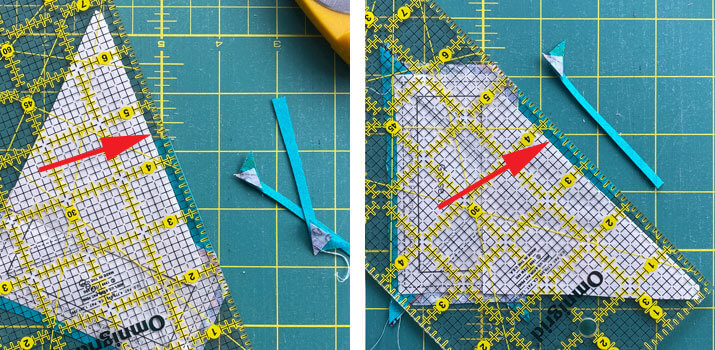 I've oriented the unit for my right-handedness in both photos above
Again, we've created the perfect placement lines.
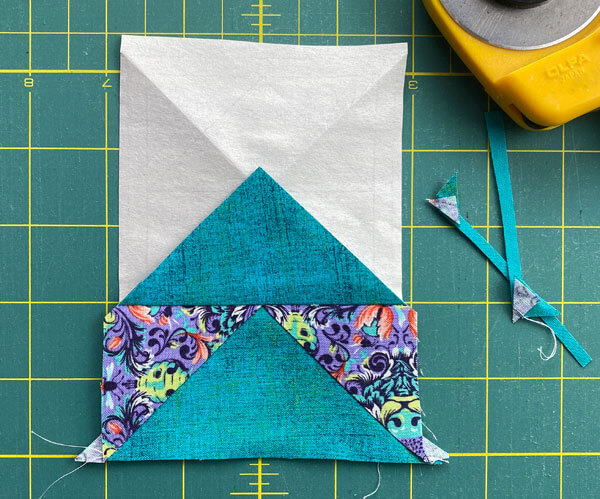
From this point, continue on in the same manner—positioning, sewing, pressing, trimming.
The second FG is complete.
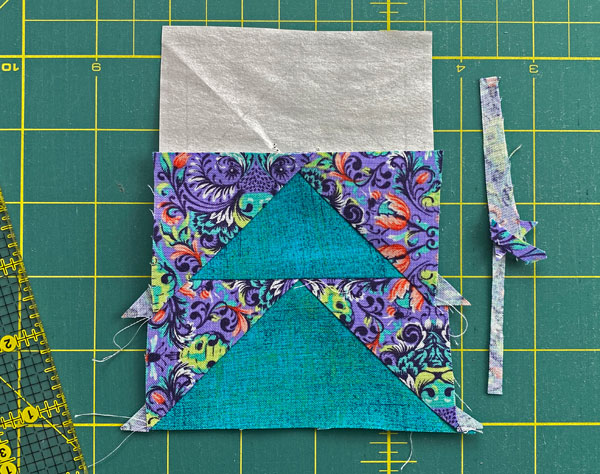
And the third.
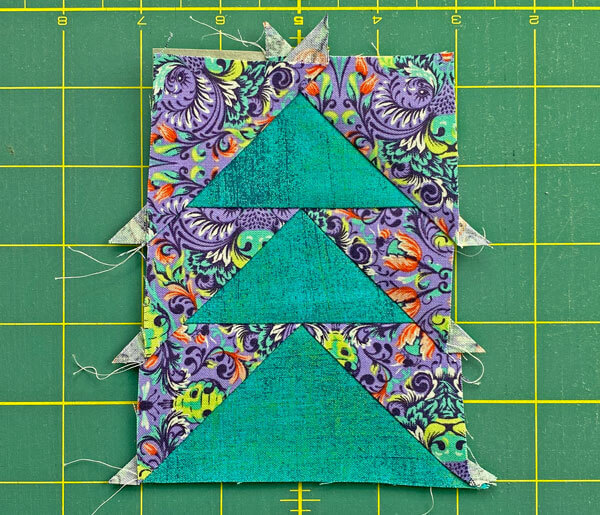 Perfect points, but the outside edges are a hot mess. We can remedy that!
All that's left is to trim to perfection.
Back at our cutting mat, position the 1/4" marking on your ruler with one side of the solid rectangle that surrounds the block. Cut away the excess. (#1)
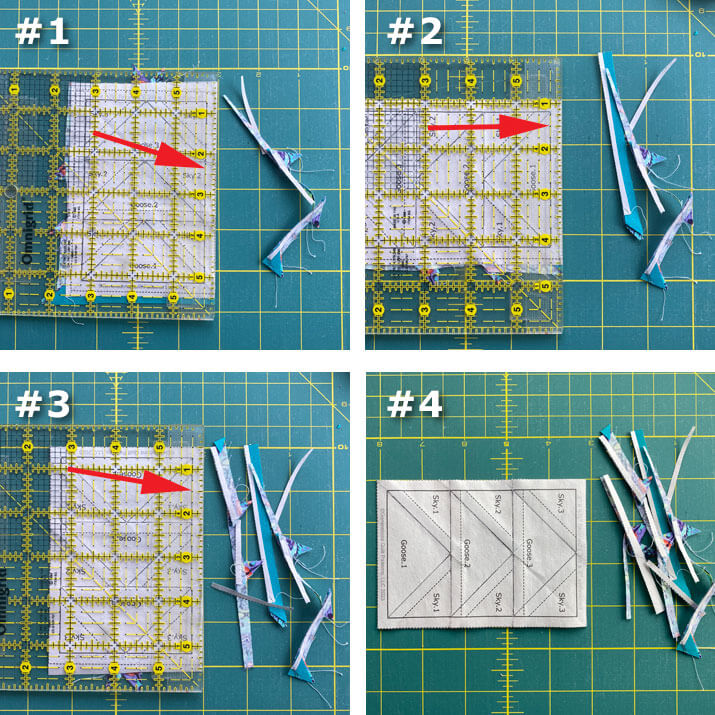
Rotate the unit a quarter turn and repeat. (#2)
Continuing until all four sides are trimmed. (#3 and #4)
Below you can get a close look at how the stitching starts and stops a generous 1/4" before and after the solid stitching line. All the thread tails on the back have been trimmed away.
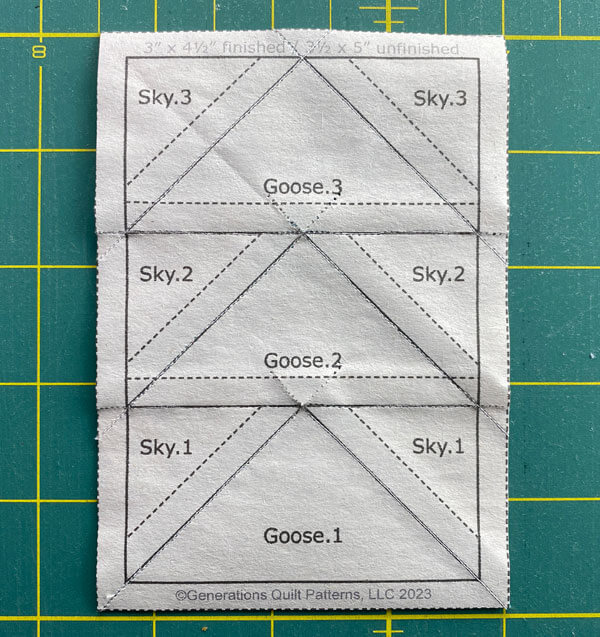
And from the pretty side. All those points are exactly 1/4" in from the edge.
The ones at the top of each Goose are perfect...not cut off and blunt
And we only made four trims instead of 12 for these three Geese.
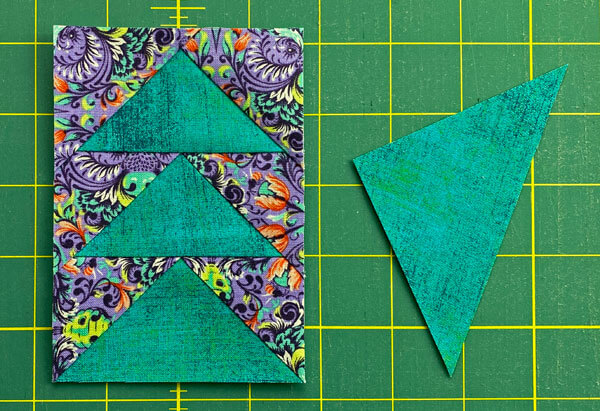 For a single FG, you'll have one of the triangle patches leftover.
More design options with FG Trios
I'd be remiss if I didn't remind you that a trio of FG can be stitched in a few different ways.
If you've used quilting stencils for quilting designs, you've probably been exposed to the idea of using parts of the stencil to increase your design library.
Occasionally, you can do the same with paper pieced patterns.
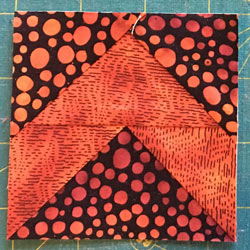
 From left to right, as pieced in this tutorial, chevrons, bigger chevrons, substituting an uncut patch into the design for the top Goose, and finally for the bottom Goose
With the two options on the far right, I'd cut those solid patches an extra 1/4" wider than the required unfinished patch.
Instead of cutting a patch 2-1/2" x 4-1/2" for the solid cut rectangle, I'd cut it 2-3/4" x 4-3/4". That way I've got something to trim when trimming to perfection.
Try it first, and then adjust the measurements as you require.
The Basic Building Blocks of Quilting
Click here for instructions for more beginner-friendly quilt blocks and units in our basic building blocks of quilting series.
You'll find multiple methods for all of these basic units:
Rail Fence, Half Square Triangles, Quarter Square Triangles, 4-Patch, 9-Patch, Square in a Square, Triangle in a Square, Corner Beams, Half Rectangle Triangles, and Flying Geese.
Choose the technique that works best for your skill set and your project.
For even MORE blocks to make... 🧩🎨

...visit our Free Quilt Block Pattern Library, with over 230+ blocks to choose from in multiple sizes.
Free downloads are included in all sizes for any blocks require paper piecing patterns or templates.
- Home
- Free Quilt Block Patterns
- Paper Pieced Flying Geese
