- Home
- Free Quilt Block Patterns
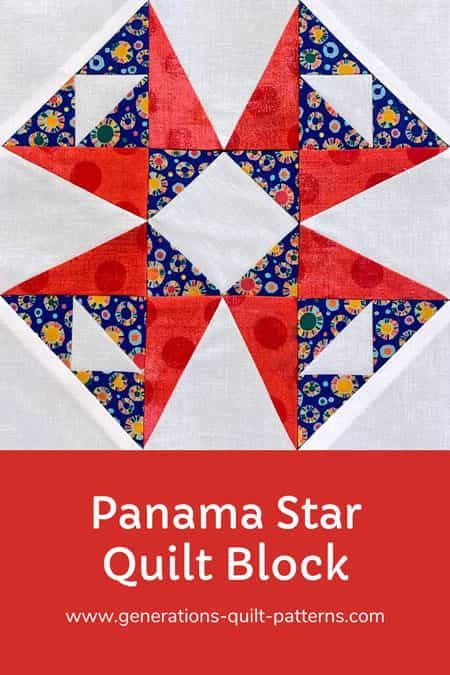
- Panama Star Quilt Block
Create a Panama Star Quilt Block: Drama-Free Piecing Made Simple 📐
Where Point Perfection Meets Peace of Mind 🧘♀️
This post contains affiliate links, for which I receive compensation.
The key to making a Panama Star quilt block is stitching accurate patches to make it. No drama, just facts! ✨
The best way I know how to get that accuracy for units that I don't often make is with paper piecing. And with our paper-piecing technique, you'll navigate your way to perfect points faster than a ship through the Panama Canal! ⛵
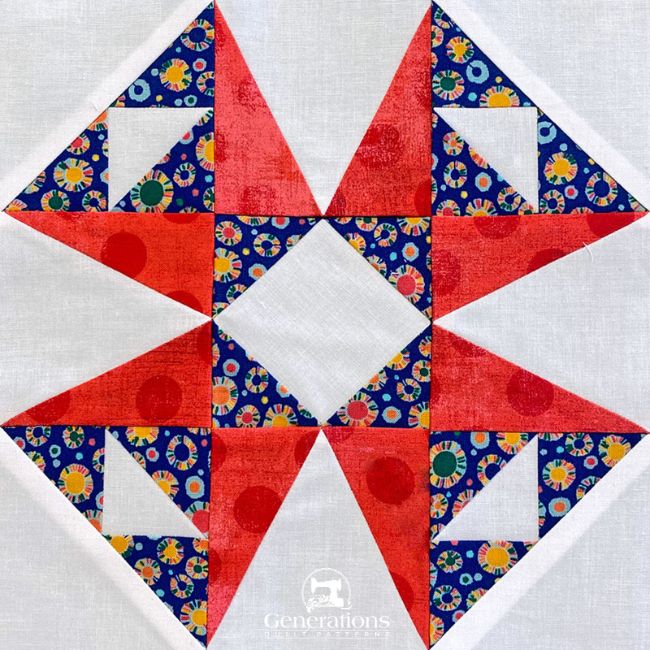
Here's the no-drama truth: 🚫 No specialty rulers to buy 📐 No tricky formulas to dust off and remember ✂️ Simply sew on a line and trim on a line
Got basic quilting skills? Then you've got this! 🙌
🧭 Tour drama-free GPS to quilting success
Skip the drama and head straight to the section you need with these handy links.
- A cutting chart in 5 sizes, with downloads of the chart and block design
Cut. Sew. Press. Watch the drama take a siesta! 🌴
📋 General Instructions
Several abbreviations are used on this page. They are:
- SA - seam allowance
- RST - right sides together
- BiTA - Birds in the Air
- SiaS - Square in a Square
- TiaS - Triangle in a Square
A 1/4" SA is used in this tutorial.
Highlighted in yellow, pressing instructions are easy to spot.
To press, first press the patches in the closed position as they came off your sewing machine. This sets the seam, melding the fibers of the threads into the fibers of the fabric.
Then press the SA to the dark unless otherwise noted.
📥 Download and print the paper piecing patterns
To download the pattern, use the most current version of Adobe.
For accurate results, on Adobe's Print Menu page, under 'Page Size and Handling' set 'Custom Scale' to 100%. Then print.
Click here to see what it looks like on the Print Menu page.
Find your finished block size from the chart below. For each block you want to make, print the corresponding number of units for a total of:
- 4 TiaS
- 4 BitA
- 1 SiaS
Download and Print the | ||||||
|---|---|---|---|---|---|---|
| Finished Block Size | SiaS Print 1 | Bita | Tias | |||
| # of Copies to Print | Link to PDF Download | Templates Print 1 | # of Copies to Print | Link to PDF Download | ||
| 6" | 2" | 1 | 2" | 2", 3", 4" | 1 | 2" |
| 9" | 3" | 1 | 3" | 1 | 3" | |
| 12" | 4" | 2 | 4" | 2 | 4" | |
| 15" | 5" | 4 | 5" | 5" | 4 | 5" |
| 18" | 6" | 4 | 6" | 6" | 4 | 6" |
After printing, use the 1" square graphic on the printed page(s) to double check that your patterns printed at the correct size.
Then cut out the required number of patterns from your copies. A rough cut is good enough—an 1/8"-1/4"-ish away from the outside dashed square.

Not sure which paper to use?
Take a look at my review of several of the most popular brands available to us quilters on the market.
You want a super-easy paper to tear away—less stress on the stitches.
The newest quilt fabrics to tickle your fancy...
Click the images below to see the full collection. We share any commercial and/or free patterns that showcase them, too. (For inspiration, of course!)
✂️ Cutting patches for your Panama Star block
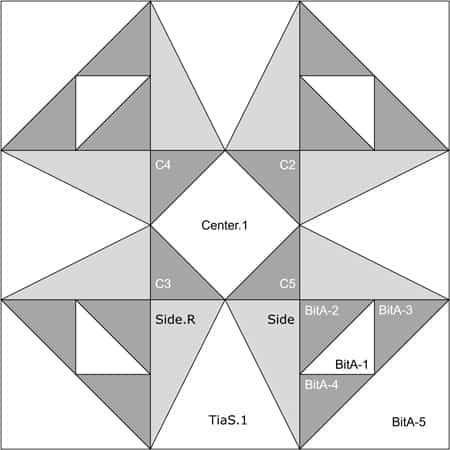
Sample Block Size: 9" finished / 9½" unfinished
Grid: 6×6
Brackman ID: None
Design Type: Star | Equal 9-patch | Paper piecing
Organization is key to success! Take a moment to label your patches with their corresponding numbers. These will be your reliable companions as we piece this block together.
 | Cutting Chart for a~ Includes Paper Piecing ~ | |||||||
|---|---|---|---|---|---|---|---|---|
| Patch | Fabric | Qty | Finished Block Size | Sub Cut | ||||
| 6'' | 9'' | 12'' | 15'' | 18'' | ||||
| BitA-1 | Bac | 2 | 1⅞'' x 1⅞'' | 2⅜'' x 2⅜'' | 2⅞'' x 2⅞'' | 3⅜'' x 3⅜'' | 3⅞'' x 3⅞'' | |
| BitA-2, BitA-3, BitA-4, C2, C3, C4, C5 | Dark | 8 | 2⅜'' x 2⅜'' | 2⅞'' x 2⅞'' | 3⅜'' x 3⅜'' | 3⅞'' x 3⅞'' | 4⅜'' x 4⅜'' | |
| BitA-5 | Bac | 2 | 3⅜'' x 3⅜'' | 4⅜'' x 4⅜'' | 5⅜'' x 5⅜'' | 6⅜'' x 6⅜'' | 7⅜'' x 7⅜'' | |
| TiaS.1 | Bac | 4 | 3'' x 2¾'' | 4'' x 3¾'' | 5'' x 4¾'' | 6'' x 5¾'' | 7'' x 6¾'' | yes |
| Side, Side.R | Med | 4 | 2⅞'' x 3¼'' | 3⅜'' x 4¼'' | 3⅞'' x 5¼'' | 4⅜'' x 6¼'' | 4⅞'' x 7¼'' | yes |
| Center.1 | Bac | 1 | 1⅞'' x 1⅞'' | 2⅝'' x 2⅝'' | 3⅜'' x 3⅜'' | 4⅛'' x 4⅛'' | 4¾'' x 4¾'' | --- |
| Unfinished Block Size | 6½'' | 9½'' | 12½'' | 15½'' | 18½'' | na | ||
| Grid Size | 1'' | 1½'' | 2'' | 2½'' | 3'' | na | ||
Subcutting
Layer your Side and Side.R rectangles in PAIRS THAT ARE WRONG SIDES TOGETHER. (below left) We must do this to create the needed mirror-imaged patches after we make our cut.
With a pencil, make a tick mark on the top edge 5/8" in from the left side. Make another mark at the bottom edge, 5/8" in from the right side.
Line up your ruler with these marks and cut the rectangles in half. (below right)
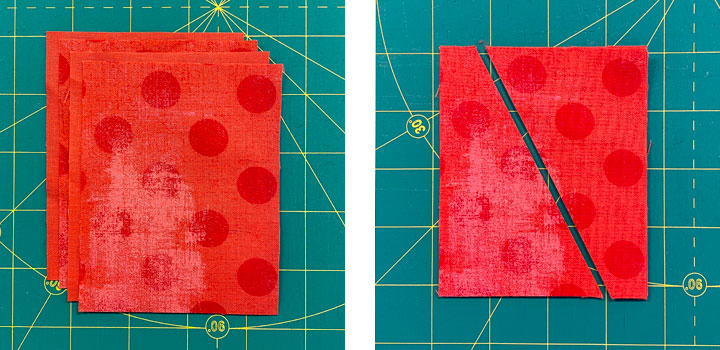
Layer the TiaS.1 rectangles ALL RIGHT SIDES UP. The Width measurement is on the top and bottom edges. Height is on the sides.
Cut out the template that goes with your chosen block size. The top and bottom edges of the template match those for the rectangles.
I use a piece of Scotch Brand Magic Tape® (it peels off your cutting mat easier) to hold the template in position. (below left) Trim away the excess fabric (below right) with your rotary cutter and ruler.
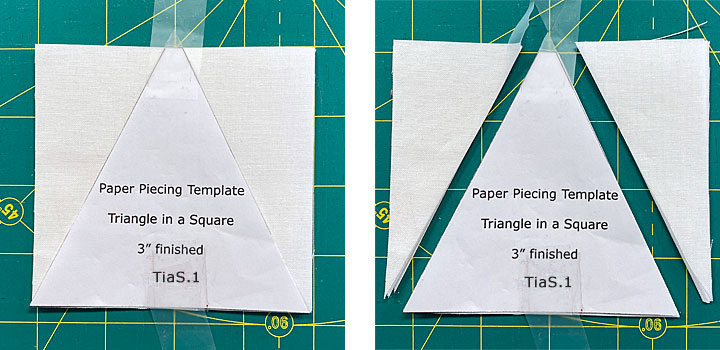
Finally, BitA.1-BitA.5 and C.2-C.5 are all cut once on the diagonal to form HST.
Your patches will look like this with different fabric choices, of course.
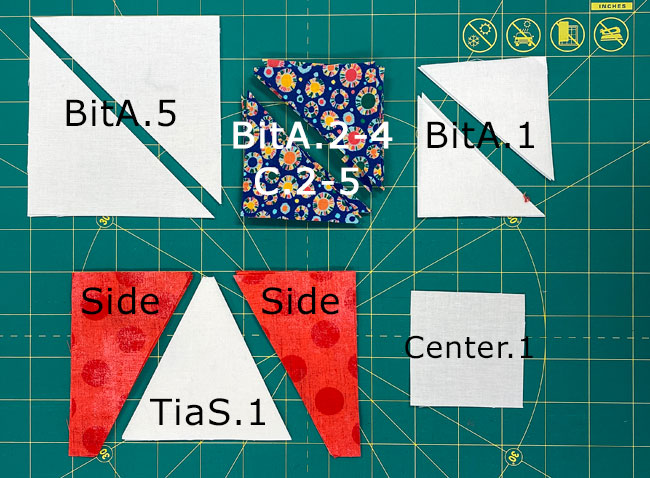
🧵 Prepare Your Units: Step-by-Step Instructions
Grab your Elmer's Washable Glue Stick® and use a dot of it to hold the Center.1 (below left), BitA-1s (below center), and Tias.1s (below right) in position on the wrong side of the paper piecing patterns.
💡 Pro Tips
- Use minimal glue. Excess glue makes paper removal difficult
- The glue's only purpose is to hold the first patch in place for the first seam

Once all the first patches are positioned, we're done with the gluestick. It can be put away.
To get your sewing machine ready for paper piecing, we need to make a few adjustments.
- Reduce your stitch length to 16–20 stitches per inch (1.3-1.6 mm). This perforates the paper and stabilizes the seam when you remove the pattern. [Learn more about stitch length here.]
- Reduce your machine's speed or just plain slow down. Sew only as fast as you can and stay on the solid stitching line.
- Install an open toe appliqué foot (sometimes called an 'embroidery' or 'satin stitch' foot) if you have one (it's easier to see where you're stitching with one installed).
- Use a larger needle (90/14) IF you have problems removing the pattern. Personally, I use an 80/12 Microtex Sharp for paper piecing without any problems.
SiaS
Make 1
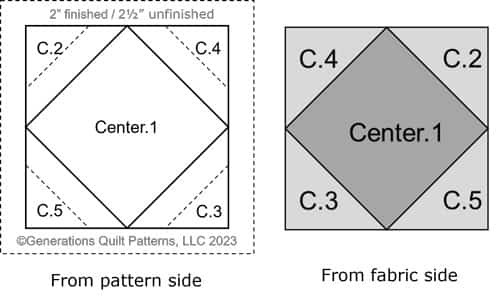
💡 Helpful Hint
When you flip the SiaS pattern over from the pattern to the fabric side, the C.2, C.3, C.4, and C.5 change position. This movement DOES NOT affect this block. However, it will if you are using different fabrics for the C.2-C.5 patches in another block design.
With RST, line up the long bias edge of the C.2 with one side of the Center.1.
From the printed side, sew on the line, but start and end past the outside dashed lines. This ensures your seams are sturdy and will last.
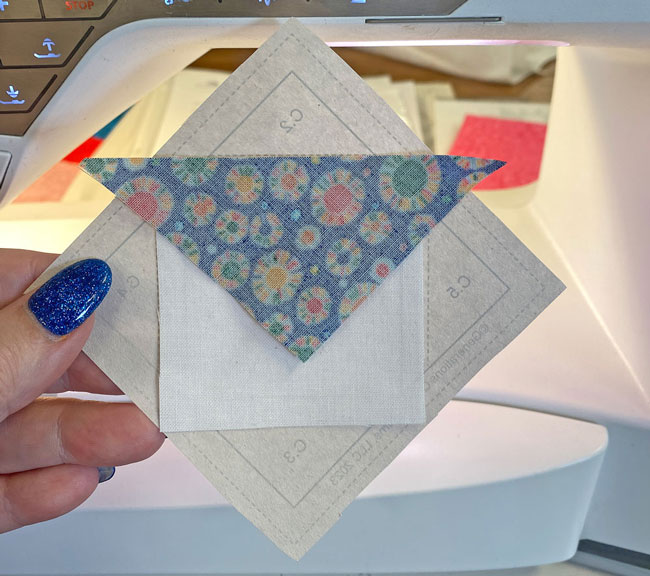
Press. (If your SiaS is large enough, you can add two opposite Cs before pressing.)
Repeat for C.3, C.4, and C.5.
After one last pressing, put the SiaS aside for now.
Birds in the Air (BitA)
Make 4

💡 Helpful Hint:
Just like the SiaS unit, when this patch is flipped from pattern to fabric side, the BitA-3 and BitA-4 patches swap positions. It doesn't make any difference to this block because the background patches are cut from a single fabric.
With RST, match the long bias edges of BitA-1 and BitA-2.
From the paper side, sew the seam starting and ending past the outside dashed lines of this unit. (red arrow)
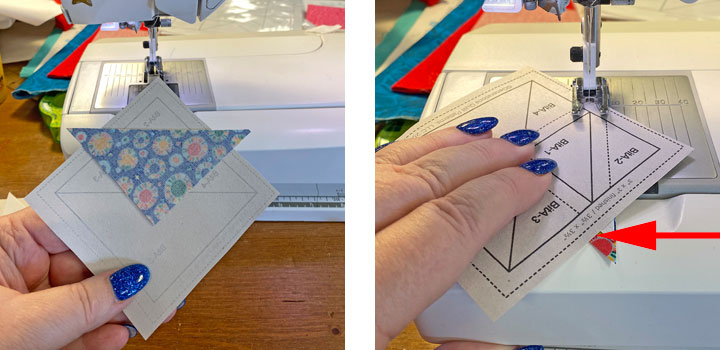
Press.
With RST, match a short side of BitA-3 to BitA-1 (red arrow). Use the photo below to help with positioning.
Sew the seam, starting and ending a generous 1/4" before and after the solid line.
Press.
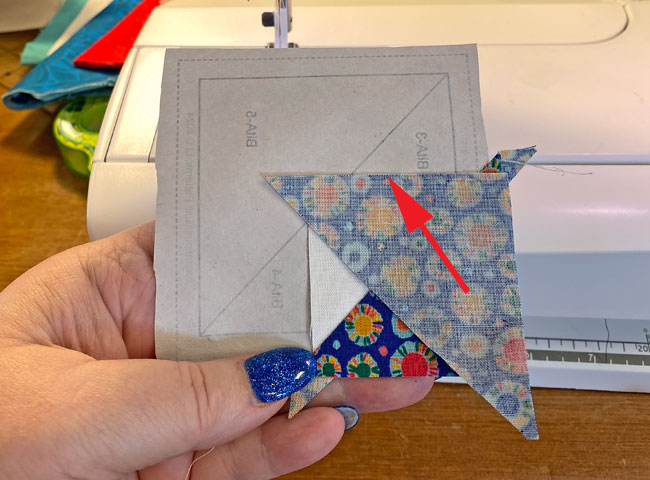
Repeat for BitA-4.
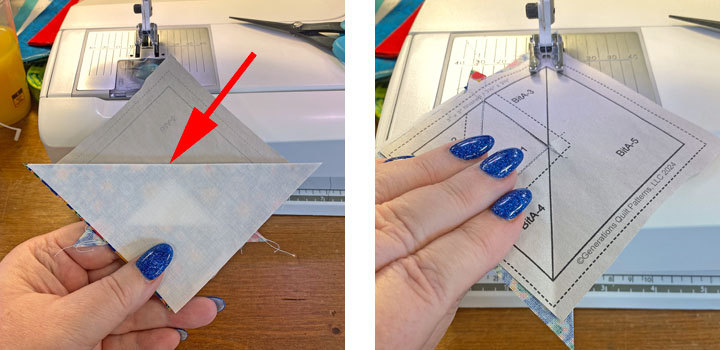
After a turn at the ironing board, take the BitA to your cutting mat, paper side up.
Pull the pattern away from the stitches at the center a bit. (below, left, red arrow). If the paper tears too much, use a bit of Magic Tape® to repair it from the printed side. Just don't iron directly on the tape. It'll melt, gunking up your iron.
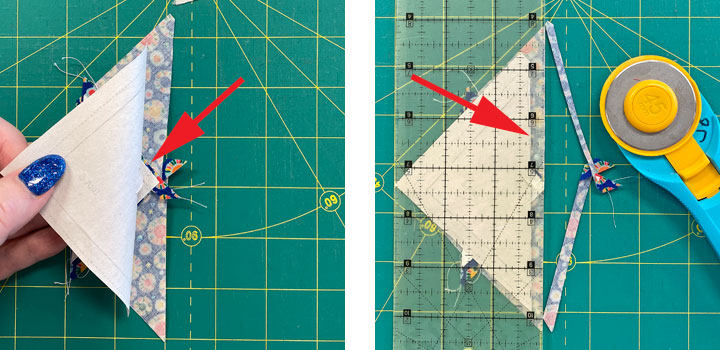
Place the edge of your ruler on the solid line between BitA-3&4 and BitA-5 and:
- Crease the pattern along the edge of the ruler.
- Fold the pattern back on itself on the line.
- Position the 1/4" mark on your ruler with the folded edge.
- Use your rotary cutter to trim away the excess, leaving behind a perfect 1/4" seam allowance. (above, right).
Back at your sewing machine, with RST, match the long bias edge of BitA-5 with the freshly trimmed one.
Here I've nudged the lighter BitA-5 a couple of threads past the edge (below left) to prevent the darker fabric from shadowing through the lighter one. Don't worry. We cut generous patches. A few threads won't make a difference,
Sew the final SA, again starting and ending past the outside dashed lines. (below right)
Set these aside. We'll do the trimming all at once.
Triangle in a Square (TiaS)
Make 4
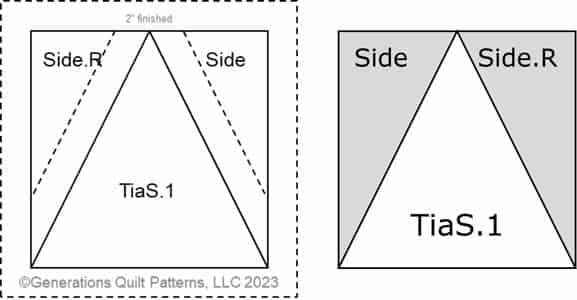
💡 Helpful Hint
Just like the previous paper pieced units, the Sides swap place when you flip the TiaS from the pattern to the fabric side. It has no effect on this design.
With RST, match the long bias edges of the TiaS.1 and Side. (below left)
Sew on the solid line, starting outside dashed border and ending at about the red arrow below right.
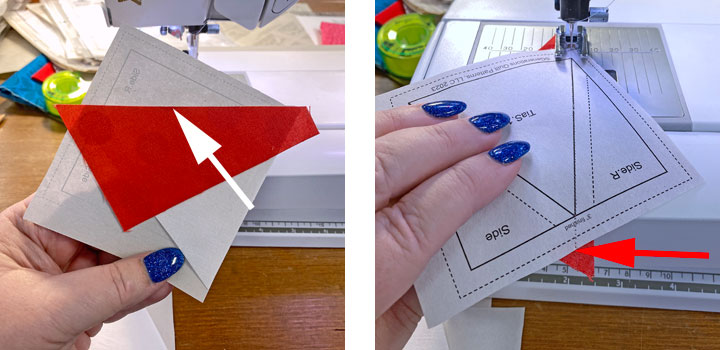
Press.
Repeat for the remaining Side patch.
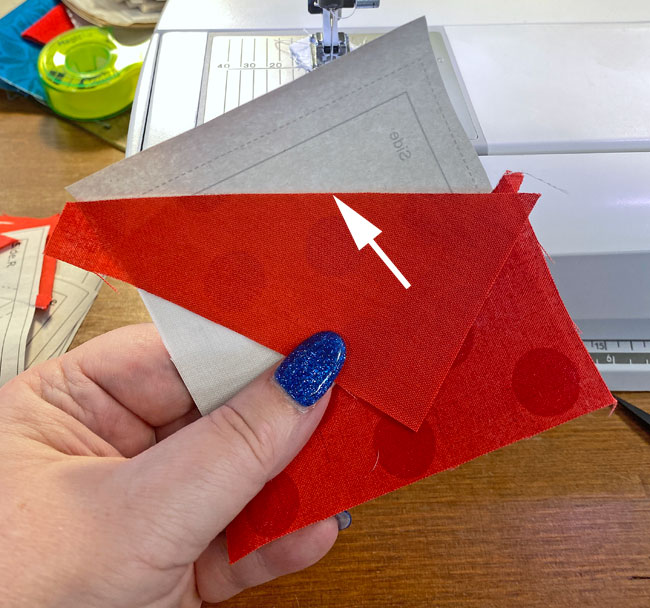
The paper piecing is complete. From this point forward, return your stitch length to the one you regularly use for piecing and install your favorite 1/4" presser foot.
Trim the paper pieced units to size
Trimming is a simple process.
Place the 1/4" mark on your ruler directly over the solid line on one side of the unit. (red arrow) Trim away the excess.
Repeat for every side until they're all trimmed.
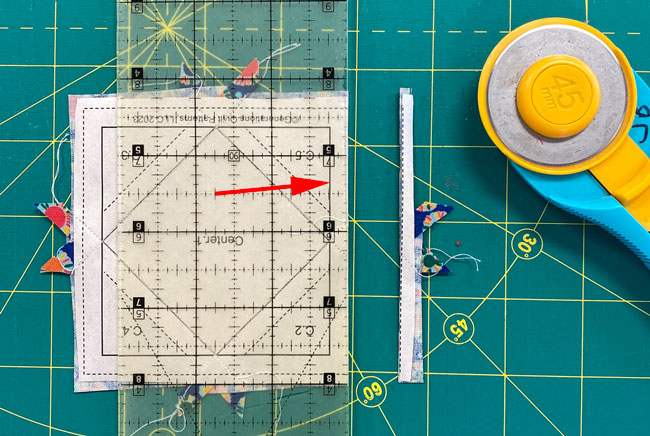
Personally, I line up as many as I can on my rotating cutting mat, turning the mat a 1/4 turn once all of one side is trimmed.
It saves a good bit of time AND things don't move around as you rotate the mat. They do move if you're using, say, a smaller 12" x 18" mat.
I know.
I've tried it.
These rotating mats are pricey…which makes them a great suggestion at Christmastime.
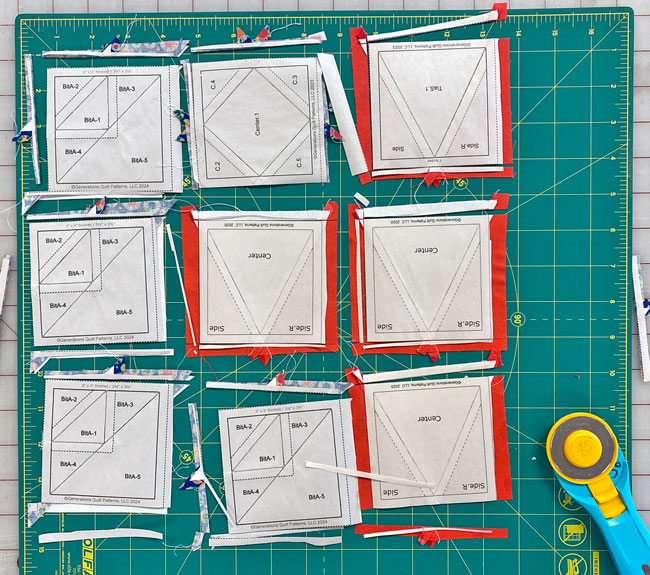
Once the trimming is complete, remove the paper.
We cut patches so that the resulting units all have straight of grain on the outside edges. They're as stable as any block you piece with traditional methods.
🧩 Final Assembly - Where the Magic Happens!
You're in the home stretch now. Let's put this star together with no drama! ⭐
First up, let's get our layout looking fabulous:
- Arrange your TiaS, BitA and SiaS units to create our Panama Star design
- Pro tip: Your background fabric should frame the entire block—think of it as your drama-free zone around the edges! 🎯
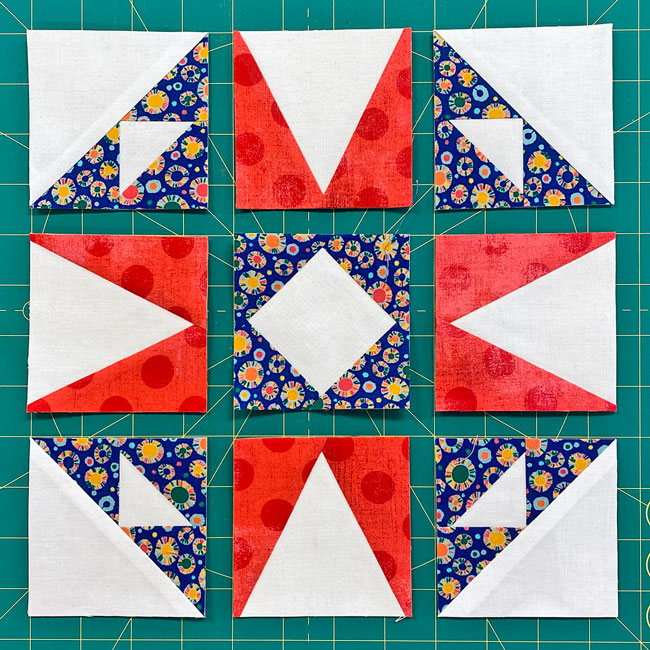
Time to join your units (you're doing great!):
- With RST, stitch the units in each row together
- If you were careful and stitched on the line, the only thing you need to pay attention to is keeping the edges of the units lined up with each other ✨
- Press these seams away from the BitA units, it makes everything play nicely together!) 👌
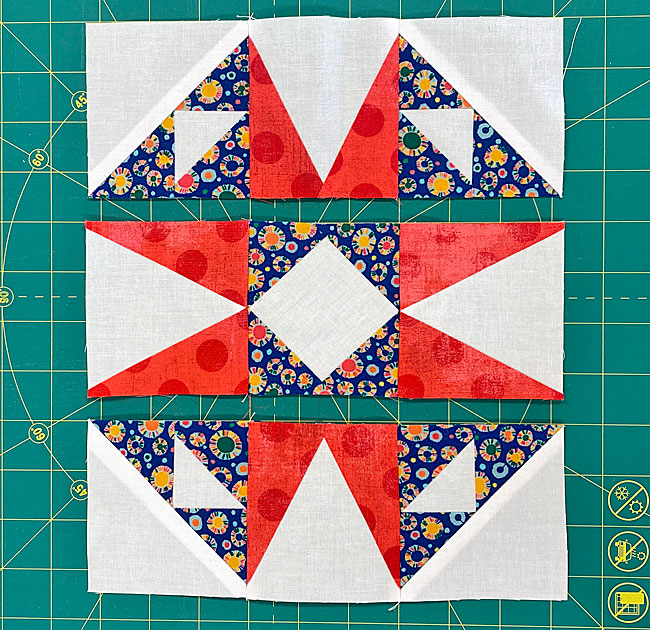
Now for the grand finale:
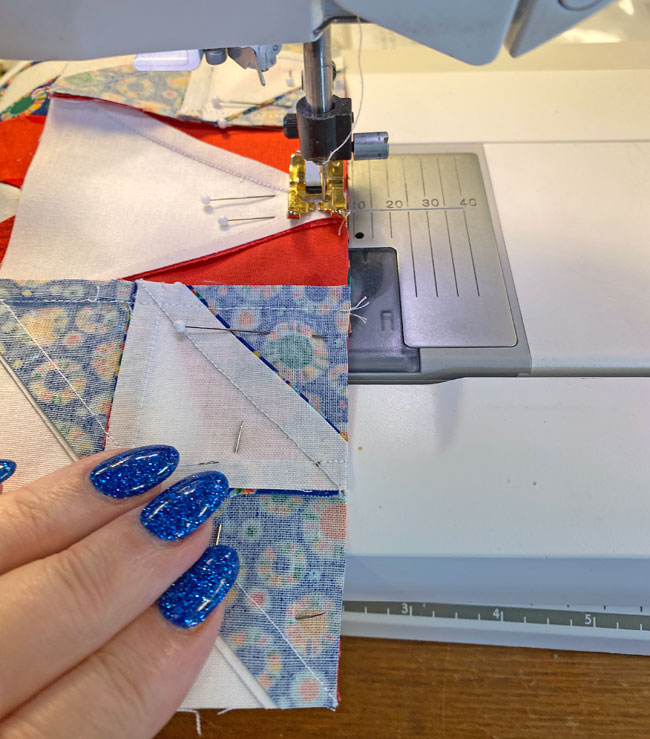
- With RST, sew the rows together. I found it helpful to use pins to keep the edges neatly matched while stitching. 📍
- Press these final seams away from the center 😉
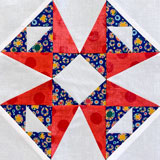
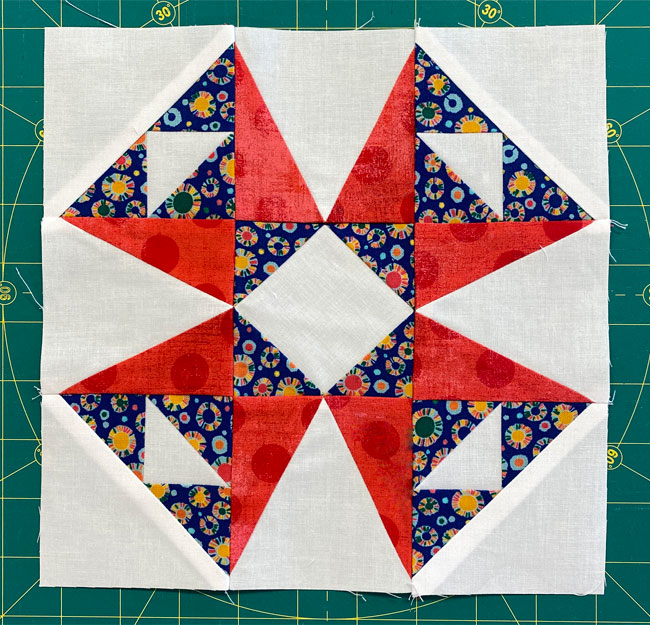
Ta-da! 🎉 Let's admire our handiwork—the gorgeous Panama Star quilt block sample from the front—looking sharp and pointy!
And take a look at that back side—neat as a pin! Study those pressing lines. They're like a roadmap to success for your next Panama Star!
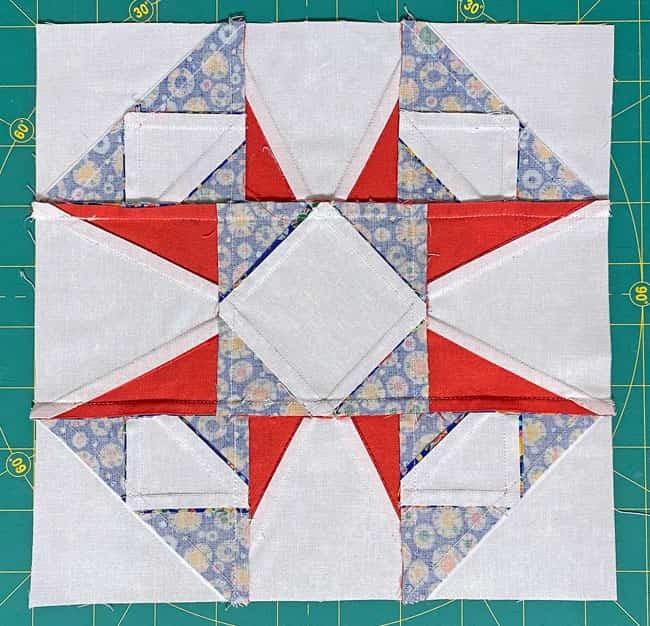
Remember: If anything looks a little wonky, don't stress! That's why seam rippers were invented (I should know. I've used mine plenty over the last 30 years! 😅)
🎓 Confessions of a Seasoned Quilter
You know what they say about old dogs and new tricks? Well, this old quilting dog just got a refresher course.
After 30-ish years of playing with fabric (yes, really! 👵), you'd think I'd have all the lessons down pat. But every so often we need a gentle reminder of Quilting 101, don't we? 🤭
Here's my "No Drama" confessional: I fell hard for the gorgeous blue print. Like, "planning-our-future-together" hard! 💙 I was so smitten that I immediately cast it in another block—Hull's Victory (coming soon to a tutorial near you! 🎬)
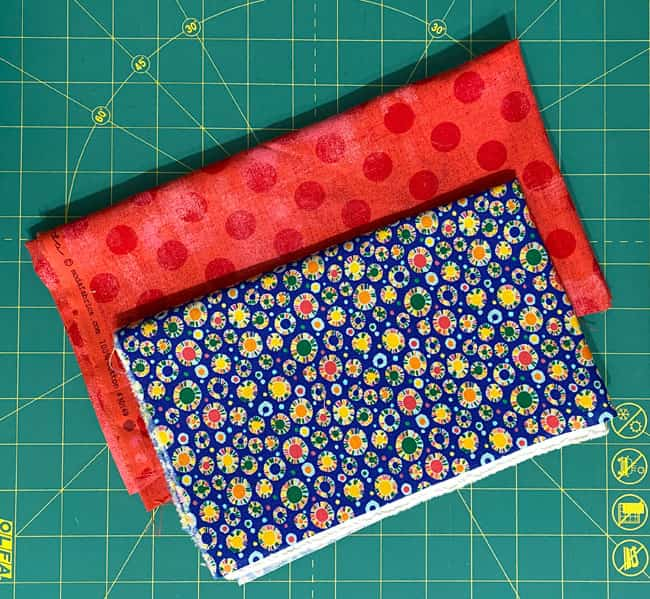
Then came the star points—in this fabulous red dot grunge. Perfect color chemistry with our blue, but… (whispers) the scale had me worried. You know that feeling when something's just a bit… off? For a single block, I thought, "Let's live dangerously!"
But for a whole quilt?
That might be more drama than my inner-artist could handle! 😅
Plot twist! The sample block turned out to be a show-stopper! Those slightly uneven red star points? They're not imperfections—they're personality. In a full quilt, they'd be like little sparkles of joy, leading your eyes on a treasure hunt across the design. ✨
So here's my "been-there-done-that" wisdom, served with a slice of humble pie: Making a sample block isn't just for beginners (though it's absolutely brilliant advice for those just starting their quilting adventure). It's for ALL of us. Even those of us who should know better but occasionally get carried away by pretty fabric. 🙈
Think of it as your dress rehearsal before the big show. It's where you can test your fabric chemistry, audition your color casting, and make sure everything plays well together—all without committing to a full production. 🎭
Because let's be honest. Isn't a little preview better than a whole quilt's worth of "well, that's not quite what I pictured"? 😉
📌 Smooth Sailing Star Block! ⛵
Drop this pin in your quilting harbor. It's your passport to drama-free piecing perfection!
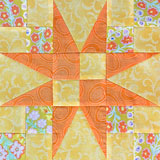
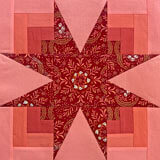
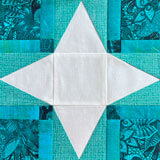
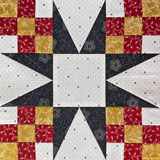
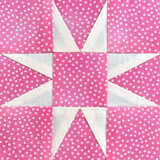
More star blocks with this Triangle in a Square unit
There are several stars in the Free Quilt Block Library that use this energetic unit. Click on any of the images below to go straight to that tutorial.
🔭 Looking for something truly stellar?
You've finished your star quilt block, and you're ready for more!
Browse our collection of 60 stellar star quilt block patterns. All have instructions and cutting charts in multiple sizes. If templates or paper piecing is used in the tutorial, there's a free download for you of those materials.

Eeny. Meenie. Miney. Moe.
Which star quilt block will you sew?
For a star-studded quilting experience, choose from 100+ bedazzling star quilt patterns—for beginners and beyond—click here.
For even MORE blocks to make... 🧩🎨

...visit our Free Quilt Block Pattern Library, with over 230+ blocks to choose from in multiple sizes.
Free downloads are included in all sizes for any blocks require paper piecing patterns or templates.
- Home
- Free Quilt Block Patterns
- Panama Star Quilt Block

