- Home
- Free Quilt Block Patterns
- Oklahoma Twister Quilt Block
Master the Oklahoma Twister Quilt Block: A Confident Beginner's Guide to Perfect Pinwheels 🌀
Transform squares into a twirling masterpiece, one step at a time 💫✂️
This post contains affiliate links for which I receive compensation
Have you ever noticed how making an Oklahoma Twister quilt block feels a bit like learning a new dance routine?
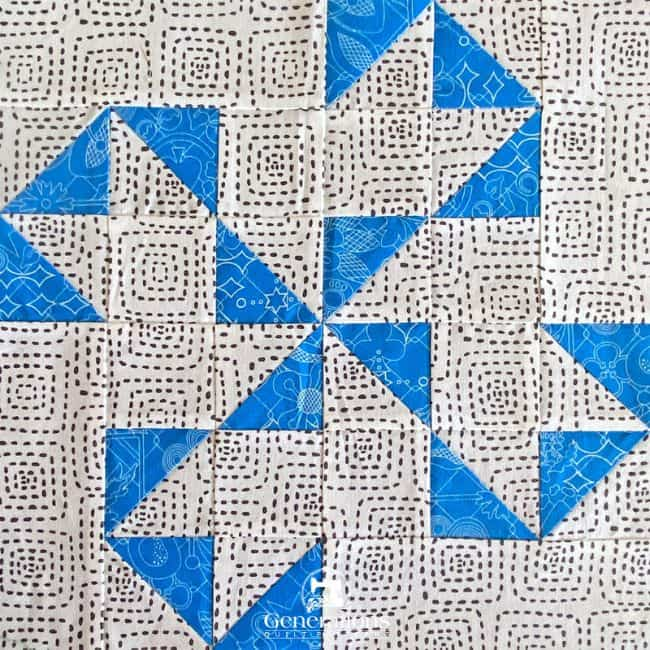
At first, there's that moment of "wait, which foot goes where?"—or in our case, "which triangle points in what direction?" The beauty of this block is that once you get the hang of the steps—cutting those squares, creating HSTs, and assembling the quarters—you'll find yourself moving through the process with unexpected grace.
This two-fabric version is strikingly modern.
Don't let that fool you—we're using time-tested techniques that any confident beginner can master. Shall we dance? 🕺🪡
🧭 Find Your Way Around
Welcome to your Oklahoma Twister journey! Use these quick links to jump between sections, grab your free downloads, or jump ahead to the parts you're most curious about—because sometimes quilters need to boogie! 💃
- For a more traditional approach to this block, click here to find the instructions for a three fabric block.
📋 General Instructions
Several abbreviations are used on this page. They are:
- SA - seam allowance
- RST - right sides together
- HST - half square triangles
A 1/4" SA is used through this tutorial.
When instructed to press, first press the patches in the closed position just as they came off your sewing machine. This sets the seam, melding the fibers of the threads into the fibers of the fabric.
Then press the SA to the dark unless otherwise noted.
Starching your fabric before cutting makes it easier to cut and your sewing more accurate. Learn more about how to do it here.
I use a 50/50 mix of liquid starch concentrate and water.
✂️ Cut fabric for your Oklahoma Twister block
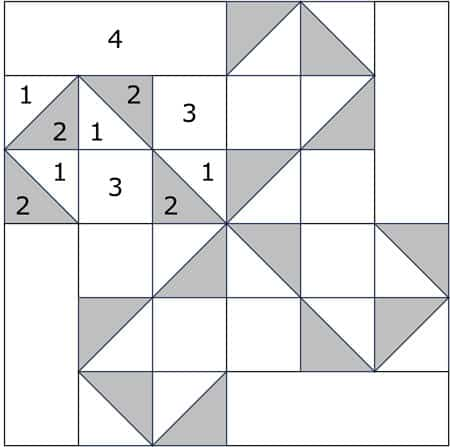 Oklahoma Twister block design
Sample Size: 12" Finished / 12½" Unfinished
Grid: 6x6
Barbara Brackman ID#: 1134
Design Type: 4-patch | Pinwheel
Attributed to: Aunt Kate's Quilting Bee
This two-color block requires fabrics with very strong contrast. Each one distinct but working together to create something beautiful
It's this contrast that makes the design visible as you look at the block. If the fabrics are too close in value, it'll be harder to see the pattern that emerges
If the fabrics are too close in value, it'll be harder to see the pattern that emerges.
 | Cutting Chart for an~ Traditional Piecing~ | ||||||
|---|---|---|---|---|---|---|---|
| Patch | Fabric | Qty | Finished Block Size | ||||
| 6'' | 7½'' | 9'' | 12'' | 18'' | |||
| 1 | Bac | 2 | 4¼'' x 4¼'' | 4¾'' x 4¾'' | 5¼'' x 5¼'' | 6¼'' x 6¼'' | 8¼'' x 8¼'' |
| 2 | Dark | 2 | 4¼'' x 4¼'' | 4¾'' x 4¾'' | 5¼'' x 5¼'' | 6¼'' x 6¼'' | 8¼'' x 8¼'' |
| 3 | Bac | 8 | 1½'' x 1½'' | 1¾'' x 1¾'' | 2'' x 2'' | 2½'' x 2½'' | 3½'' x 3½'' |
| 4 | Bac | 4 | 1½'' x 3½'' | 1¾'' x 4¼'' | 2'' x 5'' | 2½'' x 6½'' | 3½'' x 9½'' |
| Unfinished Block Size | 6½'' | 8'' | 9½'' | 12½'' | 18½'' | ||
| Grid Size | 1'' | 1¼'' | 1½'' | 2'' | 3'' | ||
🪡 Assemble the units for your Oklahoma Twister
Half Square Triangles (HSTs)
Make 16
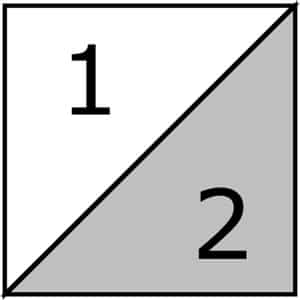
We use the 8-at-a-time to make our HSTs. If you plan on making tons of these blocks, you may want to consider using triangle paper for even more efficiency.
To start, on the backside of either the #1 or #2 patches draw 2 diagonal lines, one from each pair of corners. (You'll just barely be able to see my lines in the photo below.)
Mark whichever fabric is easier to see the lines on. I love my Bohin Mechanical Chalk Pencil for this.
With your favorite quarter inch foot installed, stitch a 1/4" away from both sides of both lines.
Due to their larger size, I chose to pin the patches together to keep them from shifting during sewing.
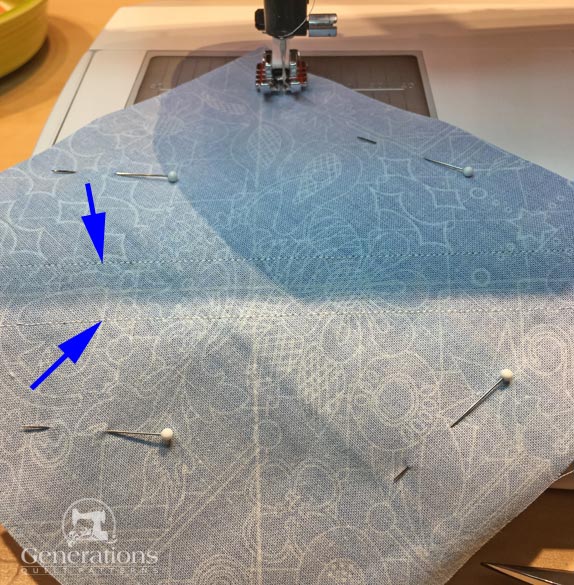 Here, I've already stitched a pair of lines (blue arrows) and am just starting the third
Repeat for the second pair of #1/#2 squares. Press the units flat to set all the seams all at once.
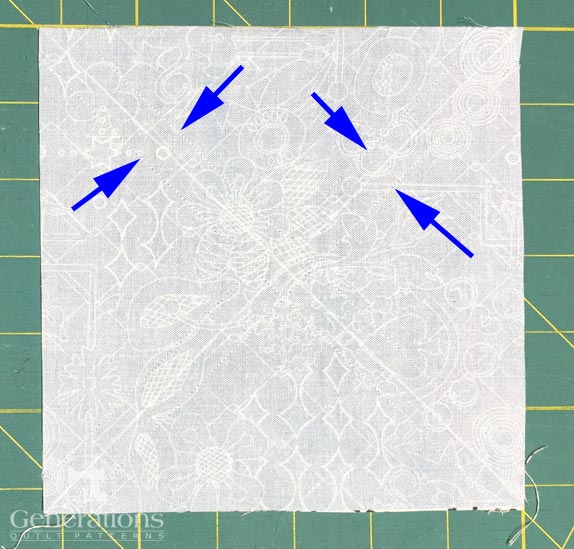 Blue arrows point to the stitches—they're there, just hard to see in this picture.
Now it's time to cut these patches in HST. I like to use a small rotating rotary mat for this next bit. You're less likely to disturb the patches as you cut.
From the chart below, find the "Center Measurement" for the block size you're making. We use this to cut the stitched pairs into 4 equal squares.
| HST Dimensions | ||
|---|---|---|
| Finished Block Size | Center Measurement | Trim HST to… |
| 6" | 2⅛ | 1½" |
| 7½" | 2⅜" | 1¾" |
| 9" | 2⅝ | 2" |
| 12" | 3⅛ | 2½" |
| 18" | 4⅛" | 3½" |
For our sample 12" Oklahoma Twister, the Center measurement is 3-1/8".
Align that mark on your ruler (blue arrow) with the edge of your block. Since I'm righthanded, that's the lefthand edge. If you're a lefty, that'll be the righthand edge.
With your rotary cutter, cut through the center of the block.
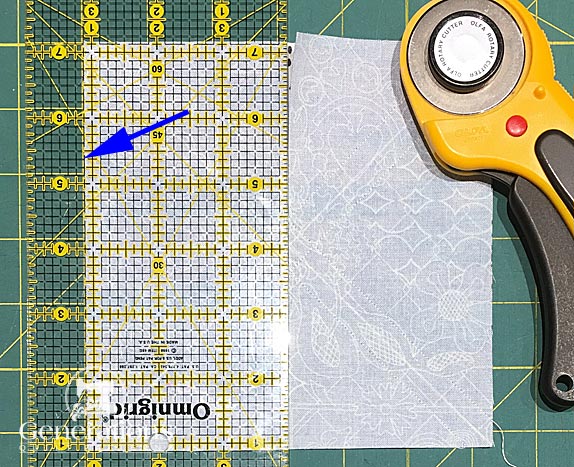
Without moving the patches, turn your mat a quarter turn. Using the same measurement, cut through the center again.
You've now got four equal pairs of sewn square like this.
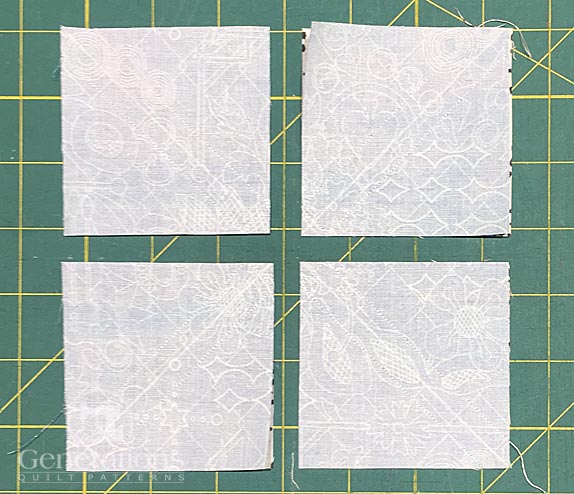
With either a scissor or rotary cutter, cut each pair in half along the original mark you drew.
Here are your 8 HST from just 2 patches.
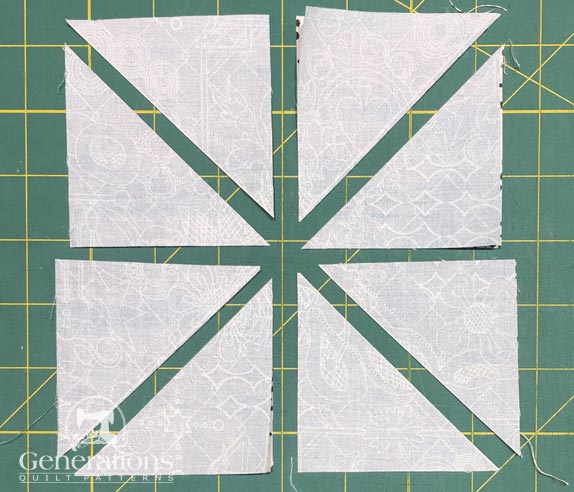
Press the units with the SA towards the darker fabric.
The pad that I'm pressing on in the picture below is my new favorite quilting tool—The Magic Pressing Mat—read my review on it here.
It's really helped me up my pressing game...by simply pressing on it! :D
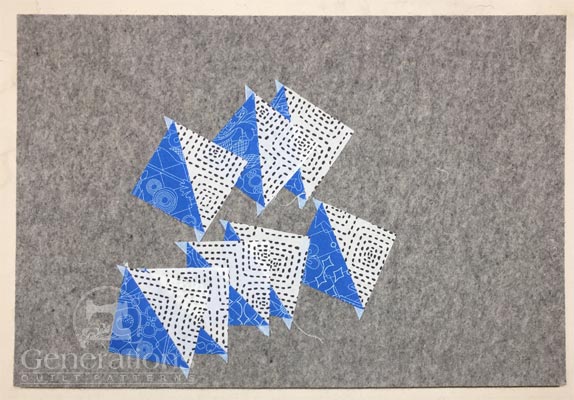 Half of the needed HST, now to repeat the process for the second pair of #1/#2 patches.
And finally trim the HST to size. Use the chart in this Step 2. Find "Trim HST to..." dimension. For this 12" sample it's 2-1/2" x 2-1/2".
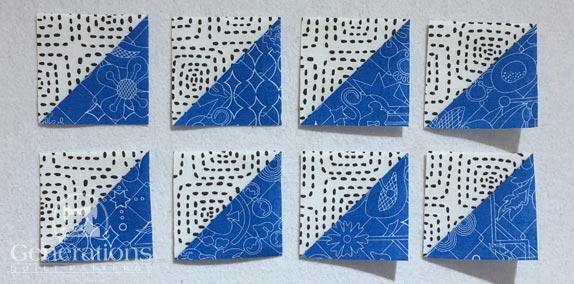 Perfectly sized HST for our Oklahoma Twister quilt block—now to trim the final eight.
Finish trimming the remaining HST units.
Quarter Blocks
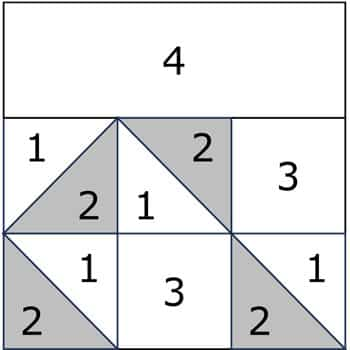
Make 4
To construct the blocks, we'll assemble the units into quarter blocks—it's impossible to stitch rows of 6 units together for this patchwork design.
Using the photo below, with RST, join a #1/#2 HST to both sides of a #3 square.
Press the SAs towards the #3 square to reduce bulk.
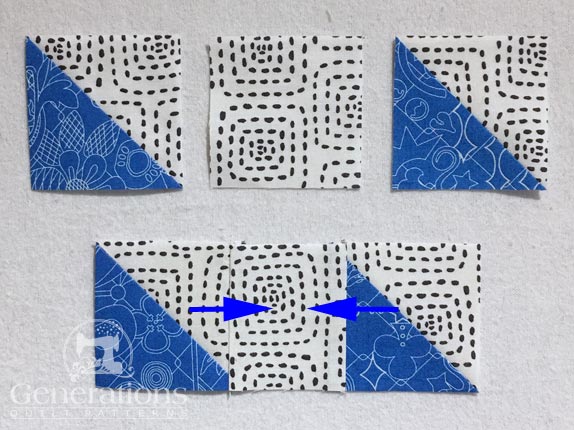 Press SA in the direction of the arrows.
Repeat for a total of four units.
With RST, add a #1/#2 HST and a #3 square to each side of a #1/#2 HST paying particular attention to the orientation of the HSTs. The seams in these HST nest if you pressed the HST SAs towards the dark.
SA are pressed in the direction of the arrows, out from the center.
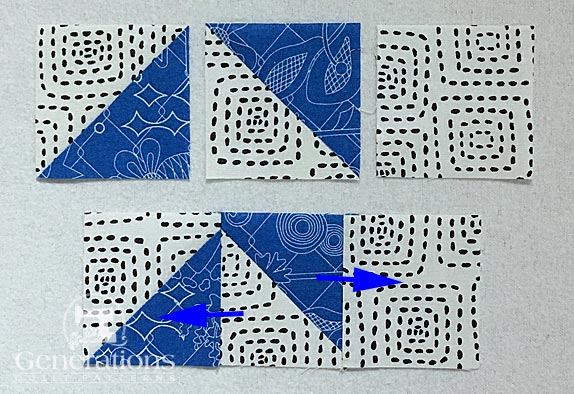
Repeat for a total of four units.
To complete the quarters, arrange the sewnn units and a #4 rectangle as shown below.
Stitch them together, pressing the SA out from the center (blue arrows).
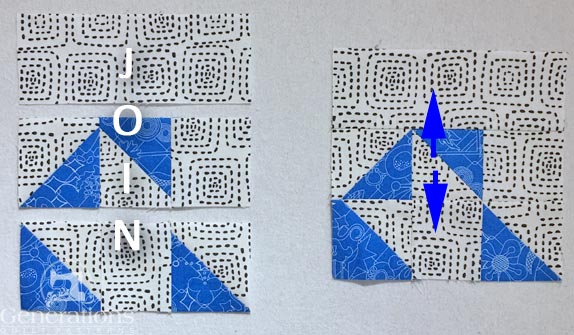
Here it is from the back side so that you can inspect the pressed SAs.
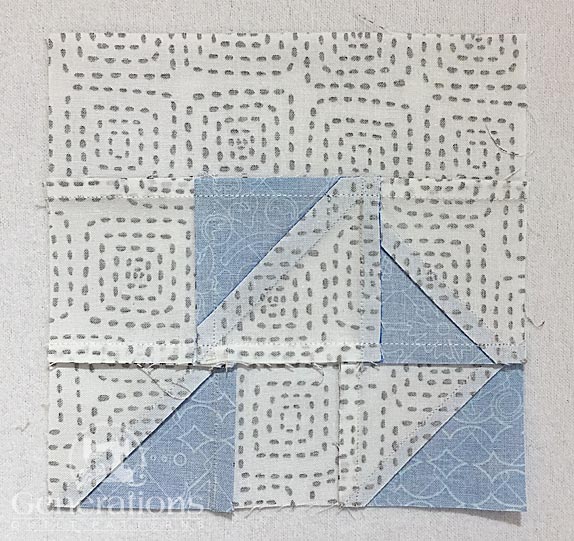 That's it. We're just 3 seams away from a finished Oklahoma Twister!
🧩 Assemble your Oklahoma Twister quilt block
Arrange the quarters to create the Oklahoma Twister design.
Starting from the upper-left corner, as you place the units, rotate them a quarter turn clockwise from the previous one. When they are correctly positioned, our old friend, the pinwheel, forms in the center.
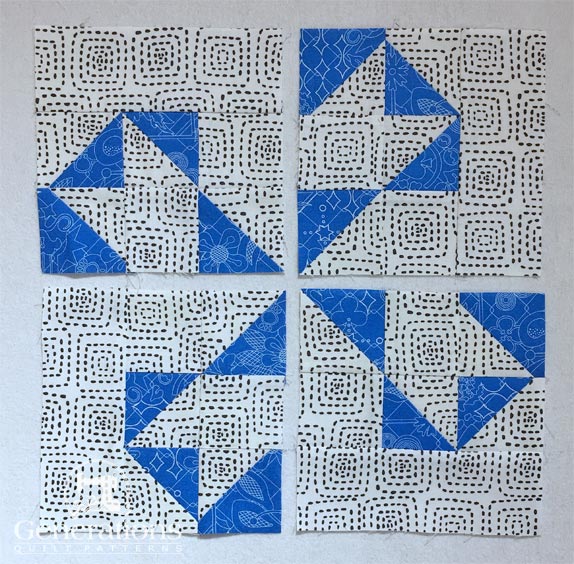
Stitch the pairs in each row together.
If you followed the pressing instructions, the SAs nest to make matching the seams easier, but you still may want to use a couple of pins. (I do—but choose what helps YOUR quilting workflow.)
Press the SAs you just stitched in opposite directions.
Sew the two rows together to complete the block.
And here it is!
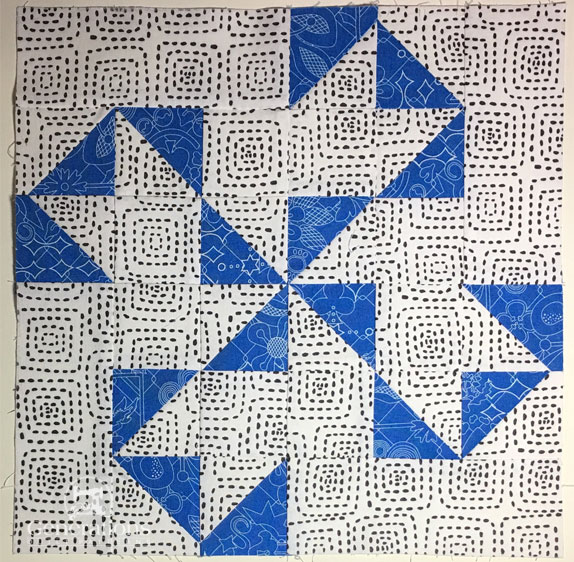 The finished Oklahoma Twister quilt block
And from the backside for one final check to see how the SAs are pressed.
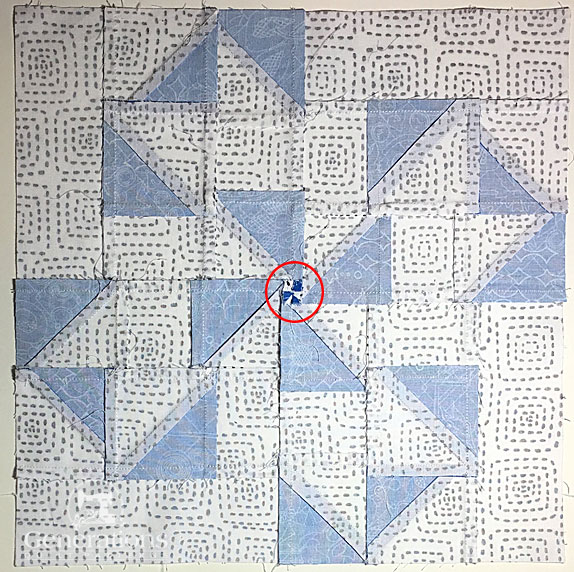
To reduce bulk in the very center of the block, I chose to twirl or fan the seam allowance. (red circle) That means loosening a couple of the stitches in the center SA—do not cut any of the short thread tails—to be able to fan the SAs are the center.
A final press and our block is finished. Take a bow—you've mastered the Oklahoma Twister dance! 👏
📌 Pin Now, Twirl With Fabric Later! 🌀🧵
Future You will be eternally grateful when you find this Oklahoma Twister tutorial waiting patiently on your Pinterest board. 🙏 Don't leave yourself frantically searching through browser history at midnight when the quilting muse strikes! 🌙✨
🌀More playful pinwheel quilt blocks to stitch!
You've finished your pinwheel quilt block, and you're ready for more!
Our pinwheel quilt blocks are a delightful blend of playful interlocking patterns and vivid, eye-catching color. The interlocking patterns dazzle your eyes and inspire your creativity, while our step-by-step instruction ensures that you can create these stunning blocks with ease.
Click here to dive in and turn your fabric into MAGIC!
For even MORE blocks to make… 🧩🎨

...visit our Free Quilt Block Pattern Library, with over 260+ blocks to choose from in multiple sizes.
Free downloads are included in all sizes for any blocks require paper piecing patterns or templates.
- Home
- Free Quilt Block Patterns
- Oklahoma Twister Quilt Block


