- Home
- Free Quilt Block Patterns
- Northern Lights Quilt Block
Sew Your Own Aurora: The Northern Lights Quilt Block Tutorial
From our Free Quilt Block Patterns Library
This post contains affiliate links, for which I receive compensation.
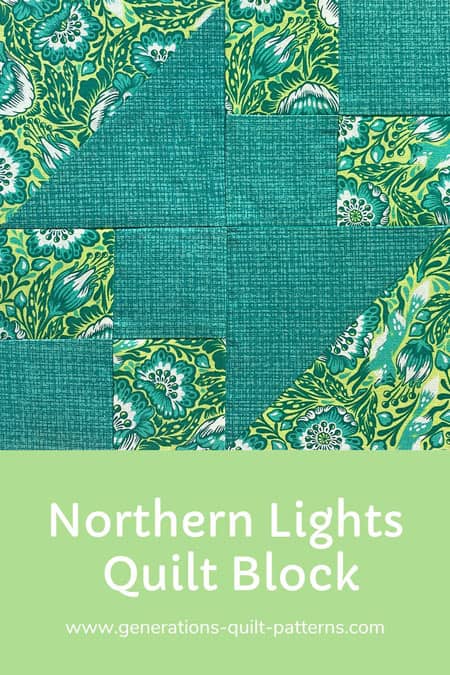
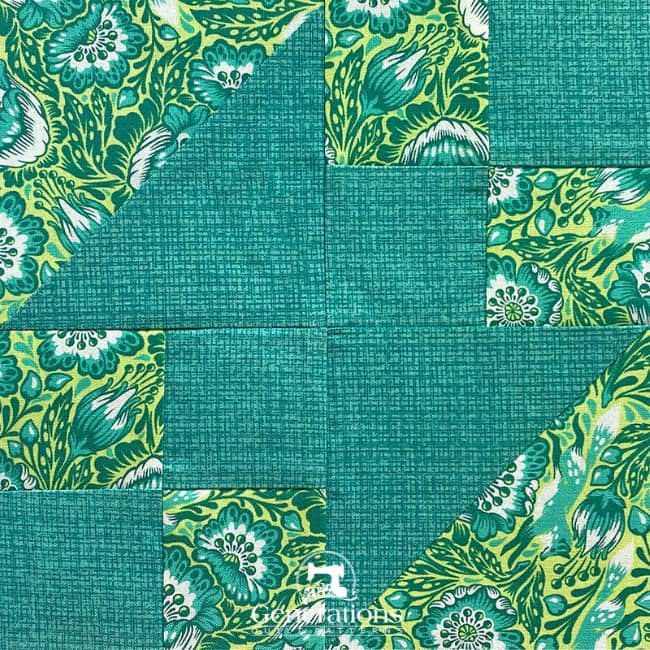
Illuminate your quilting journey with the Northern Lights quilt block! 🌟
This beginner-friendly design is as easy as counting to two—two basic units, that is! Half square triangles and 4-patches come together to create a dazzling effect that's sure to light up your creativity.
And here's a bright idea: 💡 while our tutorial showcases a two-fabric version, feel free to let your scrappy side shine! 🌈
Use these links to quickly jump to different parts of the tutorial:
Ready to stitch up your own fabric aurora? Let's get glowing!
📋 General Instructions
These abbreviations are used in the tutorial:
- SA - seam allowance
- RST - right sides together
- HST - Half Square Triangle
All seam allowances (SA) are 1/4".
To press, s the pieced unit flat to first pressed flat to set the seam. Then open the patches, pressing from the front.
Seam allowances are pressed to the darker fabric unless otherwise noted.
Pressing instructions are highlighted in yellow to make them easy to find.
The newest quilt fabrics to tickle your fancy...
Click the images below to see the full collection. We share any commercial and/or free patterns that showcase them, too. (For inspiration, of course!)
✂️ Cutting for a Northern Lights
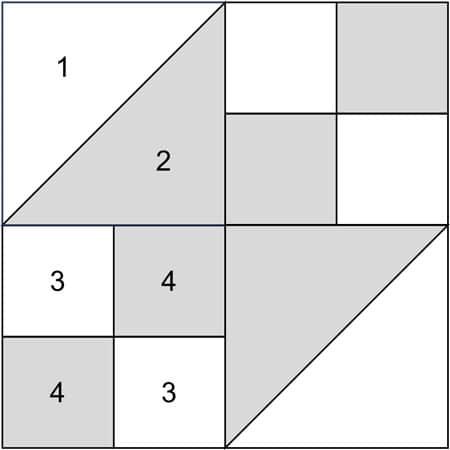 Northern Lights quilt block
Finished Block Size: 8" finished / 8½" unfinished
Grid: 4x4
Design Type: 4-patch
The squares for the half square triangles (marked with **) are based on using the Quick Piecing technique. If your 1/4" seam allowance is perfect, use these measurements.
I like to start with over-sized squares, stitch the unit and then trim to an exact size, so I added an extra 3/8" to each measurement in #1 and #2 before cutting.
Enquiring minds…
Why 3/8" instead of a 1/4" you ask? I simply find it easier to cut units in 1/4" increments. Using 3/8" gives me that.
 | Cutting Chart for a~ Traditional Piecing ~ | ||||||
|---|---|---|---|---|---|---|---|
| Patch | Fabric | Qty | Finished Block Size | ||||
| 3'' | 4'' | 6'' | 8'' | 12'' | |||
| 1** | Light | 1 | 2⅜'' x 2⅜'' | 2⅞'' x 2⅞'' | 3⅞'' x 3⅞'' | 4⅞'' x 4⅞'' | 6⅞'' x 6⅞'' |
| 2** | Dark | 1 | 2⅜'' x 2⅜'' | 2⅞'' x 2⅞'' | 3⅞'' x 3⅞'' | 4⅞'' x 4⅞'' | 6⅞'' x 6⅞'' |
| 3 | Light | 1 | 1¼'' x 6'' | 1½'' x 7'' | 2'' x 9'' | 2½'' x 11'' | 3½'' x 15'' |
| 4 | Dark | 1 | 1¼'' x 6'' | 1½'' x 7'' | 2'' x 9'' | 2½'' x 11'' | 3½'' x 15'' |
| Unfinished Block Size | 3½'' | 4½'' | 6½'' | 8½'' | 12½'' | ||
| Grid Size | ¾" | 1'' | 1½'' | 2'' | 3'' | ||
🪡 Create the units for your Northern Lights quilt block
Half Square Triangles
Make 2
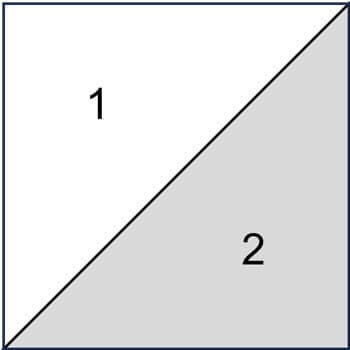
Using the Quick Piece technique for making half square triangles, draw a diagonal line on the back of your lighter #1 square. I like using a mechanical pencil for its consistently fine line.
With RST layer a #1 and #2 square and stitch a 1/4" from each side of the drawn line.
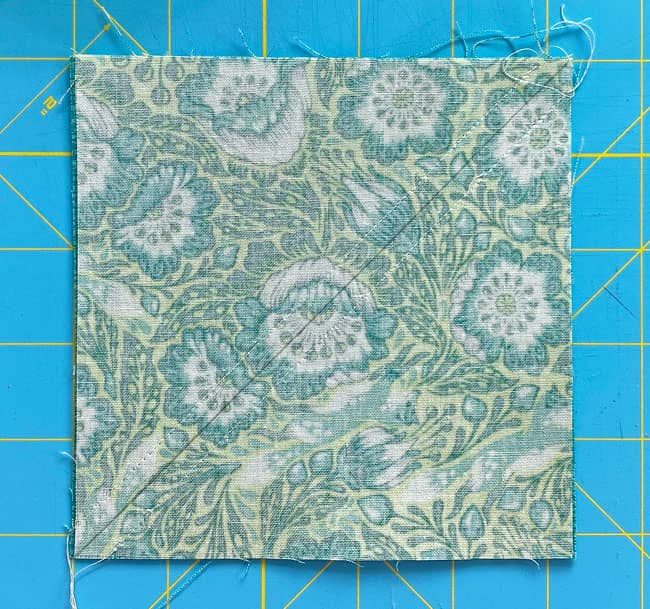 Marked and stitched, our #1/#2 squares are ready to cut in half.
Cut on the line to create two HST units.
Press.
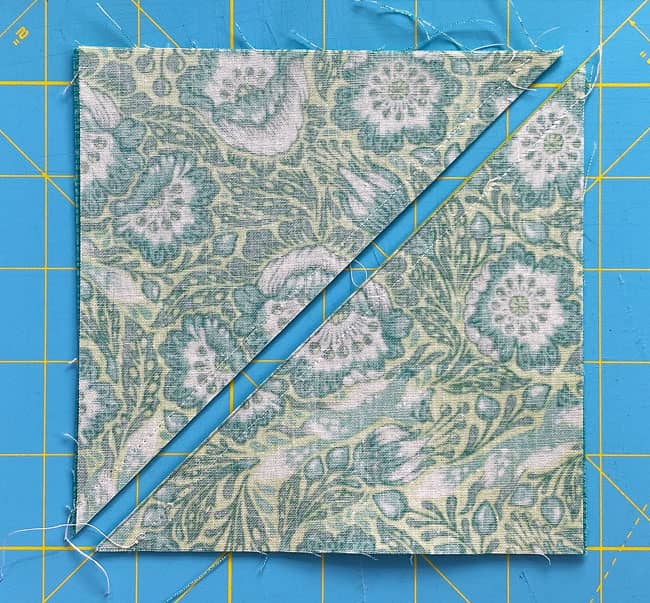
If you cut oversized patches, use the chart below to find the 'Trim HST to…' size. If you cut your patches exactly, use this same measurement to check for accuracy. Make any necessary adjustments.
The HSTs for our 8" sample are trimmed to 4½" square.
HST Dimensions | |
|---|---|
| Finished Block Size | Trim HST to… |
| 3" | 2" |
| 4" | 2½" |
| 6" | 3½" |
| 8" | 4½" |
| 12" | 6½" |
Place the diagonal line on your square ruler directly over the seam, positioned so that you can trim to the perfect size.
Cut away any exposed excess.
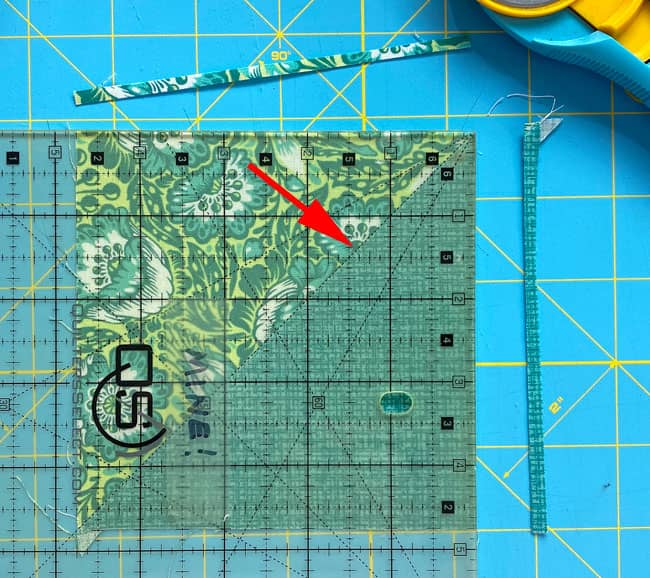
Turn the mat (or your block) 180°, and:
- Align the diagonal line with the seam, and
- Match the freshly cut edges with the lines on the ruler for the 'Trim HST to...' size. For our 8" sample, that measurement is 4½".
Trim away any exposed excess fabric.
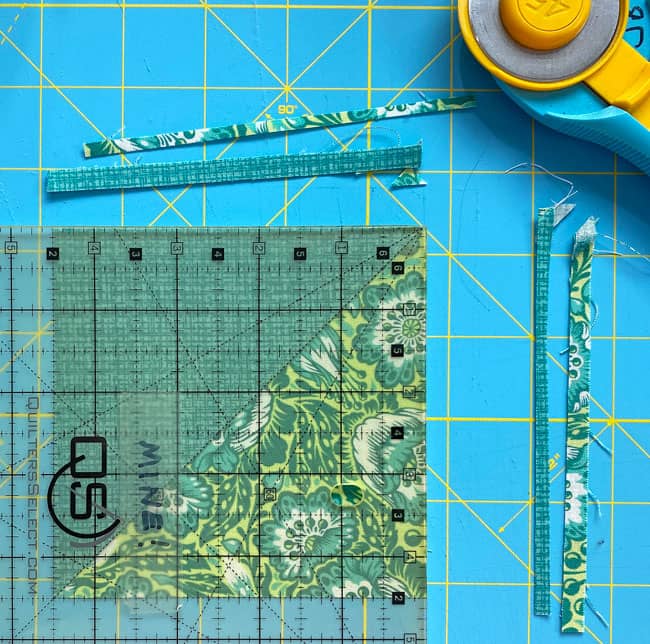
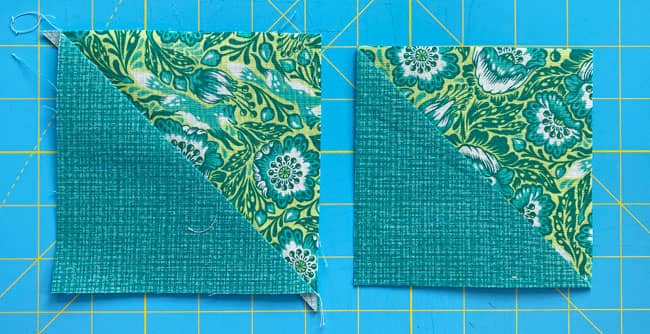
The untrimmed, oversized block on the left—remember (I added ⅜" to each measurement before cutting—and the trimmed-to-perfection HST on the right.
Four Patches
Make 2
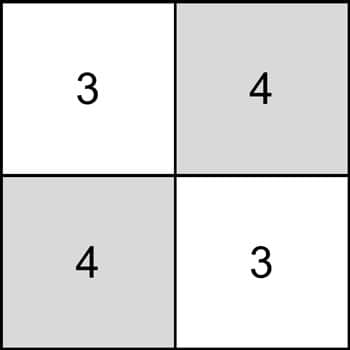
With RST, layer a #3 and #4 strip and stitch along the long edge to create a strip set.
Press,
Use the chart below to check that your strip set is the correct width.
Four Patch Measurements | |||
|---|---|---|---|
| Finished Block Size | Stripset Width after stitching | SubCut Width | 4-Patch Dimensions |
| 3" | 2" | 1¼" | 2" x 2" |
| 4" | 2½" | 1½" | 2½" x 2½" |
| 6" | 3½" | 2" | 3½" x 3½" |
| 8" | 4½" | 2½" | 4½" x 4½" |
| 12" | 6½" | 3½" | 6½" x 6½" |
At your cutting mat, check the strip set width for accuracy. (We need a 4½" wide stripset for our 8" sample.)
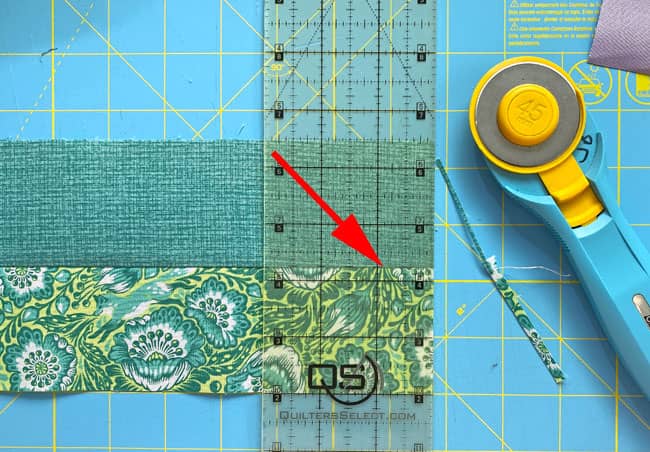
To straighten one short side, align a straight line on your ruler with the seam line (red arrow). Trim just enough to create a clean, straight edge.
Find the 'Subcut Width' in the chart for your block size. Cut four pieces from the strip set using this width.
For our 8" sample, the subcut is 2½".
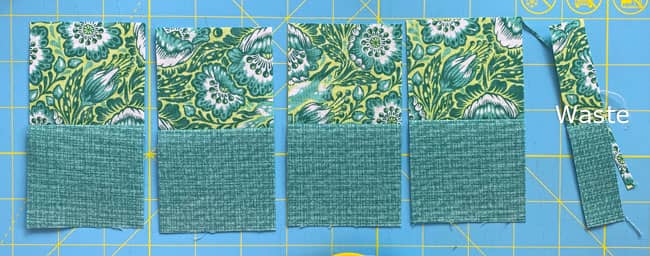 Four subcuts 2½" wide for the 8" sample block
Alternate the segments (below, left). Sew each set into a 4-path (below, right)
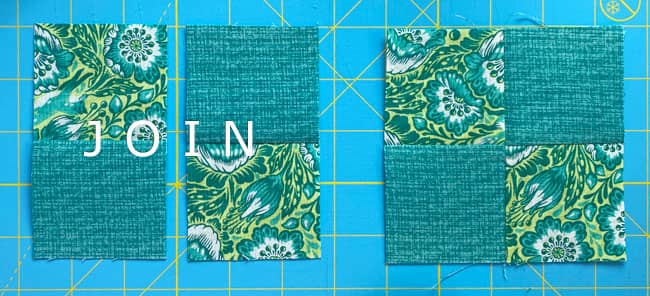
Check your completed four-patch units against '4-Patch Dimensions' in the chart above.
For our 8" sample, the dimensions are 4½" square.
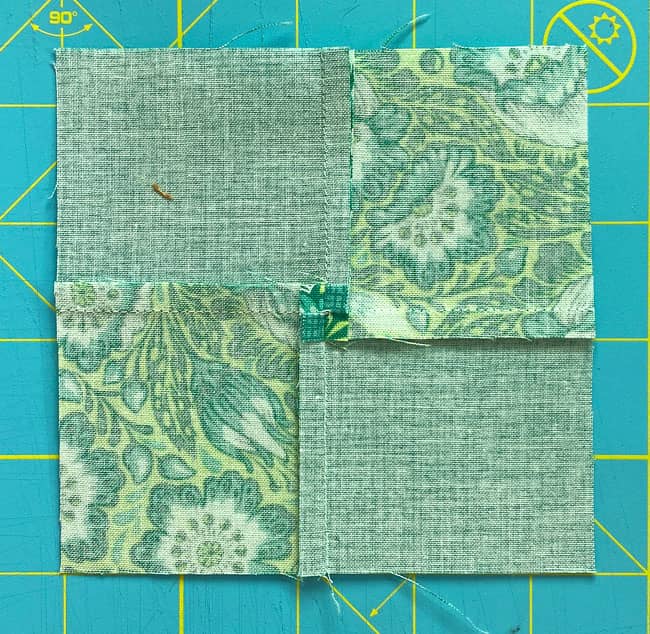
While this last step is optional, it does help to reduce bulk.
Why do we care? Because it's easier to quilt with our domestic machine when there's less.
Loosen the stitches in the center of the SA. DO NOT CUT THE THREAD TAILS—they maintain the integrity and stability of the unit.
Using your fingers, manipulate the SAs clockwise around the center
🧩Assemble the Northern Lights Quilt Block
It's Layout Time 📐:
- Place dark halves of HSTs in the center
- Position dark squares of 4-patches in outside corners
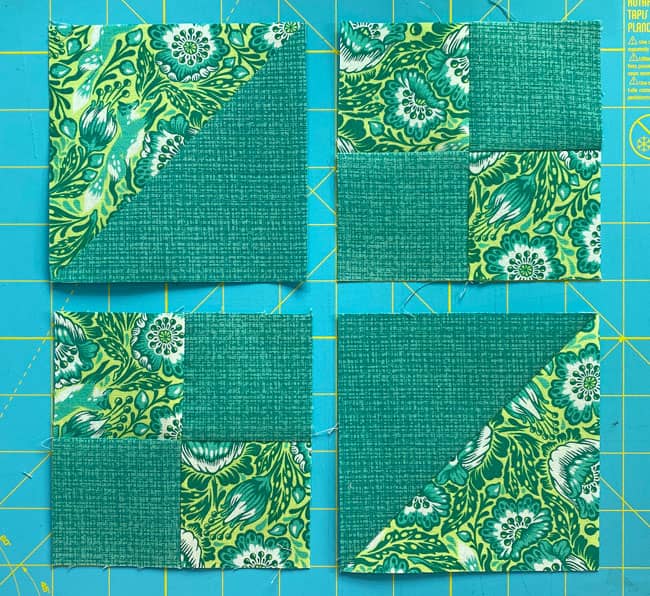
Stitch the patches into rows.
Right before sewing, flip them open to make sure you haven't turned things around. It's easy to do…in fact, I did it while making this sample! 😉
You can press in either direction, just be consistent so that your seams will nest for ease in matching the seams. For the sample, these seams were pressed towards the HSTs.
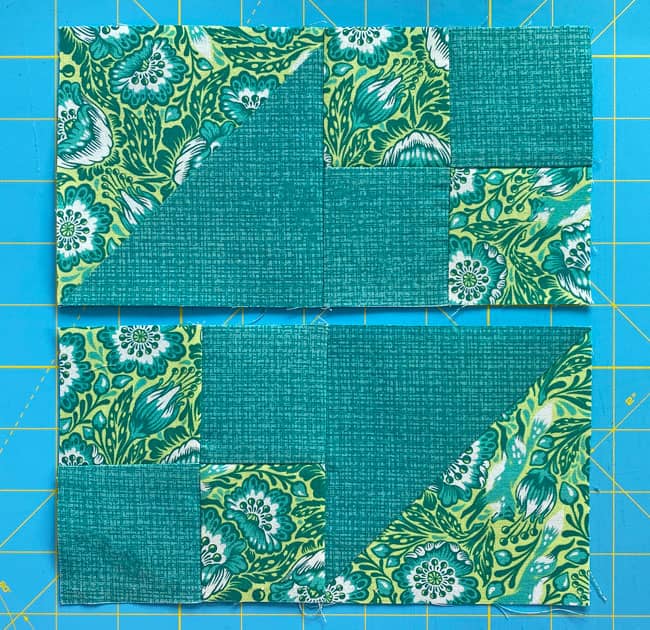
Sew the two rows into a block. I twirled the seam allowance to reduce bulk in the center of the block.
Let's take a closer look.
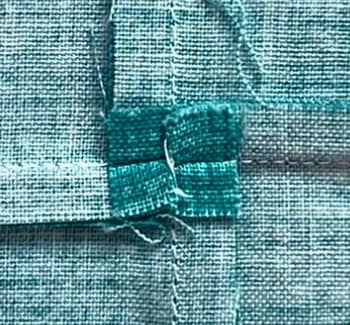 The thread tail is still there as expected
You'll pick out a couple of the stitches holding the seam together starting at the edge of the seam up to the stitching that crosses it. Then you're able to maneuver each seam into position.
Instead of having the bulk of the seam all pressed to one side, you can spread it around the joined seam.
This is your finished Northern Lights quilt block from the backside with all three twirled or fanned SAs to reduce bulk.
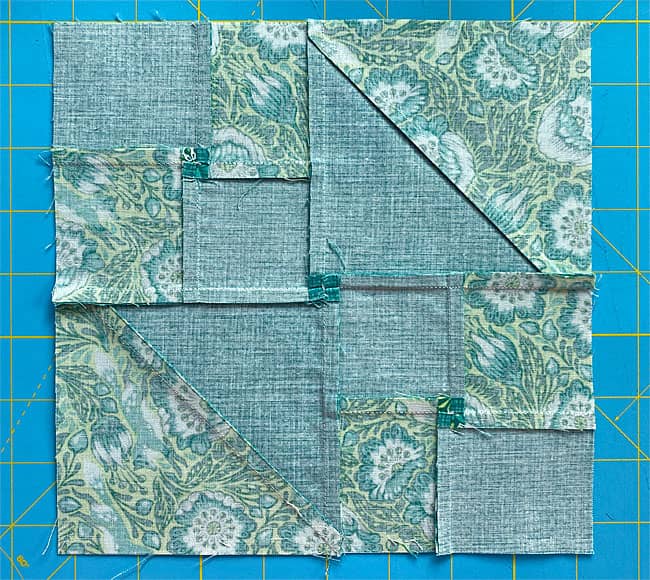
Voila! ✨ Your Northern Lights quilt block is complete. Doesn't it look amazing?
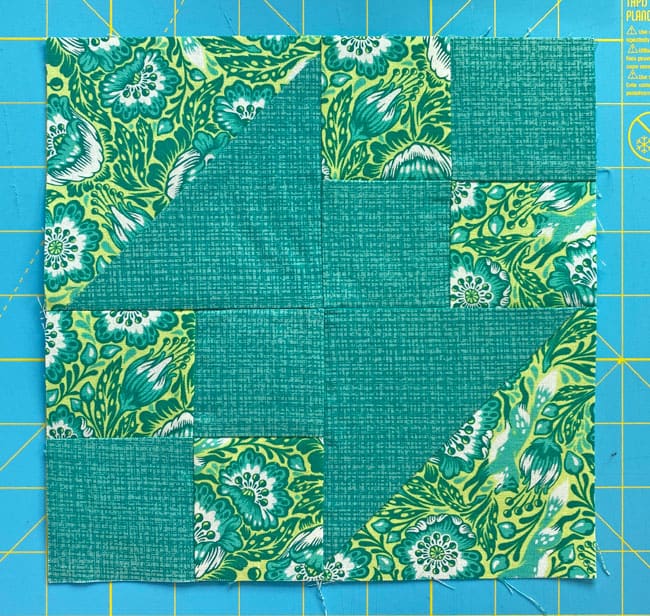
Remember, every quilt is a learning experience. Embrace the journey and enjoy watching your skills grow with each block you make! 💖🧵
🌟 Feeling overshadowed by complicated quilt patterns? 📌
Let the Northern Lights block be your guiding star! ✨
This beginner-friendly design uses simple shapes to create a luminous effect. 📌 Pin this tutorial now and keep this bright idea on your radar. 💡🧵
For even MORE blocks to make… 🧩🎨

...visit our Free Quilt Block Pattern Library, with over 260+ blocks to choose from in multiple sizes.
Free downloads are included in all sizes for any blocks require paper piecing patterns or templates.
- Home
- Free Quilt Block Patterns
- Northern Lights Quilt Block
