- Home
- Free Quilt Block Patterns
- Nine Patch Star Quilt Block
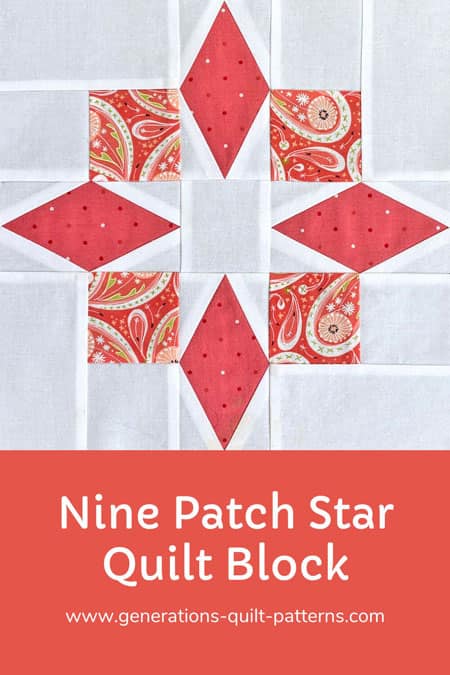
The 'Life's Too Short for Miters' Nine Patch Star Quilt Block Tutorial
✂️ Where traditional designs meet modern efficiency! ✨
This post contains affiliate links, for which I receive compensation.
Our Nine Patch Star quilt block delivers all the charm without the challenge! If you're looking for a design that combines classic nine-patch construction with a touch of sparkle—but skips the unnecessary fussiness—you've found your perfect match!
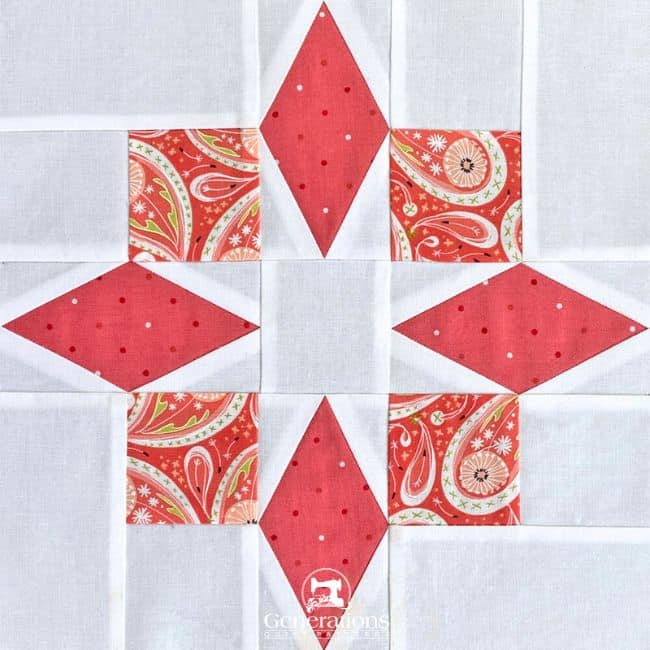
Skill Level: Confident Beginner
This block is perfect if you:
- Can sew a consistent quarter-inch seam
- Have tackled basic squares and rectangles
- Are comfortable with simple paper piecing (or excited to try!)
- Appreciate patterns that don't waste your precious quilting time
Don't worry about complex techniques or specialty tools—we've streamlined this traditional design to use straightforward piecing methods that give beautiful results. Discover how this classic block has been reimagined for today's busy quilter—without sacrificing any of its star power! You might just find yourself using this same approach on other 'fussy' patterns in your collection.
Let's create something stellar together!
🔎 Find It Fast Feature 🏃♀️
Your quilting time is precious, and we don't want you wasting it scrolling! These handy links will zip you straight to the information you need.
Do you have more quilts in your head than you have time to make?
If you're like me, you do.
The original Nine Patch Star block shown in Barbara Brackman's 'Encyclopedia of Pieced Quilt Patterns', 3rd edition (pg 427 in the 3rd edition) shows a design with mitered corners (blue arrow).
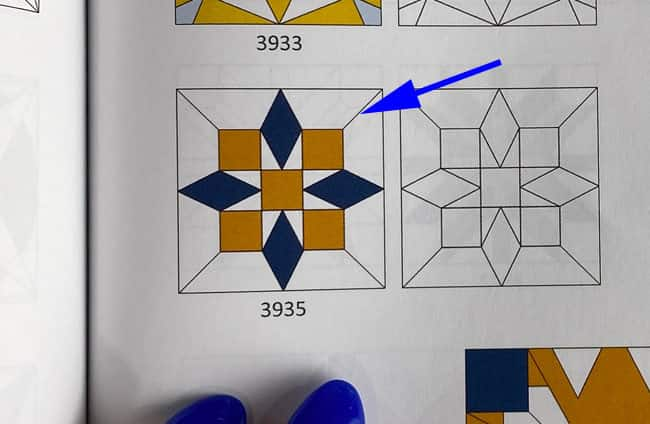
Seriously?!!
Life's too short for unnecessary fussiness! Fiddly-farting around with mitered corners, when it's not something I do regularly—not even once a year—is not how I want to spend my precious quilting time. Especially when there's no significant design advantage in this particular block.
So I made an executive quilter's decision (and YOU have that power, too!): squares and rectangles instead of those pesky mitered corners.
Remember, quilt patterns are invitations, not commandments. They're meant to inspire, not intimidate. Feel free to modify any pattern to match your preferences, skills, and available time.
Peace returns to the sewing room, eh?
📋 General Instructions
⚡ PRINTING TIP: Need help printing this tutorial? Click here for easy instructions!
Several abbreviations are used on this page. They are:
- SA - seam allowance
- RST - right sides together
- DiaR - Diamond in a Rectangle
A 1/4" SA is used in this tutorial.
Highlighted in yellow, pressing instructions are easy to spot.
✅ KEY TECHNIQUE: To press efficiently, first press the patches in the closed position as they came off your sewing machine. This sets the seam, melding the fibers of the threads into the fabric. Then press the SA to the dark unless otherwise noted.
📥 Download and print the paper piecing pattern
To download the pattern, use the most current version of Adobe.
For accurate results, on Adobe's Print Menu page, under 'Page Size and Handling' set 'Custom Scale' to 100%. Then print.
Click here to see what it looks like on the Print Menu page.
Choose your finished block size from the chart below. For each block you make, print the corresponding number of copies for a total of:
- 4 Diamond in a Rectangle
- 1 template
Download and Print | ||||
|---|---|---|---|---|
| Finished Block Size | DiaR Sizes | # of Copies to Print | Templates | |
| Finished | Unfinished | |||
| 5" | 1" x 2" | 1½" x 2½" | 1 | 1 |
| 7½" | 1½" x 3" | 2" x 3½" | 1 | |
| 10" | 2" x 4" | 2½" x 4½" | 1 | |
| 12½" | 2½" x 5" | 3" x 5½" | 2 | |
| 15" | 3" x 6" | 3½" x 6½" | 2 | |
After printing, use the 1" square graphic on the printed page(s) to double check that your patterns printed at the correct size.
Then cut out the required number of patterns from your copies. A rough cut is good enough—an 1/8"-1/4"-ish away from the outside dashed square.

Not sure which paper to use?
Take a look at my review of several of the most popular brands available to us quilters on the market.
You want a super-easy paper to tear away—less stress on the stitches.
✂️ Cutting patches for a Nine Patch Star block
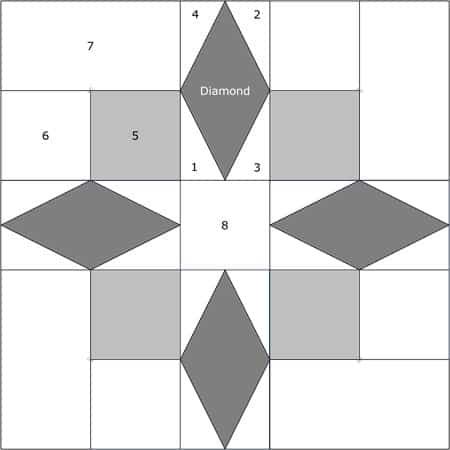
Sample Block Size: 10" finished / 10½" unfinished
Grid: 5x5
Barbara Brackman ID: 3935
Design Type: Star | Paper piecing | Uneven 9-patch, small center
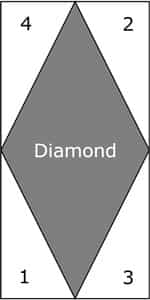
Please label all your patches. We use their numbers throughout this tutorial.
I must admit to being a bit concerned about the value (lights and darks) placement in this block. Dark fabric tends to recede visually, while light tends to come forward.
My choices definitely go together, but would my star shine?
Even after decades of quilting, I still second-guess fabric placement sometimes.
My executive quilter tip? Make a sample block when you're unsure. Those few extra minutes can save hours of seam-ripper frustration later!
I think my choices worked in the final block. Do you?
 | Cutting Chart for a~ Includes Paper Piecing ~ | ||||||
|---|---|---|---|---|---|---|---|
| Patch | Fabric | Qty | Finished Block Size | ||||
| 5'' | 7½'' | 10'' | 12½'' | 15'' | |||
| Diamond | Dark | 4 | 1½'' x 2½'' | 2'' x 3½'' | 2½'' x 4½'' | 3'' x 5½'' | 3½'' x 6½'' |
| 1, 2, 3, 4 | Bac | 8 | 2⅜'' x 2¼'' | 2⅝'' x 2¾'' | 2⅞'' x 3¼'' | 3⅛'' x 3¾'' | 3⅜'' x 4¼'' |
| 5 | Light | 4 | 1½'' x 1½'' | 2'' x 2'' | 2½'' x 2½'' | 3'' x 3'' | 3½'' x 3½'' |
| 6, 8 | Bac | 5 | 1½'' x 1½'' | 2'' x 2'' | 2½'' x 2½'' | 3'' x 3'' | 3½'' x 3½'' |
| 7 | Bac | 4 | 1½'' x 2½'' | 2'' x 3½'' | 2½'' x 4½'' | 3'' x 5½'' | 3½'' x 6½'' |
| Unfinished Block Size | 5½'' | 8'' | 10½'' | 13'' | 15½'' | ||
| Grid Size | 1'' | 1½'' | 2'' | 2½'' | 3'' | ||
Here are all the patches. The orange with dots is my dark, and the paisley is the light. My go-to background is Bella Solid 9900 98, Bleached White that I buy by the 20 yard bolt.
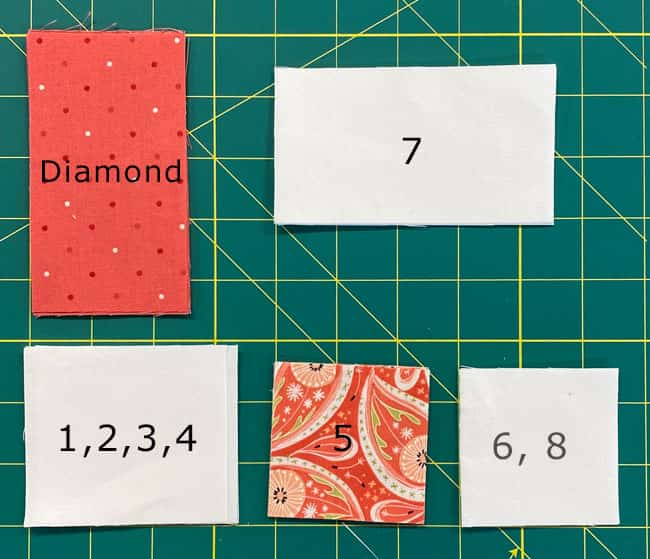
✂️✂️ Subcutting
To subcut the #1-#4 rectangles, layer them in pairs with right sides together for mirror images.
Check your rectangle orientation carefully—for most sizes, the longer sides are left/right, but for the 5" block only, the longer sides are top/bottom.
Make two tick marks: one 5/8" from the left on the top edge, and another 5/8" from the right on the bottom edge (blue arrows).
Align your ruler between these marks and cut diagonally. I find it easiest to work with 2 piles of 4 patches each.
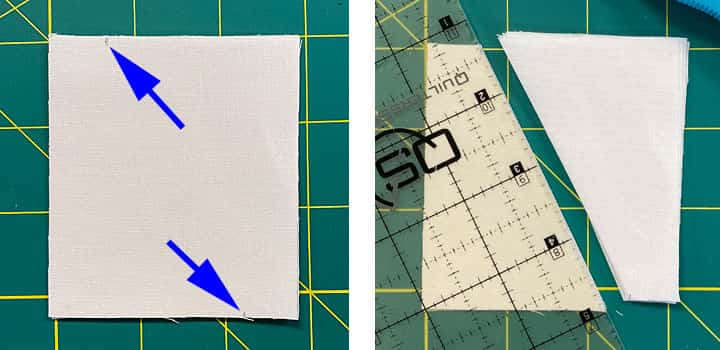
To subcut the diamond shapes we use the template. Cut the template out exactly on the short top, bottom and sides. Close to the line is good enough for the four diagonal sides.
Layer these rectangle in a single pile...right side up or down doesn't matter because this unit is symetrical.
I like to use some tape to hold the template in position on top of this pile.
Using your rotary ruler, cut away the excess with your rotary cutter.
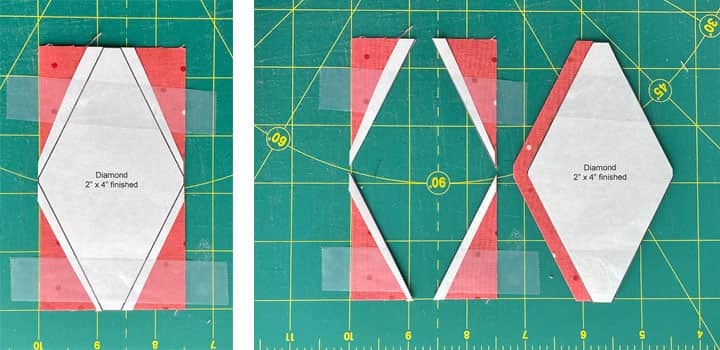
These patches will fit within the dashed placement lines in the DiaR pattern.
🧵 Create the units for your Nine Patch Star
Diamond in a Rectangle (DiaR)
Make 4
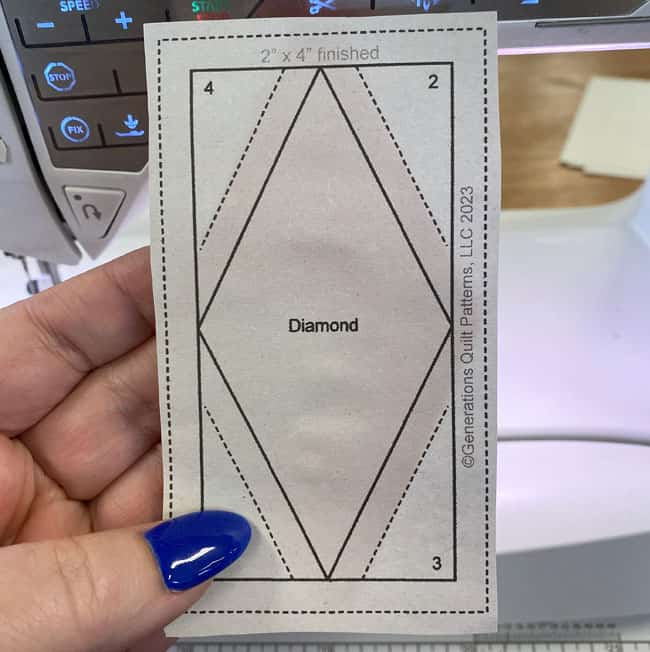
Use a tiny bit of Elmer's Washable Glue Stick® to hold a diamond patch in position between the dashed lines on the unprinted side of the pattern.
We need to make a few adjustments to our sewing machine settings to paper piece.
- Reduce your stitch length to 16–20 stitches per inch (1.3-1.6 mm). This perforates the paper and stabilizes the seam when you remove the pattern. [Learn more about stitch length here.]
- Reduce your machine's speed or just plain slow down. Sew only as fast as you can AND stay on the solid stitching line.
- Install an open toe appliqué foot (sometimes called an 'embroidery' or 'satin stitch' foot) if you have one (it makes it easier to see where you're stitching).
- Use a larger needle (90/14) IF you have problems removing the pattern. Personally, I use an 80/12 Microtex Sharp for paper piecing without any issues.
With RST, match the long bias edges of the Diamond to #1.
✅ KEY TECHNIQUE:
In our sample, the background fabric is much lighter than the dark. To keep the darker print from shadowing through the light background in the finished block, nudge the edge of the lighter patch a couple of threads past that of the print. (blue arrow)
A simple technique to prevent a lot of angst later.
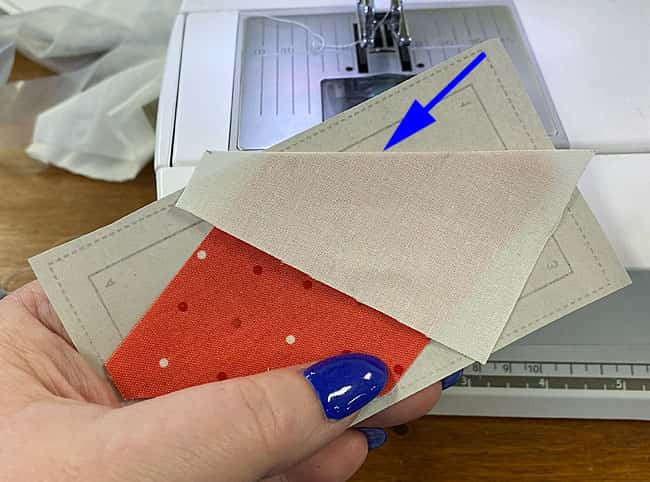
Sew this seam, starting and ending your stitches past the outside dashed lines that surround our unit.
Fingerpress the patch out of the way. Repeat for #2.
Press with your iron.
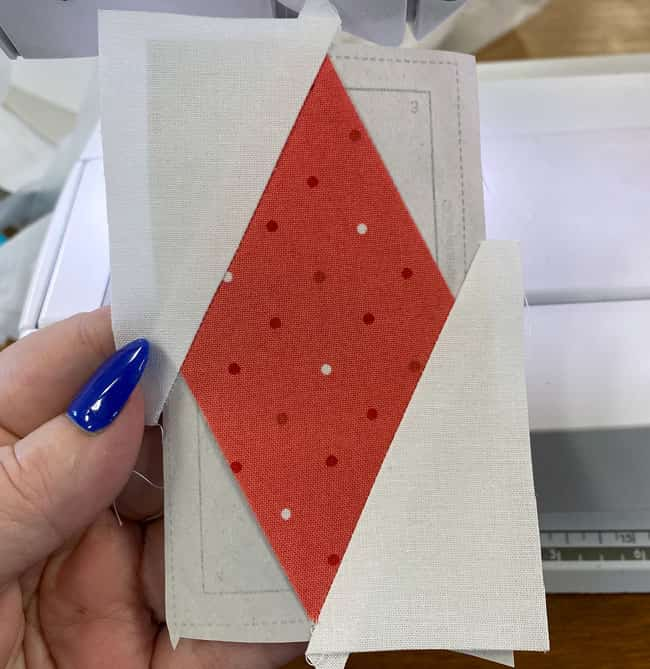
Position #3 RST with the Diamond. Sew and fingerpress open and out of the way.
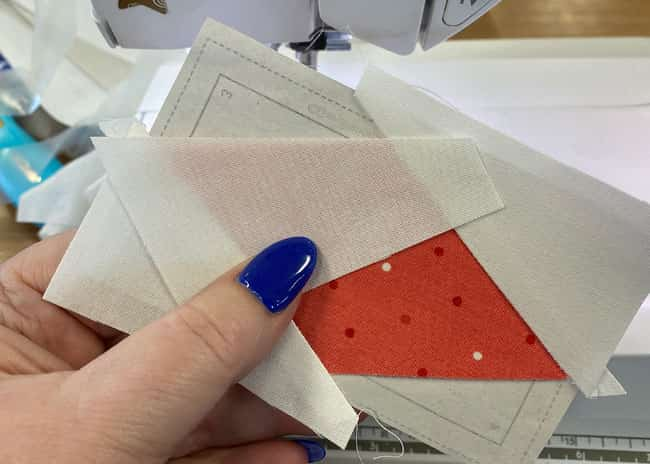
Finish off your DiaR with #4.
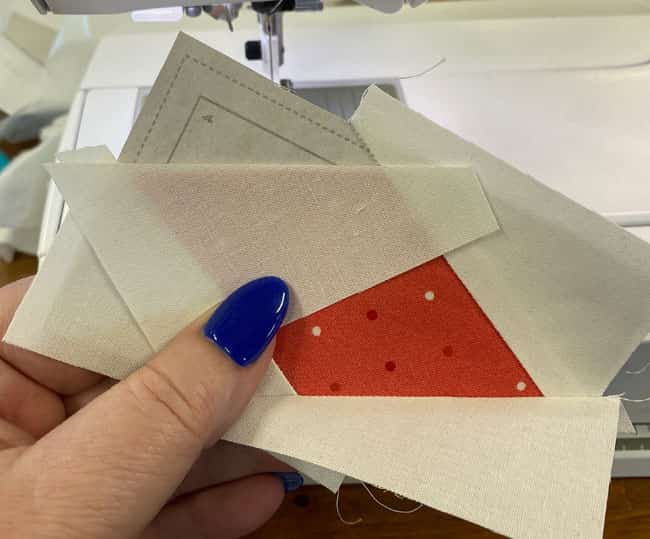
Press with your iron.
Trimming
At your cutting mat, pattern side up, match the 1/4" mark on your ruler with one side of the solid line that surrounds your DiaR.
Trim away the excess with your rotary cutter.
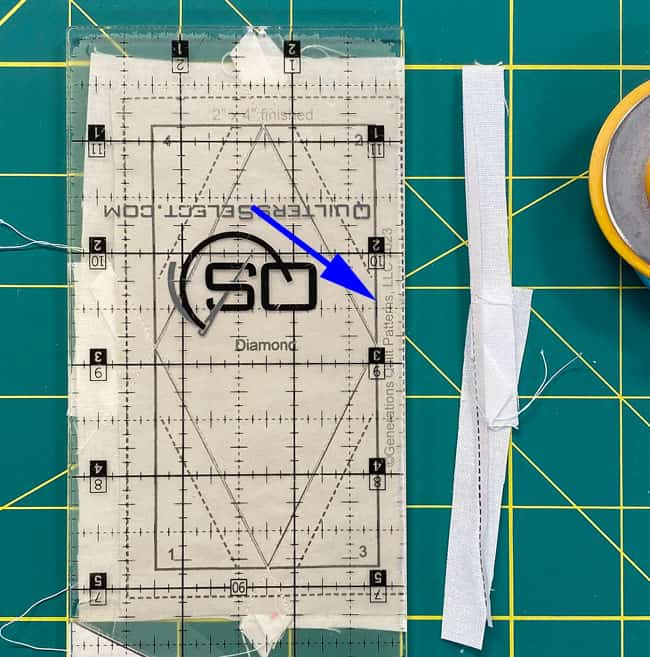
Repeat for the 4 sides of all the DiaRs.
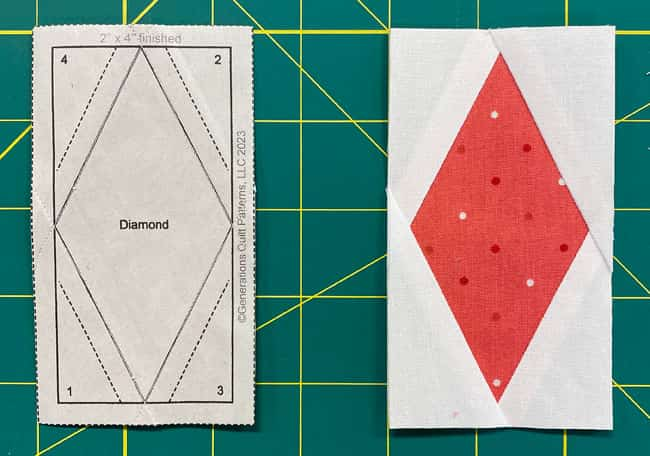 A trimmed DiaR from the pattern side (left) and fabric side (right)
We cut our patches so we'd finish with a unit with straight of grain on all the outside edges, just like a traditionally pieced block. The paper's job is done and should be removed now.
The paper piecing is complete. From this point forward, return your stitch length to the one you regularly use for piecing and install your favorite 1/4" presser foot.
Corners
Make 4
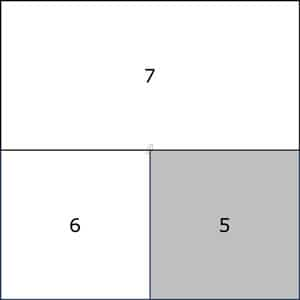
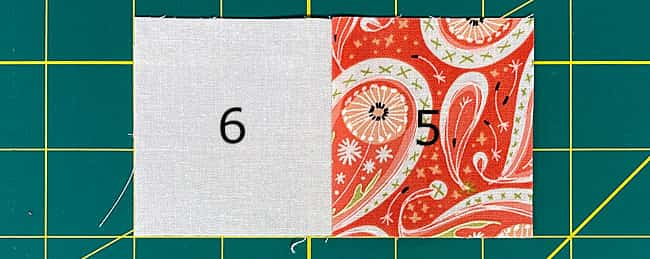
With RST, stitch a #5 to a #6. Repeat for 4 pairs.
This seam is pressed towards 5.
With RST, sew a #7 to the #5/#6. Pay attention to the positioning of the #5. We want all these units to be the same.
Press the SA away from #5/#6.
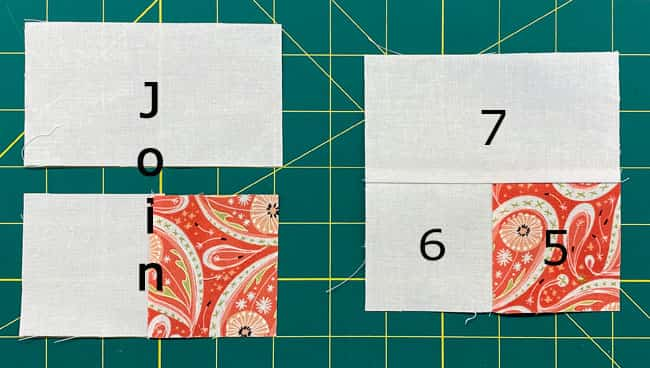
It's a good habit to check the accuracy of your units as you piece. Blocks whose units are the correct size are much easier (and satisfying!) to stitch together.
Use the chart below to check your accuracy. 📏 ✅
After sewing, the Corners measure... | |
|---|---|
| Finished Block Size | Edge-to-edge Measurement |
| 5'' | 2½" x 2½" |
| 7½" | 3½" x 3½" |
| 10" | 4½" x 4½" |
| 12½" | 5½" x 5½" |
| 15" | 6½" x 6½" |
🧩 Final Assembly
It's time to get this little beauty put together!
Arrange your patches with the darker #5 squares toward the center, the DiaR in the middle on the sides and a cut square in the center. ✅
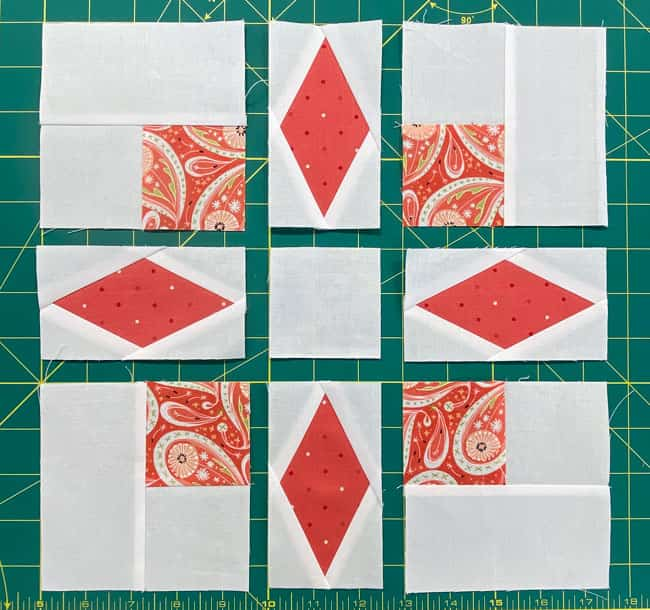
Stitch the units into rows. I like to use pins to get a good match at the point of the #5 square and wide point on the DiaR.
These seams are pressed away from the DiaR.
✅ KEY TECHNIQUE: The seams can get a bit bulky when you're matching points. Take a look at my favorite pressing technique to ensure these seams are as flat as possible—no purchase of an expensive clapper needed!
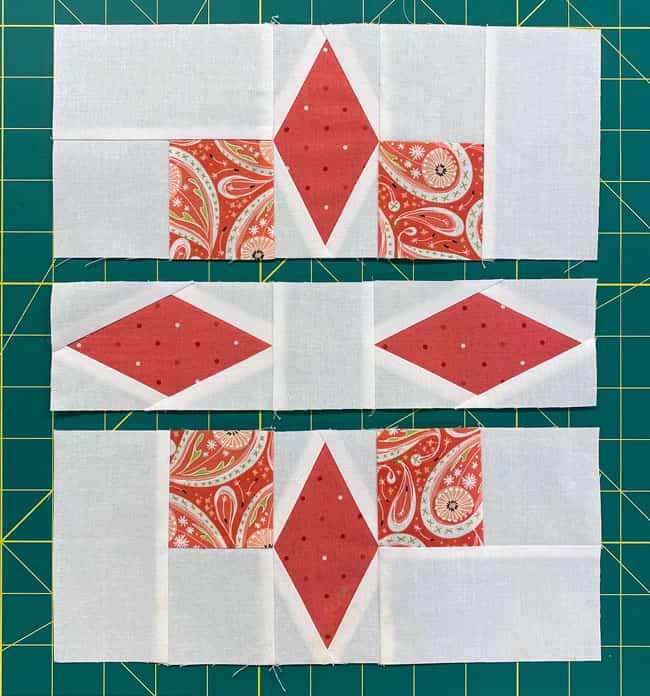
At last, sew the rows together, matching the points on the diamonds and squares and center seams.
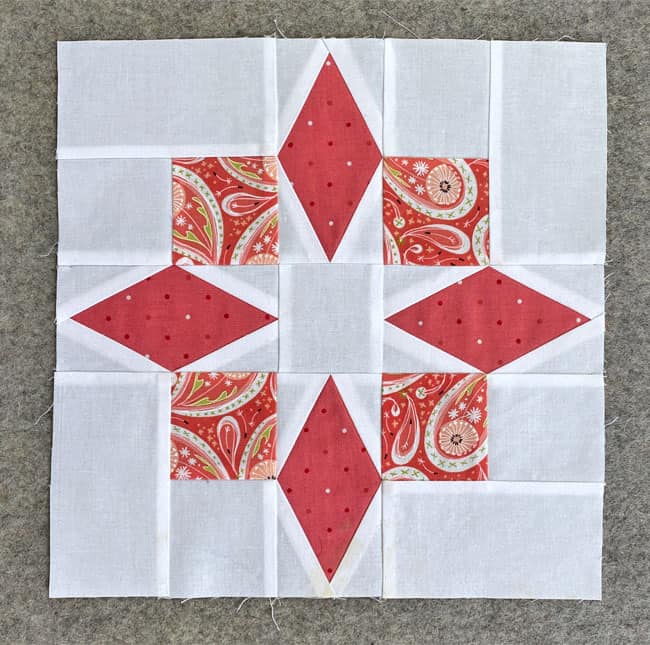
One final turn at your ironing board. You did it!
From the back side, you can see that those last two seams were pressed away from the Diamond in a Rectangle units.
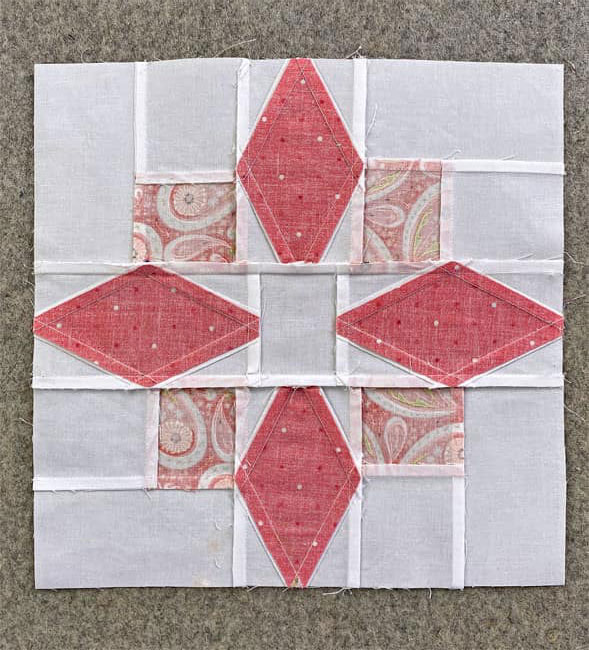
🪄 Star block complete! Now wasn't that easier than fiddly-farting around with mitered corners? Your quilting time is precious—spend it making more beautiful things, not wrestling with finicky miters that nobody will notice anyway! ✂️
Until next time, may your seams be straight, and your bobbin be full!
📌 Star-Struck but Short on Time? Pin Now, Quilt Later
So many quilts, so little time—isn't that always the way?
Save this tutorial for when you can actually sit down at your machine without interruption.
🔭 Looking for something truly stellar?
You've finished your star quilt block, and you're ready for more!
Browse our collection of 60 stellar star quilt block patterns. All have instructions and cutting charts in multiple sizes. If templates or paper piecing is used in the tutorial, there's a free download for you of those materials.

Eeny. Meenie. Miney. Moe.
Which star quilt block will you sew?
For a star-studded quilting experience, choose from 100+ bedazzling star quilt patterns—for beginners and beyond—click here.
For even MORE blocks to make... 🧩🎨

...visit our Free Quilt Block Pattern Library, with over 230+ blocks to choose from in multiple sizes.
Free downloads are included in all sizes for any blocks require paper piecing patterns or templates.
- Home
- Free Quilt Block Patterns
- Nine Patch Star Quilt Block


