- Home
- Free Quilt Block Patterns
- New England Quilt Block
The New England Quilt Block
From our Free Quilt Block Patterns Library
This post contains affiliate links, for which I receive compensation.
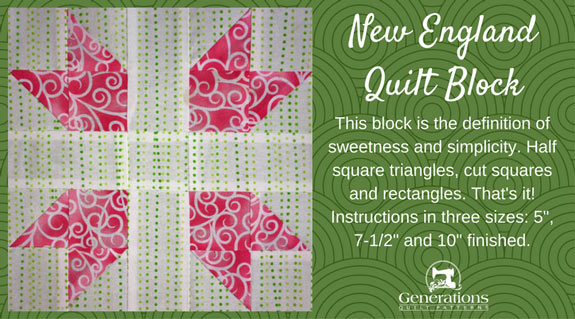
The New England quilt block is the definition of sweetness and simplicity.
A smattering of half square triangles (we'll use the 8-at-a-time method for efficiency) and solid squares and rectangles.
And seriously.
I have no idea how the New England block got it's name. Maybe for Massachusetts' Mayflower?
I dunno.
Regardless, it's a terrific little design to add to your quilt block garden.
Let's begin.
📋 General Instructions
Seams are all 1/4" and pressed toward the darker fabric unless otherwise noted.
Several common abbreviations are used in this tutorial:
- RST - right sides together
- SA - seam allowance
- HST - half square triangle
As always, I've prewashed and starched my quilt fabrics before cutting. Click the links for more information to make your own decision.
You need to make the choice that works best for yourself and your own quilting situation.
The newest quilt fabrics to tickle your fancy...
Click the images below to see the full collection. We share any commercial and/or free patterns that showcase them, too. (For inspiration, of course!)
Step 1: Cut patches for a New England block
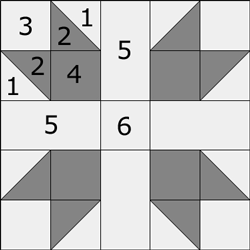 New England design
Sample Size: 7½" finished / 8" unfinished
Grid: 5x5
Attribution: Needle Craft Supply
Design Type: Uneven 9-patch
AKA: Greek Cross (Kansas City Star)
In the New England sample, I've chosen a directional stripe for my light fabric—Patches 1, 3, 5 and 6.
Since the block is completely symmetrical, there is only one change to make to cutting the rectangles—cut two in each direction of the stripe. (More on that a bit below.)
 | Cutting Chart for a~ Traditional Piecing ~ | |||||
|---|---|---|---|---|---|---|
| Patch | Fabric | Qty | Finished Block Size | |||
| 5'' | 7½'' | 10'' | ||||
| 1* | Light | 1 | 4¼'' x 4¼'' | 5¼'' x 5¼'' | 6¼'' x 6¼'' | |
| 2* | Dark | 1 | 4¼'' x 4¼'' | 5¼'' x 5¼'' | 6¼'' x 6¼'' | |
| 3, 6 | Light | 5 | 1½'' x 1½'' | 2'' x 2'' | 2½'' x 2½'' | |
| 4 | Dark | 4 | 1½'' x 1½'' | 2'' x 2'' | 2½'' x 2½'' | |
| 5 | Light | 4 | 1½'' x 2½'' | 2'' x 3½'' | 2½'' x 4½'' | |
| Unfinished Block Size | 5½'' | 8'' | 10½'' | |||
| Grid Size | 1'' | 1½'' | 2'' | |||
Here are all of the patches.
Notice the four #5 rectangles (lower left). To keep the stripe design running in the same direction all through the block, two were cut with the stripe running between the short edges. Two with it running between the long edges.
All the other patches will take care of themselves if you're using a directional fabric.
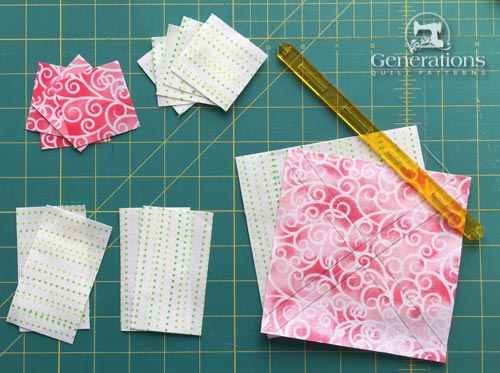 Half the #5 rectangles are cut the lengthwise design of the stripe; half are cut crosswise to it.
Step 2: Assemble the units
Half Square Triangles (HST)
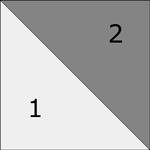 Make 8
Make 8
My go-to technique for HST, when there are multiples of 8 in the block, is our 8-at-a-time method. Click here to learn more about it.
Start by marking the back of either your #1 or #2 square—whichever one is easier for you to see the lines on.
Here I've marked the #2 with pairs of diagonal lines with a Quick Quarter ruler.
If you don't have this ruler, just mark two single diagonals from each pair of corners with your every rotary ruler.
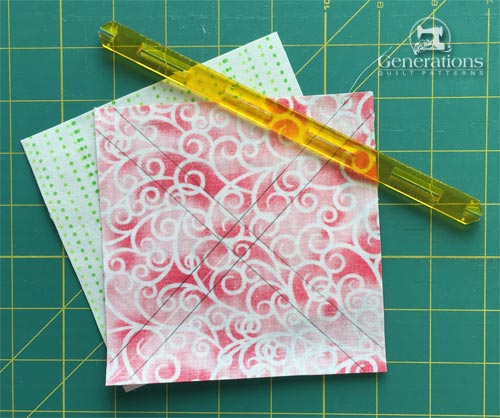 I don't usually bother to mark the center diagonal when I use the Quick Quarter ruler. 'Saves a step.
If you marked the pairs of lines, stitch directly on them. I love my open toe applique foot for this—it's easy to see the lines.
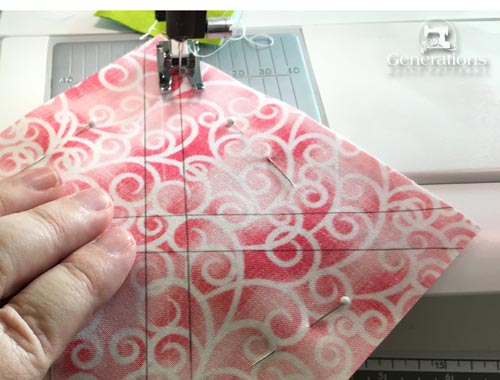 Gotta love an open toe applique foot for this sewing!
If you marked the single diagonals, then install your quarter inch foot and stitch 1/4" away from both sides of both lines.
Press the pair of squares as sewn to set the seams and flatten any distortion created during stitching.
Use the table below to find the Center Measurement. We use this number to cut the unit into four equal sized squares.
HST Dimensions | ||
|---|---|---|
| Finished Block Size | Center Measurement | Trim HST to… |
| 5" | 2⅛" | 1½" |
| 7½" | 2⅝" | 2" |
| 10" | 3⅛" | 2½" |
For this 5" sample block, the Center is 2⅝". Place that line of your ruler along the edge of your patches (black arrow).
The edge of your rule should run through the center. Cut the patches in half. (blue arrow)
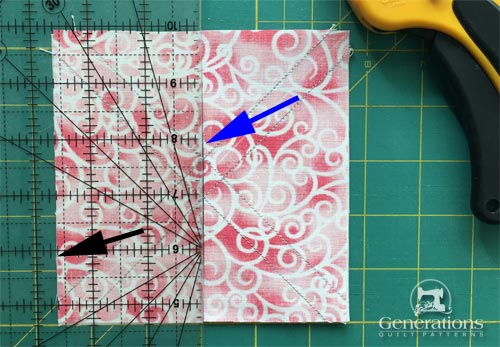 Black arrows points to 2⅝" line of the ruler on the very edge of the patch.
Turn your mat a quarter turn (or your patches a quarter turn). Align the same 2⅝" line with the edge. Cut in half again.
You now have four squares with two pairs of diagonal stitching running through them.
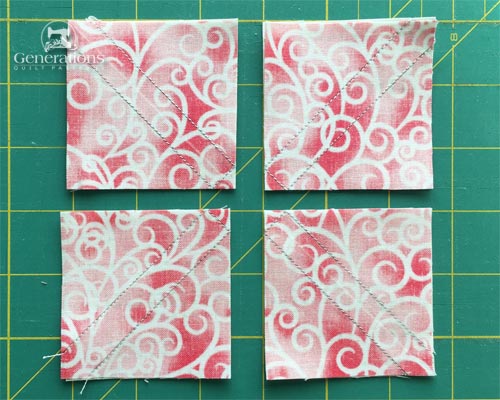 Four squares equal to the Center Measurement.
Cut them apart between the sewing lines to create 8 HST.
Press, SA to the dark.
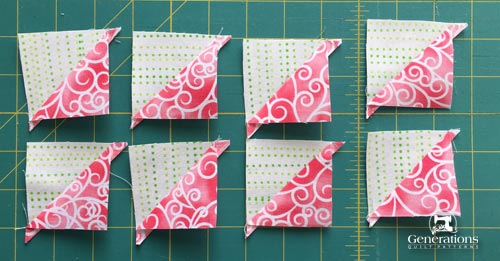
Refer back to the chart above. Find the 'Trim HSTs to...' measurement and trim yours to size.
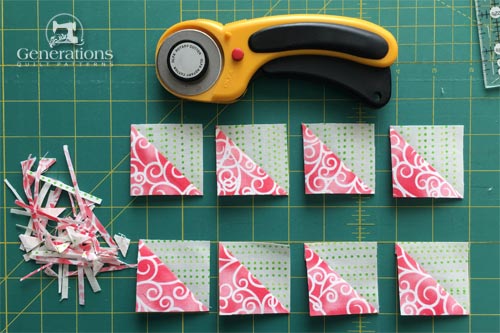 Four HST have the stripe running top to bottom. The remaining four have it running side to side. Perfect for our design.
Corner Units
Make 4
If you did not use a directional print, make all four of the corners the same—you don't need to worry about the design of the fabric.
For directional fabrics, to keep the stripe running from top to bottom, we need to make two full corners with the patches oriented as shown below...
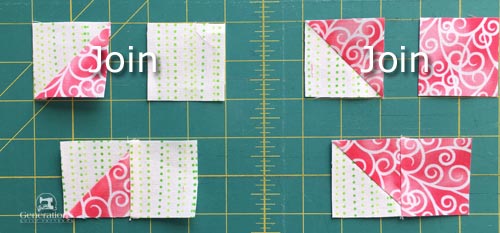 Make 2 of each subunit
...and two full ones with the patches oriented this way.
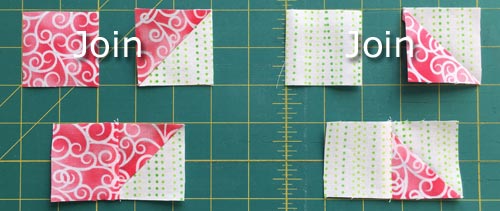 Make 2 of each subunit.
Now join the subunits together, keeping the strip running in the same direction.
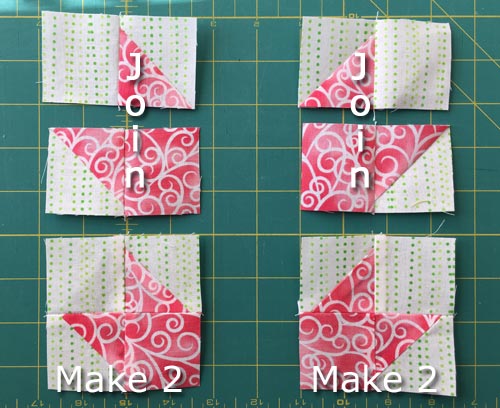
Press SA to the dark or twirl to reduce bulk.
Step 3: Assemble your New England quilt block
Arrange the patches into the New England design. Here I've made the effort to keep the dotted stripes running all top to bottom. (Remember I cut the rectangles in two different directions.)
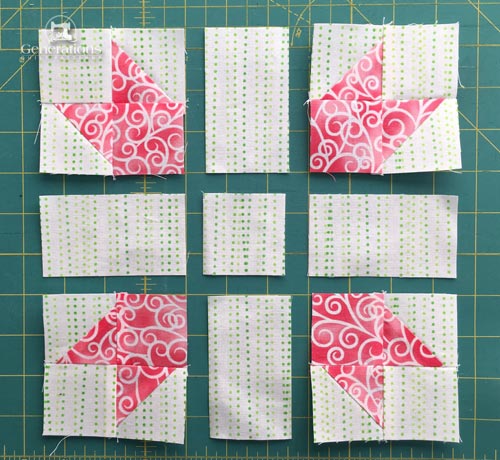 Points point out for our New England block
In all the rows press the SA toward the #5 rectangles to reduce bulk.
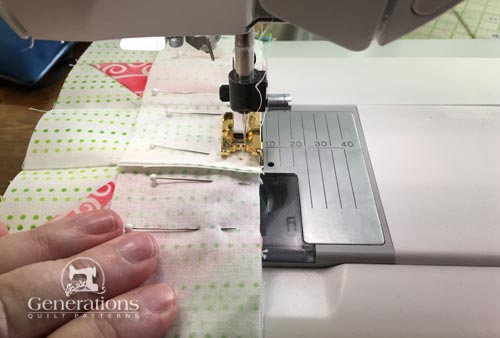
Stitch the units in each row together, pinning as necessary to keep things in place.
This is the finished New England block. Sweet, isn't it?!
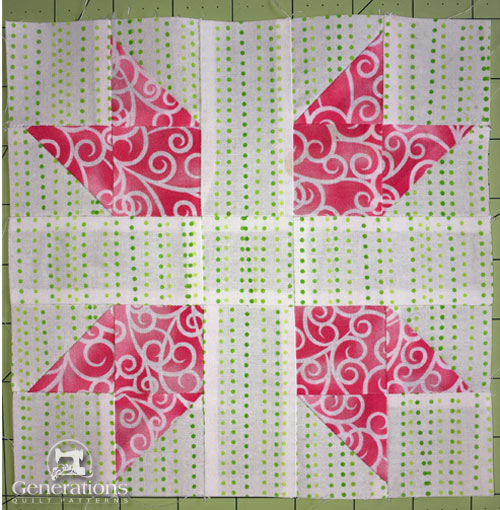 The New England block is done!
What about a different quilt block?
For a list of all the 220+ quilt block patterns on this site, start here.
If you know the name of the block, shorten your search by using these links:
Click here if you're looking for blocks with at least some paper piecing.
Click here if you're looking for the basic building blocks of quilting, i.e., Flying Geese, half square triangles, quarter square triangles, etc., along with several techniques to make each.
And finally, use these links to find blocks in these finished sizes:
