- Home
- Free Quilt Block Patterns
- Mosaic 3 Quilt Block
Mosaic 3 Quilt Block
From our Free Quilt Block Patterns Library
This post contains affiliate links, for which I receive compensation.
Skill Level: Confident Beginner
The Mosaic 3 quilt block is from a family of blocks where all the patches are on point.
Because of this, the measurements are typically unfriendly for rotary cutting. Lots of fudging and guesstimating going on.
To make this block we offer two alternatives.
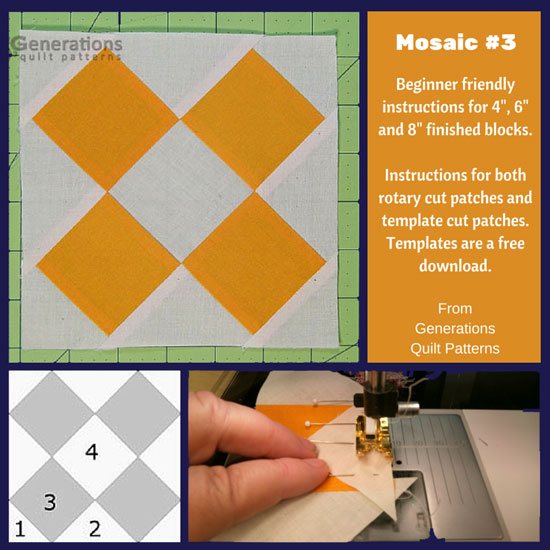
Low cost—using templates printed directly from this page,
And some cost—using a specialty ruler that makes cutting the on-point, weird-math patches easy as pie!
Let's get started!
Special Note
If you've come to this page from our Deconstructing Antique Quilt Designs series, note that the background and dark fabrics in the cutting charts are reversed for our antique quilt design.
Click here to read my confession about the making of the sample block.
📋 General Instructions
While it's not often that I write instructions that recommend a specialty ruler, the On Point (by Donna Lynn Thomas) makes creating this block really easy—especially if you're making a lot of them.
Templates are also included if you don't want to add to your collection of quilting rulers. (The links to print them from are in the cutting instructions below.)
Because of the many bias edges in this block, I highly recommend starching your quilt fabric.
Starch helps tame the bias and minimize the stretching out of shape as you stitch.
All the seams run diagonally through this block so an exact quarter inch seam is a must. A quick sewing test before you start will help you check the accuracy of your seams before you begin.
All seam allowances (SA) are a 1/4".
The newest quilt fabrics to tickle your fancy...
Click the images below to see the full collection. We share any commercial and/or free patterns that showcase them, too. (For inspiration, of course!)
Step 1: Cut the Mosaic #3 patches
Choose the cutting option that best suits your situation.
The sample block is made using Option 2 and the On-Point ruler.
Option 1: Using templates
Choose your block size and then print the corresponding template page
from the table below.
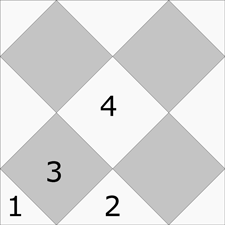 Mosaic 3 Quilt Block
If you've never downloaded and printed patterns from this website, click here for instructions so that each template is printed at the correct size.
Check that the 1" box on the template page is exactly one inch.
Then cut out #1, #2, #3 and #4. There's no need to cut exactly on the line—we'll clean things up when we use our rotary cutter.
#3 and #4 are exactly the same shape and size. You will use them for two different fabrics.
The arrows indicate the fabric grainline and should be placed on your fabric so that they are parallel to the selvedge edge. This makes the blocks more stable. At an absolute minimum, the #1 and #2 triangle patches should be 'on-grain' to make the block's outside edges stable.
For your Mosaic quilt block you'll need the following quantities:
- Four background #1's - half square triangles
- Four background #2's - quarter square triangles
- Four Dark #3's - squares
- One background #4 - square
Remember that dark is a relative term—you need even contrast between the #3's and the rest of the patches for your piecing to show—otherwise why bother to piece the block?
On your cutting mat, lay the template printed side up on your fabric. The paper can be a bit slippery, so I use Scotch® Brand Magic™ Tape (it doesn't leave behind a residue) to tape the templates to the top layer of fabric.
You need a 1/4" seam allowance past the solid outline of the template. Though there is a dashed line to indicate where to cut, I find it SO MUCH EASIER and FASTER to place the 1/4" mark on ruler directly on top of the solid line on one side of the template (red arrow below).
Trying to match the edge of a ruler with that dashed line is just a pain in the you-know-where!
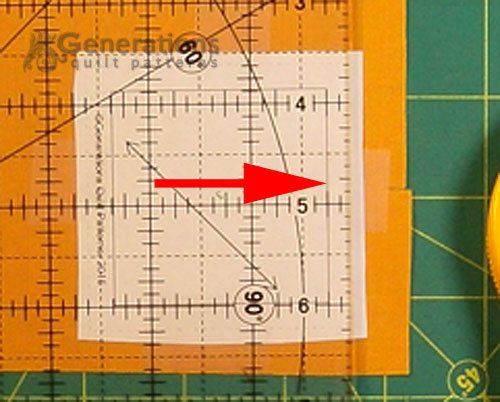 You can just make out the tape I used to hold the template in place.
Cut. Repeat for the remaining three sides of this #3 template.
To save time, I use a rotating rotary mat and turn it instead of the fabric. Between this and the tape, there's almost no time spent re-positioning templates.
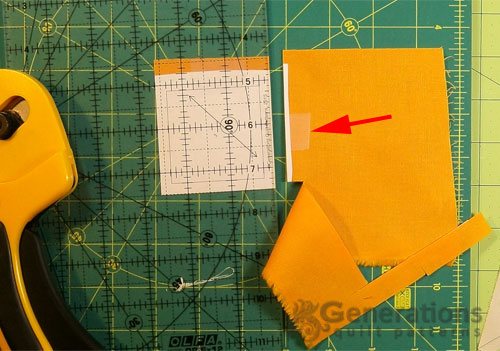 There's another piece of Magic™ Tape.
Once your patches are cut, click here to skip to Step 2.
Option 2: Using an On-Point plus a standard ruler
 Mosaic #3
Sample Size: 6" finished / 6½" unfinished
Grid: 4x4
Attribution: Ladies Art Company
Design Type: On-point
Choose your block size from the table below and cut the patches indicated. You'll need your regular ruler for #1 and #2.
#3 and #4 are cut with the On Point Ruler.
If you do not have one, print appropriate templates for Option #1.
The numbers in the chart represent squares, i.e. 1-7/8" means to cut a 1-7/8"x1-7/8" square.
Don't forget to subcut your #3 and #4 patches.
 |
Cutting Chart for a~ Traditional Piecing ~ | |||||
|---|---|---|---|---|---|---|
| Patch | Fabric | Qty | Finished Block Size | Sub Cut | ||
| 4" | 6" | 8" | ||||
| 1 | Background | 2 | 1-7/8” | 2-3/8” | 2-7/8” | |
| 2 | Background | 1 | 3-1/4” | 4-1/4” | 5-1/4” | |
| 3** | Dark | 4 | 2” | 3” | 4” | na |
| 4** | Background | 1 | 2” | 3” | 4” | na |
| Unfinished Block Size | 4 1/2" | 6 1/2" | 8 1/2" | --- | ||
| Grid Size | 1" | 1 1/2" | 2" | --- | ||
**MUST CUT with the On Point Ruler
Step 2: Assemble the rows of the Mosaic 3 quilt block
Arrange the patches as shown below.
Take care that the #2 quarter square triangles (QST) are on the sides and the #1 half square triangles (HST) are in the corners. This insures that the outside edges of the blocks are on straight of grain. They'll be less likely to stretch out of shape.

Starting with the upper left #3 square, pin a #2 QST to one side so that the straight edges will feed into your sewing machine first (red arrow).
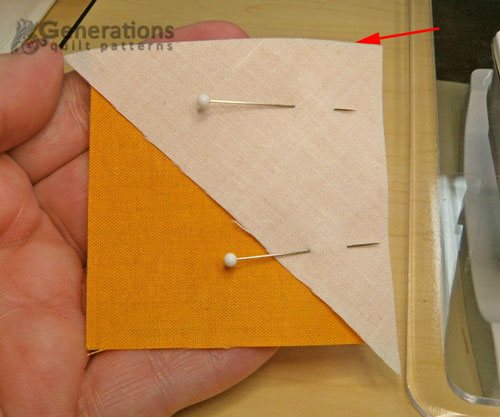 Stitch starting at the red arrow.
Stitch. From the #3 side you can see that the 1/4" seamline is slightly to the left of the valley created by the two patches. This is correct.
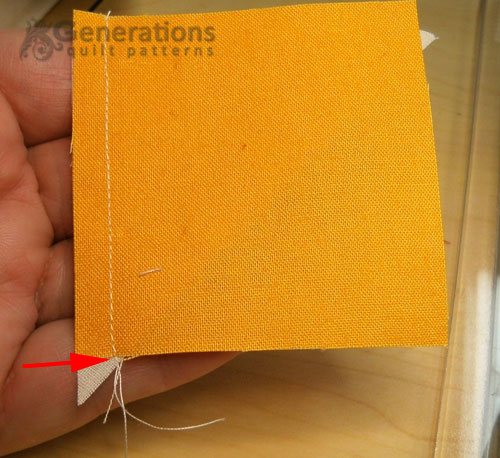
Stitch and press with the SA towards #2 QST.
Add a #2 QST to the opposite side of this orange #3 in the same manner. Again, you can see that the QST extends just a wee bit beyond the bottom of the #3 patch. This is correct.
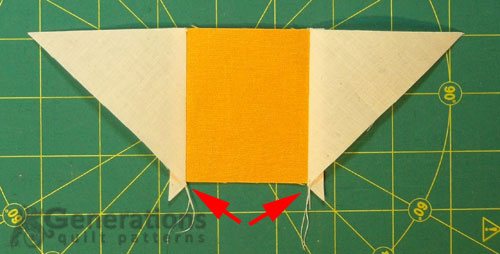
To find the center of the #3 and a #1 patch, fold them in half and fingerpress a crease into the fold.
With RST, match center (fold) of the #1 HST to the center (fold) of the #3 unit. Pin.
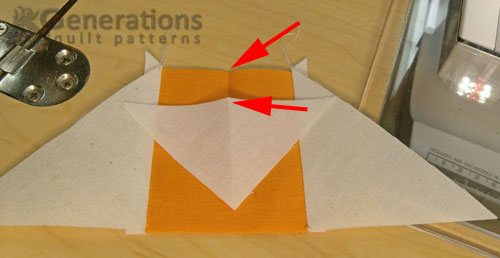 Fingerpress a crease into the center of the edges of the #1 and #3
With RST match the fingerpressed fold of the #3 to a #1. Stitch. This
time your 1/4" seam should fall exactly at the bottom of the valley
created by the patches (red arrows).
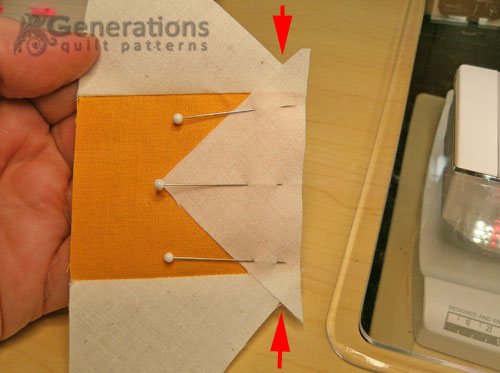
Press towards the #1 HST (red arrow).
The outside edges of the #1 and #2 triangles should create a straight line. If they don't, it's a sign that your seam allowance is off somewhere. Adjust it as necessary.
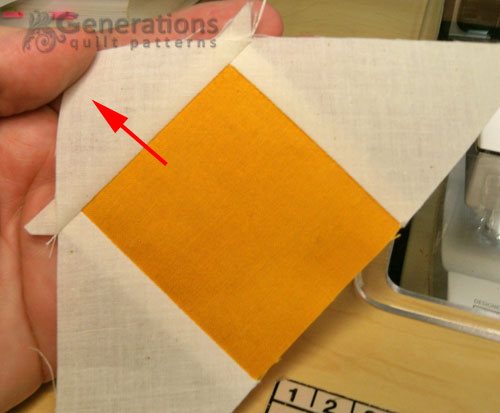 Just need to trim away the dog ears.
For the center diagonal row, with RST stitch a #3 dark square to opposite sides of the #4 background square, pressing the SA toward the #3s.
Find the center of the end of each #3 and fingerpress a crease to mark it as we did before. Do the same for the two remaining #1 HST.
With RST, match a creased #1 to a #3. Stitch. Repeat for the other #3. Stitch. Press the SA towards the #3s.
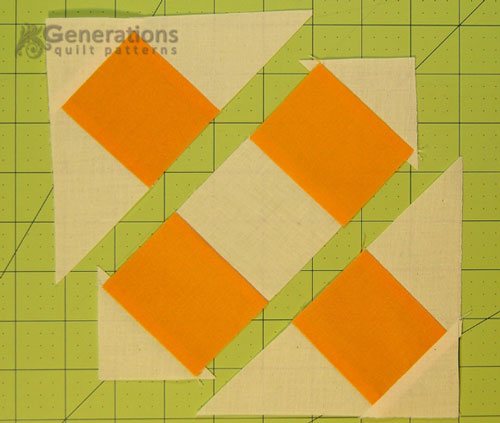 Dogs ears are trimmed off either now or after the rows are joined.
Pin the rows together. The seams will nest making matching easy.
Stitch.
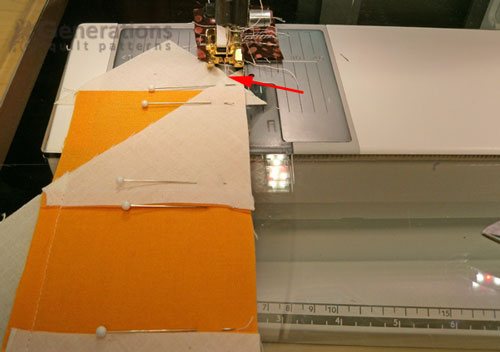 If your seam allowances are accurate, your quarter inch seam will start exactly in the valley created by these two rows (red arrow).
The SA can be pressed in either direction.
Give your Mosaic #3 quilt block a final press using my favorite technique for pressing quilt blocks and you are finished!
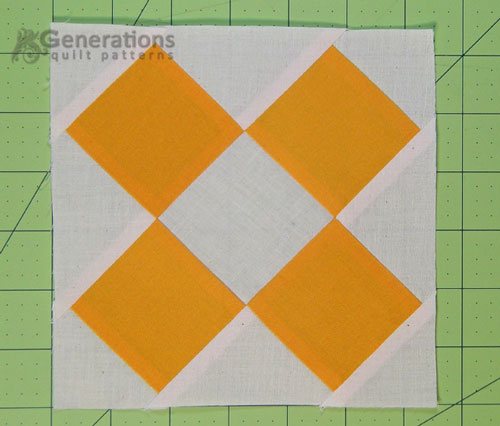 Our Mosaic #3 block is finished!
What about a different quilt block?
For a list of all the 220+ quilt block patterns on this site, start here.
If you know the name of the block, shorten your search by using these links:
Click here if you're looking for blocks with at least some paper piecing.
Click here if you're looking for the basic building blocks of quilting, i.e., Flying Geese, half square triangles, quarter square triangles, etc., along with several techniques to make each.
And finally, use these links to find blocks in these finished sizes:

