- Home
- Free Quilt Block Patterns
- Morning Star Quilt Block
Morning Star Quilt Block: Choose Your Path to Perfect Points 🌞
Two techniques, endless possibilities, perfect results 🎯
This post contains affiliate links, for which I receive compensation.
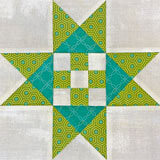
Welcome to the Morning Star quilt block tutorial, where celestial beauty meets quilting precision! ✨
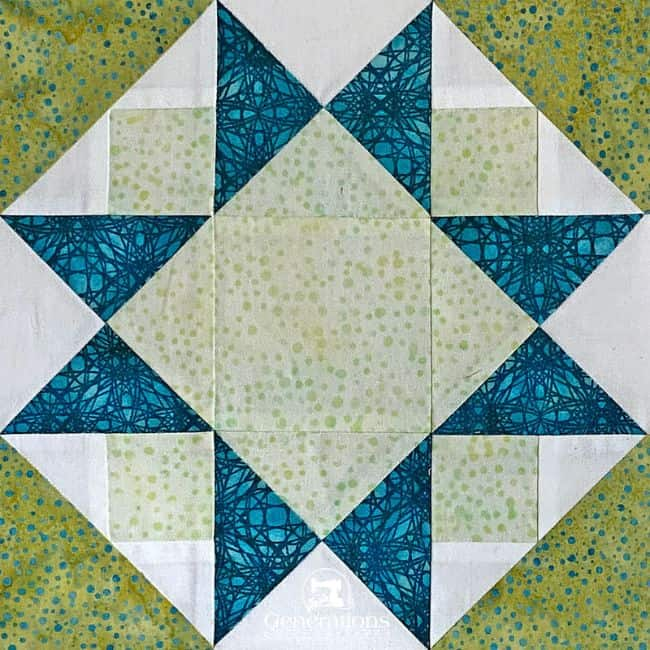
Whether you're ready to embrace paper piecing or prefer traditional methods, this block offers a perfect opportunity to create stunning star points that radiate with accuracy.
With sizes ranging from 4½" to 15", you'll turn simple shapes into a dazzling star design—sure to become a favorite in your quilting constellation. 🌟
🧭 Welcome to your Morning Star adventure! ⭐
To help you navigate this tutorial with ease, we've created convenient shortcuts to each section below.
- Downloadable cutting charts in 5 sizes
- No time to quilt? Pin this tutorial for later!
It's time to cut up and sew!
Hate to paper piece?
Don't worry, I've got you covered.
Click here for instructions to make your Morning Star using traditional piecing methods.
📋 General Instructions
Several abbreviations are used on this page. They are:
- SA - seam allowance
- RST - right sides together
- HST - half square triangles
- QST - quarter square triangles
- Bac - background fabric
- Med - medium fabric value
- BW - Brave World unit
1/4" SAs are used through this tutorial.
Pressing instructions are highlighted in yellow throughout this tutorial to make them easy to find.
When instructed to press, first press the patches in the closed position just as they came off your sewing machine. This sets the seam, melding the fibers of the threads into the fibers of the fabric.
I like using nested seam allowances as much as possible to make matching seams more accurate.
🎯 Accuracy Checkpoints
Your Morning Star contains units that need to align exactly. We've placed measurement verification steps throughout the tutorial.
📥 Download and print paper piecing pattern
Four Brave World (BW) units are needed to complete our Morning Star block. The sample block it is paperpieced. Download and print the pattern following the instructions below.
If paperpiecing doesn't blow your skirt up, click here to go directly to the green cutting chart for traditional techniques and skip printing these patterns.
You'll need the most current version of Adobe installed on your computer to download the pattern.
On the Adobe Print Menu page, under 'Page Size and Handling' set 'Custom Scale' to 100% before printing for accurate results. Click here to see what it looks like on the Print Menu page.
Choose your finished block size from the chart below and print the corresponding number of pages for a total of 4 units.
After printing, use the 1" square graphic on the printed page(s) the patterns printed at the correct dimensions.
Print the Brave World Paper Piecing Units | ||
|---|---|---|
| Click on the Finished Block Size | Print this many copies for each block | Finished BW Unit Size |
| 4½" | 1 | 1½" |
| 6" | 1 | 2" |
| 9" | 1 | 3" |
| 12" | 2 | 4" |
| 15" | 4 | 5" |

Not sure which paper to use?
Take a look at my review of several of the most popular brands available to us quilters on the market.
You want a super-easy paper to tear away—less stress on the stitches.
The newest quilt fabrics to tickle your fancy...
Click the images below to see the full collection. We share any commercial and/or free patterns that showcase them, too. (For inspiration, of course!)
✂️ Cutting patches for a Morning Star block
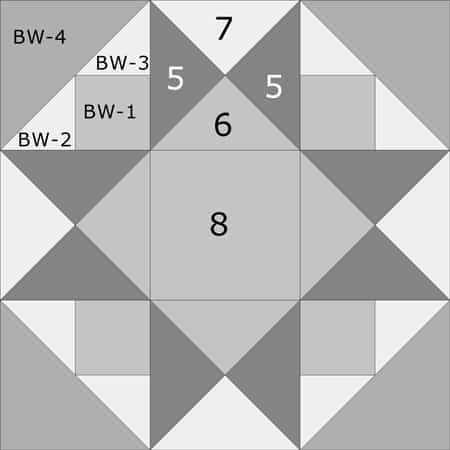
Sample Block: 9" finished / 9½" unfinished
Grid: 6x6
Design Type: Star, Even 9-patch | Star | Paper pieced
To create your Morning Star you'll need a light, a medium, and a dark plus a background fabric. Good contrast between them is essential for all your piecing to show.
Please label all your patches. The numbers are used throughout this tutorial.

 | Cutting Chart for a~ Includes Paper Piecing ~ | |||||||
|---|---|---|---|---|---|---|---|---|
| Patch | Fabric | Qty | Finished Block Size | Sub Cut | ||||
| 4½'' | 6'' | 9'' | 12'' | 15'' | ||||
| BW-1 | Light | 4 | 1½'' x 1½'' | 1¾'' x 1¾'' | 2¼'' x 2¼'' | 2¾'' x 2¾'' | 3¼'' x 3¼'' | --- |
| BW-2, BW-3 | Bac | 4 | 2⅛'' x 2⅛'' | 2⅜'' x 2⅜'' | 2⅞'' x 2⅞'' | 3⅜'' x 3⅜'' | 3⅞'' x 3⅞'' | |
| BW-4 | Med | 2 | 2⅞'' x 2⅞'' | 3⅜'' x 3⅜'' | 4⅜'' x 4⅜'' | 5⅜'' x 5⅜'' | 6⅜'' x 6⅜'' | |
| 5** | Dark | 2 | 3'' x 3'' | 3½'' x 3½'' | 4½'' x 4½'' | 5½'' x 5½'' | 6½'' x 6½'' | --- |
| 6** | Light | 1 | 3'' x 3'' | 3½'' x 3½'' | 4½'' x 4½'' | 5½'' x 5½'' | 6½'' x 6½'' | --- |
| 7** | Bac | 1 | 3'' x 3'' | 3½'' x 3½'' | 4½'' x 4½'' | 5½'' x 5½'' | 6½'' x 6½'' | --- |
| 8 | Light | 1 | 2'' x 2'' | 2½'' x 2½'' | 3½'' x 3½'' | 4½'' x 4½'' | 5½'' x 5½'' | --- |
| Unfinished Block Size | 5'' | 6½'' | 9½'' | 12½'' | 15½'' | na | ||
| Grid Size | 3/4'' | 1'' | 1½'' | 2'' | 2½'' | na | ||
| **I prefer to cut my patches extra large for QST, stitch, and then trim them to perfection. If you prefer to do the same, add a bit extra to the measurements for Patches #5, #6 and #7 above (I added 1/2" to each dimension for the sample block). There is a chart further down in these instructions where you need it for trimming them. If you have a perfectly reliable 1/4" seam allowance use the dimensions in the cutting charts for this patches. | ||||||||
🪡 Building the Basic Units for Your Morning Star 🌟
The Morning Star block combines three simple units:
- 4 BW units (for the corners)
- 4 QSTs (for the star points), and
- 1 center square
We'll construct each unit separately, then join them to create the complete block. ✨
Brave World (BW)
Make 4
Real Talk Note ✨
Don't worry if you're new to paper piecing. Many quilters find their first few stitches feel awkward. Think of it like learning a new constellation — once you recognize the pattern, it becomes second nature.
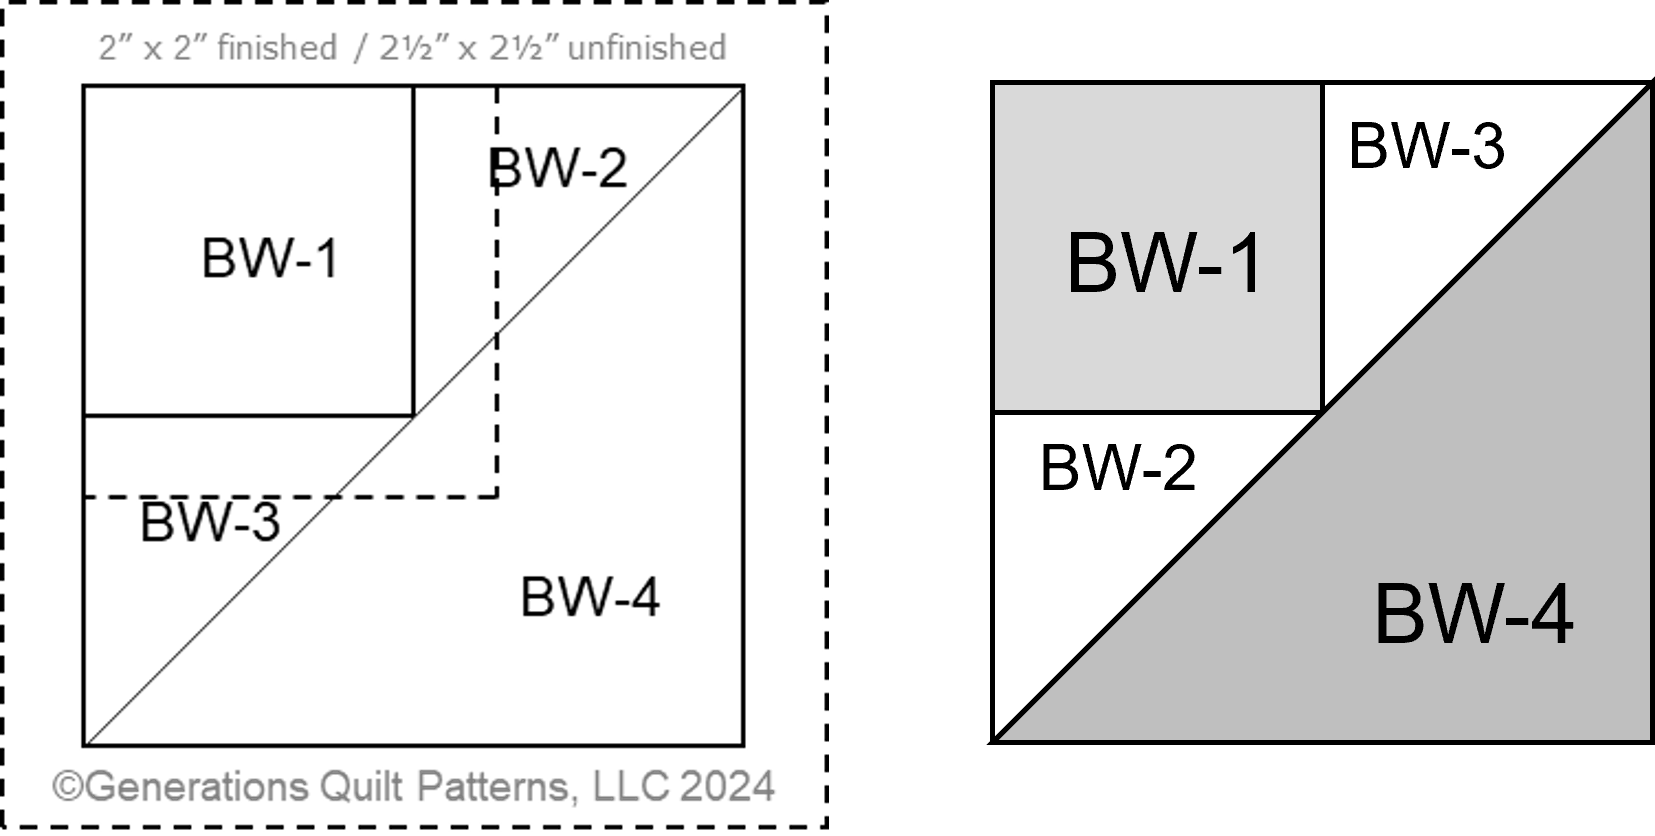 The BW unit from the pattern side (left) and the fabric side (right)
📢 Updated Tutorial Note:
When the Brave World was originally added to our block library, the paper piecing patches were labelled: 1, 2, 3, and 4.
I've added the prefix 'BW' to each of the numbers to make them easier to identify in the cutting charts.
You'll also find the finished/unfinished block/unit size in the seam allowance of the patterns, and maxed out the number of units on a page to save paper.
You'll see some old numbering on this tutorial in the pictures. The order of piecing the patches has not changed.
Enjoy!
Be aware that the BW-2 and BW-3 patches swap positions when you flip your BW from the back to the front sides. It makes no difference in this design because we're using the same fabric for both patches.
Paperpiecing method
Cut out four units just past the dashed outside line. No need for perfection. We trim to size after the last patch is stitched.
Use a tiny bit of Elmer's Washable Gluestick to adhere the wrong side of BW-1 in position on the unprinted side of the pattern. Use the dashed placement guides for quick positioning.
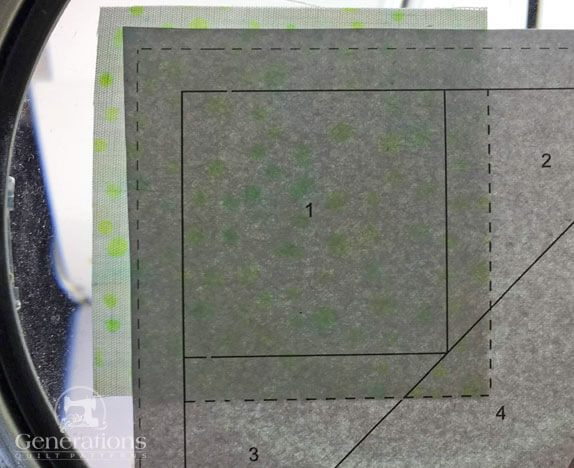 You can easily see how I've trimmed just outside the dashed outline.
We need to make a few adjustments to our sewing machine settings to paper piece.
- Reduce your stitch length to 16–20 stitches per inch (1.3-1.6 mm). This perforates the paper and stabilizes the seam when you remove the pattern. [Learn more about stitch length here.]
- Reduce your machine's speed or just plain slow down. Sew only as fast as you can AND stay on the solid stitching line.
- Install an open toe appliqué foot (sometimes called an 'embroidery' or 'satin stitch' foot) if you have one (it makes it easier to see where you're stitching).
- Use a larger needle (90/14) IF you have problems removing the pattern. Personally, I use an 80/12 Microtex Sharp for paper piecing without any issues.
With RST, position a short edge of BW-2 with BW-1.
Stitch on the solid line between BW-1 and BW-2, starting and stopping a good quarter inch before and after the line.
Stitch ALL your paperpieced seams in this manner.
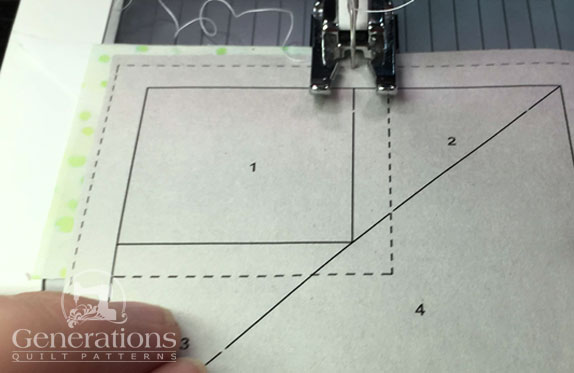
Press.
With RST, align a short edge of BW-3 (blue arrow) with the other side of BW-1.
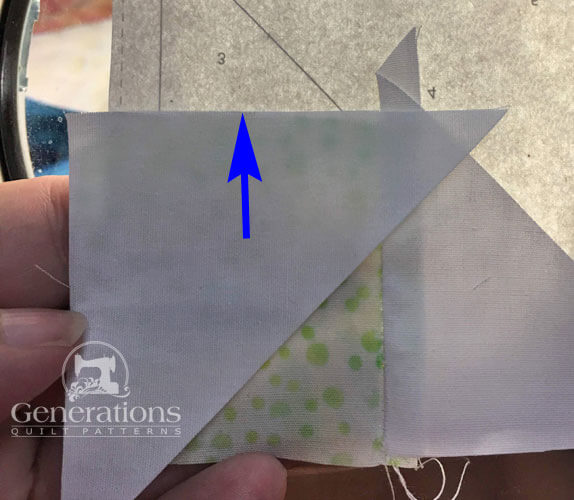
Stitch and press as before.
Next, we trim the patches to establish the placement line for BW-4.
On your cutting mat, with the printed side up, pull back the pattern from the stitches just a bit (blue arrow).
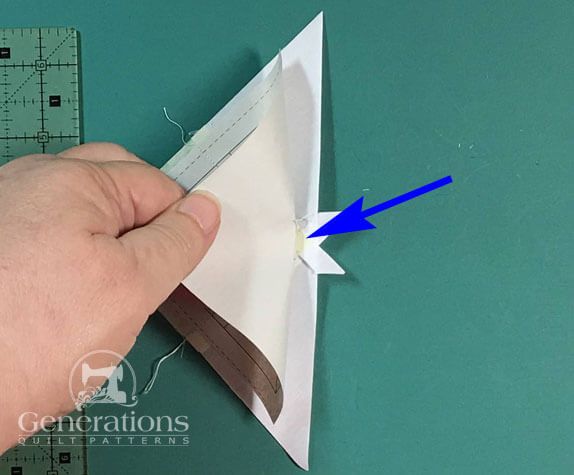
The paper may rip. It happens. If it's a big rip, use a big of Scotch Brand Magic Tape® to repair it.
Position the ruler's edge on the solid line between BW-2, BW-3 and BW-4.
Use your thumb to crease the pattern on this line (blue arrow).
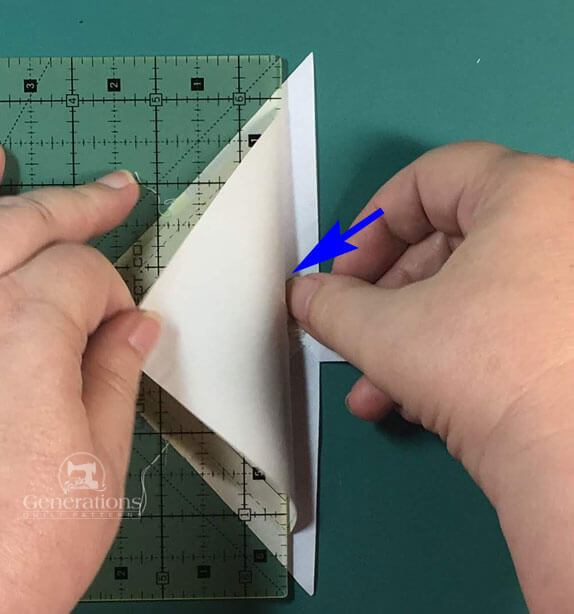 Even with big fingers like mine this is pretty easy to do.
Fold back the paper on itself and align the 1/4" mark on your ruler with the folded edge of the paper.
Trim away the excess fabric with your rotary cutter, leaving behind a perfect 1/4" seam.
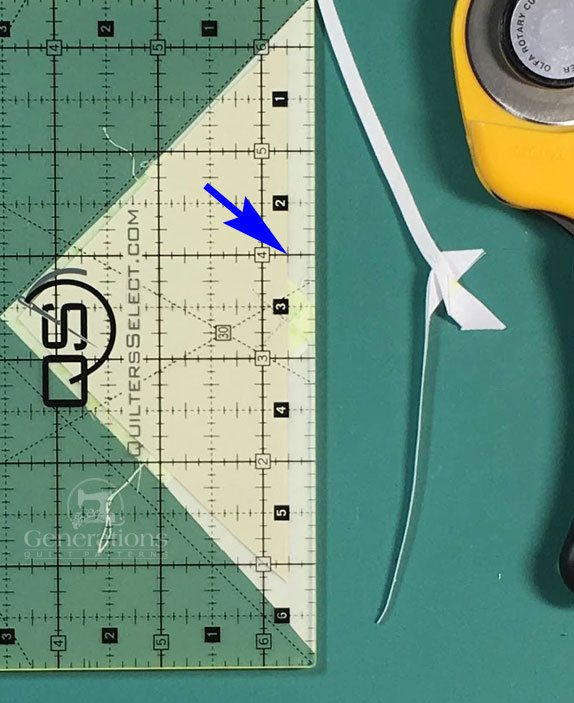 You can just barely make out the paper's folded edge.
With RST, line up the long side of BW-4 with the cut edges. The point of the triangle should be opposite the corner of the patch in the pattern (white arrow).
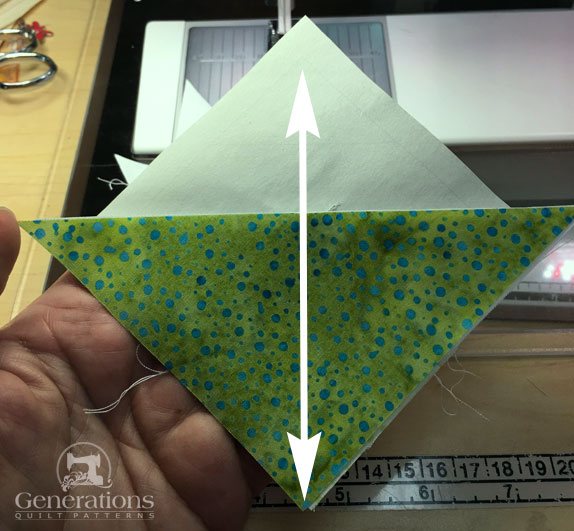 Checking #4 for our Morning Star quilt block
Stitch and press.
At your cutting mat, place the 1/4" line of your ruler on top of the solid outside square line. Trim away the excess with your rotary cutter.
Repeat for all the sides of all the the units.
Return your sewing machine to your everyday settings.
Install your favorite quarter inch presser foot. Adjust the needle position if needed. Return to your normal piecing stitch length.
The paper piecing is finished, from this point forward, construction is the same whether you've paper pieced or used traditional methods.

Click here for instructions to make the QSTs and finish your Morning Star quilt block.
📌 Caution: Quilters can't resist the pull of this celestial beauty
Pin this cosmic beauty to your boards and watch your fellow quilters become totally obsessed with creating their own stellar masterpiece! 🧵
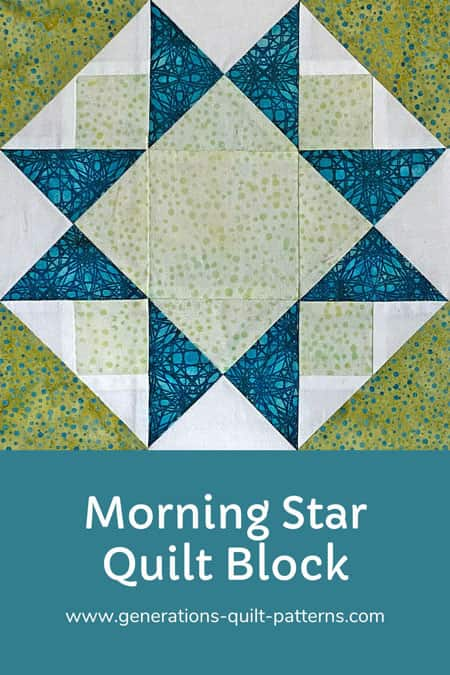
More related 8-pointed star quilt block patterns
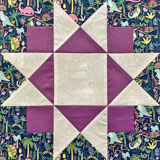
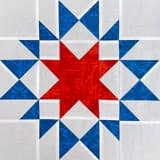
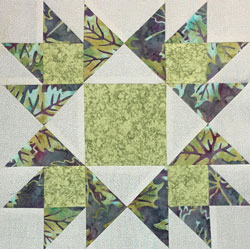
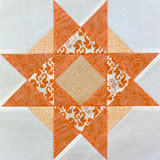
There are several tutorials available to you on this website that start with an Ohio star as its base. Click on any of the images below to go straight to that tutorial.
Aunt Dinah and Twin Star may seem a little suspect.
But look closely. Those are 3-patch quarter square triangles on each side.
You'll find confirmation in Barbara Brackman's BlockBase+ (love the software). These blocks are listed in the '09 Equal Nine Patch' library in '03 Like Ohio Star'.
🔭 Looking for something truly stellar?
You've finished your star quilt block, and you're ready for more!
Browse our collection of 60 stellar star quilt block patterns. All have instructions and cutting charts in multiple sizes. If templates or paper piecing is used in the tutorial, there's a free download for you of those materials.

Eeny. Meenie. Miney. Moe.
Which star quilt block will you sew?
For a star-studded quilting experience, choose from 100+ bedazzling star quilt patterns—for beginners and beyond—click here.
For even MORE blocks to make... 🧩🎨

...visit our Free Quilt Block Pattern Library, with over 230+ blocks to choose from in multiple sizes.
Free downloads are included in all sizes for any blocks require paper piecing patterns or templates.
- Home
- Free Quilt Block Patterns
- Morning Star Quilt Block
