- Home
- Free Quilt Block Patterns
- Monkey Wrench Quilt Block
Monkey Wrench Quilt Block
From our Free Quilt Block Patterns Library
This post contains affiliate links, for which I receive compensation.
Skill Level: Beginner
The Monkey Wrench quilt block is a terrific block for the beginning quilter!
It's made of just half square triangles and strip sets!
It also makes a GREAT block for block exchanges—either for your quilting bee or your guild because it's simple enough to whip up quickly.
Because we all know that if it weren't for the last minute...NOTHING would get done!
You might know it as the 'Churn Dash' quilt block.

But this simple, two-fabric block goes by a myriad of other names including:
- Double Wrench
- Aeroplane
- Airplane
- Alaska Homestead
- Bear Paw Design
- Bride's Knot
- The Broad Axe
- The Crow's Nest
- Dragon's head
- French 4's
- Hens and Chickens
- Hole in the Barn Door
- Honey Dish
- Maltese Cross
- Pioneer Patch
- Square Triangles
- T Design
- T Quartette
- True Lover's Knot
...or just plain ol' Wrench.
📋 General Instructions
All seams are 1/4".
Pressing instructions are highlighted to make them easy to locate.
When you are instructed to press, first press the pieced unit flat to set the seam. Then open the patch, pressing from the front. Seam allowances are pressed to the dark fabric unless otherwise noted.
The newest quilt fabrics to tickle your fancy...
Click the images below to see the full collection. We share any commercial and/or free patterns that showcase them, too. (For inspiration, of course!)
Step 1: Cut the Monkey Wrench patches
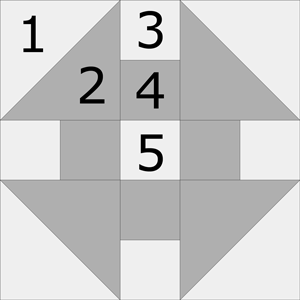 Monkey Wrench
Block Size: 5" finished / 5-1/2" unfinished
Grid: 5x5
Attribution: Ohio Farmer
Design Type: Uneven 9-patch, small center
For this block requires four half square triangles. We'll use Technique #1 to make them two at a time.
I prefer to cut my patches over-sized and then trim after stitching. The squares marked with '**' were cut 1/4" bigger (at 3-1/8" for this 5" finished sample block).
After stitching they were trimmed to 2-1/2" unfinished.
 | Cutting Chart for a~Traditional Piecing ~ | |||||
|---|---|---|---|---|---|---|
| Patch | Fabric | Qty | Finished Block Size | |||
| 5" | 7 1/2" | 10" | 12 1/2" | |||
| 1** | L | 2 | 2⅞" x 2⅞" | 3⅞" x 3⅞" | 4⅞" x 4⅞" | 5⅞" x 5⅞" |
| 2** | D | 2 | 2⅞" x 2⅞" | 3⅞" x 3⅞" | 4⅞" x 4⅞" | 5⅞" x 5⅞" |
| 3 | L | 1 | 1½" x 7" | 2" x 9" | 2½" x 11" | 3" x 13" |
| 4 | D | 1 | 1½" x 7" | 2" x 9" | 2½" x 11" | 3" x 13" |
| 5 | L | 1 | 1½" x 1½" | 2" x 2" | 2½" x 2½" | 3" x 3" |
| Unfinished Block Size | 5 1/2" | 8" | 10-1/2" | 13" | ||
| Grid Size | 1" | 1 1/2" | 2" | 2 1/2" | ||
| **I prefer to cut my patches extra large for HST, stitch, and then trim them to size. If you prefer to do the same, add a bit extra to the measurements for Patches #1 and #2 above. There is a chart further down in these instructions where you need it for trimming them to size. | ||||||
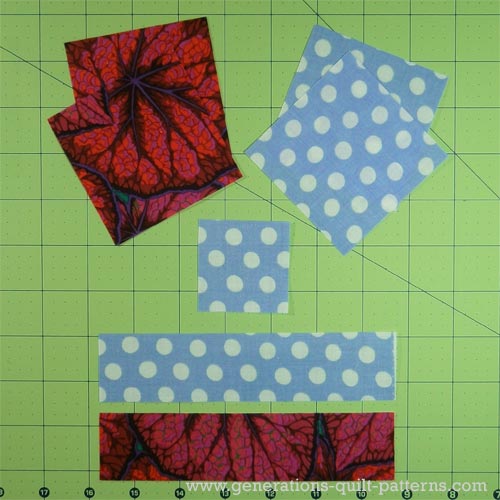
Our patches are cut and we're ready to continue.
Step 2: Assemble the units for your Monkey Wrench
Half Square Triangles
Make 4
Draw a diagonal line from corner to corner on the back of the two #1 squares.
With RST, align the edges of a #1 with a #2. Stitch 1/4" away from the drawn line on both sides.
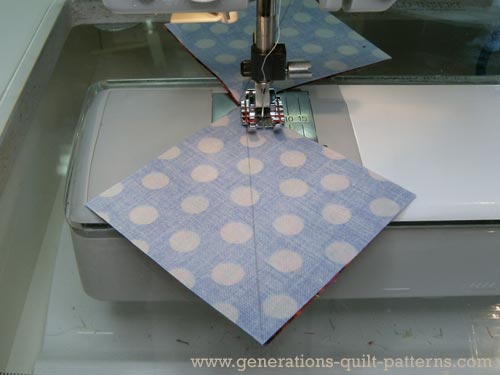
Cut apart on the drawn line to create two units.
Press.
If you've cut over-sized patches trim to 2-1/2" square, otherwise trim off the dog ears.
Repeat for the other pair of squares to create a total of four half square triangles that measure 2-1/2" at this point.
Strip Set
Align the long edges of the #3 and #4 strips. Stitch.
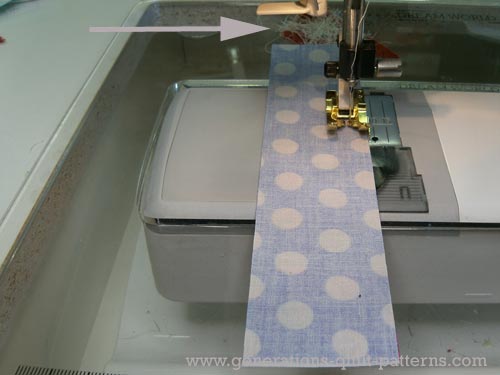
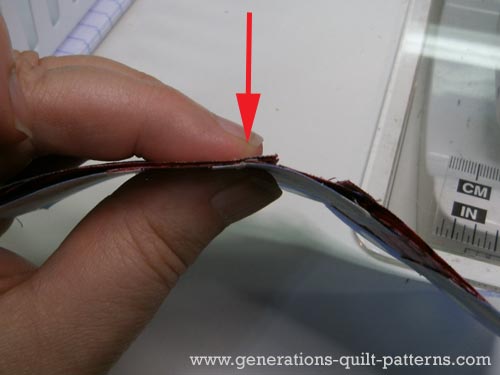
The arrow above points to my anchor cloth. Stitch on one first to prevent<br>your sewing machine from eating your patches' points.
Use the chart below to check that your stripset is the correct width. Make any needed adjustments.
Square off the end of the strip. (The strips were cut with 1" extra to accommodate this.)
Subcut into four units has directed in the chart below.
StripSet Widths | ||
|---|---|---|
| Finished Block Size | Stripset Width after stitching | SubCut Width |
| 5" | 2-1/2" | 1-1/2" |
| 7 1/2" | 3-1/2" | 2" |
| 10" | 4-1/2" | 2-1/2" |
| 12 1/2" | 5-1/2" | 3" |
Step 3: Assemble the Monkey Wrench
Arrange the units for form the Monkey Wrench design.
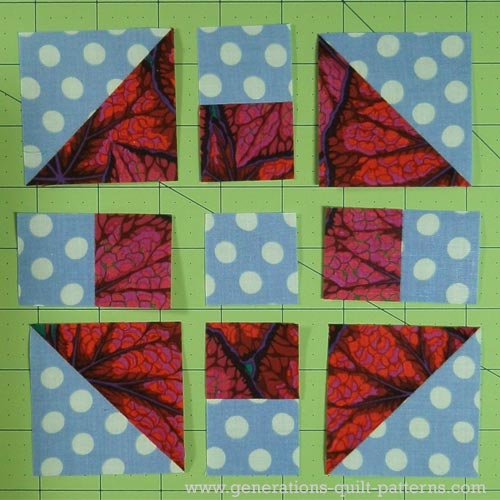
Stitch them into rows. Press the seam allowances toward the strip set units for each row.
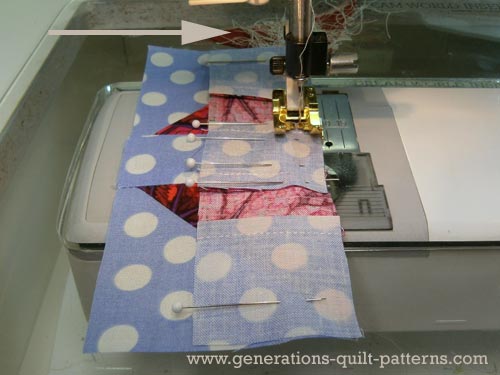
Nesting your seam allowances helps to make for perfect matches. Use pins as needed.
Stitch the rows together.
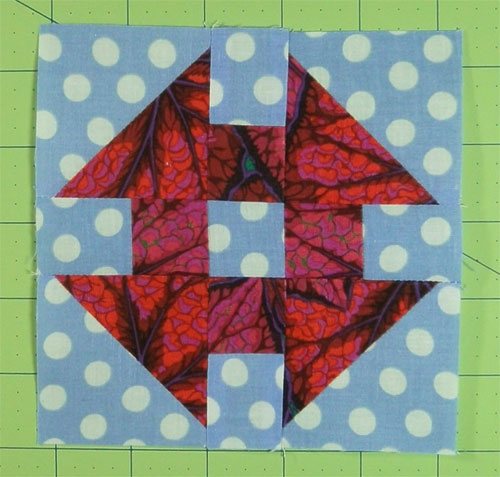
This is the finished Monkey Wrench quilt block.
Ready for More Blocks?

Your Monkey Wrench quilt block is finished, but there's plenty more to keep you busy!
Just check out our Free Quilt Block Pattern Library to find blocks for your next quilting creation!
What about a different quilt block?
For a list of all the 220+ quilt block patterns on this site, start here.
If you know the name of the block, shorten your search by using these links:
Click here if you're looking for blocks with at least some paper piecing.
Click here if you're looking for the basic building blocks of quilting, i.e., Flying Geese, half square triangles, quarter square triangles, etc., along with several techniques to make each.
And finally, use these links to find blocks in these finished sizes:

