- Home
- Free Quilt Block Patterns
- Meteor Quilt Block
Blast Off with the Meteor Quilt Block: Your Ticket to Quilting Stardom!
This post contains affiliate links, for which I receive compensation.
Houston, we have a solution for quilting boredom! The Meteor quilt block has just landed, and it's ready to launch your creativity into the stratosphere.
This cosmic creation is perfect for confident beginners looking to add some celestial charm to their quilting repertoire.
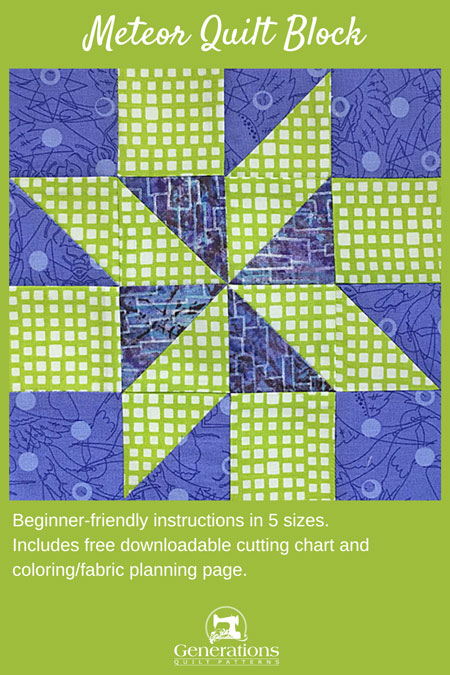
 Quilting not on a calendar? Pin this as a quick reference for later!
With our easy-to-follow tutorial, this design offers a stunning combination of precision and creativity—you'll be piecing faster than light speed.
As always, beginner-friendly, illustrated instructions are the backbone of the tutorial. There's more free goodies available for you to download to help you. They are:
- Quilt block names can be so confusing. One design may have multiple names and one name, multiple designs. Take a look at this slight variation on the Meteor block (and yes, you'll find a new cutting chart and design for it!)
- Quilting time being sucked into a temporal vortex? Pin this tutorial for later, and prepare for an interstellar quilting adventure when your craft is clear for takeoff! 🌟📌"
Cut. Sew. Press. Launch your fabric into a quilting orbit!
📋General Instructions
Several abbreviations are used on this page. They are:
- SA - seam allowance
- RST - right sides together
- HST - half square triangles
A 1/4" SA is used in this tutorial.
Highlighted in yellow, pressing instructions are easy to spot.
To press, first press the patches in the closed position as they came off your sewing machine. This sets the seam, melding the fibers of the threads into the fibers of the fabric.
Then press the SA to the dark unless otherwise instructed.
The newest quilt fabrics to tickle your fancy...
Click the images below to see the full collection. We share any commercial and/or free patterns that showcase them, too. (For inspiration, of course!)
✂️Cut the patches for your Meteor block
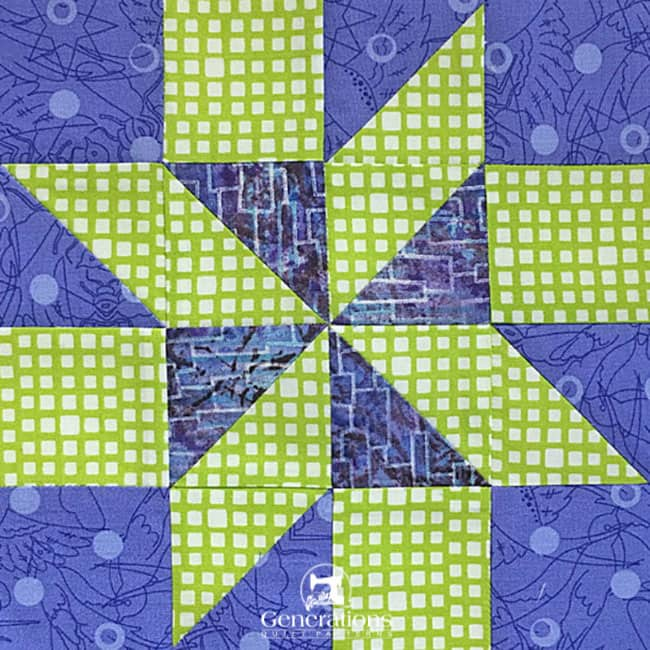
Sample Block Size: 8" finished / 8½" unfinished
Grid: 4x4
Design Type: Pinwheel
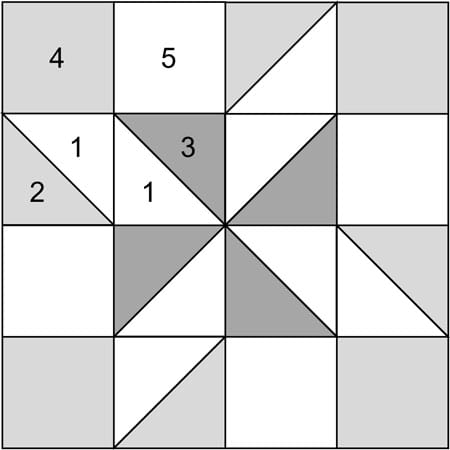
Please label your patches. We use their numbers throughout this tutorial.
The patches for the HST are cut oversized. They'll be trimmed to perfection and a chart is provided at that point in the tutorial for your convenience.
 | Cutting Chart for a~ Traditional Piecing ~ | ||||||
|---|---|---|---|---|---|---|---|
| Patch | Fabric | Qty | Finished Block Size | ||||
| 4'' | 6'' | 8'' | 10'' | 12'' | |||
| 1 | Bac | 4 | 2¼'' x 2¼'' | 2¾'' x 2¾'' | 3¼'' x 3¼'' | 3¾'' x 3¾'' | 4¼'' x 4¼'' |
| 2 | Med | 2 | 2¼'' x 2¼'' | 2¾'' x 2¾'' | 3¼'' x 3¼'' | 3¾'' x 3¾'' | 4¼'' x 4¼'' |
| 3 | Dark | 2 | 2¼'' x 2¼'' | 2¾'' x 2¾'' | 3¼'' x 3¼'' | 3¾'' x 3¾'' | 4¼'' x 4¼'' |
| 4 | Med | 4 | 1½'' x 1½'' | 2" x 2" | 2½'' x 2½'' | 3" x 3" | 3½'' x 3½'' |
| 5 | Bac | 4 | 1½'' x 1½'' | 2'' x 2'' | 2½'' x 2½'' | 3'' x 3'' | 3½'' x 3½'' |
| Unfinished Block Size | 4½'' | 6½'' | 8½'' | 10½'' | 12½'' | ||
| Grid Size | 1'' | 1½'' | 2'' | 2½'' | 3'' | ||
🪡Assemble the units
HSTs
Make 4 of each fabric pairing
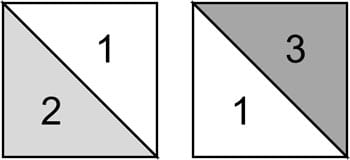
On the backside of all the #1 patches, draw a diagonal line from corner to corner. This line needs to be just dark enough for you to see it.
For the sample block, I drew it in pen to make it easier for YOU to see. (In my personal quilting, my go-to is a mechanical lead or chalk pencil—depending on which is easier to see.) Of course, in my haste, I marked the #2 square. That's what happens when you're quilting with your mouth with friends. <V-8 head smack!>
Layer each #2 with a #1. Repeat for the #1/#3 squares.
With your favorite 1/4" presser foot installed, stitch 1/4" away from both sides of all the drawn lines.
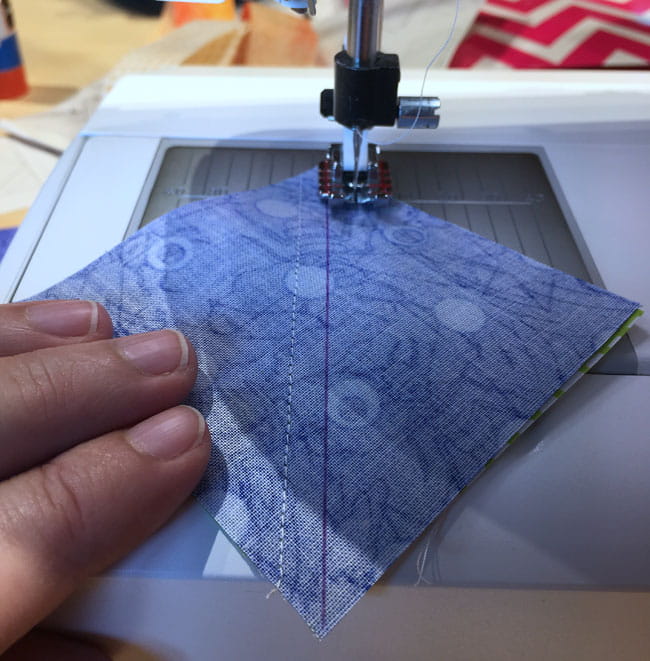 Sewing 1/4" away from the drawn line on a #1/#2 pairing
At your ironing board, press the pairs flat to set all the seams. (Your HST will lay flatter.) (below, left). Cut the pairs in half between the sewing lines, pressing again. This time the SA are towards the darker fabric. (below, center)
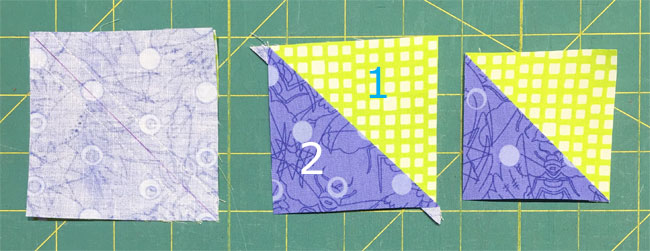
Finally, using the chart below, find the 'Trim HST to...' measurement that corresponds with the finished block size you're working on.
HST Dimensions | |
|---|---|
| Finished Block Size | Trim HST to… |
| 4" | 1½" x 1½" |
| 6" | 2" x 2" |
| 8" | 2½" x 2½" |
| 10" | 3" x 3" |
| 12" | 3½" x 3½" |
Trim all the HSTs to this size. (above, right) For the 8" finished sample, it's trimmed to 2½" x 2½".
After trimming all your HST, you'll have two sets of four each of the different pairings. #1/#3s are in the top row, #1/#2's in the bottom.
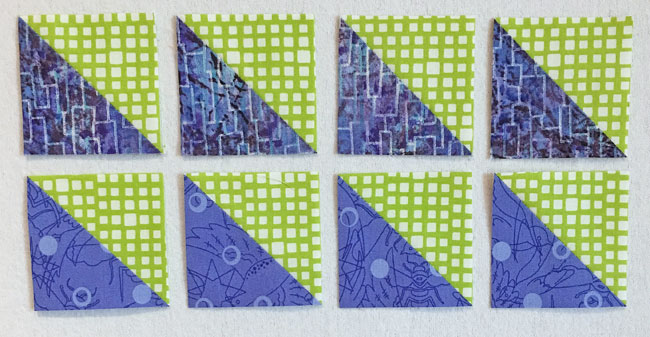 The HSTs are done. Time to move on to the next step.
Pairs of HSTs
Make 4
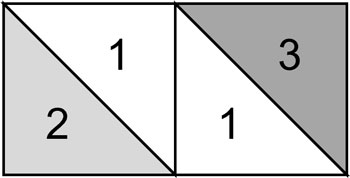
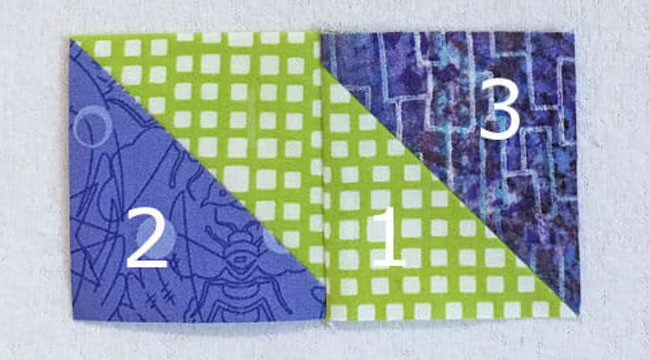
With RST, sew a #1/#2 HST to the left side of a #1/#3.
Press with the SA toward the #1/#3 HST.
Corners or Quarter Blocks
Make 4
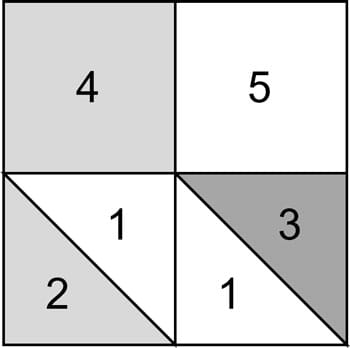
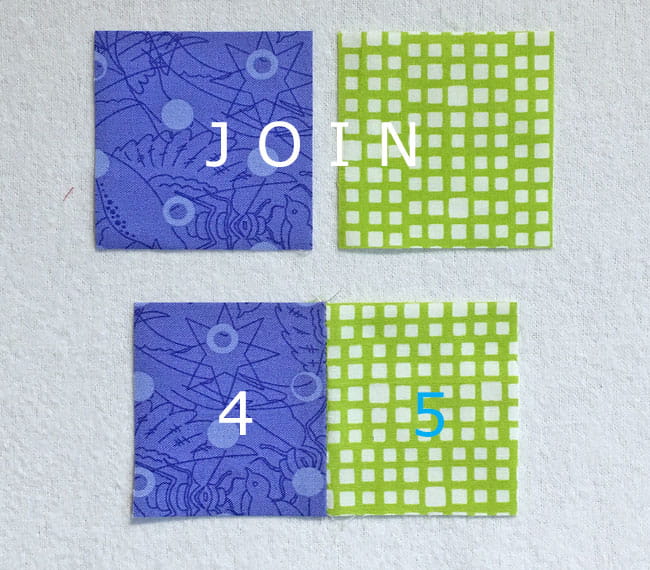
With RST, sew a #4 to a #5, repeating for a total of four. Press SA toward #4.
Arrange a #4/#5 and a paired HST as shown below left and sew together. If you followed the pressing instructions, your SA nest.
Stitch a total of 4 identical units.
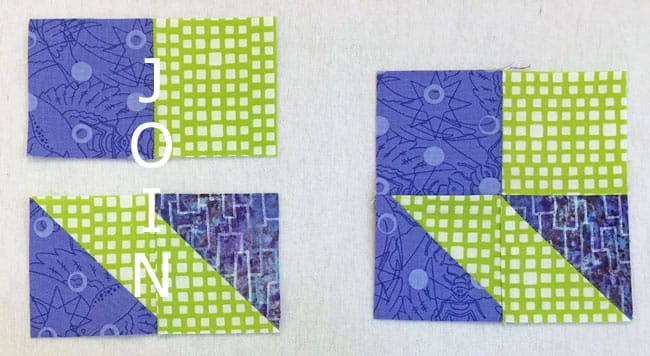
Press flat to set the seams.
We're going to twirl or fan the SA in the center to reduce bulk. To do so, unpick—but do not cut—the thread tails in the center.
Work the seams with your fingers and iron so that they 'twirl' clockwise around the center as you look at your corner from the backside.
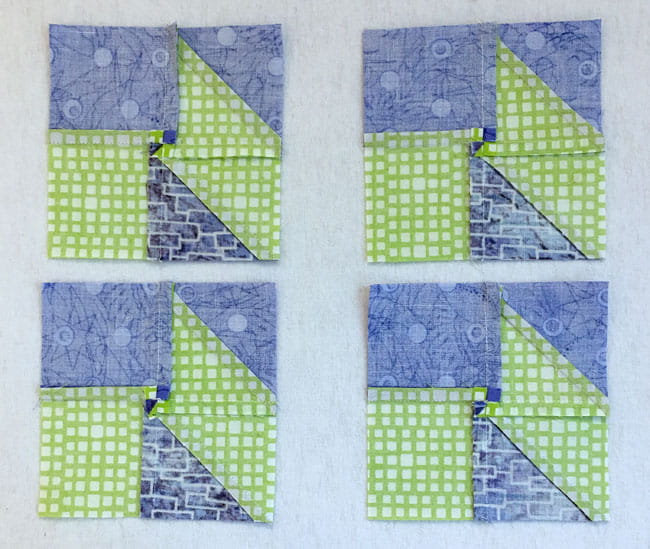
Here's a closeup of that twirl. The thead tail is still there with the two threads in the seam pulled apart, not cut.
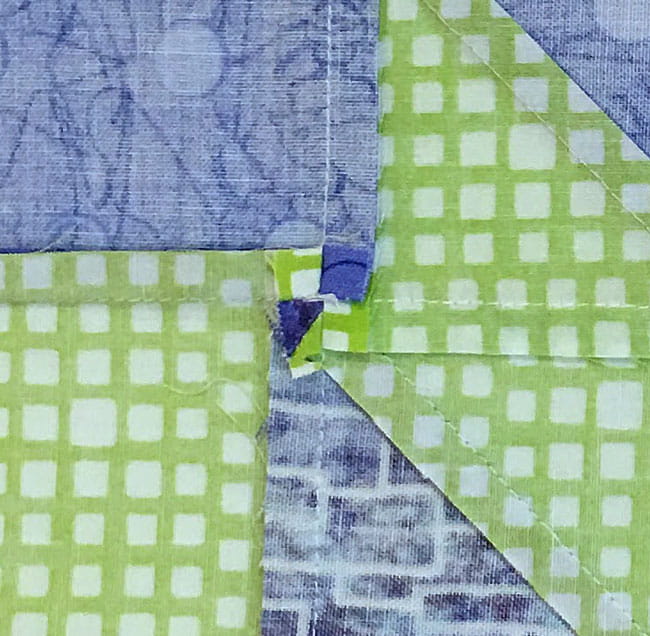
Give these patches a good pressing. Try out my secret pressing technique for a really professional job—and you won't need to buy a clapper to do it!
🧩Assemble your Meteor quilt block
Lay out your Corner units as shown below. As you move clockwise around the block, each corner is rotated a quarter turn, with the darker #3 HSTS toward the center forming a pinwheel.
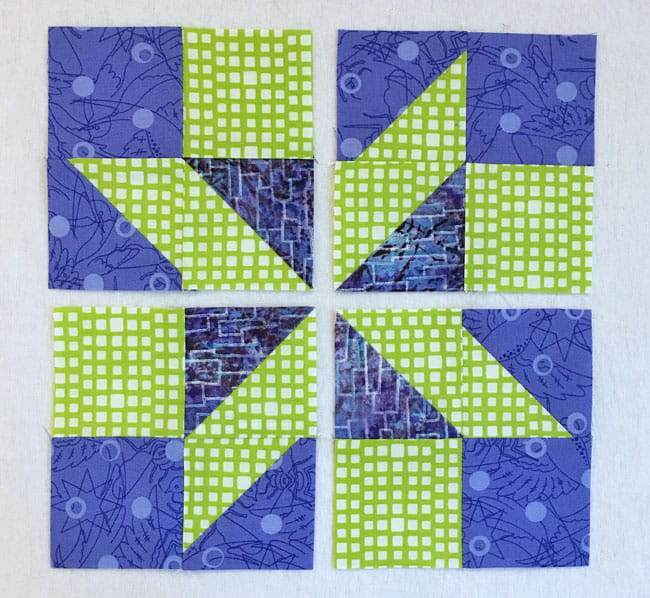
With RST, stitch the pairs in each row together. Because we're smart quilters, we planned ahead, making it much easier for us to match the seams between the units. They nest together!
Press. SA toward the Corner unit with the wide side of the dark #3 HST at the center edge.
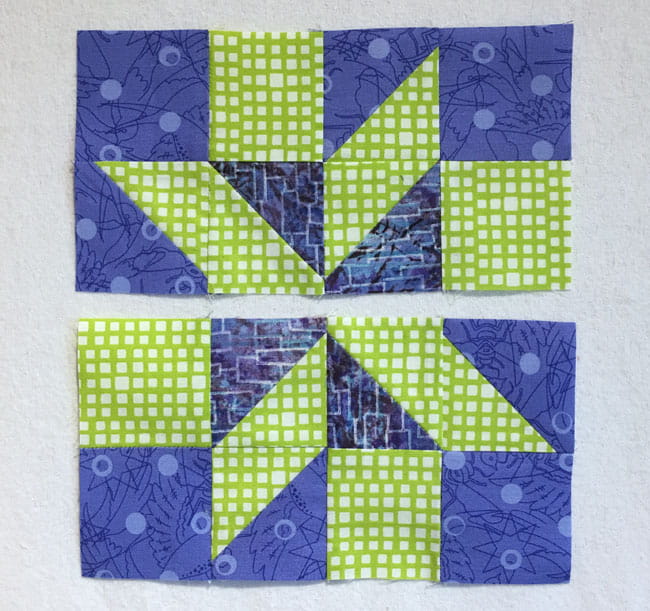 The seam that joins the units in each row is pressed towards the left in the top row and toward the right in the bottom.
With RST, sew the rows together. Pin as needed to help match the seams.
If you need help with pinning, refer to my article for pinning perfect points. (Use the back bottom on your browser to return here.)
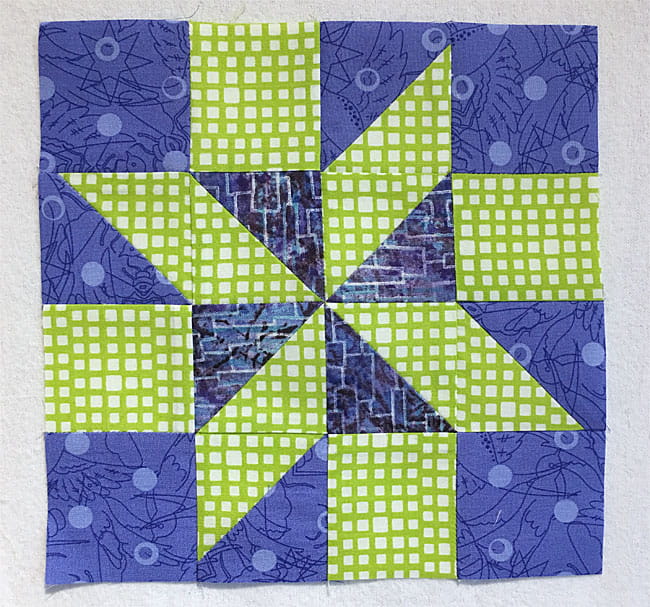
Again, we're going to twirl the seam.
Loosen the stitches at the center, don't cut them away. Use your fingers and the iron to 'twirl' the SAs clockwise around the center.
You can see all this 'twirling' action from the back side.
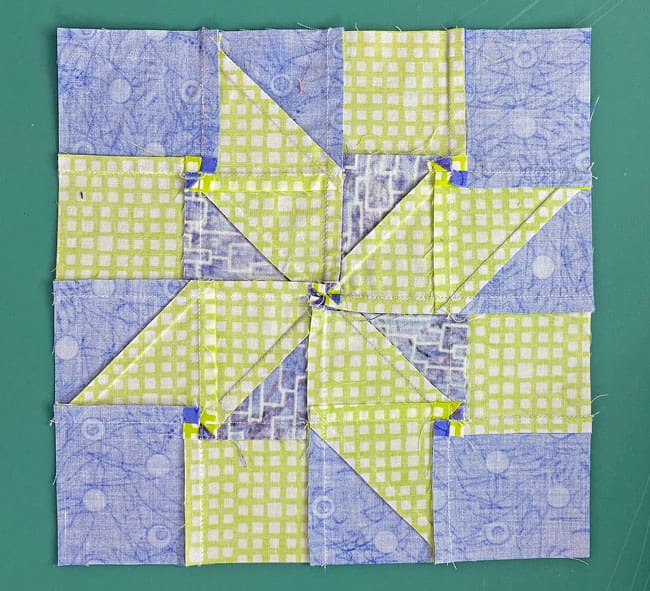
Another closeup. 'Love how the technique creates a tiny pinwheel in the very center.
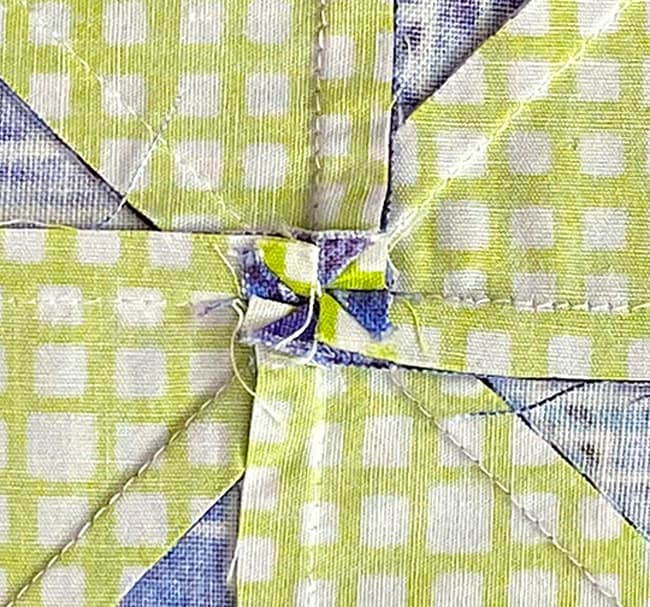
This simple step goes a long way to reducing bulk at the center of pinwheels. Try it! You'll like it! :D
A slight variation on our Meteor quilt block design
The same quilt block can have many names.
I mean, it figures, right?
All we're doing is moving around a pretty standard groups of shapes (triangles, squares, rectangles, etc.) on a particular grid. For our Meteor, it's a 4x4 grid.
While Meteor is the only name I've seen for this block (found in Mary Malone's "5500 Quilt Block Designs"), Barbara Brackman shows the Meteor as the same lay out of shapes but with 2 fabrics instead of three.
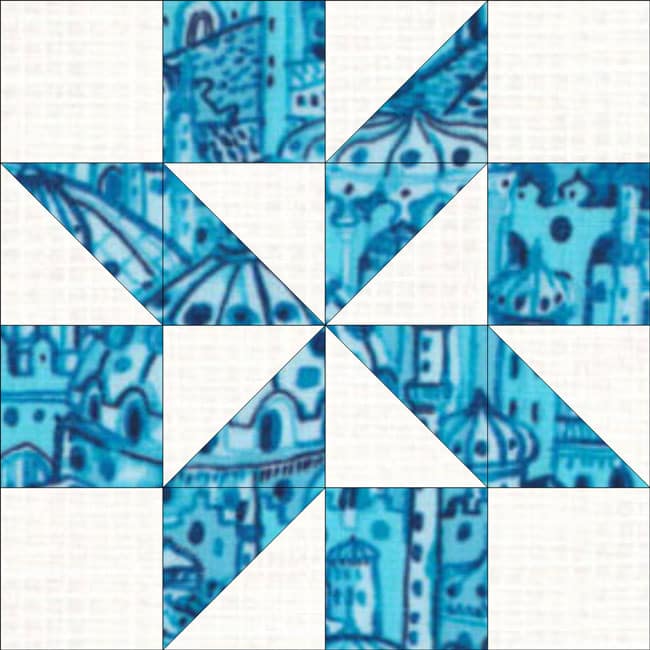
If you prefer this variation, use the cutting chart and design below to guide you, or download and print your personal copy of it here.
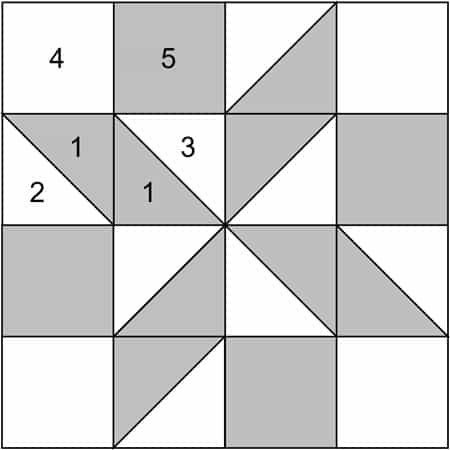 Meteor quilt block design, a two fabric variation
 | Cutting Chart for a~ Traditional Piecing ~ | ||||||
|---|---|---|---|---|---|---|---|
| Patch | Fabric | Qty | Finished Block Size | ||||
| 4'' | 6'' | 8'' | 10'' | 12'' | |||
| 1 | A | 4 | 2¼'' x 2¼'' | 2¾'' x 2¾'' | 3¼'' x 3¼'' | 3¾'' x 3¾'' | 4¼'' x 4¼'' |
| 2 | Bac | 2 | 2¼'' x 2¼'' | 2¾'' x 2¾'' | 3¼'' x 3¼'' | 3¾'' x 3¾'' | 4¼'' x 4¼'' |
| 3 | Bac | 2 | 2¼'' x 2¼'' | 2¾'' x 2¾'' | 3¼'' x 3¼'' | 3¾'' x 3¾'' | 4¼'' x 4¼'' |
| 4 | Bac | 4 | 1½'' x 1½'' | 2" x 2" | 2½'' x 2½'' | 3" x 3" | 3½'' x 3½'' |
| 5 | A | 4 | 1½'' x 1½'' | 2'' x 2'' | 2½'' x 2½'' | 3'' x 3'' | 3½'' x 3½'' |
| Unfinished Block Size | 4½'' | 6½'' | 8½'' | 10½'' | 12½'' | ||
| Grid Size | 1'' | 1½'' | 2'' | 2½'' | 3'' | ||
🌀More playful pinwheel quilt blocks to stitch!
You've finished your pinwheel quilt block, and you're ready for more!
Our pinwheel quilt blocks are a delightful blend of playful interlocking patterns and vivid, eye-catching color. The interlocking patterns dazzle your eyes and inspire your creativity, while our step-by-step instruction ensures that you can create these stunning blocks with ease.
Click here to dive in and turn your fabric into MAGIC!
For even MORE blocks to make... 🧩🎨

...visit our Free Quilt Block Pattern Library, with over 230+ blocks to choose from in multiple sizes.
Free downloads are included in all sizes for any blocks require paper piecing patterns or templates.
Too many meteors in your path right now?
Dock this tutorial in your Pinterest space station for when your quilting rocket is fueled up! 🛰️📌
- Home
- Free Quilt Block Patterns
- Meteor Quilt Block
