- Home
- Quilt Design Inspiration
- Medieval Walls Quilt
Designing with the Medieval Walls Quilt Block
From our Quilt Design 101 series...you love the block...now what?
This post contains affiliate links, for which I receive compensation.
You've finished your first Medieval Walls quilt block ...
... and like it!
Now the question is, "What design potential does this block have?"
How will you arrange your blocks?
On this page, you will find:
- Straight and diagonal or on-point settings with layouts with and without sashings and cornerstones
And if you've missed it, you can find the Medieval Walls quilt block tutorial here.
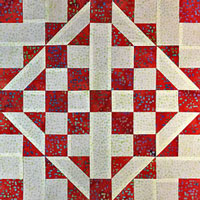 Medieval Walls quilt block
There you'll find:
- Free downloadable cutting charts
- Paper piecing
patterns (if you choose to use them) and
- Complete step-by-step, beginner-friendly instructions to make this block using two different techniques.
How 'bout them apples!
And finally, no time to quilt or read right now, simply Pin this page for later.
Let's get started.
Tools to make quilt designing easier...
Click any image for more information, reviews, and pricing.
Ideas for a Medieval Walls Quilt
All of the Medieval Walls quilt layout ideas provided here are either:
- Straight Sets of 5 by 6 for a total of 30 blocks, with 71 sashing units and 42 cornerstones, or
- Diagonal Sets of 4 by 5 for a total of 32 blocks. These on-point settings also require 4 corner triangles and 14 quarter-triangle blocks for the top, sides and bottom setting triangles, with 80 sashing units and 49 cornerstones
There's more about the finished sizes of these patchwork designs at the bottom of this page.
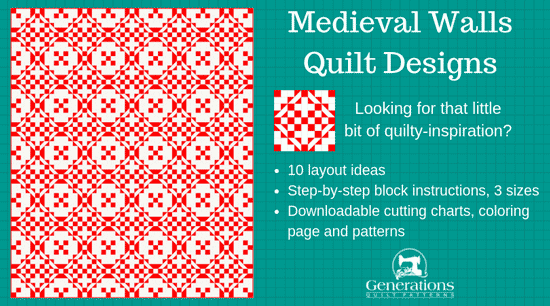
The outlines in and around the blocks have been eliminated to help you get a better idea of the finished patchwork design.
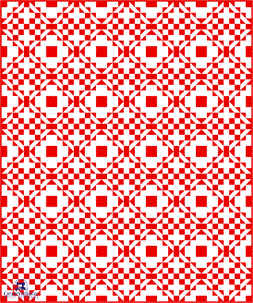
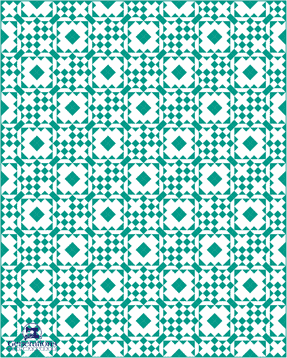
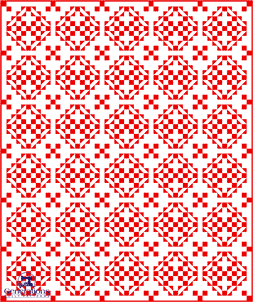
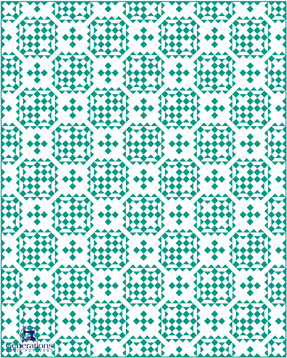
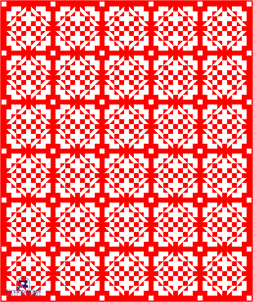
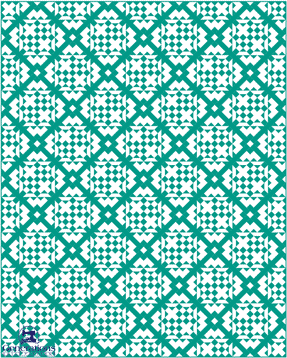
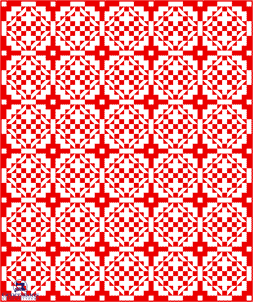
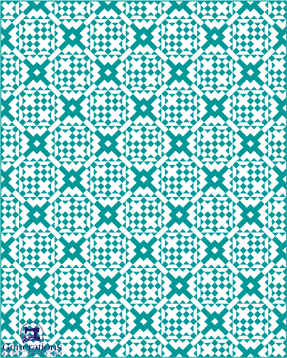
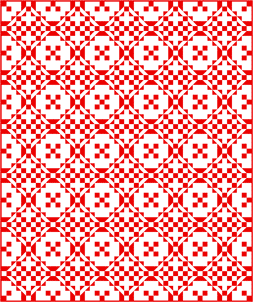
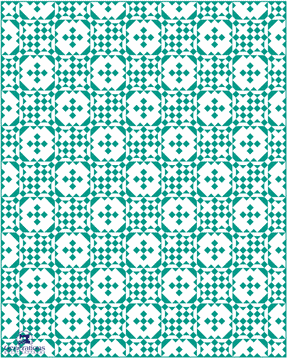
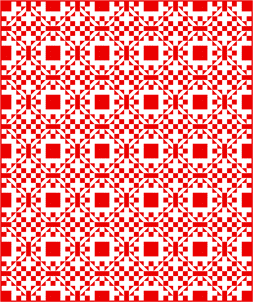
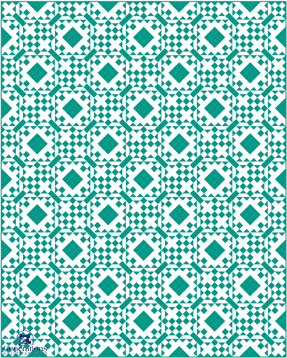
Straight set quilt layouts are colored in red and white while diagonal (on-point) layouts in turquoise and white to help you quickly identify the two settings.
For more info on quilt layouts, click here.
When sashings and cornerstones are added, they are added between the blocks and around the outside edge of the quilt.
Medieval Walls Quilt Ideas
To get a good visual understanding of the designs, blocks in straight sets are colored red and white and are on the left below.
Those in diagonal or on-point settings are in turquoise and white, on the right.
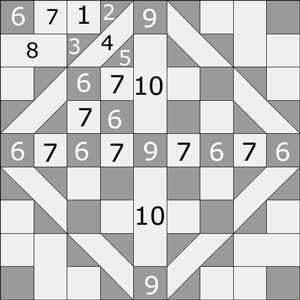 Medieval Walls block design
The quilts are shown in proportional sizes. The size of the patches in every block is the same. It's a good reminder that for on-point layouts the finished quilt sizes are different.
This is to help you decide if the extra effort in creating the setting and corner triangles for an on-point quilt is worth your time, effort and quilting dollars.
For a larger view of any quilt design, simply click on the quilt.
Blocks set edge-to-edge, no sashing or cornerstones
Medieval Walls - Variation #1 (click each image for a closer look)
First in straight sets (below, left) and in a diagonal set (below, right)...remember red for straight, turquoise for diagonal sets. :)
The dark corner squares (#6) meet to form larger squares. Using all scraps of a single color with similar values would liven this design right up.
To make it would require some changes to the pressing directions. Blocks whose outside edge seams nest together are easier to match at the seamlines.
Blocks with sashings and cornerstones
Adding sashing to a quilt is certainly a great way to change up a design. It's also a terrific technique to coax your patchwork to a larger size to accommodate a particular bed or wall space.
In each of these examples the width of the sashing strips is equal to one grid unit in the block. For our 9", 13-1/2" and 18" patterns, those corresponding grid units (or finished measurements) are 1", 1-1/2" and 2" (or 1-1/2", 2" and 2-1/2" wide unfinished or cut).
Medieval Walls - Variation #2 (click each image for a closer look)
This first one is about as easy as it gets, solid cut light strips for sashing and a solid dark square cornerstone.
Same layout, but now swapping the values—a dark sash and light cornerstone—a much bolder design.
Again, using scraps of a single color, close in value would up the interest.
In fact, to use use your scrap stash, you might consider splitting the long sashings into 9 individual squares—each 1 grid unit—cut 1-1/2", 2" or 2-1/2" for 9", 13-1/2" or 18" finished blocks, respectively.
More piecing, yes, but simple piecing.
Medieval Walls - Variation #3 (click each image for a closer look)
Next we'll divide those solid strips in three equal segments (light-dark-light) like sew...
...with dark cornerstones for this pair of design variations. A nice little nine-patch forms where four blocks meet.
Swap the lights and darks...
...and reveal a substantial change in the patchwork—no more nine patch.
Medieval Walls - Variation #4 (click each image for a closer look)
Split the center section into three patches, alternating dark and light.
Using a dark cornerstone.
Medieval Walls - Variation #5 (click each image for a closer look)
Construct these sash strips from alternating darks and lights, with a dark square for cornerstones.

The large dark squares are formed where the corners of the blocks meet.
Medieval Walls Finished Quilt Sizes
The measurements for all our Medieval Walls quilts are rounded up to the nearest 1/8".
If you'd like to compare these sizes to standard quilt sizes, click here to either see or download your own Standard Sizes chart.
In this first table are the measurements for quilts without sashing. The 1/4" wide binding IS included in the measurements.
Includes 1/4" wide binding, no sashing | ||||
|---|---|---|---|---|
| Setting | Block Layout | Finished Block Sizes | ||
| 9" | 13-1/2" | 18" | ||
| Straight | 5x6 | 45½" x 54 ½" | 68" x 81½" | 90½" x 108½" |
| On-Point | 4x5 | 51½" x 64½" | 76⅞" x 96" | 102⅜" x 127⅞" |
In this second table the measurements include sashing, the finished and unfinished widths of which are listed in parentheses below the block size.
These widths are 1 grid unit wide—remember, the Medieval Walls block is drawn on a 9x9 grid.
Includes 1/4" wide binding AND sashing | ||||
|---|---|---|---|---|
| Setting | Block Layout | Finished Block Sizes | ||
| 9" (1"/1½") | 13-1/2" (1½"/2") | 18" (2"/2½") | ||
| Straight | 5x6 | 51½" x 61½" | 77" x 92" | 102½" x 122½" |
| On-Point | 4x5 | 57⅛" x 71¼" | 85⅜" x 106⅝" | 133¾" x 142" |

For more blocks to make, visit our Free Quilt Block Pattern Library and choose another.
Or go straight to the Medieval Walls quilt block tutorial and make your own.
An itch I just couldn't scratch, until…
After making the sample of this block, I just couldn't get the design out of my head.
The quilt designs on this page made the itch even worse. So I started making scrappy pink Medieval Walls blocks. This is how far I've gotten.
 Eventually, there'll be 6x6 or 6x7 rows in this quilt.
The only thing I'd change in these blocks is to remove a couple of the light-light pinks. I see a bit of frog-stitching (Rip-it! Rip-it! Rip-it!) in my future, but I'm 'tickled-pink' with how this is turning out.
Now I just have to choose a setting!
- Home
- Quilt Design Inspiration
- Medieval Walls Quilt
