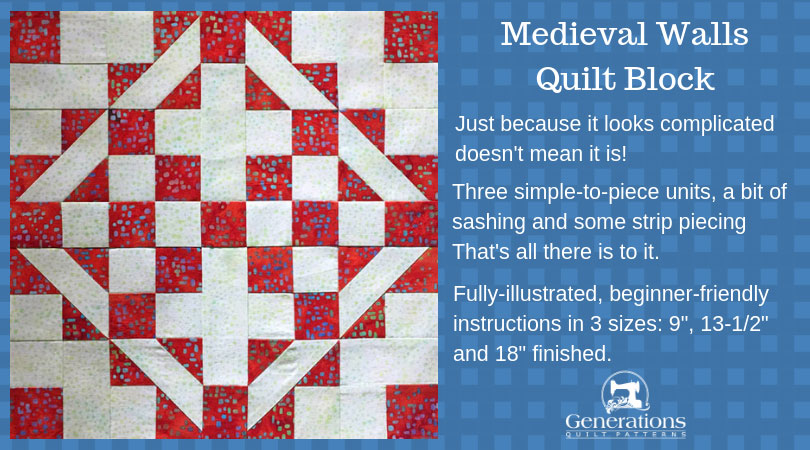
Medieval Walls Quilt Block, Pt.2
From our Free Quilt Block Patterns Library
This post contains affiliate links for which I receive compensation.
Our Medieval Walls quilt block lesson continues...
Use the links below to navigate to other sections of the tutorial.
In this tutorial you'll find:
Don't forget to 'Like' this page below if this tutorial is helpful to you.
Not sure what to do with this block?
Check out 10 different quilt designs using Medieval Walls blocks to get your creative juices flowing.
Step 3: Assemble the Medieval Walls corner sections
The corners for our Medieval Walls quilt block are each made with 2 Brave World units (BW), a four-patch (#6/#7) and a 3 patch (#6/#7/#8).
If you've followed the pressing instructions (highlighted in yellow) all the seams in this block will nest or lock together.
That makes matching the seams SO MUCH EASIER.
Pair #1

Make 4
For this set, we're joining a #6/#7/#8 corner to a BW.
Double check that the SA for the #6/#7/#8 is pressed away from #8 so that it will nest with the BW.
Position the #6/#7/#8 patch with the seam line between #6/#7 and #8 running left to right (red line below). The BW has its #1 in the upper left corner.
With RST stitch the units together, joining the sides with #1/#3 and #7/#8, repeating for a total of four pairs.
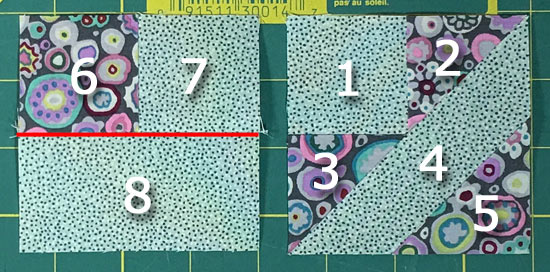
Press the SA towards the BW unit.
Pair #2

Make 4
For this set, we'll stitch a BW to a four patch.
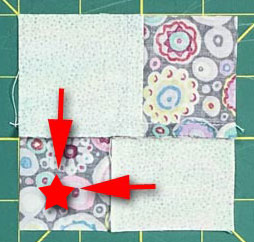
Remember that when we constructed our 4-patches that both SAs were pressed in toward one dark square as shown here.
I've marked that dark #6 square with a red star in the photos so you know where it goes.
If it helps, put a pin or safety pin or something so that you can quickly identify which square it is in your own four patches. It'll make assembly much easier.
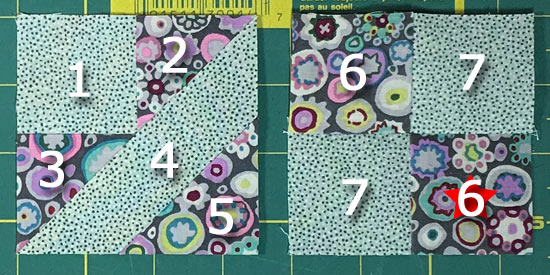
Brush up on your pinning techniques if needed here. You'll want a good match between the points and squares (#5 and #6/#7) where they meet.
With RST stitch four of these pairs. These SAs are pressed toward the BWs.
Assemble the corner section
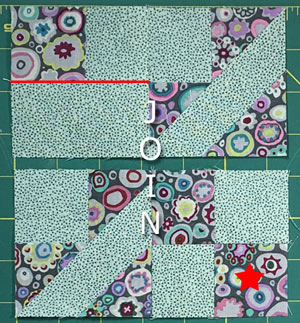 One last seam and our corners are ready.
Make 4
Arrange one of each pair as shown here, dark #6 from the first pair in the upper left, dark #6 with both SA pressed in towards it (red star) in the second pairing in the lower right.
With RST, pin as needed to get a good match.
Press this SA away from the pair containing the four patch.
After stitching it looks like this, though your's won't have a red line and red star on it. :)
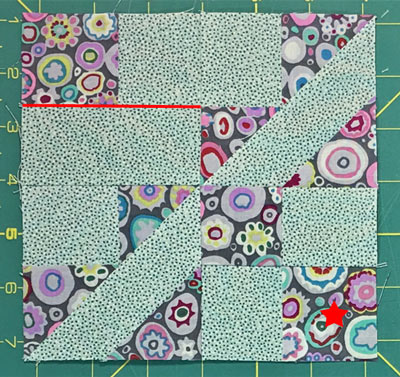 Make four exactly like this
Step 4: Assemble your Medieval Walls quilt block
To create the Medieval Walls design arrange the four corners and sashing units as shown below.
The light background trapezoid shapes (Patch #4) forms pairs of diagonal bars in the block when everything is laid out correctly.
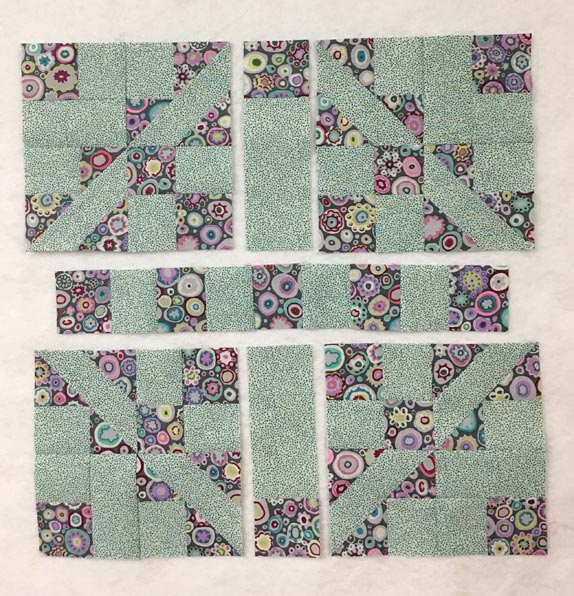 Oops! Looks like someone near and dear to me sewed the center row together before she took the picture. I'll have to speak to her about this! :)
With RST, join the units in each row together.
I've pinned again to get a good match between the squares and points in the design.
Press SAs in the direction of the arrows.
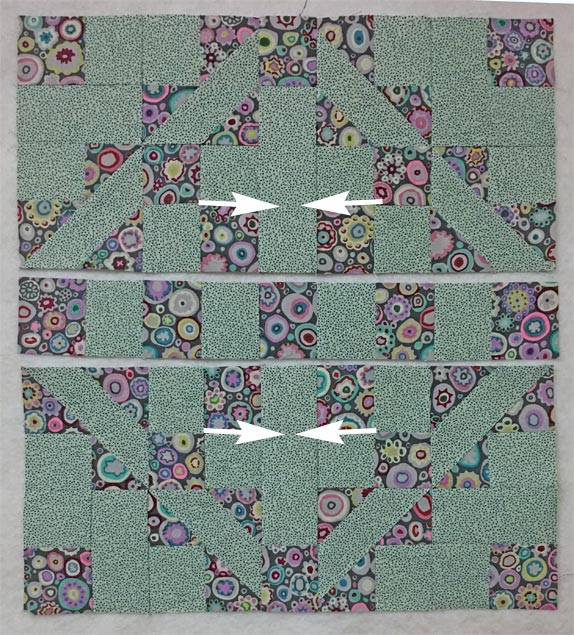 Our Medieval Walls is almost done!
All that's left is to stitch the rows together. If you've followed the pressing directions all the adjacent seams in each seamline nest to make matching them pretty easy.
Again, pin as needed.
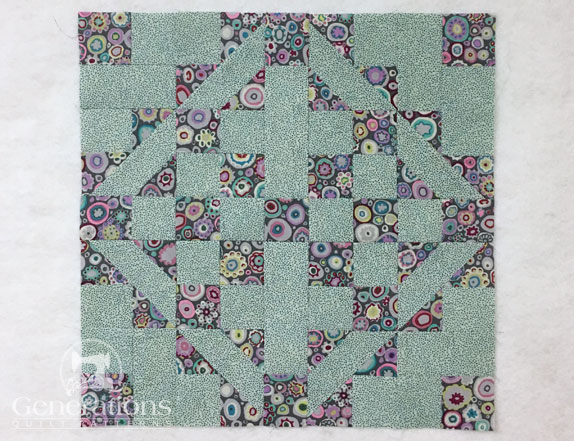 Voila! The Medieval Walls quilt block is ready for a quilt...or it's big enough to maybe become a pillow. Who'd a thunk it?!!
Now that you've discovered just how straight forward it is to make this rather complicated-looking block, there's a question...
OK...now what?
Do you want to see some of the design options you have with this block?
Click here to be inspired by several Medieval Walls quilt block layouts.
5 easy sashing ideas in both straight and diagonal or on-point settings.
Not tired yet?
An itch I just couldn't scratch, until…
I feel in love with this block while working on this tutorial. It happens.
I don't know if it was how easy the units went together with the paper piecing (what's not to love when you don't have to rip, right?) Maybe it was the way it looks way more complex than the piecing would indicate.
Either way, this was a block that I came back to try it scrappy.
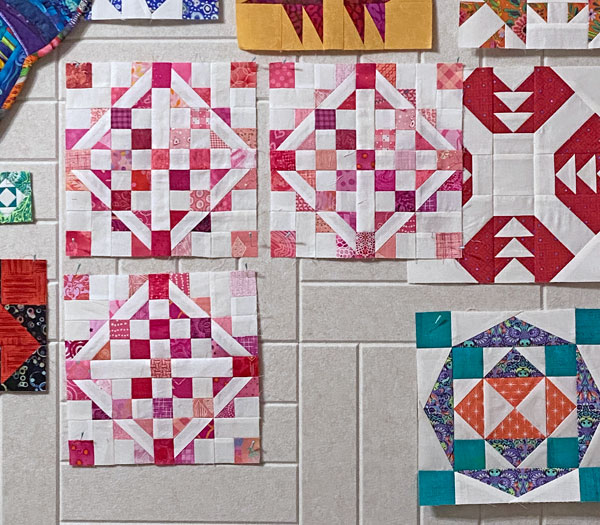
And it didn't stop there.
Check out the design page. You'll see that the itch got the better of me.
What about a different quilt block?
For a list of all the 220+ quilt block patterns on this site, start here.
If you know the name of the block, shorten your search by using these links:
Click here if you're looking for blocks with at least some paper piecing.
Click here if you're looking for the basic building blocks of quilting, i.e., Flying Geese, half square triangles, quarter square triangles, etc., along with several techniques to make each.
And finally, use these links to find blocks in these finished sizes:
