- Home
- Free Quilt Block Patterns
- Magnolia Bud Quilt Block
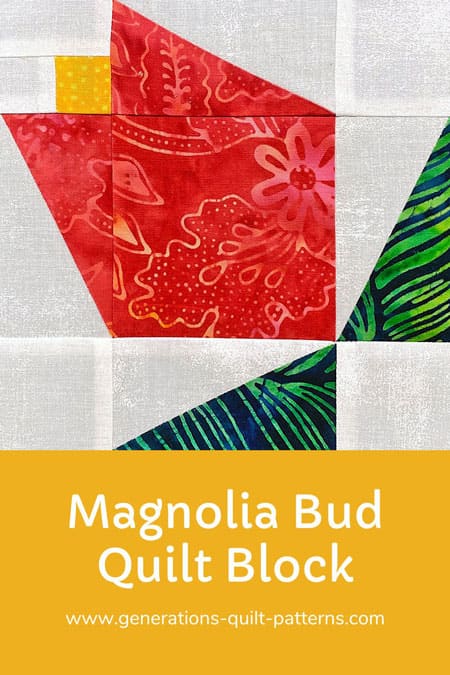
Master the Magnolia Bud Quilt Block: No Green Thumb Required!🧵
From our Free Quilt Block Patterns Library
This post contains affiliate links, for which I receive compensation.
Ready to blossom as a quilter?
The Magnolia Bud quilt block is your perfect springboard!
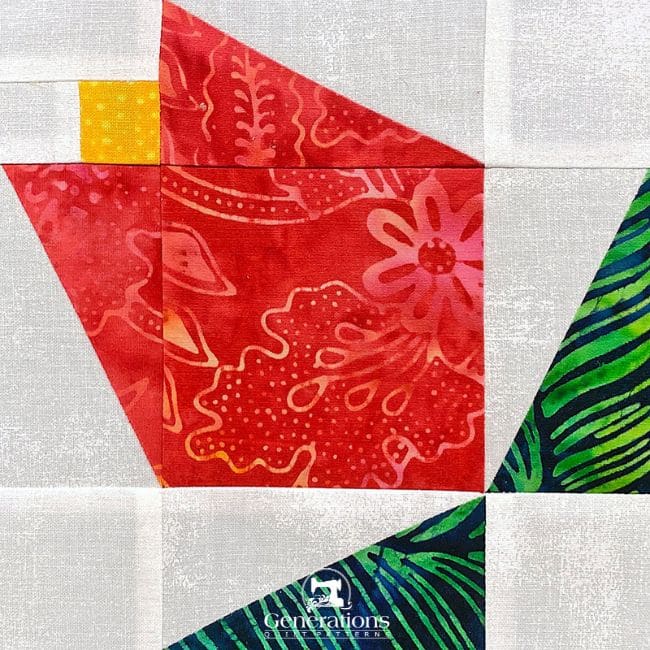
This tutorial offers a bouquet of possibilities, including free paper piecing patterns for Half Rectangle Triangles in four sizes. No specialty ruler needed—just your creativity and a dash of determination.
Let's turn your fabric into a floral masterpiece!
🧭Quick Navigation🔍
Navigate through our Magnolia Bud quilting adventure with ease! Use these quick links to find exactly what you need to help your creativity blossom:
- A cutting chart in four sizes, with downloads of the chart and block design
📋General Instructions
Several abbreviations are used on this page. They are:
- SA - seam allowance
- RST - right sides together
- HRT - Half Rectangle Triangle
A 1/4" SA is used in this tutorial.
Highlighted in yellow, pressing instructions are easy to spot.
To press, first press the patches in the closed position as they came off your sewing machine. This sets the seam, melding the fibers of the threads into the fibers of the fabric.
Then press the SA to the dark unless otherwise noted.
Download and print the paper piecing pattern
To download the pattern, use the most current version of the Adobe Reader.
For accurate results, on Adobe's Print Menu page, under 'Page Size and Handling' set 'Custom Scale' to 100%. Then print.
Click here to see what it looks like on the Print Menu page.
Find your finished block size from the chart below. For each block you make, print the corresponding number of copies for a total of:
- 2 pairs of HRT-A and B
Download and Print Paper Piecing Patterns | ||
|---|---|---|
| Finished Block Size # of Copies | Size | |
| 4" | 1 | 1" x 2" |
| 6" | 1 | 1½" x 3" |
| 8" | 1 | 2" x 4" |
| 12" | 2 | 3" x 6" |
After printing, use the 1" square graphic on the printed page(s) to double-check that your patterns printed at the correct size.
Then cut out the required number of patterns from your copies. A rough cut is good enough—an 1/8"-1/4"-ish away from the outside dashed square.

Not sure which paper to use?
Take a look at my review of several of the most popular brands available to us quilters on the market.
You want a super-easy paper to tear away—less stress on the stitches.
The newest quilt fabrics to tickle your fancy...
Click the images below to see the full collection. We share any commercial and/or free patterns that showcase them, too. (For inspiration, of course!)
Cutting patches for a block
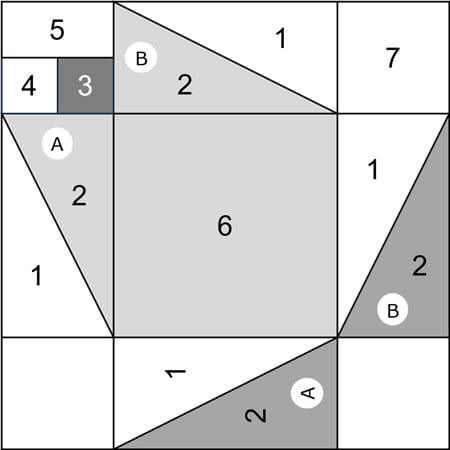 Magnolia Bud design
Sample Block Size: 6" finished / 6½" unfinished
Grid: 4×4
Attribution: KC Star
AKA: Pink Magnolia (Nancy Cabot)
Design Type: Unequal 9-patch, large center | Paper piecing
Label all patches. You'll need them throughout the tutorial.
Batiks were chosen as the Flower and Leaf fabrics for our sample block.
Surprisingly, both sides of the fabric looked nearly identical—;a common trait with batiks. This happy accident means you can create mirror-image patches for the HRTs from a single rectangle.
Simply flip one patch over. Voila! You've got the mirror image triangle you need. A lucky break!
 | Cutting Chart for a~ Includes some paper piecing ~ | ||||||
|---|---|---|---|---|---|---|---|
| Patch | Fabric | Qty | Finished Block Size | Sub Cut | |||
| 4'' | 6'' | 8'' | 12'' | ||||
| A1/B1 | Bac | 2 | 2⅞'' x 3¼'' | 3⅜'' x 4¼'' | 3⅞'' x 5¼'' | 4⅞'' x 7¼'' | yes |
| A2** | Flower | 2 | 2⅞'' x 3¼'' | 3⅜'' x 4¼'' | 3⅞'' x 5¼'' | 4⅞'' x 7¼'' | yes |
| B2** | Leaf | 2 | 2⅞'' x 3¼'' | 3⅜'' x 4¼'' | 3⅞'' x 5¼'' | 4⅞'' x 7¼'' | yes |
| 3 | Dark | 1 | 1'' x 1'' | 1¼'' x 1¼'' | 1½'' x 1½'' | 2'' x 2'' | --- |
| 4 | Bac | 1 | 1'' x 1'' | 1¼'' x 1¼'' | 1½'' x 1½'' | 2'' x 2'' | --- |
| 5 | Bac | 1 | 1'' x 1½'' | 1¼'' x 2'' | 1½'' x 2½'' | 2'' x 3½'' | --- |
| 6 | Flower | 1 | 2½'' x 2½'' | 3½'' x 3½'' | 4½'' x 4½'' | 6½'' x 6½'' | --- |
| 7 | Bac | 3 | 1½'' x 1½'' | 2'' x 2'' | 2½'' x 2½'' | 3½'' 3½'' | --- |
| Unfinished Block Size | 4½'' | 6½'' | 8½'' | 12½'' | na | ||
| Grid Size | 1" | 1½" | 2" | 3" | na | ||
**If your fabric looks the same on both sides, cut one piece each for A2 and B2. You can flip one piece over to create the mirror image patch.
Subcutting
Before piecing, do some subcutting:
- Stack Leaf, Flower, and background rectangles in like pairs, right sides together.
- Mark 5/8" from left on top edge and 5/8" from right on bottom edge.
- Cut diagonally between these marks.
This creates mirror-image patches for HRT-A and HRT-B triangles.
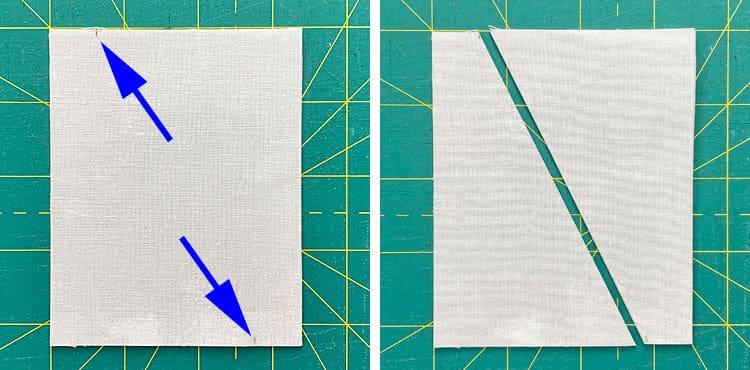 Subcutting the HRT-A1/B1 background rectangles.
After marking (left), after cutting (right).
💡 Pro Tip: If you choose a fabric that looks the same on the front and back, like these batiks in the sample, you'll need just one rectangle of each instead of two for each block.
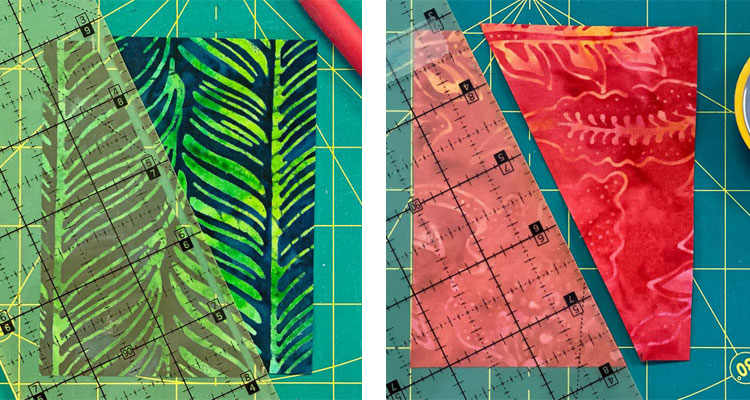 Marking and subcutting the Leaf (left) and Flower (right) rectangles.
Repeat for your A1/B1 background rectangles, these are our patches.
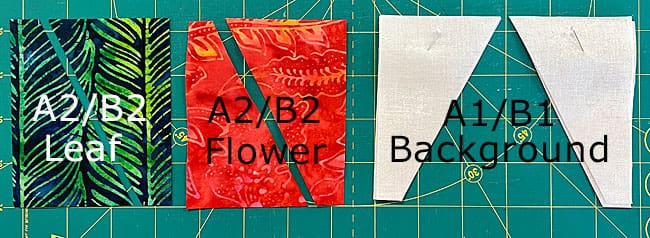 Flip one leaf patch and one flower patch to the other side. This creates mirror images. It works because the fabric looks the same on both sides.
🧵Create the units for your Magnolia Bud block
Create to Half Rectangle Triangles A & B
Make 1 pair each, flower and leaf fabric
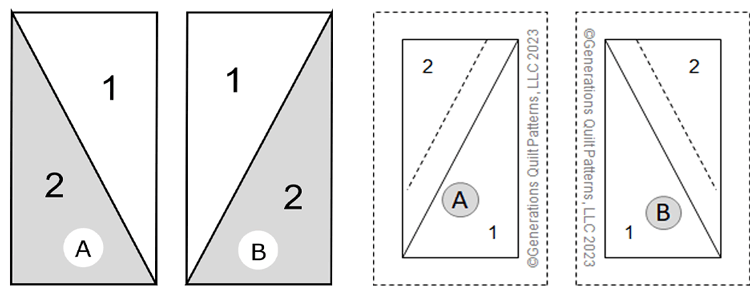 Half Rectangle Triangles A & B from the fabric side (left) and from the paper pattern side (right)
Position the A1 and B1 patches, wrong side of fabric to the unprinted side of the pattern. I like to hold them in position with a tiny bit of Elmer's Washable Glue Stick.
Use the dashed placement guides to get this done quickly;
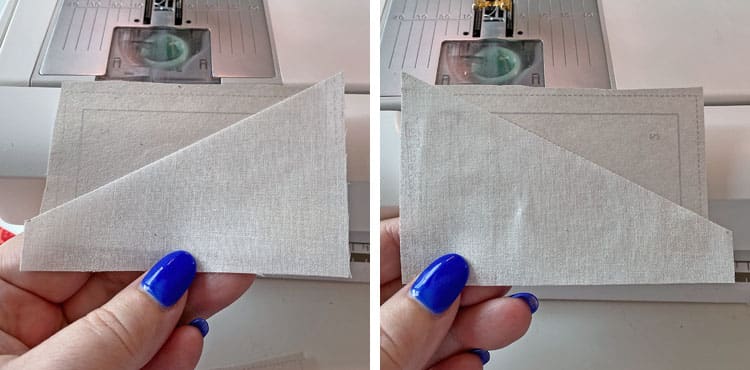 Position the #1 patches for all the HRTs.
We need to make a few adjustments to our sewing machine settings to paper piece.
- Reduce your stitch length to 16–20 stitches per inch (1.3-1.6 mm). This perforates the paper and stabilizes the seam when you remove the pattern. [Learn more about stitch length here.]
- Reduce your machine's speed or just plain slow down. Sew only as fast as you can AND stay on the solid stitching line.
- Install an open toe appliqué foot (sometimes called an 'embroidery' or 'satin stitch' foot) if you have one (it makes it easier to see where you're stitching).
- Use a larger needle (90/14) IF you have problems removing the pattern. Personally, I use an 80/12 Microtex Sharp for paper piecing without any issues.
With RST, align the A2 and B2 patches, long bias edges together with the A1 and B1 patches.
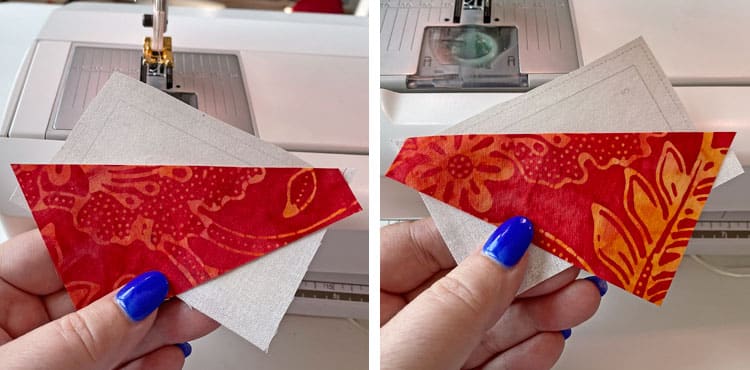 HRT-A (left) and HRT-B (right)
Sew these seams starting outside the dashed lines surrounding the block, then onto the solid line, finishing past those outside dashed lines.
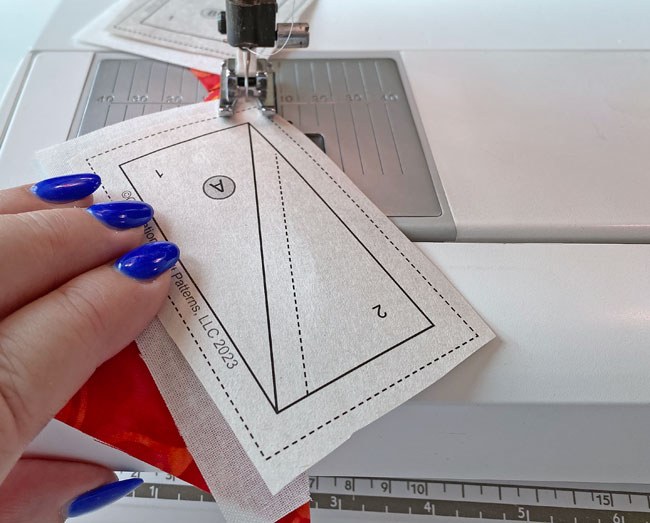
There's no need to trim away the thread tails. We'll get them when we trim these units to sizes.
Press.
At your cutting mat, line up the 1/4" mark on your ruler with one of the solid lines surrounding your block.
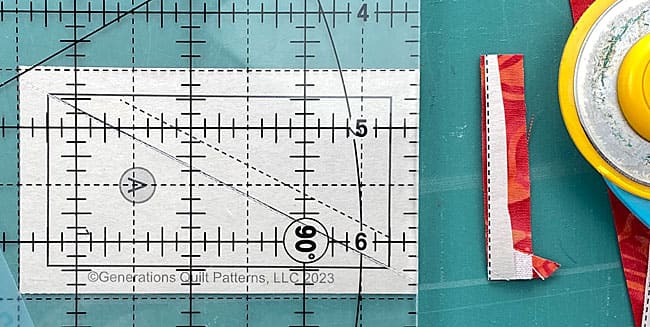
Turn the mat (a rotating cutting mat is perfect for this job—and a great ask for Christmas, that's how I got mine —a 1/4 turn and trim again.
Keep turning and trimming until all the edges are trimmed.
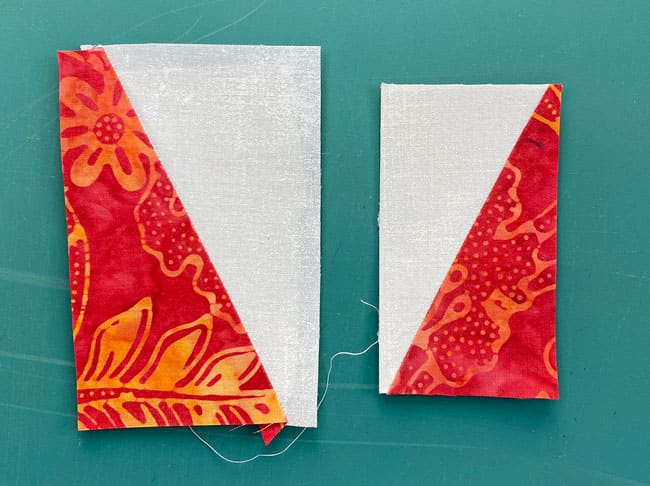 Untrimmed HRT-B (left) and trimmed HRT-A (right)
The paper piecing is complete. From this point forward, return your stitch length to the one you regularly use for piecing and install your favorite 1/4" presser foot.
Remove that paper pattern. It no longer serves a purpose.
Creating the Bloom Center
With RST, stitch #3 to #4.
Press the seam open.
Position #3 as shown in the photo. With RST, add #5 to the unit.
Press this new seam toward #5.
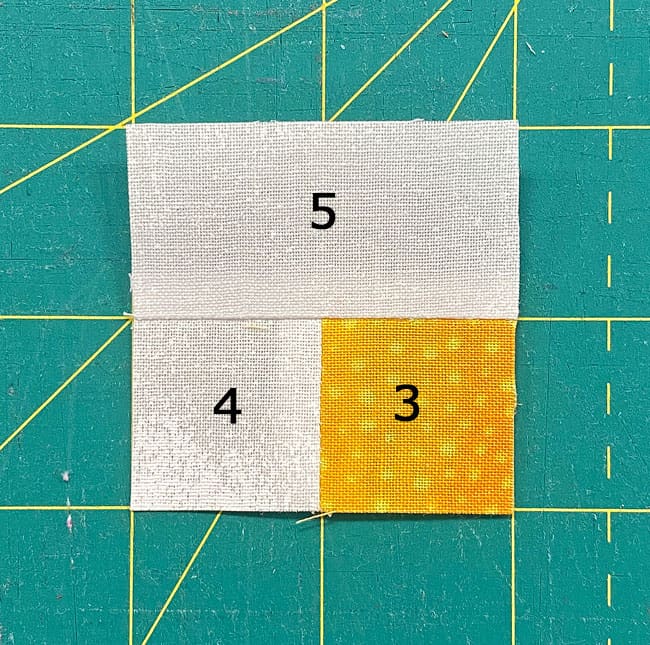
📏Measure for success
Time for a quick check-up on your blooming beauty. For this 6" sample, the Center Bloom measures 2" x 2".
After sewing, Bloom Centers measure… | |
|---|---|
| Finished Block Size | Edge-to-edge Measurement |
| 4" | 1½" x 1½" |
| 6" | 2" x 2" |
| 8" | 2½" x 2½" |
| 12" | 3½" x 3½" |
🧩 Assemble your Magnolia Bud quilt block
Lay out your patches following the photo.
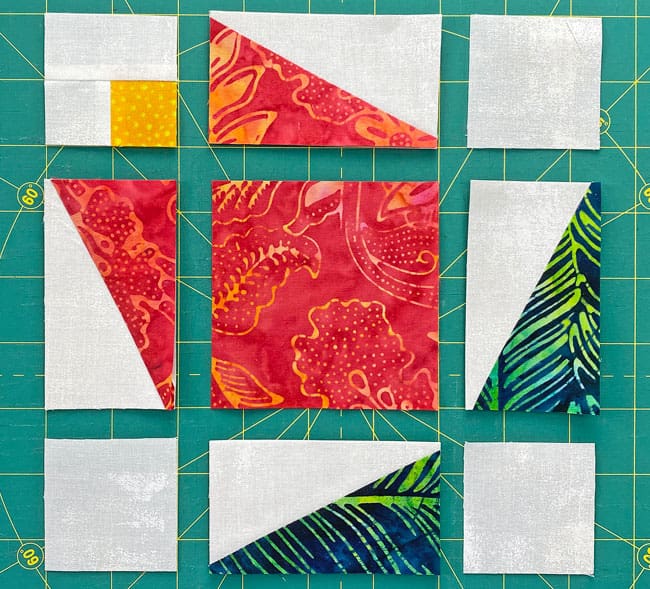
Stitch the HRTs, cut patches and the bloom center into rows.
These SAs are all pressed away from the HRT units.
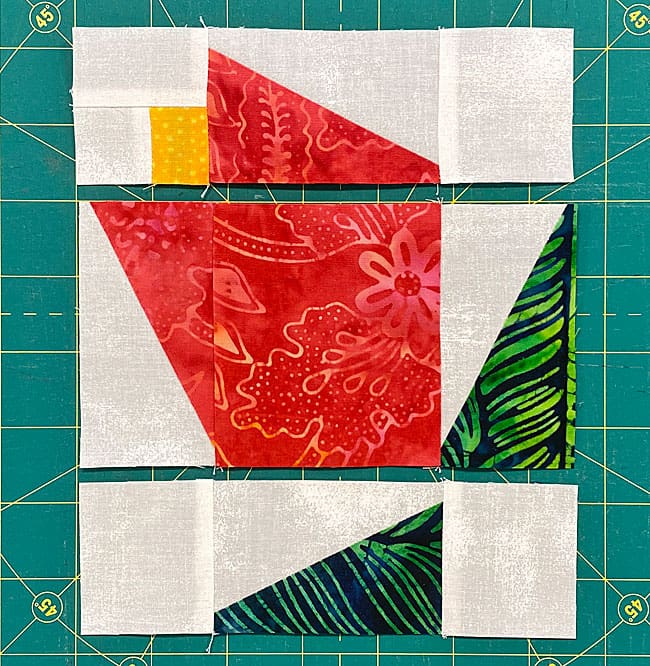
Time to unite those rows! Use pins to match seams if you need.
These last seams are pressed out from the center.
Tada! 🎉 Here's our finished Magnolia Bud block in all its blooming glory. Isn't it a beauty? Simple yet stunning.
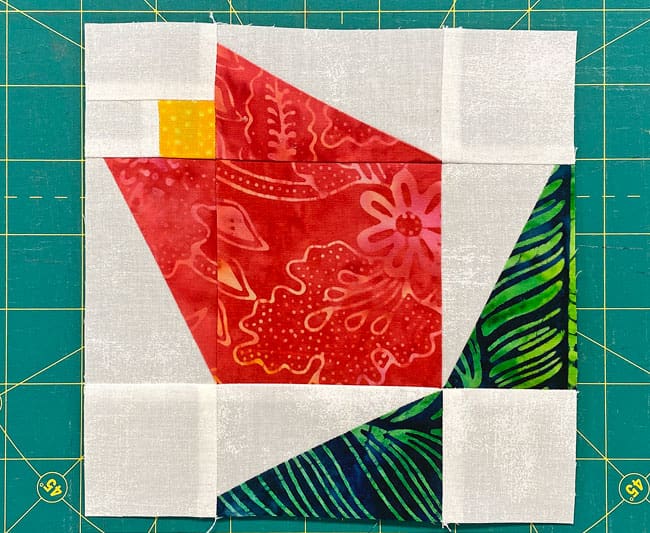
Now, let's peek behind the scenes.
Flip that block over and admire your handiwork from the back.
The seams in the bloom center are rotated from the previous photo. That's because the block is shown in the same direction as the front view. To accomplish this, it was turned a 1/4 turn clockwise.
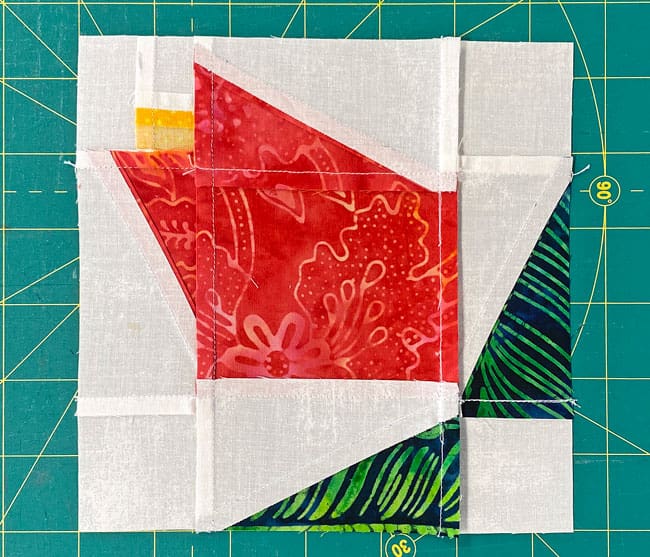
Remember, every stitch you've made is a step in your quilting journey. You've created something truly special here. Pat yourself on the back—you're blossoming into an amazing quilter! 🌸👏
Quilting mojo feeling a bit wilted? 📌
Pin this Magnolia Bud block tutorial and prepare for a creative growth spurt! Our easy paper piecing technique will help your skills flourish like never before.
For even MORE blocks to make… 🧩🎨

...visit our Free Quilt Block Pattern Library, with over 260+ blocks to choose from in multiple sizes.
Free downloads are included in all sizes for any blocks require paper piecing patterns or templates.
- Home
- Free Quilt Block Patterns
- Magnolia Bud Quilt Block
