- Home
- Free Quilt Block Patterns
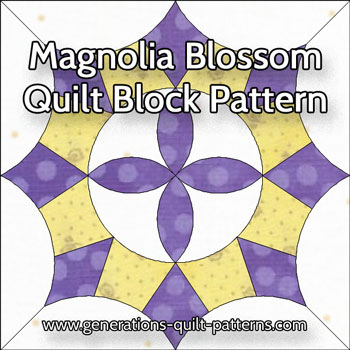
- Magnolia Blossom Quilt Block
Magnolia Blossom Quilt Block Pattern
From our Free Quilt Block Patterns Library
This post contains affiliate links, for which I receive compensation.
This page for the Magnolia Blossom quilt block came to be because of a question from a loyal reader. (There are templates to download further down.)
Nell wrote:
"This sweet quilt just screamed at me to pick it up and take it home.
So I did!
Now that I have it home I'm curious about the name of the block pattern.
The fabrics look 1930's. The block measures 15" x 15" finished. All hand-pieced and hand-quilted.
The secondary block is just wonderful too!
I found one block that looks a bit like it called "Castle Wall" but the curved pieces on the outside of the block are not curved.
 This is the photo Nell sent of her scrumptious antique quilt
The curves are needed to make the secondary block. You'll see when I upload the photos of my quilt. You can see that I laid fabric around the block to define it."
Nell's right!
This is a yummy quilt and an interesting block. The secondary design it forms is perfect to showcase some splendid quilting—either by hand or by machine—just like the quilt's maker did!
So I did some looking and some asking around.
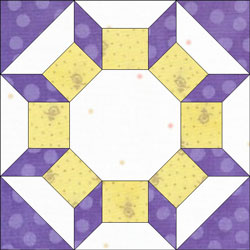 Castle Wall design
(For a truly great group of quilters, check out the Facebook group 'Quilts-Vintage and Antique'. They are one smart and truly helpful group of quilters interested and well-versed in quilt history!)
This is the Castle Wall block (right) that Nell mentioned in her note.
In Barbara Brackman's book, The Encyclopedia of Quilt Block patterns, it is #3610. Its design is attributed to the Kansas City Star, published in 1931.
It's completely constructed with straight-edged patches, no curves.
I took the liberty of removing the purple corner triangles from the block design.
When pieced into a quilt, this would be the result.
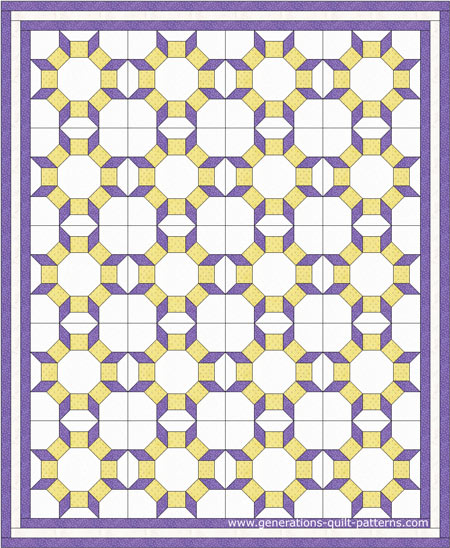 Straight set layout, 4x5 blocks
Finished size 69½" x 84½"
All border strips are 1-1/2" wide finished
Even if you added the applique shapes to the center, the block still forms a design looking more like interlocking chains than the twirly-whirly quilt we're after.
If I set the blocks on point, they still touch twice on each side, not once like the quilt in Nell's picture.
As they say where I come from, "Close...but no banana!"
Back to the drawing board. And then...
Eureka!
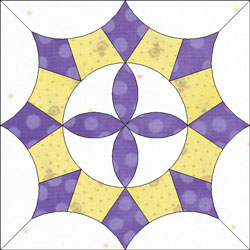 Magnolia Blossom design
I believe the block in Nell's quilt is actually the Magnolia Blossom quilt block pattern (left).
In Barbara's book it is #3530. The Magnolia Blossom quilt block design is attributed to the Oklahoma Farmer Stockman, published September 15, 1930.
When the Magnolia Blossom is set into the same 4x5 block straight set layout as above with 15" finished blocks and 1-1/2" wide finished border strips...
...this is the resulting quilt design that finishes 69-1/2" x 84-1/2".
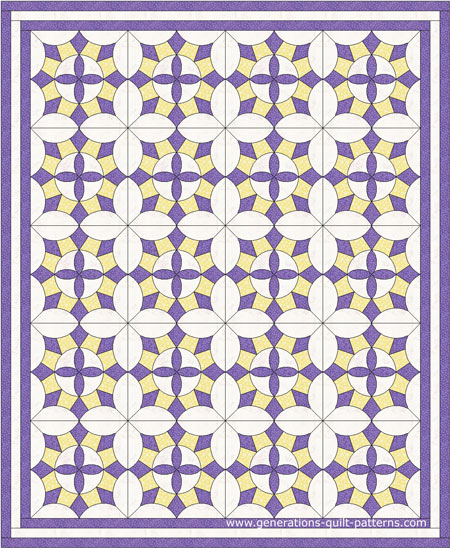
Pretty darn close to the picture Nell shared, isn't it? I think we've got it!
(Gotta love Electric Quilt, it makes it so easy to swap blocks in and out and change layouts and colors. I LOVE this program!)
The Magnolia Blossom quilt block pattern templates
As the time of this writing my website does not contain the usual step-by-step instructions to make this block. That's because this block is intended to be hand pieced.
I'm not a hand piecer.
But I am also not inclined to let templates sit, hidden away in a file on my computer. So you are free to download them here for your own personal use. They are sized for a 15" finished block.
You'll need the most current version of Adobe installed on your computer to download the pattern.
On the Adobe Print Menu page, under 'Page Size and Handling' set 'Custom Scale' to 100% before printing for accurate results. Click here to see what it looks like on the Print Menu page.
After printing, use the 1" square graphic on the printed pages to confirm they are printed accurately.
Click here to open the Magnolia Blossom quilt block template set.
For hand piecing
The Magnolia Blossom quilt block templates are printed at the finished size of each unit.
To prepare your template(s), trace around it lightly and accurately with a pencil. This line is your stitching line. Cut out the shape a 1/4" outside the drawn line to add your seam allowance.
Some of the shapes may look like they're duplicates.
That's because you'll need to cut both left and right facing units, in other words, mirror images so that everything fits together properly.
Cut all patches with the printing on the template facing up.
For complete instructions on hand piecing, I recommend you either purchase (or borrow from your local library like I frequently do):
Quiltmaking by Hand: Simple Stitches, Exquisite Quilts by Jinny Beyer
This book is a complete primer on handpiecing by one of the best and most prolific handpiecers of our time, Jinny Beyer.
An alternative construction idea if you don't handpiece...
I admitted it. I'm a machine piecer. But I really like this block.
If it were me, I'd applique it. With our invisible machine applique technique. So I'd finish it in my lifetime.
To do this, I'd redraw the pattern by printing out all the templates, taping them to a large sheet of paper. To help with their placement, I'd mark that paper with a line drawn through the center both horizontally and vertically and then from NW to SE and NE to SW.
After I was satisfied that the whole thing was symmetrical, I'd trace on another sheet for a clean copy. Then, I could either prepare my applique patches or take it to a copy store to reduce/enlarge it as needed.
Something for my every-growing bucket list! What about you?
There's always more blocks to try...
What about a different quilt block?
For a list of all the 220+ quilt block patterns on this site, start here.
If you know the name of the block, shorten your search by using these links:
Click here if you're looking for blocks with at least some paper piecing.
Click here if you're looking for the basic building blocks of quilting, i.e., Flying Geese, half square triangles, quarter square triangles, etc., along with several techniques to make each.
And finally, use these links to find blocks in these finished sizes:

