- Home
- Machine Applique (Invisible)
- Machine Applique Instructions
Sewing the Applique
Lesson 5: Invisible Machine Applique Instructions continued...
This post contains affiliate links, for which I receive compensation.
Our invisible machine applique instructions continue...
Invisible machine applique is just like chain piecing and machine quilting. We, quilters, try to sew for as long as possible without stopping to tie off.
With a little creativity you can applique our basket completely in just two passes.
On this page you'll learn how to stitch your applique as efficiently as possible—that means with as few stops as possible.
Let's get started!
The Basket Handle and Outside Edge
Use the labeled block below for reference. SL (stitch-length) and SW (stitch-width) settings are as follows unless otherwise noted:
Straight Stitch Traveling: SL=1.0, SW=0
Micro-stitching: SL=.5, SW=0
Zig Zag: SL=1.0, SW**=.5 to 1.0
**Choose where YOU are comfortable; both SWs work just fine.
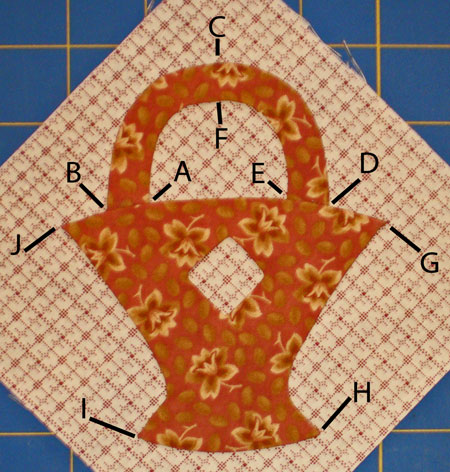 The labeled reference points are used in the following instructions
For traveling, set your machine to a zig zag, reduce the SW to 0 and SL to 1.0.
I find it's faster to change my machine settings this way. You may find it easier to alternate between a zig zag and a straight stitch setting. Test it on your machine.
Choose the Simplest Path
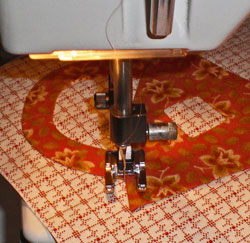
1. Start between A and B, straight stitch traveling (SL=1, SW=0)
Stop at B.
I cut my monofilament thread tail here, close to the top of the block to keep it from getting tangled.
In the picture, the needle is stopped at B.
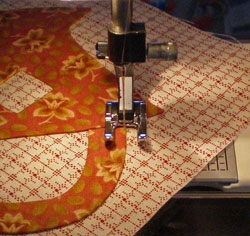
2. Pivot at B.
Zig zag the outer handle from B to C to D (SL=1, SW=1).
Stop at D.
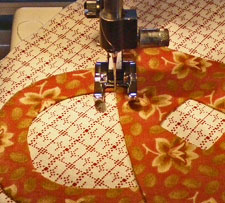
3. Pivot at D, straight stitch traveling from D to E, pivot at E.
4. Zig zag the inner side of the handle, from E to F to A, pivot at A.
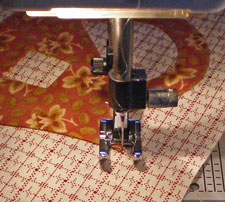
5. ZigZag from A to E to D to G to H to I to J and return to A.
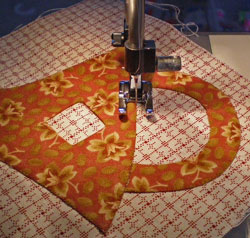
6. Microstitch just off the edge of the applique shape on the background fabric past A for a quarter inch.
The Cutout Square
You'll want to put a few extra stitches into the corners for our reverse applique square to reinforce the corner where we've clipped.
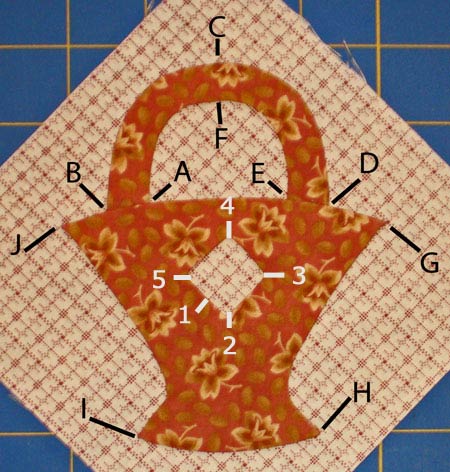 Reference points for inner square.
1. Start at 1 just past a corner and zigzag. Start here since you'll want a bit of room for overlapping zigzag and microstitches to tie off at the end.
2. Continue to 2. Stop with your needle in the background fabric in the very corner.
3. Pivot and stitch, pivot and stitch, lifting your presser foot as needed so you can fan out several stitches going around the corner in the template. These extras hold the corner fabric securely where you've clipped.
4. Zigzag to the next corner and repeat Steps 2, 3, and 4, repeat for all corners.
5. Once you reach "1" again, zigzag past it for a few stitches, then...
6. Microstitch just off the edge of the applique shape on the background fabric for another quarter inch
7. Stop with the uptake arm in its highest position and remove your block from the sewing machine.
8. Clip the monofilament thread tail close to the top of the block. Turn the block over, give a quick tug on the bobbin thread and clip the bobbin thread leaving about a 1/2" thread tail.
A few points to emphasize about this stitching...
Travel in the "ditch" with straight stitches to get from place to place without stopping. (Just like you do in machine quilting.) In our basket block, it happened at the ends of both basket handles. These stitches are hidden because you stitch "thiscloseto" the applique template without stitching on it.
ZigZag stitching twice over the same area runs the risk of making a "shiny" spot, so do try to minimize it.
Tying off with micro-stitching is a technique borrowed from machine quilting. They do hold nicely.
When applique quilts are quilted, typically every shape is quilted around for emphasis. This quilting will further hide the micro stitching.
These invisible machine applique instructions and techniques can be used with any applique pattern. Use them, enjoy them, and have fun fooling your friends!
Our final steps in our invisible machine applique instructions are to wash our applique quilt blocks and square them up.


