- Home
- Free Quilt Block Patterns
- Lovers Lane Quilt Block
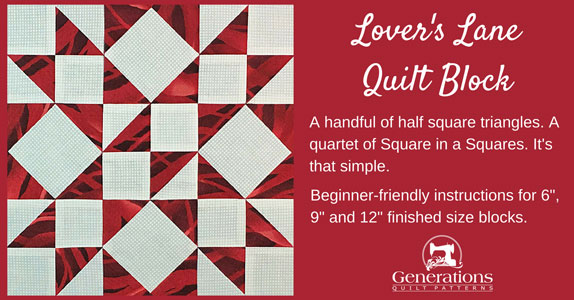
The Lover's Lane Quilt Block is a Sweetheart!
From our Free Quilt Block Patterns Library
This post contains affiliate links, for which I receive compensation.
The Lover's Lane Quilt Block takes a handful of half square triangles.
A quartet of Square in a Square units.
Simple piecing, for sure.
To provide you with options, both paperpiecing and the Connector (or Folded) corners techniques are shared for creating the Square in a Square units.
Choose whichever technique works best for you.
It's time to cut up and sew our Lover's Lane!
📋 General Instructions
Several abbreviations are used on this page. They are:
- SA - seam allowance
- RST - right sides together
- HST - half square triangles
- SiaS - square in a square
- CC - connector corners
- C.2, C.3, C.4, C.5 - Corner.2, Corner.3, etc
1/4" SA are used through this tutorial.
When instructed to press, first press the patches in the closed position just as they came off your sewing machine.
This sets the seam, melding the fibers of the threads into the fibers of the fabric.
Then press the SA as directed.
Those seams between the units can get a bit lumpy. Check out my favorite pressing technique to flatten them into submission.
The newest quilt fabrics to tickle your fancy...
Click the images below to see the full collection. We share any commercial and/or free patterns that showcase them, too. (For inspiration, of course!)
Step 1: Cutting for a Lover's Lane quilt block
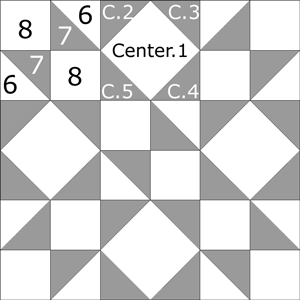 Lover's Lane design
Sample Size: 9" finished / 9½" unfinished
Grid: 6x6
Attribution: KC Star
AKA: Kissing Lanes (Nancy Cabot, but doubtful)
Design Type: Even 9-patch
The sample block is made with two tone on tone fabrics with high contrast so all those pointy-points show up.
It'd be a shame to do all the piecing only to have them disappear because of fabric choices that blend together.
If you like paperpiecing, choose the blue cutting chart. If you'd rather use all traditional techniques (including Connector Corners), choose the yellow chart.
**I prefer to cut my patches extra large for HST, stitch, and then trim them to size.
If you prefer to do the same, add a bit extra to the measurements for Patches #6 and #7 below (both charts).
There is a chart further down in these instructions where you need it for trimming them to size.
 | Cutting Chart for a~Paperpiecing PLUS Traditional Piecing ~ | |||||
|---|---|---|---|---|---|---|
| Patch | Fabric | Qty | Finished Block Size | Sub Cut | ||
| 6" | 9" | 12" | ||||
| Center.1 | Light | 4 | 1⅞" x 1⅞" | 2⅝ x 2⅝ | 3⅜" x 3⅜" | --- |
| C.2, C.3 C.4, C.5 | Dark | 8 | 2⅜" x 2⅜" | 2⅞" x 2⅞" | 3⅜" x 3⅜" | |
| 6** | Light | 5 | 1⅞" x 1⅞" | 2⅜" x 2⅜" | 2⅞" x 2⅞" | --- |
| 7** | Dark | 5 | 1⅞" x 1⅞" | 2⅜" x 2⅜" | 2⅞" x 2⅞" | --- |
| 8 | Light | 10 | 1½" x 1½" | 2 " x 2 " | 2½" x 2½" | --- |
| Unfinished Block Size | 6½" | 9½" | 12½" | na | ||
| Grid Size | 1" | 1½" | 2" | na | ||
There's no subcutting needed for the traditionally pieced block.
 | Cutting Chart for a~Traditional Piecing w/Connector Corners~ | |||||
|---|---|---|---|---|---|---|
| Patch | Fabric | Qty | Finished Block Size | |||
| 6" | 9" | 12" | ||||
| Center.1 | Light | 4 | 2½" x 2½" | 3½" x 3½" | 4½" x 4½" | |
| C.2, C.3 C.4, C.5 | Dark | 16 | 1½" x 1½" | 2" x 2" | 2½" x 2½" | |
| 6** | Light | 5 | 1⅞" x 1⅞" | 2⅜" x 2⅜" | 2⅞" x 2⅞" | |
| 7** | Dark | 5 | 1⅞" x 1⅞" | 2⅜" x 2⅜" | 2⅞" x 2⅞" | |
| 8 | Light | 10 | 1½" x 1½" | 2" x 2" | 2½" x 2½" | |
| Unfinished Block Size | 6½" | 9½" | 12½" | |||
| Grid Size | 1" | 1½" | 2" | |||
Optional: Download and print paper piecing pattern templates
If you've cut your patches from the yellow chart you can skip this step.
If you've cut patches using the blue chart, you need to print the paperpiecing patterns as follows.
Choose your finished block size from the chart below and print the corresponding number of pages for a total of four units.
Print Paperpiecing Patterns | ||
|---|---|---|
| Finished Block Size | # of copies | Link to PDF Download |
| 6" | 1 | 2" |
| 9" | 1 | 3" |
| 12" | 2 | 4" |
After printing, follow the instructions on the printed page(s) to check that the patterns printed at the correct size.
Cut out four units a bit beyond the outside line. There's no need to be exact at this time.
Step 2: Assemble the units
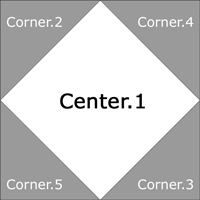
SiaS
Make 4
If you cut your patches from the yellow cutting chart, click here for instructions to make these units using the Connector Corners technique.
If you used the blue chart, continue here.
General Sewing Machine Setup for Paperpiecing
- Reduce your stitch length to 16–20 stitches per inch (1.3-1.6 mm). This perforates the paper and stabilizes the seam when you remove the pattern. [Learn more about stitch length here.]
- Reduce your machine's speed or just plain slow down. Sew only as fast as you can stay on the stitching lines.
- Install an open toe appliqué foot (sometimes called an 'embroidery' or 'satin stitch' foot) if you have one (it's easier to see where you're stitching with one installed).
- Use a larger needle (90/14) if you have problems removing the pattern.
- If your machine has a needle stop up, use it. The stitching goes faster when you don't have to lift the presser foot with every seam.
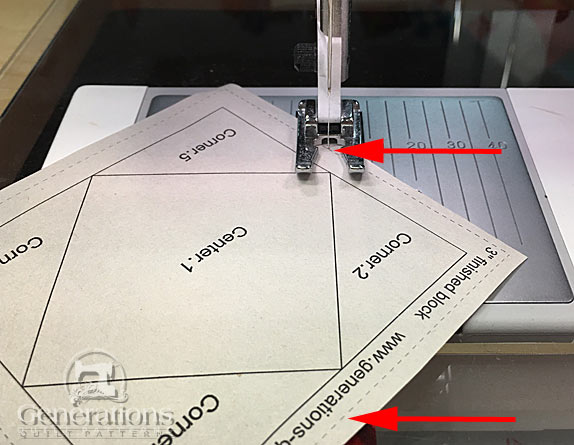
- As you stitch each seam, start and stop a generous 1/4” before and after the solid stitching lines. ALWAYS. Future lines of stitching secure the ends.
After adding each patch, press the unit as it was sewn to set the seam and then open. The SA is automatically pressed towards the last patch added.
Before adding the next patch, take a look to make sure the one you just added covers the space plus seam allowance that it is supposed to.
Steam is optional and usually curls the pattern.
If that bothers you, don't use steam. Sometimes I do. Sometimes I don't.
It truly depends on my mood.
Remember, as you follow this paper piecing tutorial, the printed and the fabric sides of this block are mirror-images of each other.
At last!
Let's sew!
Use a tiny dot of Elmer's Glue Stick to hold the Center.1 patch in place on the unprinted side of the pattern. It should extend 1/4" past the solid lines.
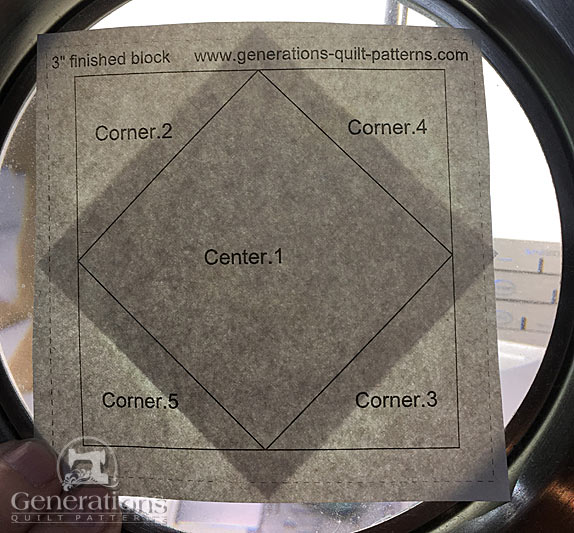 You can see the shadow of the patch positioned on the unprinted side of the pattern.
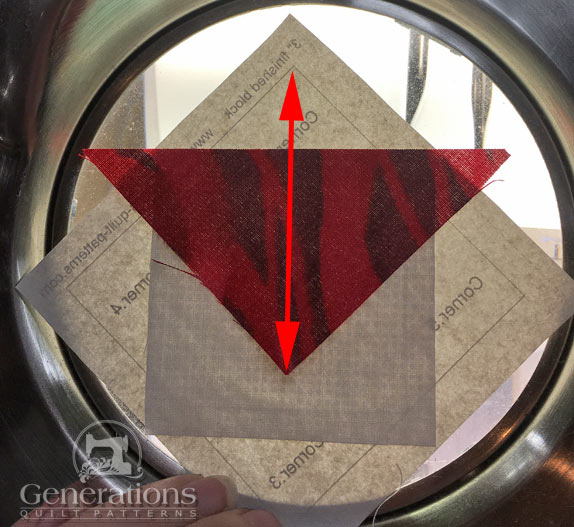
With RST, add the C.2 patch by aligning its longest edge with the edge of Center.1. To help quickly position the patch, the corner of C.2 should be directly opposite the solid outline of the corner of the unit (red arrow).
Stitch the two patches, starting and stopping your stitching a generous 1/4" before and after the solid line between C.1 and C.2.
Press. Because I've heavily starch my fabrics ahead of time, I can usually fingerpress here.
Add the remaining corners, stitching and pressing as before.
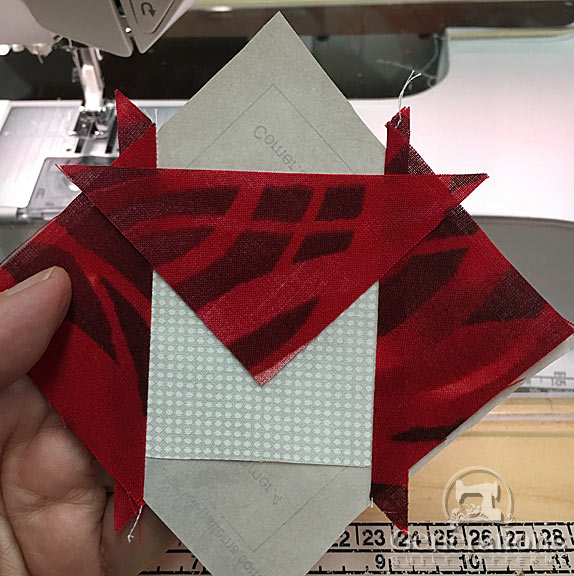 Positioning the third corner patch.
I like to trim away the "dog ears" after adding C4 and C5.
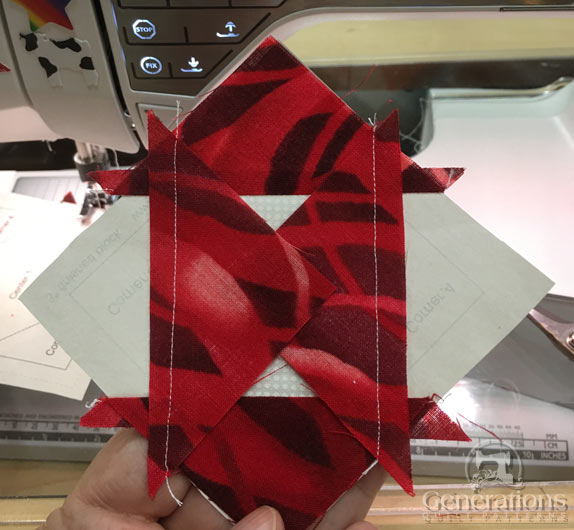 After adding all four corners...all that's left is to lop off the dog ears, press and trim to perfection.
To complete the SiaSs, trim by aligning the 1/4" mark on your ruler with the dark solid outline.
Trim with your rotary cutter.
Rotate the mat. Aligning and trimming again. Repeat for all four sides of all four SiaS.
Regardless of the technique you used, the four SiaS look like this.
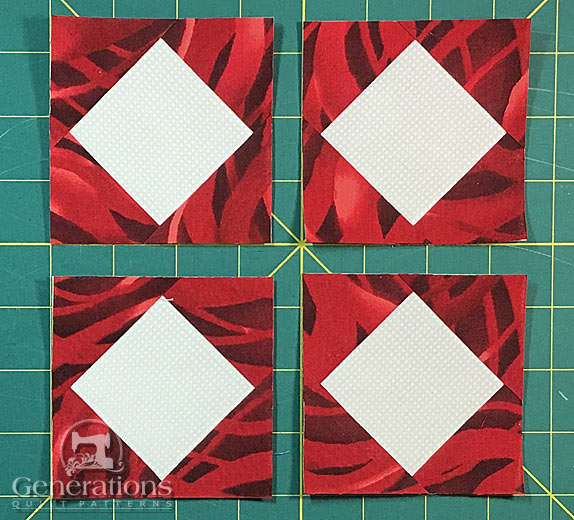

The paper piecing is complete. From this point forward, return your stitch length to the one you regularly use for piecing and install your favorite 1/4" presser foot.
Corners and Center
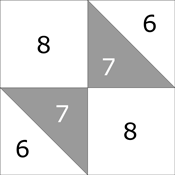 Make 5
We use the Quick Pieced method for making our HSTs.
If you plan to make many blocks, you may want to use another HST method like 8-at-a-time or triangle paper.
Let's begin.
On the wrong side of either the #6 or #7 patches (whichever is easier to see your markings on) draw a single diagonal line from corner to corner.
On the far left image below, you can see I've used my favorite Bohin Mechanical Chalk Pencil to mark the diagonals.
 HST sewn (left), cut in half, pressed, trimmed (right)
With RST, layer a #6 and #7 square. Stitch a 1/4" from both sides of the line for all 5 pairs. (above far left)
Press flat to set the seams.
Cut apart on the diagonal line. (above, middle left)
Press the HSTs open with the SA towards the darker square. (above middle right)
Find your Finished Block Size in the chart below. If you cut your HST squares exactly, then check your accuracy. From cut edge to cut edge they should measure exactly the number in the 'Trim HST to...' column.
If you cut your patches generously (as I choose to do) then trim to perfection.
HST Dimensions | |
|---|---|
| Finished Block Size | Trim HST to… |
| 6" | 1½" |
| 9" | 2" |
| 12" | 2½" |
After trimming, you have 10 perfectly sized HST.
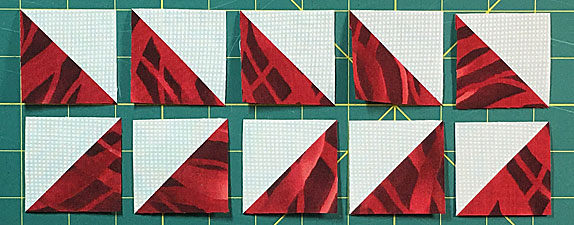 Perfect trimmed HSTs
To construct the corners, add a #8 square as shown below to each HST, pressing the SA toward #8.
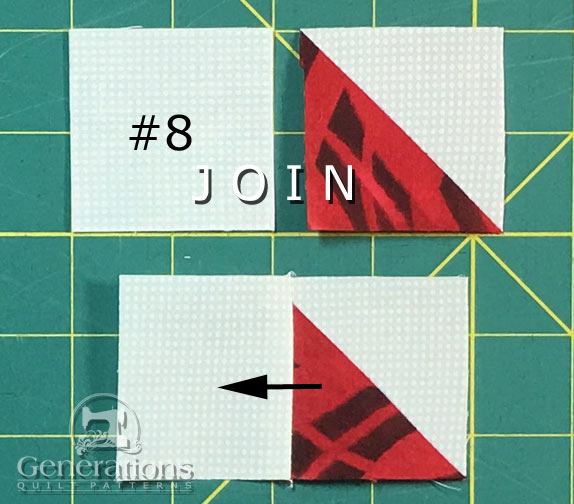
With RST, stitch pairs together to form a little bowtie shape.
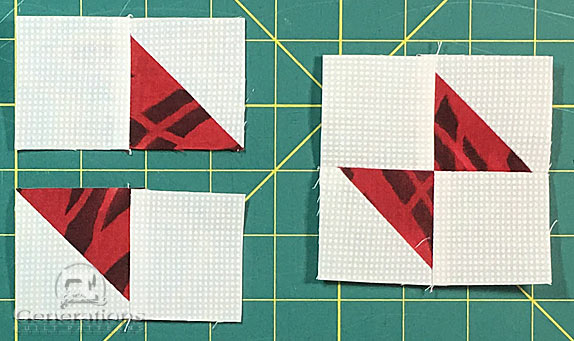 Make 5
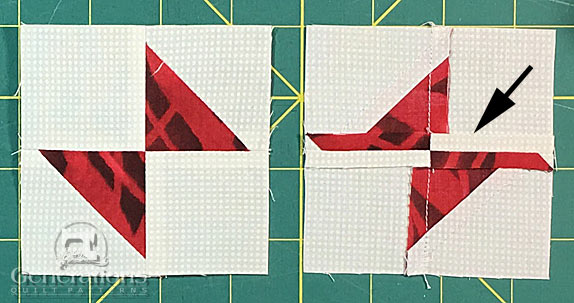
To distribute the bulk, I've chosen to press open the seam that joins these units. (black arrow)
NOTE: I could have chosen to press the seam that joins #8 and the HST together open, too, but simply didn't want to. Again. Do what works best for YOU.
Step 3: Assemble the Lover's Lane quilt block
Arrange your SiaSs, corners and center into the Lover's Lane design.
Pay special attention to the orientation of the corners and center. Light #8 squares are in the outside corners.
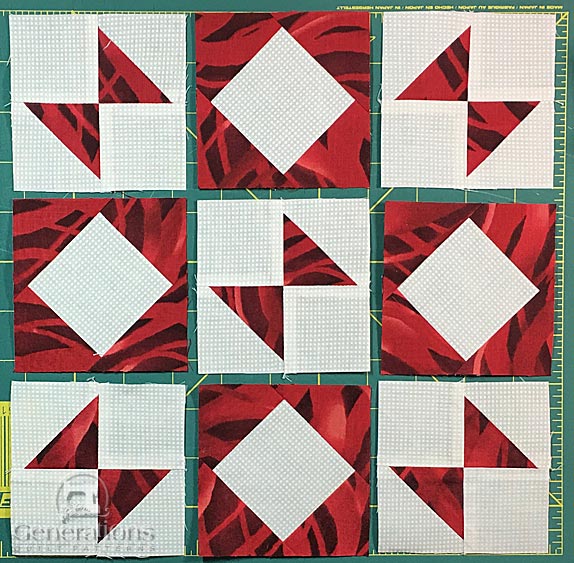
With RST stitch the units in each row together.
Double check as you go along.
I say this from experience because this is what happened the first time when I assembled the sample Lover's Lane.
Arggghhh. Clearly an example of not enough caffeine!
To get a good match where points meet, I pin. Check out 'Pinning for Perfect Points' if you're not a habitual pinner.
My favorite pins for this are IBC's Super Fine Pins with a glass head, 1-3/8" long, .50mm.
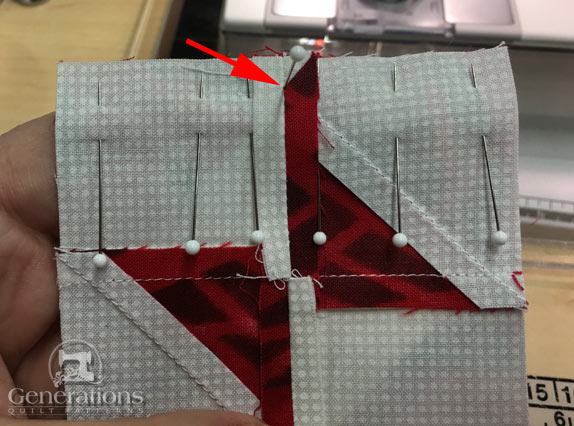 That perpendicular pin (red arrow) pierces the two seam lines at 1/4" from the edge.
SiaSs can be pretty lumpy after they're stitched to other units.
To tame the lumpiness, try my favorite pressing technique.
It's amazing how such a simple trick makes sure a huge difference in the finished block.
Now back to our Lover's Lane block, here the rows are ready to stitch together.
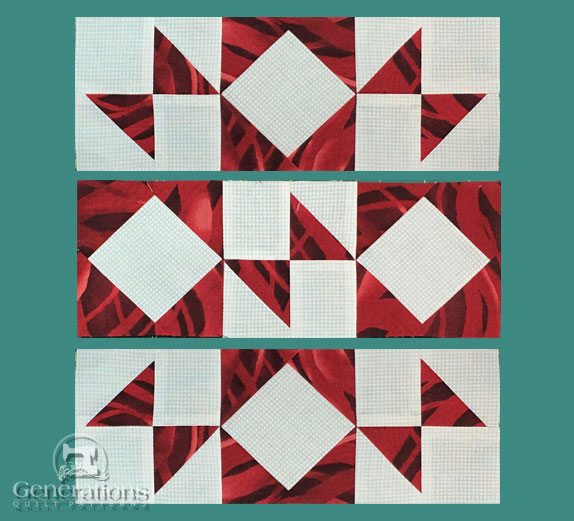
After stitching, our Lover's Lane looks like this from the backside.
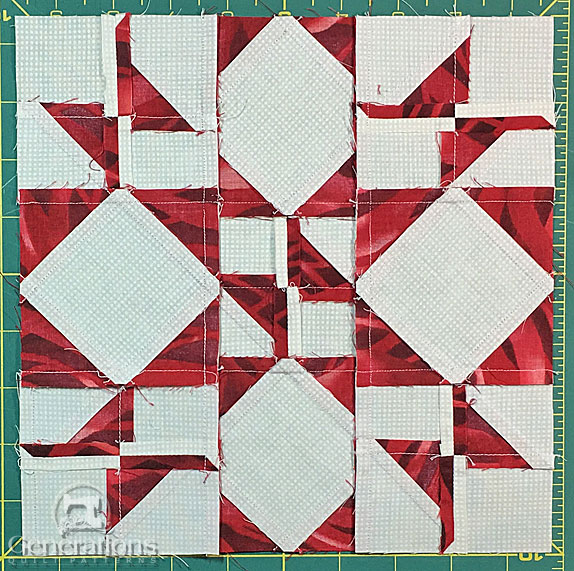
Because of the high contrast between the red and white fabrics, I'll be sure to trim away any straggly threads—don't want them shadowing through the quilt top once it's finished.
From the front, our Lover's Lane looks like this.
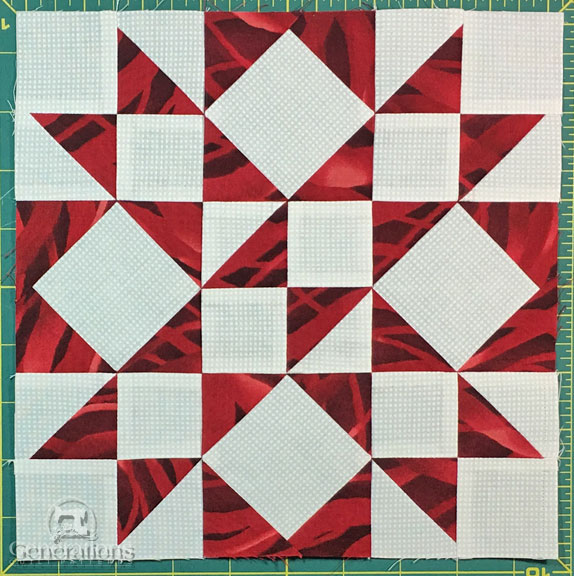 Our Lover's Lane is complete!
All nice, crisp and pointy.
What about a different quilt block?
For a list of all the 220+ quilt block patterns on this site, start here.
If you know the name of the block, shorten your search by using these links:
Click here if you're looking for blocks with at least some paper piecing.
Click here if you're looking for the basic building blocks of quilting, i.e., Flying Geese, half square triangles, quarter square triangles, etc., along with several techniques to make each.
And finally, use these links to find blocks in these finished sizes:
