- Home
- Free Quilt Block Patterns
- London Roads Quilt Block
London Roads Quilt Block Pattern
From our Free Quilt Block Patterns Library
This post contains affiliate links, for which I receive compensation.
Skill Level: Beginner
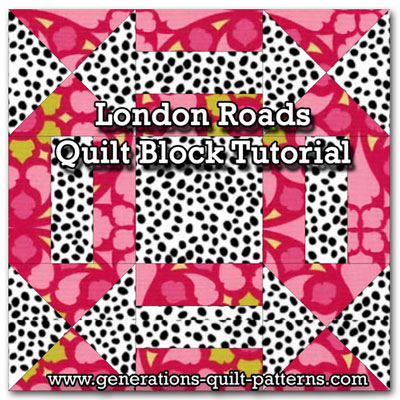
The London Roads quilt block pattern is made from quarter square triangle and Rail Fence units and a solid center patch.
A great combination for the beginning quilter!
It is a two fabric block where the placement of the fabrics creates 'arrows'.
No special tools are needed, just your basic quilting supplies and rulers.
On this page you'll find cutting and piecing instructions, as well as additional block sizes to make.
Let's get started!
📋 General Instructions
These abbreviations are used on this page:
- SA -seam allowance
- RST - right sides together
- QST - quarter square triangle
All SA are 1/4" and pressed toward the darker fabric unless otherwise noted.
When you are instructed to press, first press the pieced unit flat to set the seam. Then open the patch, pressing from the front.
The newest quilt fabrics to tickle your fancy...
Click the images below to see the full collection. We share any commercial and/or free patterns that showcase them, too. (For inspiration, of course!)
Step 1: Cut patches for a London Roads block
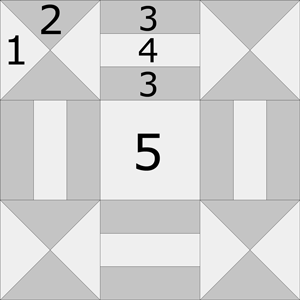 London Roads design
Sample Block: 9" finished (9½" unfinished)
Grid: 9x9
Attribution: Ladies Art Company
AKA: Arrow (Aunt Martha Studios), At the Square (Nancy Page), Betty's Choice, Colorado's Arrowhead, Fireside Visitor (Clara Stone), Rope and Anchor (KC Star)
Design Type: Even 9-patch
For QSTs, I prefer to cut my patches 'over-sized' and then trim the unit to the correct size after stitching.
This block requires a light and a dark fabric.
 | Cutting Chart for a~Traditional Piecing ~ | |||||
|---|---|---|---|---|---|---|
| Patch | Fabric | Qty | Finished Block Size | |||
| 4½" | 9" | 13½" | 18" | |||
| 1** | L | 2 | 2¾" x 2¾" | 4¼" x 4¼" | 5¾" x 5¾" | 7¼" x 7¼" |
| 2** | D | 2 | 2¾" x 2¾" | 4¼" x 4¼" | 5¾" x 5¾" | 7¼" x 7¼" |
| 3 | D | 1 | 1" x 9" | 1½" x 15" | 2" x 21" | 2 1/2" x 27" |
| 4 | L | 1 | 1" x 9" | 1½" x 15" | 2" x 21" | 2 1/2" x 27" |
| 5 | L | 1 | 2" x 2" | 3½" x 3½" | 5" x 5" | 6½" x 6½" |
| Unfinished Block Size | 5" | 9½" | 14" | 18½" | ||
| Grid Size | ½" | 1" | 1½" | 2" | ||
| **I prefer to cut my patches extra large for QST, stitch, and then trim them to size. If you prefer to do the same, add a bit extra to the measurements for Patches #1 and #2 above. There is a chart further down in these instructions where you need it for trimming them to size. | ||||||
Step 2: Assemble the units
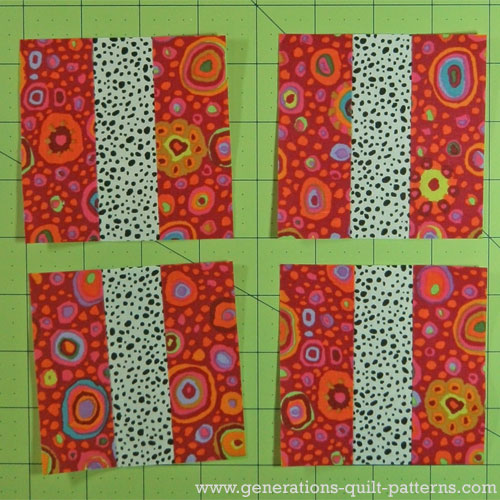
Stitch the Rail Fence units
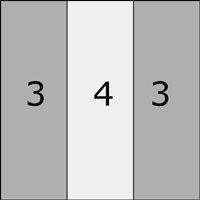 Make 4
Make 4
The strips are cut an extra 1/2" long to allow for squaring the strip sets once they are stitched.
Align the long edges of one dark #3 and one light #4 strip.
Stitch.
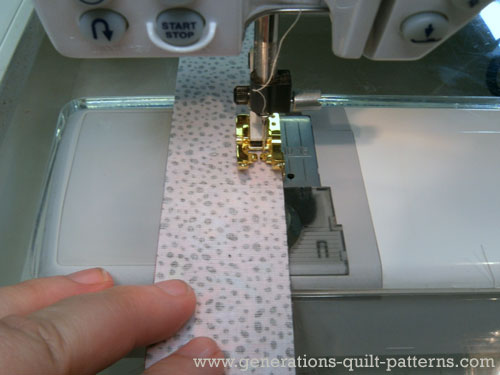
Press.
Align the long edge of the remaining dark #3 strip with the light strip of the pieced unit. Stitch.
Press.
At the cutting mat, straighten the end of the strip set with your rotary cutter.
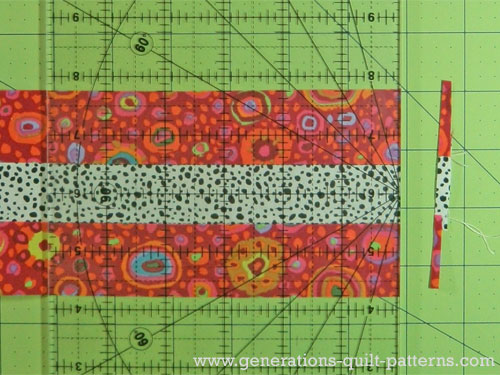
Sub-cut it into 3-1/2" squares.
Stitch the QSTs
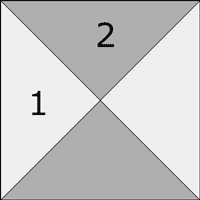 Make 4
Make 4
We'll use the quick pieced method to make these units.
With a pencil mark a diagonal line from corner to corner on each of the light #1 squares. (I've added an extra 1/4" to each dimension because I like to cut generously and the trim to perfection.)
With RST, align a light #1 square with a dark #2 square.
Stitch a 1/4" away from both sides of the line.
Cut this unit apart on the drawn line.
Repeat for the remaining pair.
Press.
At this point you have four half square triangles.
Draw a diagonal line on the back of two of these units that bisects the seam. (You can see it in the photo below.)
With RST, align two units with the light fabric of one to the dark fabric of the other. Nest the seam allowances. Pin if needed.
Stitch 1/4" away from the drawn line on both sides.
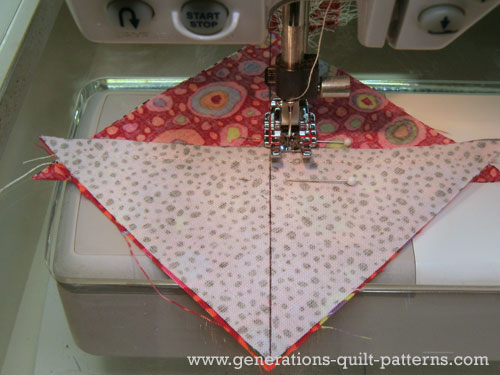
Helpful Tip
As you can see, my HSTs were a little sloppy, but because I cut those original squares a 1/4" over-sized it all works out in the end (you'll see in the finished block).
Cut apart on the drawn line.
Repeat for the remaining pair.
Press with the seam allowance towards either side or open.
For a refresher on trimming QST units to size, click here to review this technique in Step 8 of Learn to Make Quarter Square Triangles. The center measurement for our unit here is 1-3/4".
Step 3: Assemble your London Roads quilt block
Use the photo below to arrange the units into the London Roads design— paying particular attention to the positioning of the corners.
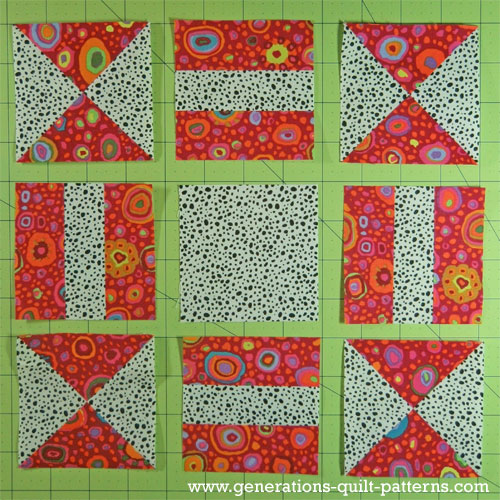
Stitch the blocks into rows. The black arrows show the direction of the seam allowances. Pin as needed.
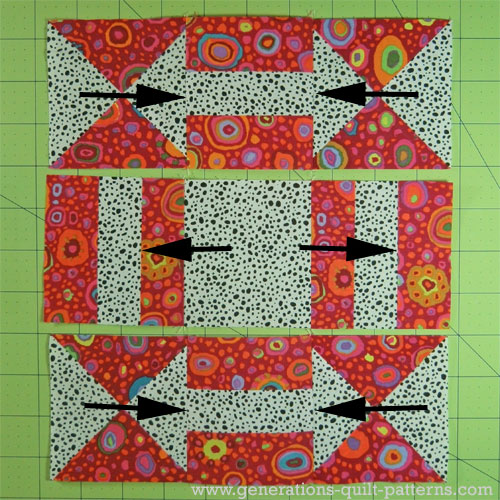
Nest the seam allowances to help you match the seams as you pin the rows together.
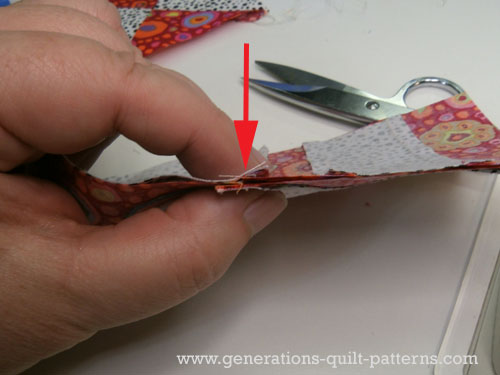
Stitch the rows together.
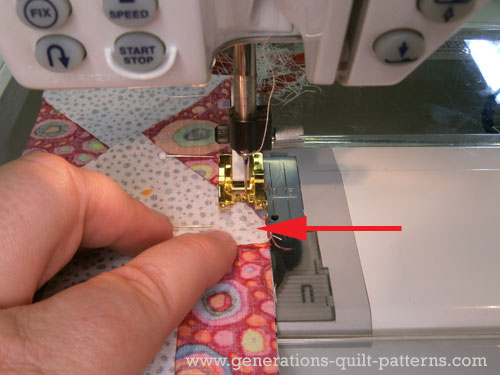
Press. For the flattest block, check out our Best Pressing Technique.
Your finished London Roads quilt block looks like this.
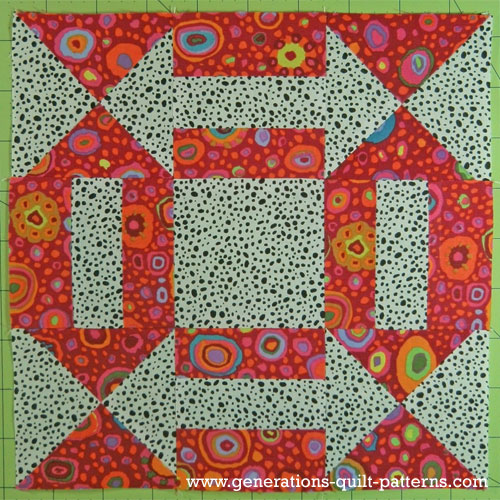
Ready for more?

Congratulations! You've finished your London Roads quilt block.
When you're ready for more, do visit our Free Quilt Block Pattern Library for your next patchwork adventure.
What about a different quilt block?
For a list of all the 220+ quilt block patterns on this site, start here.
If you know the name of the block, shorten your search by using these links:
Click here if you're looking for blocks with at least some paper piecing.
Click here if you're looking for the basic building blocks of quilting, i.e., Flying Geese, half square triangles, quarter square triangles, etc., along with several techniques to make each.
And finally, use these links to find blocks in these finished sizes:
