This post contains affiliate links for which I receive compensation
Log Cabin Quilt Block - need cutting instructions for a 9" finished block
A reader asks:
I want to make a 9" finished size log cabin block and am having a bit of a problem.
What size should the center be and what size should "logs" be to attain the finished size.
Thanks.
Julie replies:
I went ahead and drafted instructions for two versions of the block--one with all the strips cut an even width, and one with a larger center square.
UPDATE: I've added another page to the website that includes a step-by-step tutorial to piece a log cabin block, as well as a Cutting Chart to download for a Log Cabin with 5 rounds of log for 1", 1 1/4" and 1 1/2" finished strips. There's also a coloring page for the block.
Click here to go to that page now.
 Traditional Log Cabin Quilt Block
Construction Tips
When I construct Log Cabin quilt blocks, I add the first patch to the right side of the center square.
Next press the unit, first with it closed to set the seam, then press the unit open with the seam allowances to the dark (or in this case, red) side.
Back at my sewing machine, I then rotate the unit 1/4 turn to the left and add the next patch to the right side. All seam allowances are 1/4 inch.
Continue in this manner until all the patches have been added. Your block will measure 9-1/2" unfinished.
Logs and Center Square are Equal Widths
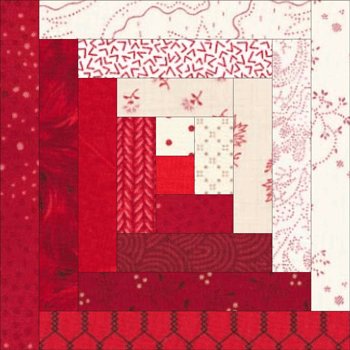
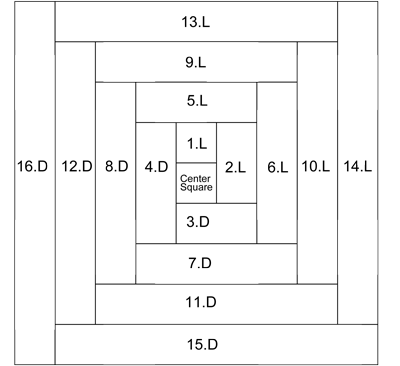
This rendition of the block is made from a small center square and four rounds of logs. Cut your light and dark (in my example, red) fabrics into 1-1/2" cross-grain strips.
Except for the first and last piece, you'll be sub-cutting both a dark and a light patch to the same length.
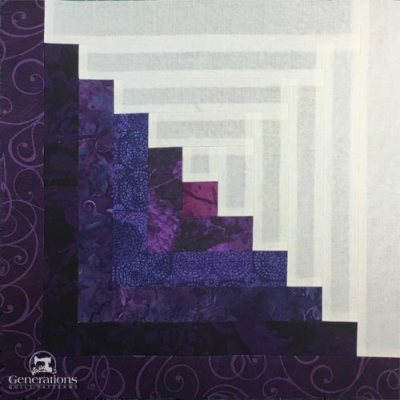
Notice that the block is slightly asymmetrical; there is more of the dark fabric than the light.
| Cutting Instructions |
|---|
| Patch | Color | Cut Size |
|---|
| Center Square | Center | 1-1/2" square |
| 1.L | Light 1 | 1-1/2" x 1-1/2" |
| 2.L | Light 2 | 2-1/2" x 1-1/2" |
| 3.D | Dark 1 | 2-1/2" x 1-1/2" |
| 4.D | Dark 2 | 3-1/2" x 1-1/2" |
| 5.L | Light 3 | 3-1/2" x 1-1/2" |
| 6.L | Light 4 | 4-1/2" x 1-1/2" |
| 7.D | Dark 3 | 4-1/2" x 1-1/2" |
| 8.D | Dark 4 | 5-1/2" x 1-1/2" |
| 9.L | Light 5 | 5-1/2" x 1-1/2" |
| 10.L | Light 6 | 6-1/2" x 1-1/2" |
| 11.D | Dark 5 | 6-1/2" x 1-1/2" |
| 12.D | Dark 6 | 7-1/2" x 1-1/2" |
| 13.L | Light 7 | 7-1/2" x 1-1/2" |
| 14.L | Light 8 | 8-1/2" x 1-1/2" |
| 15.D | Dark 7 | 8-1/2" x 1-1/2" |
| 16.D | Dark 8 | 9-1/2" x 1-1/2" |
The diagram below shows the position of the patches and the order of piecing. Piece 1.L is added first and is a light patch. Piece 4.D is the fourth patch added and is cut from a dark fabric.
Logs and Center Square are Different Widths
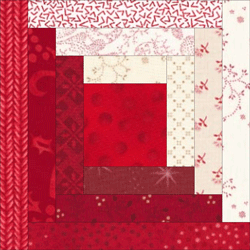
In this block the center square is much larger. It takes just three rounds of logs to complete so it's faster than the first block.
After cutting your 3-1/2" square for the center, cut your light and dark strips into 1-1/2" strips.
This block is also slightly asymmetrical.
| Cutting Instructions |
|---|
| Patch | Color | Cut Size |
|---|
| Center Square | Center | 3-1/2" square |
| 1.L | Light 1 | 3-1/2" x 1-1/2" |
| 2.L | Light 2 | 4-1/2" x 1-1/2" |
| 3.D | Dark 1 | 4-1/2" x 1-1/2" |
| 4.D | Dark 2 | 5-1/2" x 1-1/2" |
| 5.L | Light 3 | 5-1/2" x 1-1/2" |
| 6.L | Light 4 | 6-1/2" x 1-1/2" |
| 7.D | Dark 3 | 6-1/2" x 1-1/2" |
| 8.D | Dark 4 | 7-1/2" x 1-1/2" |
| 9.L | Light 5 | 7-1/2" x 1-1/2" |
| 10.L | Light 6 | 8-1/2" x 1-1/2" |
| 11.D | Dark 5 | 8-1/2" x 1-1/2" |
| 12.D | Dark 6 | 9-1/2" x 1-1/2" |
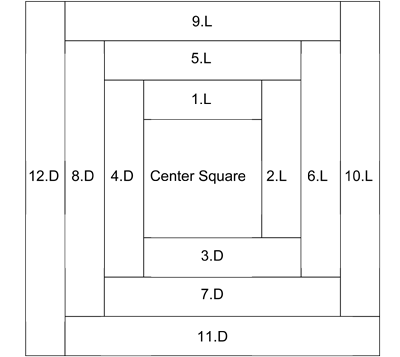
The following diagram shows the placement of the patches.
For ideas for laying out your 9" Log Cabin blocks check out
Log Cabin Quilt Designs.
Thank you for your question.
Piecefully,
Julie Baird
Editor
Return to the
Generations Quilt Patterns' Quilting Forum.
This article was printed from Generations-Quilt-Patterns.com
Print Article

