- Home
- Free Quilt Block Patterns
- Lady of the White House Quilt Block
Lady of the White House Quilt Block
From our Free Quilt Block Patterns Library
This post contains affiliate links, for which I receive compensation.
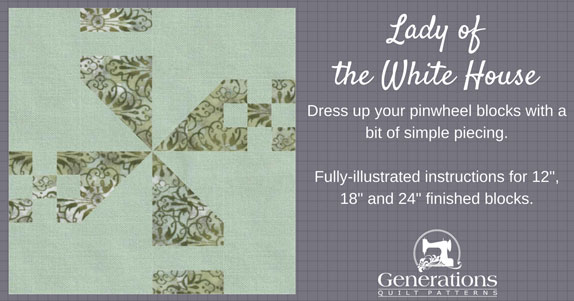
The Lady of the White House quilt block is an uncomplicated variation on the basic pinwheel design.
Simple strip piecing techniques and quick pieced half square triangles makes it a cinch to create it's whirly-twirly goodness.
On this page you'll find instructions for three different block sizes, as well as links to our favorite quilting supplies and quilt block resources.
Time to cut up and sew!
📋 General Instructions
These abbreviations are used on this page:
- SA - seam allowance
- RST - right sides together
- HST - half square triangle
- RF - Rail Fence
SA are 1/4" and pressed towards the darker fabric unless noted otherwise by a blue arrow.
I like to starch my quilt fabric with a 50/50 mix of water and StaFlo liquid starch. Stiffer fabric is easier to cut accurately. Easier to press#8212;especially the strip sets.
If you prefer fabric with body, without so much stiffness, then use Best Press.
Step 1: Cutting for a Lady of the White House
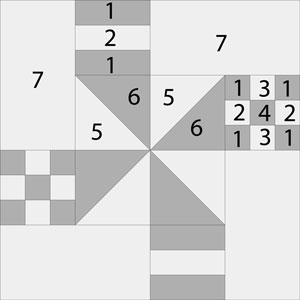 Lady of the White House design
Sample block size: 12" (12-1/2" unfinished)
Grid: 12x12
Attribution: Little n'Big
Design Type: Pinwheel, 4-patch
I've used a solid and a batik for this block. A benefit of using batiks is that you can usually use either side. This print was no exception.
During block construction I worried there wasn't enough contrast in the fabric values. That the points would get lost.
This time, my worries were unfounded.
Batik fabric has a higher thread count that your standard, every-day quilting cotton. For that reason I prefer Schmetz's Microtex Sharp needle. The result is better stitch quality. (If you have a Singer sewing machine, you must use Singer brand needles.)
 | Cutting Chart for a~Traditional Piecing ~ | |||||
|---|---|---|---|---|---|---|
| Patch | Fabric | Qty | Finished Block Size | |||
| 12" | 18" | 24" | ||||
| 1 | D | 2 | 1½" x 14" | 2" x 19" | 2½" x 24" | |
| 2 | L | 1 | 1½" x 14" | 2" x 19" | 2½" x 24" | |
| 3 | L | 2 | 1½" x 4" | 2" x 5" | 2½" x 6" | |
| 4 | D | 1 | 1½" x 4" | 2" x 5" | 2½" x 6" | |
| 5* | L | 2 | 3⅞" x 3⅞" | 5⅜" x 5⅜" | 6⅞" x 6⅞" | |
| 6* | D | 2 | 3⅞" x 3⅞" | 5⅜" x 5⅜" | 6⅞" x 6⅞" | |
| 7 | L | 4 | 3½" x 6½" | 5" x 9½" | 6½" x 12½" | |
| Unfinished Block Size | 12½" | 18½" | 24½" | |||
| Grid Size | 1" | 1½" | 2" | |||
| **I prefer to cut my squares extra large for HST, stitch, and then trim them to size. If you prefer to do the same, add a bit extra to the measurements for #5 and #6 above. There is a chart further down in these instructions where you need it for trimming them to size. | ||||||
Step 2: Assemble the Lady of the White House units
HST
Make 4
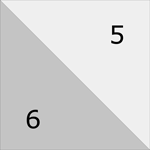
We use the Quick Pieced method for making our HSTs.
If you plan to make many blocks, you may want to use another HST method like 8-at-a-time or triangle paper.
Draw a diagonal line from corner to corner on the backside of the lighter #5 square. (I used my favorite Bohin Mechanical Chalk Pencil for this.
With RST, layer the #5 and #6 patches, aligning the edges. Stitch 1/4" away from both sides of the line.
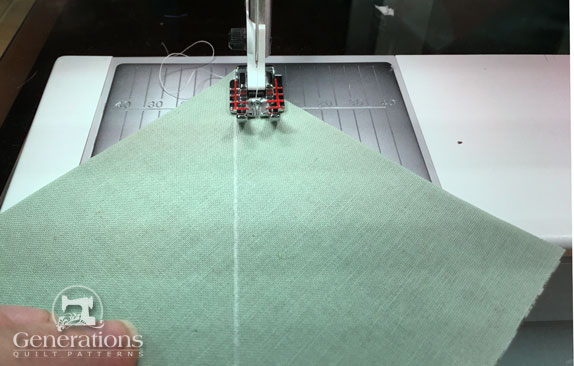 Sewing with a specialty quarter inch foot with markings on the left and right side of the foot. Love it!
Cut the patches in half between the stitching lines. Press.
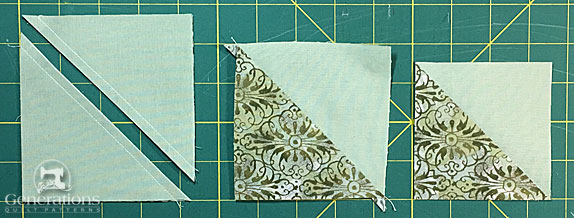 Cut in half on the drawn line (left), pressed with SA to the dark (middle), trimmed HST (right)
Use the chart below to check the accuracy of your sewing. Trim if necessary.
HST Dimensions | |
|---|---|
| Finished Block Size | Trim HST to… |
| 12" | 3½" |
| 18" | 5" |
| 24" | 6½" |
StripSets
Make 1 each: #1/#2/#1 and #3/#4/#3
With RST, sew a #1 to a #2 along the long edge. I like to start my stitching on a 'spider' (see blue arrow below). The first stitch onto the strips is always better!
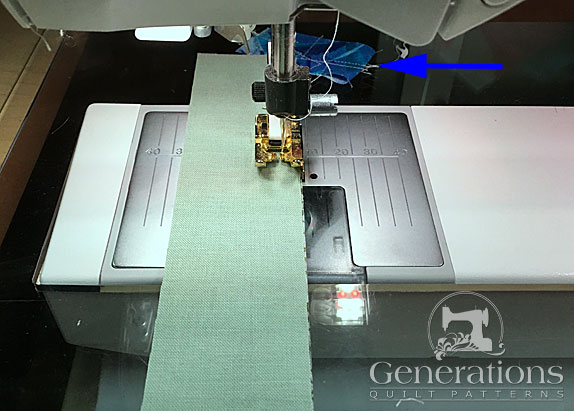
Pressing stripsets is easier when you do it as you add each strip—it's just so much easier to get at the SA.
With RST, add the second dark #1. Press.
Use the chart below to check the accuracy of your stitching. Make any necessary adjustments before subcutting.
StripSet Measurements | ||||
|---|---|---|---|---|
| Finished Block Size | Width after stitching | Subcuts | ||
| #1/#/2/#1 | #3/#4/#3 | |||
| Rail Fence Cut 2 | Nine Patches Cut 4 | Nine Patches Cut 2 | ||
| 12" | 3½" | 3½" | 1½" | 1½" |
| 18" | 5" | 5" | 2" | 2" |
| 24" | 6½" | 6½" | 2½" | 2½" |
Straighten one short edge of each stripset.
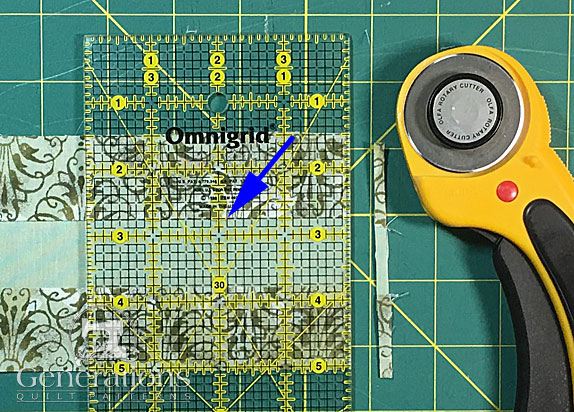 For a true, straight edge align the lines on your ruler with the seamlines. Then trim.
Subcut these stripsets as indicated in the chart above.
These are the patches after subcutting.
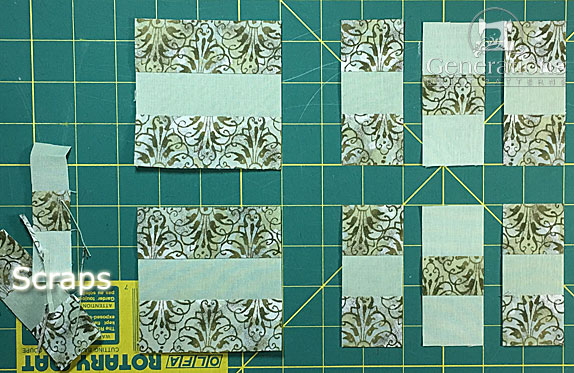
Set aside the two big units until Step 3—they are our Rail Fence units.
The four narrower patches are used to make nine patches.
Nine Patch
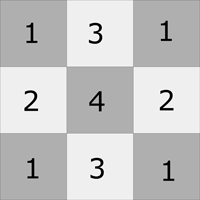
Make 2
Arrange your units to create two four-patches with dark corners and center.
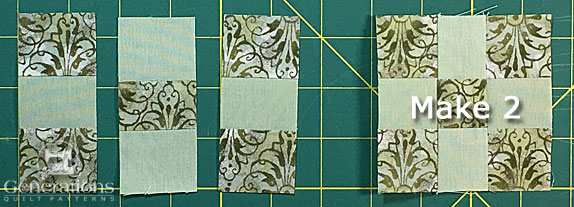
With RST, stitch the units together, pressing out from the center after the addition of each one.
Step 3: Assemble quarter blocks
A Lady in the White House block is simply a pinwheel block with a little extra.
Create two of each unit shown below, pressing the joining SA in the direction of the arrow.
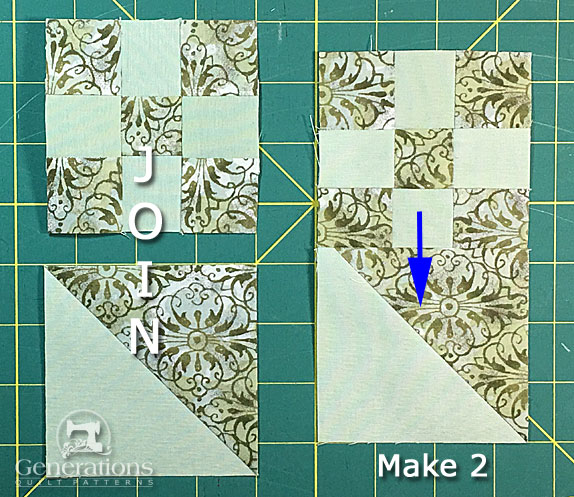
And two of these...
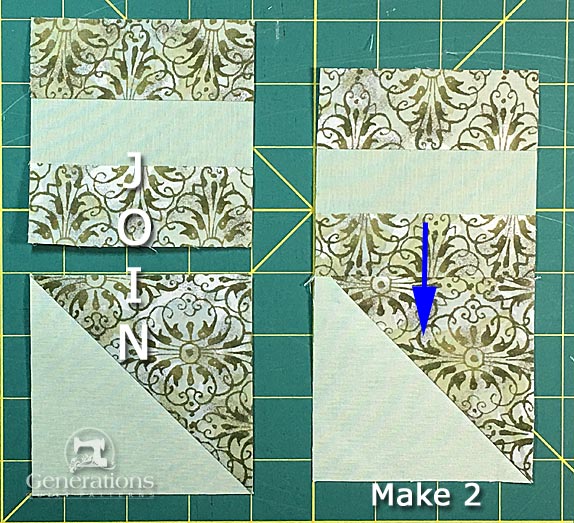
To complete the quarter blocks, add a #7 rectangle to the left side of each pair.
Like this...
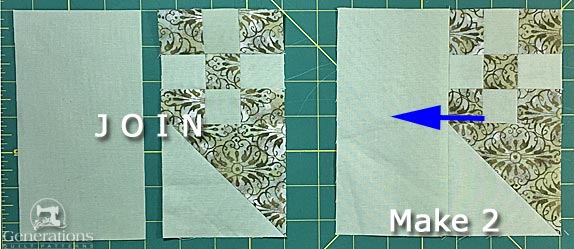
...and this.
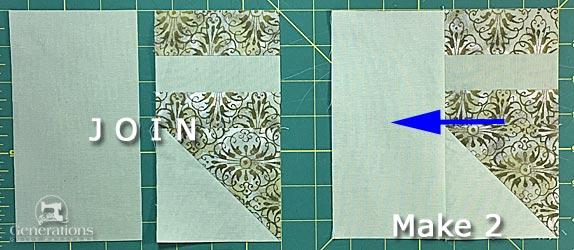
All that's left is to assemble the quarters.
Step 4: Assemble your Lady of the White House
Arrange the quarters into the Lady of the White House design shown below. Nine patches and RF units alternate around the outside edges of the block. A pinwheel forms in the center.
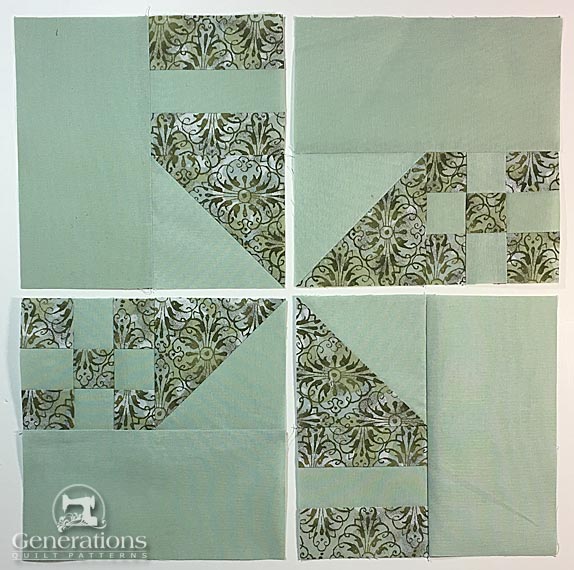
Stitch the units into rows. All the SA in the seam nest to make matching seamlines easier.
Press SA toward the #7 rectangles.
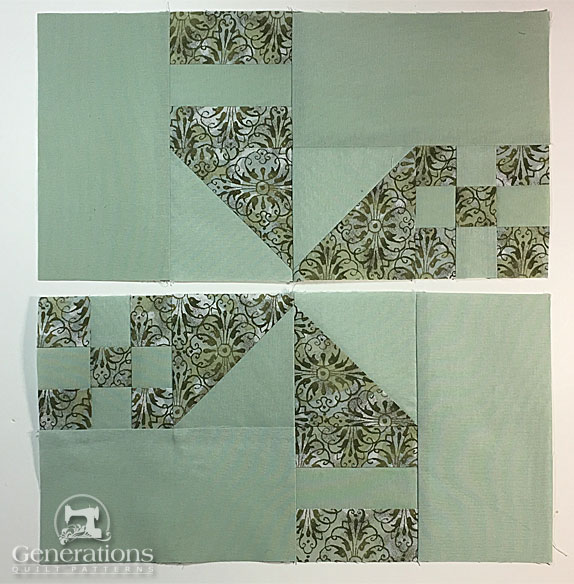
Once the rows are joined, this is the Lady of the White House from the front.

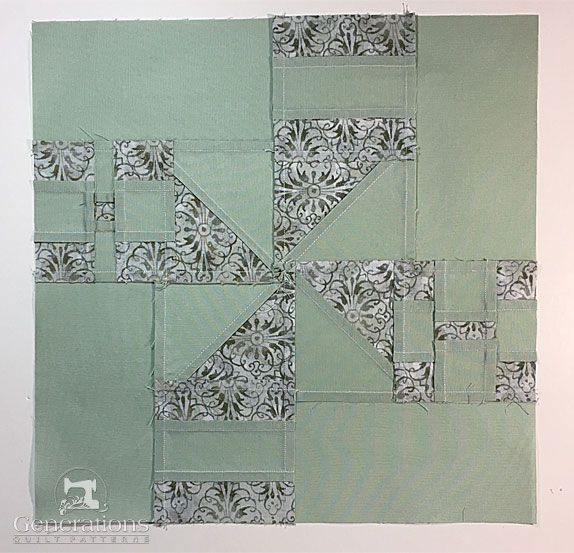
From the backside, you can see that seams joining the quarters have been twirled or fanned around the center.
The beauty of this 'twirling' technique is that for a quilt made of only this block pattern, all the seams nest.
Putting a quilt like that together is a piece o'cake!
What about a different quilt block?
For a list of all the 220+ quilt block patterns on this site, start here.
If you know the name of the block, shorten your search by using these links:
Click here if you're looking for blocks with at least some paper piecing.
Click here if you're looking for the basic building blocks of quilting, i.e., Flying Geese, half square triangles, quarter square triangles, etc., along with several techniques to make each.
And finally, use these links to find blocks in these finished sizes:
