- Home
- Free Quilt Block Patterns
- Lady of the Lake Quilt Block
Lady of the Lake Quilt Block
From our Free Quilt Block Patterns Library
This post contains affiliate links, for which I receive compensation.
Skill Level: Confident Beginner
Master the Lady of the Lake quilt block and you'll be the Queen of Half Square Triangles in no time!
In this lesson, we'll use two different techniques to sew our HSTs—no specialty rulers—no paper piecing.
Just simple, accurate methods that'll have you whipping out these two-fabric blocks in no time.
Let's get to the piecing!
The newest quilt fabrics to tickle your fancy...
Click the images below to see the full collection. We share any commercial and/or free patterns that showcase them, too. (For inspiration, of course!)
📋 General Instructions
All seam allowances (SA) are 1/4".
When you are instructed to press, first press the pieced unit flat to set the seam.
Then open the patches, pressing from the front to ensure there are no tucks in the SA.
You may notice I don't trim the thread tails while making the HSTs. There's no need for that extra step because those units are trimmed to size. The tails are automatically removed.
Step 1: Cut fabric patches for a Lady of the Lake
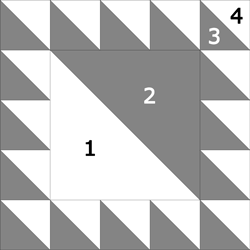 Lady of the Lake design
Sample Size: 7½" finished / 8" unfinished
Grid: 5x5
Design Type: Uneven 9-patch
A Lady of the Lake quilt block is symmetrical along the diagonal, except where one side is light, the other is dark.
It's also all about the 'points'.
When making your fabric selections, choose two high contrasting fabrics. Save the big prints for another quilt.
I lucked out in the 7-1/2" finished sample block in the photos below. A large blue polka dot never fell exactly on a point.
If I'd made the 5" block, that would most certainly have happened and points would've been harmed in the making of this block.
All the patches are cut a bit larger, with the units being trimmed to size after stitching. If you are making a single block, two triangle shapes are leftover.
It's time to choose a finished size and cut your patches.
 |
Cutting Chart for a~ Traditional Piecing ~ | ||||
|---|---|---|---|---|---|
| Patch | Fabric | Qty | Finished Block Size | ||
| 5” | 7-1/2” | 10” | |||
| 1 | L | 1 | 4” x 4” | 5-1/2” x 5-1/2” | 7” x 7” |
| 2 | D | 1 | 4” x 4” | 5-1/2” x 5-1/2” | 7” x 7” |
| 3 | D | 2 | 4-1/4” x 4-1/4” | 5-1/4” x 5-1/4” | 6-1/4” x 6-1/4” |
| 4 | L | 2 | 4-1/4” x 4-1/4” | 5-1/4” x 5-1/4” | 6-1/4” x 6-1/4” |
| Unfinished Block Size | 5-1/2” | 8" | 10-1/2” | ||
| Trim #1/#2 HST to... | 3-1/2” x 3-1/2” | 5” x 5” | 6-1/2” x 6-1/2” | ||
| Center/Midpoint | 2-1/8” | 2-5/8” | 3-1/8” | ||
| Trim #4/#3 HSTs to... | 1-1/2” x 1-1/2” | 2” x 2” | 2-1/2” x 2-1/2” | ||
| Grid Size | 1” | 1-1/2” | 2” | ||
Step 2: Assemble the Lady of the Lake HST units
We'll use the quick pieced method for the larger triangle square and the 8-at-a-time technique for the smaller ones.
Let's get the stitching for both methods out of the way first...
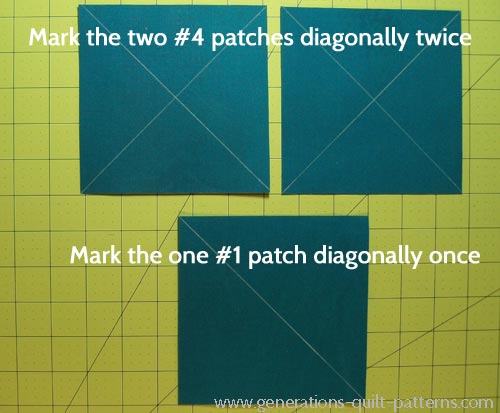
Draw one diagonal line on the back of the #1 patch and two diagonal lines on the back of each #4 as shown below.
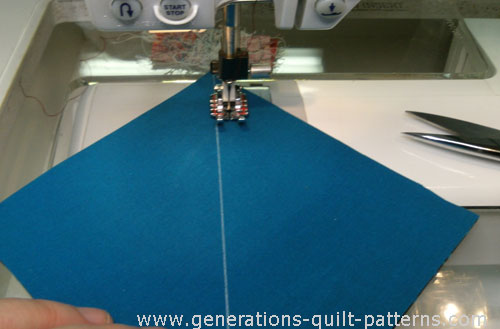
With right sides together, layer the marked #1 with a #2 patch. Sew 1/4" from one side of the line because we only need one large HST for our Lady of the Lake quilt block.
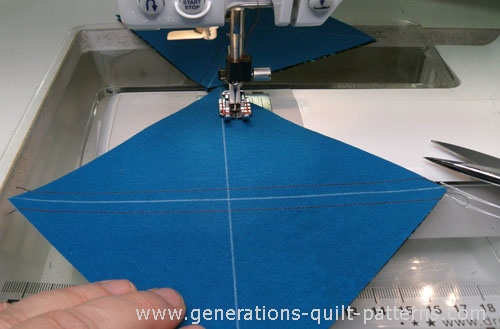
With RST, layer a marked #4 and #3. Sew a 1/4" from both sides of both lines. Repeat for the second #4/#3 pair. You can just barely make out the first two lines of stitching (in a contrasting thread to help you see it).
Press the sewn units flat to set the seams.
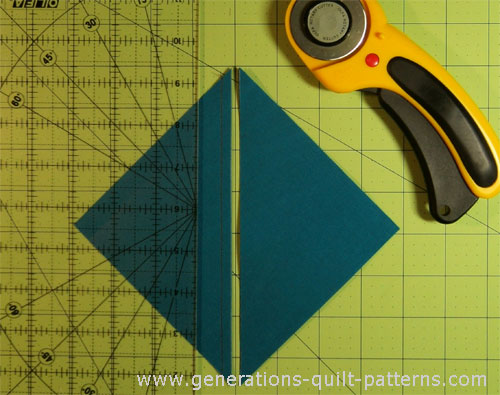
For the #1/#2 unit, cut along the drawn line. You will have one HST and two loose triangle patches.
On the cutting chart locate the row "Trim #1/#2 HSTs to..." and the corresponding measurement in the column under the Finished Block size you are making. In this example with a 7-1/2" finished block, trim to 5" square.
On to the second technique...
Lay your #4/#3 patches marked side up on a small or rotating mat—it's easier to move the mat than the patches.
Find the 'Center/Midpoint' row in the cutting chart and the corresponding measurement under the Finished Block size. Again, in the 7-1/2" column that number is 2-5/8".
Align the 2-5/8" line on your ruler with the edge of the squares (gray arrow) and cut. Ideally this cut goes directly through the center of the drawn 'X'. Since these patches are cut oversize you do have a bit of wiggle room.
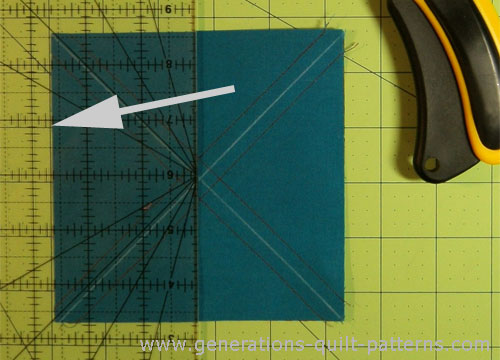
Turn the mat a quarter turn, being careful not to disturb your patches. Align the 2-5/8" mark on the ruler with the edge of the square and cut again.
You now have four squares. Cut each apart on the drawn diagonal line.
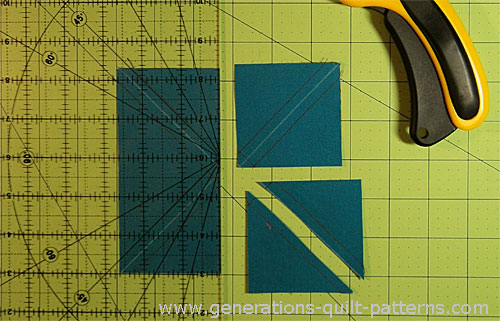
Press. Trim to the size noted in the cutting chart for the #4/#3 HSTs. Repeat for the second pair.
For more detailed instruction to make half square triangles 8 at a time, click here.
You now have 16 small HSTs and 1 large one.
Step 3: Assemble your Lady of the Lake quilt block
Lay out your triangles as shown in the Lady of the Lake design.
It's a bit confusing until you realize that ALL the small ones are oriented in the same direction with the dark corner in the lower left.

Starting with the sides, with RST sew three small HSTs together to make two sets.
For the top and bottom, with RST sew two sets of 5 HSTs together. If you find you're having trouble keeping your 1/4" seam even (especially at the ends) for these small units, try pinning them as shown below. (red arrows)
The first pin is perpendicular to the presser foot. The second is parallel to it.

Press, with the SA in the direction of the arrows. On the top and bottom row one unit's SA is pressed in the opposite direction. This is so that the seams will nest. (If you'll be setting your blocks edge to edge, click here for additional pressing instructions.)

Stitch the side 3-HST subunits to the center. Press with SA toward the center to reduce bulk.

Sew the rows together. Especially with all the points to watch out for, I find pinning saves a lot of time.

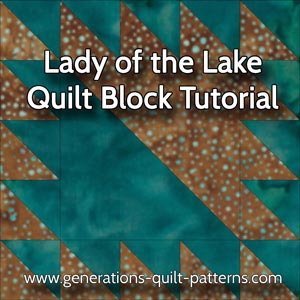
After a final press, this is your finished Lady of the Lake quilt block.
For a truly flat block, click here to learn about our Best Technique for pressing. I use it on all my blocks.
 Lady of the Lake quilt block
More about pressing your Lady of the Lake quilt block
The pressing instructions on this page are for Lady of the Lake blocks that are set together with sashing strips in between. With no seams to match to the sashing, we were only concerned with reducing bulk and making it easier for our seams within the block to nest.
If your blocks are set edge-to-edge, you'll need to adjust the pressing direction of the SAs so that they'll nest and lay flat after stitching. Since this block is all about points, it's well worth the extra time to help the points at the edge just kiss each other.
Your other option is to press all SAs open. No nesting to bother with then.
It is well worth your time to spend a few minutes planning out how the blocks join together so you don't find (after they are all made) that all the SAs are going in the same direction. That would be one lumpy quilt. Totally not fun to put together!
What about a different quilt block?
For a list of all the 220+ quilt block patterns on this site, start here.
If you know the name of the block, shorten your search by using these links:
Click here if you're looking for blocks with at least some paper piecing.
Click here if you're looking for the basic building blocks of quilting, i.e., Flying Geese, half square triangles, quarter square triangles, etc., along with several techniques to make each.
And finally, use these links to find blocks in these finished sizes:

