- Home
- Free Quilt Block Patterns
- Job's Tears Quilt Block
From Tears to Cheers: Master the Job's Tears Quilt Block Today!
This post contains affiliate links, for which I receive compensation.
Hold onto your seam rippers, folks!
The Job's Tears quilt block is here, and you're about to embark on a quilting journey of biblical proportions! 🧵📜
This captivating pattern is so easy, it'll make you weep... with joy! Don't let the name fool you; our block is more forgiving than its namesake and twice as rewarding.
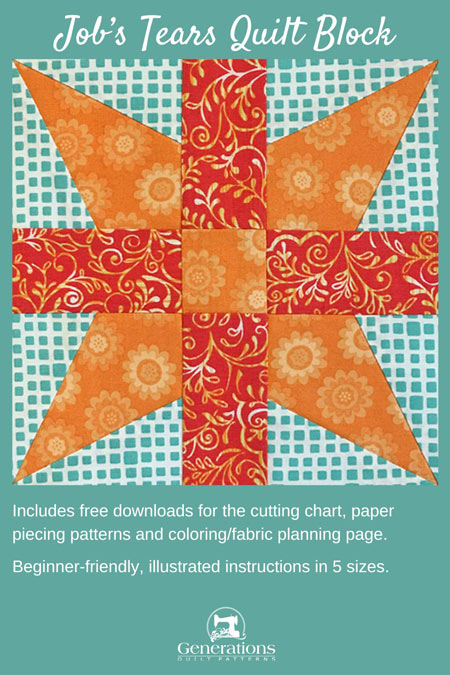
With our foolproof paper piecing method and free patterns in five sizes, you'll be stitching up this beauty faster than you can count Job's tribulations (and trust us, that's fast!).
Use these links to quickly move to different parts of the tutorial:
- A coloring or fabric planning page to download and print
Needles threaded? Let's stitch our way through this legendary pattern faster than you can say "golden fleece"! 🐑💨
What are/is Job's Tears?
Job's Tears, named after the biblical figure Job, is both a quilt block pattern and a plant with a rich history.
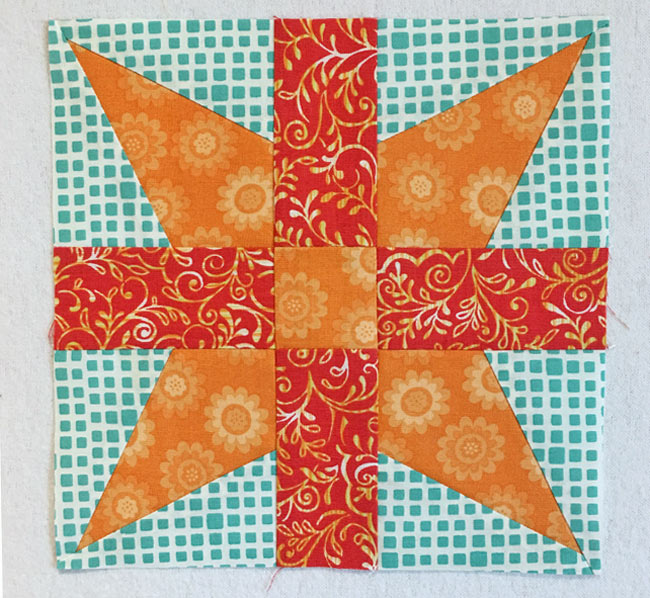
In quilting, it's a striking design featuring kite shapes, rectangles, and a square that creates a visually appealing, tear-drop-like shape.
The plant, scientifically known as Coix lacryma-jobi, produces tear-shaped seeds used in traditional medicine, cooking, and even jewelry.
 The plant, left, and the harvested seed (right)
Just as Job's faith turned tears into triumph, this quilt block turns simple shapes into a stunning design!
📋General Instructions
Several abbreviations are used on this page. They are:
- SA - seam allowance
- RST - right sides together
- CB - Corner Beam unit
1/4" SA are used through this tutorial.
Highlighted in yellow, pressing instructions are easy to spot.
To press, first press the patches in the closed position as they came off your sewing machine. This sets the seam, melding the fibers of the threads into the fibers of the fabric.
Then press the SA to the dark unless otherwise noted.
Download and print paper piecing pattern
To download the pattern, use the most current version of Adobe.
For accurate results, on Adobe's Print Menu page, under 'Page Size and Handling' set 'Custom Scale' to 100%. Then print.
Click here to see what it looks like on the Print Menu page.
Find your finished block size from the chart below. Print the corresponding number of pages for a total of 4 Corner Beam units.
Print CB Paper Piecing Patterns and Templates | |||
|---|---|---|---|
| Finished Block Size | Corner Beam | ||
| # of copies | Pattern | Template | |
| 5" | 1 | 2” | Print 1 |
| 7½" | 1 | 3” | |
| 10" | 2 | 4” | Print 1 |
| 12½" | 4 | 5” | |
| 15" | 4 | 6” | Print 1 |
After printing, use the 1" square graphic on the printed page(s) to double check that your patterns printed at the correct size.

Not sure which paper to use?
Take a look at my review of several of the most popular brands available to us quilters on the market.
You want a super-easy paper to tear away—less stress on the stitches.
The newest quilt fabrics to tickle your fancy...
Click the images below to see the full collection. We share any commercial and/or free patterns that showcase them, too. (For inspiration, of course!)
✂️Cutting patches for your Job's Tears quilt block
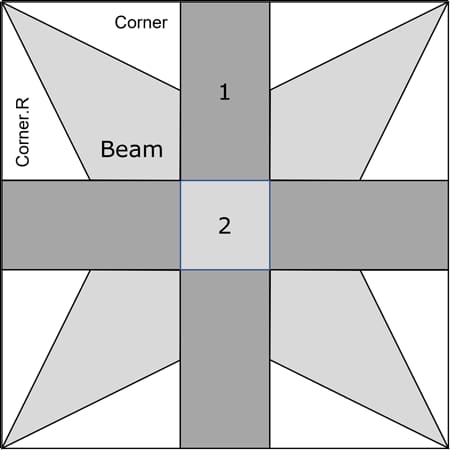 Job's Tears patchwork design
Sample Block Size: 7½" finished / 8" unfinished
Grid: 5x5
Design Type: Star | Uneven 9-patch, small center
Please label all your patches. We use their numbers throughout this tutorial.
Don't you mourn when you use up a favorite fabric? The green 'Squared Elements' check for my background has been reduced to scrap. Sure wish I'd bought more when it came out a few years ago. (╯︵╰,)
 | Cutting Chart for a~ Paper PLUS Traditional Piecing ~ | ||||||
|---|---|---|---|---|---|---|---|
| Patch | Fabric | Qty | Finished Block Size | ||||
| 5'' | 7½'' | 10'' | 12½'' | 15'' | |||
| 1 | Dark | 4 | 1½'' x 2½'' | 2'' x 3½'' | 2½'' x 4½'' | 3'' x 5½'' | 3½'' x 6½'' |
| 2 | Medium | 1 | 1½'' x 1½'' | 2'' x 2'' | 2½'' x 2½'' | 3'' x 3'' | 3½'' x 3½'' |
| Beam | Medium | 4 | 2¾'' x 2¾'' | 3¾'' x 3¾'' | 4¾'' x 4¾'' | 5¾'' x 5¾'' | 6¾'' x 6¾'' |
| Corner Corner.R | Bac | 4 | 2⅞'' x 3¼'' | 3⅜'' x 4¼'' | 3⅞'' x 5¼'' | 4⅜'' x 6¼'' | 4⅞'' x 7¼'' |
| Unfinished Block Size | 5½'' | 8'' | 10½'' | 13'' | 15½'' | ||
| Grid Size | 1'' | 1½'' | 2'' | 2½'' | 3'' | ||
Subcutting Beam and Corner/Corner.R patches
At your cutting mat, layer the Corner rectangles so that the short width measurement is across the top and bottom, The longer height measurement is on the sides. The patches MUST BE layered in pairs of RIGHT SIDES TOGETHER, with their edges even, to create the mirror-imaged patches we need.
Make a mark 5/8" in on the top-left side and 5/8" in from the bottom-right side.
Line up your ruler with the marks and cut all four patches in half on this diagonal line.
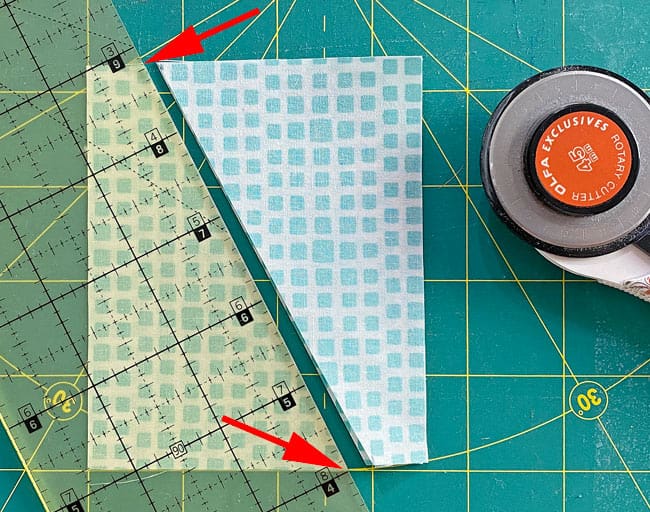
This makes the Corner and Corner.R patches.

This same cut is used no matter the size of the unit— it's always 5/8". All the paper pieced Corner Beams, Triangle in a Square, Half Rectangle and Diamond in a Rectangle basic blocks on this website use it, too. I like to keep things easy!
Cut out the Beam template that goes with your chosen finished block size.
Layer the four Beam squares together, edges even. This time, it doesn't matter which side is up.
Line up the corners of the template with those of the patches. Either hold the template in place with your fingers, or tape it down in the corners. Trim away the excess from both sides.
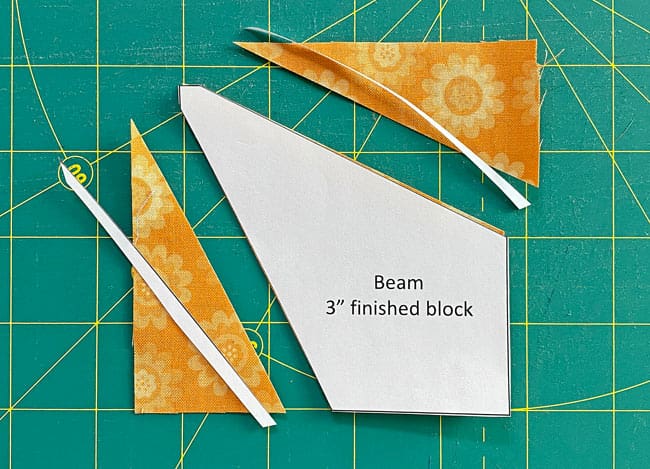
The subcutting is done. On to the fun part!
🪡Assemble Corner Beams for our Job's Tears block
Make 4
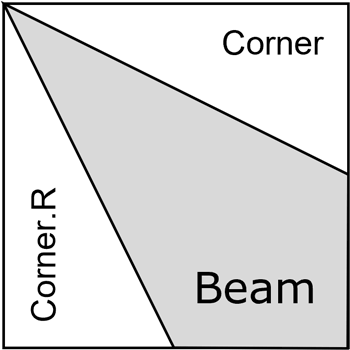
Use a spot of Elmer's Washable Glue Stick to hold the Beam patch in position. Use the dashed guides to eyeball it.
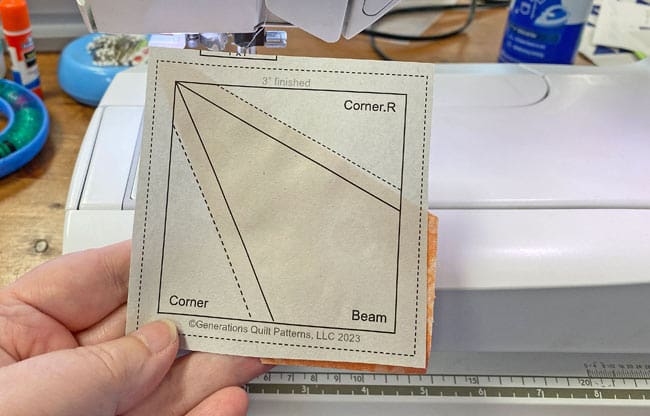
With RST, match the long edges of a Corner to the Beam. The Corners are cut oversized, so you've got some wiggle room.
Use the photo below to help you position the patch. It really doesn't matter if you start with the Corner or Corner.R, though, if you're making multiple blocks, be consistent with the side you start on. You'll get a better rhythm going and make fewer mistakes.
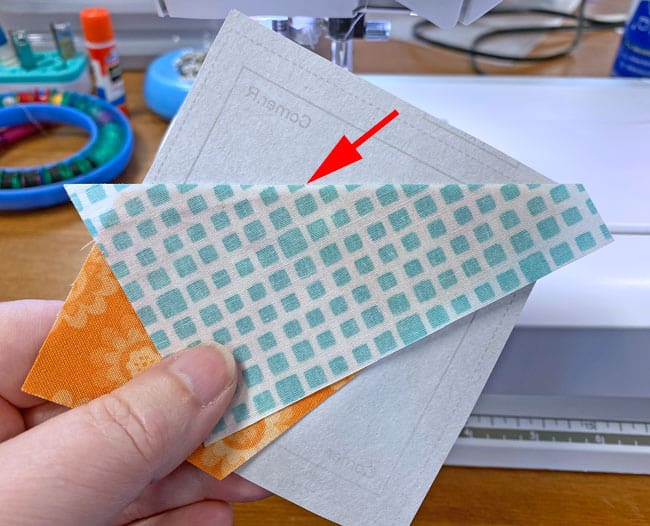 I've scooted the Corner patch a few threads past the edge of the Beam to prevent the darker fabric from showing through the lighter one. (red arrow)
Starting outside the dashed square that surrounds the CB, stitch on the solid line between Beam and Corner.1.
End your stitches past the outside dashed lines. (All the seams in a CB can be chain pieced because they run from one side of the block to the other.)
Don't bother with cutting the thread tails. We'll get those when you trim the unit to perfection.
Press.
Add the other Corner in the same way.
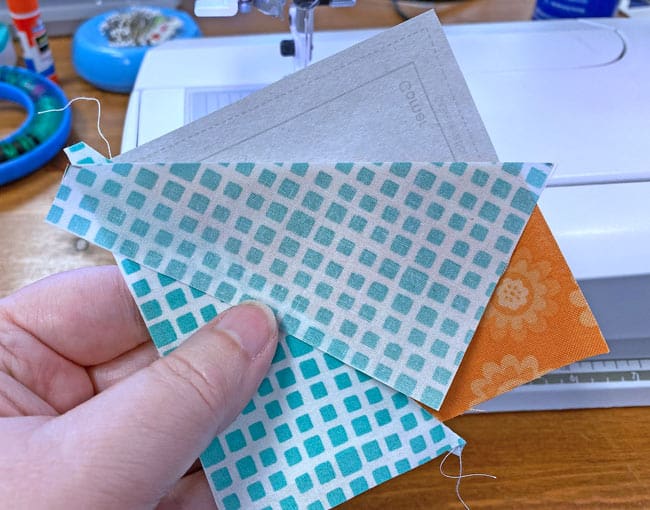
Give the stitched CB a final press. Looks like a hot mess...or rather a spicy disaster, doesn't it.
Cutting away the excess fabric will shape things right up AND remove those thread tails.
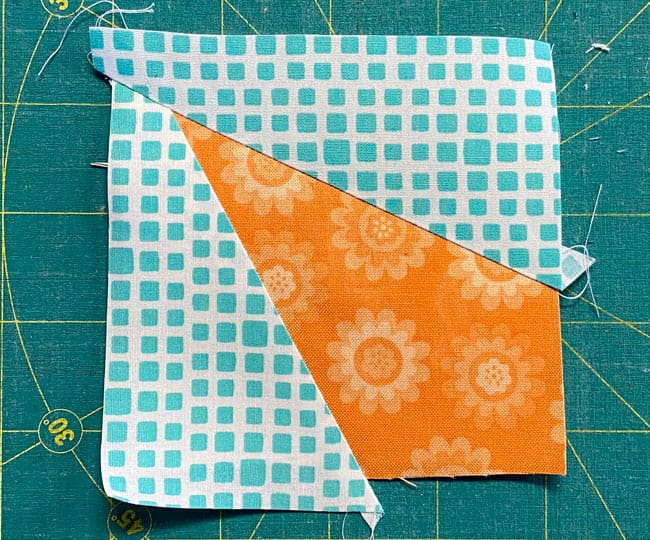
At your cutting mat, printed side up, line up the 1/4" line on your ruler with the solid line on one side.
Trim away the excess.
I think it's SOOOOO much easier to line up the ruler this way instead of trying to match its edge to the solid line!
Rotate the unit a 1/4 turn and repeat. Continue in this manner for all four sides of all four CBs.
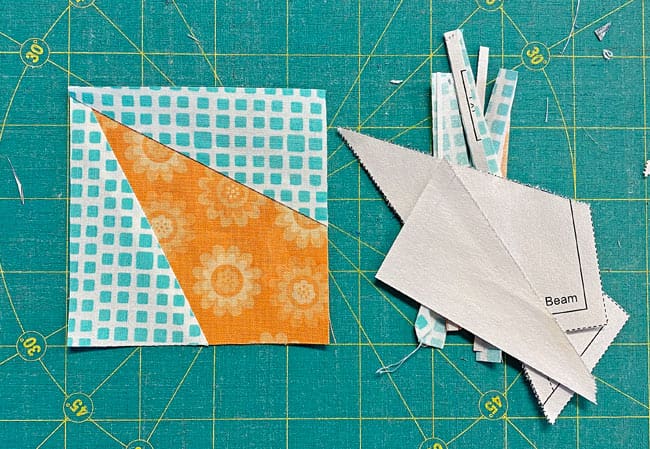
Remove the paper. It's been a big help, but no longer serves a purpose.
We cut our fabrics so all the outside edges are on straight of grain. Just the way they'd be if you'd used traditional piecing methods.
Can we talk?
A bit of subcutting patches, two simple seams and a trim-job.
Why would you ever want to buy a specialty ruler when, for the price of stitching on a line, this much accuracy is right at your fingertips?
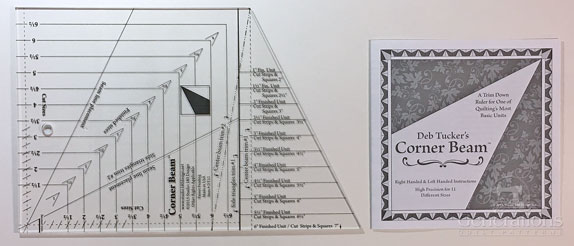
If you're a Gadget Girl at heart, don't despair! If you'd prefer a specialty ruler, then the one I recommend is the Corner Beam by Studio 180—click the link to read my review and see it in action.
🧩Assemble your Job's Tears quilt block
Arrange your patches into the Job's Tear design. CBs are in their usual position with points pointing out.
Since we paper pieced, they're all exactly 1/4" in from the edges. This will be a dream to piece into a quilt.
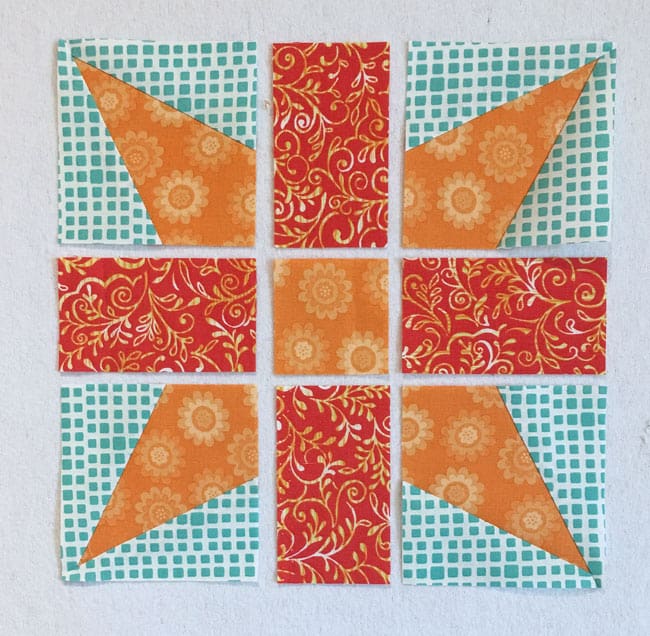
Stitch the units in each row together, Seams are pressed away from the CBs and towards the darker rectangles in the middle row.
Yep! You guessed it...to minimize the bulk.
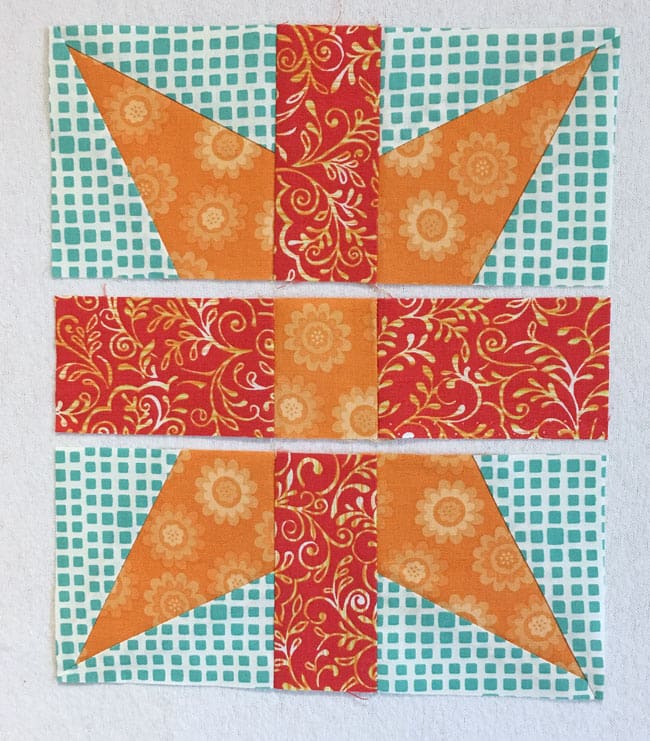
With RST, sew the rows together. Seams nest in the center to make matching them easier. Pin as needed.
From the backside, you can see how all the pressing worked together.
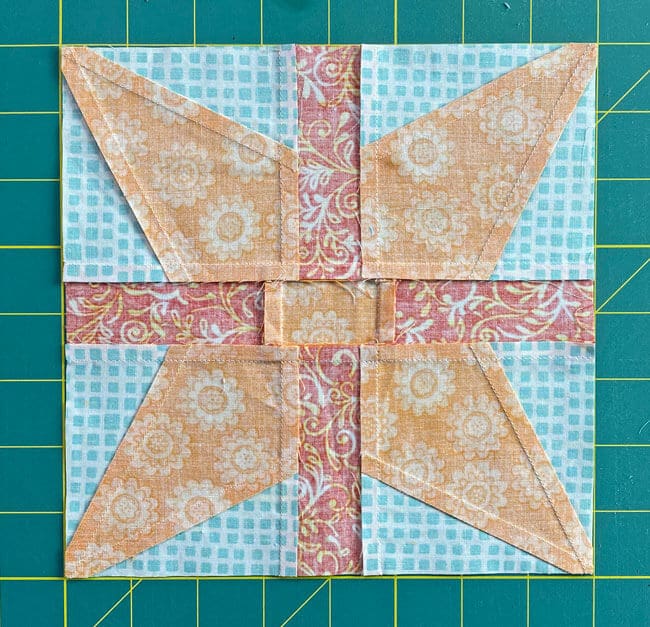
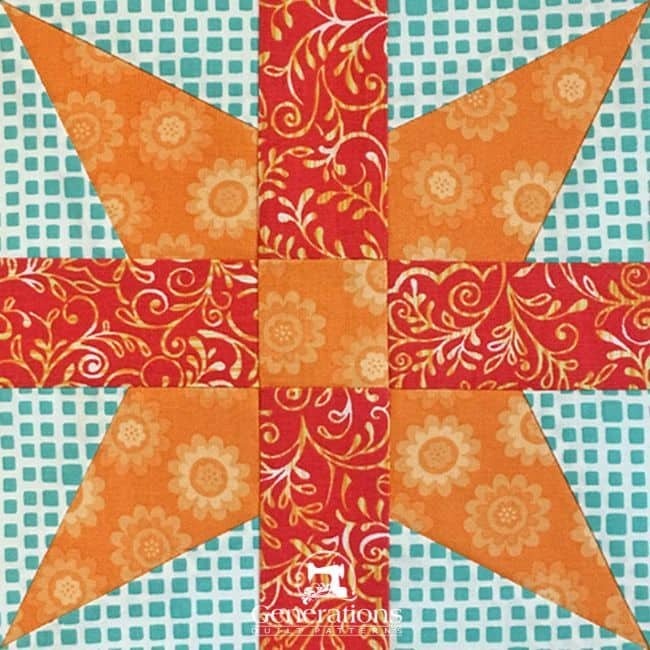
And the reveal. Here is our finished Job's Tears quilt block.
Can't quilt at the moment?
Pin this post and let your future self reap the rewards of Job's Tears! 🌱📌
🔭 Looking for something truly stellar?
You've finished your star quilt block, and you're ready for more!
Browse our collection of 70 stellar star quilt block patterns. All have instructions and cutting charts in multiple sizes. If templates or paper piecing is used in the tutorial, there's a free download for you of those materials.

Eeny. Meenie. Miney. Moe.
Which star quilt block will you sew?
For a star-studded quilting experience, choose from 100+ bedazzling star quilt patterns—for beginners and beyond—click here.
For even MORE blocks to make… 🧩🎨

...visit our Free Quilt Block Pattern Library, with over 260+ blocks to choose from in multiple sizes.
Free downloads are included in all sizes for any blocks require paper piecing patterns or templates.
- Home
- Free Quilt Block Patterns
- Job's Tears Quilt Block

