- Home
- Best Sewing Machine
- How Sewing Machines Work
Learn How Sewing Machines Work
Your Key to Sewing Machine Troubleshooting
This post contains affiliate links, for which I receive compensation.
An understanding of how sewing machines work helps you diagnosis your own sewing machine problems.
This online primer 'uncovers' the internal workings of your machine and how even the slightest misalignment can effect its performance—AND your sanity.
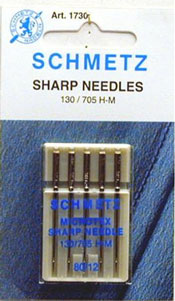
Sometimes something as innocent as a damaged needle point can prevent your machine from making a stitch.
Replacing the needle is almost always my first recommendation when something goes awry with your machine! It's that simple. But THAT important.
If you could remove the cover of your machine, you'd quickly discover how simple the basic machine truly is. And why it doesn't take much to throw it out of kilter.
Computer parts aside, the workhorse parts of your machine are:
- The needle
- Feed Dogs
- Rotary Hook
- A motor
- Two belts
Now let's see how all these parts work together!
The Process of Making a Stitch
A video follows to illustrate this example.
- Starting from the highest position, the needle moves down and pierces the fabric. Your feed dogs simultaneously drop out of the way, below the throat-plate. (The fabric doesn't move for the nanosecond that the needle is in the fabric.)
- As it starts on its way back up a small loop is created behind the scarf of the needle.
- The rotary hook rotates around and 'grabs' or 'picks up' the loop, carrying it around until it catches and twists on the bobbin thread. This forms the stitch.
- As the needle comes up and out of the fabric, the uptake arm moves to its highest position to pull the stitch tight.
- The feed dogs, move forward rising up through the throat-plate to grab the fabric and pull it through the sewing machine.
Throughout the process balanced tension from the needle and bobbin keep the stitch in the center of the fabric.
This process repeats for every stitch.
What keeps it together?
To keep each step in order and humming along, these parts are connected by belts to a single motor.
The same shaft that moves the needle with one belt and moves both the rotary hook and feed dogs with another belt. Two belts plus one motor equals synchronicity!
Domestic sewing machines stitch along at approximately 840 stitches per minute (newer models are even faster—up to 1600 spm). So it's crucial the parts work together correctly and orderly.
If they're not in sync, then 'your timing is off' and it'll take a trip to the repair shop to get it fixed.
An inside look how sewing machines work!
Now it's easy to get a look at the inside workings on older machines by simply unscrewing the cover.
Most newer models, especially those with computerized innards, require specialized tools to remove the cover properly and these tools don't usually come with your machine.
This video shows exactly how a stitch is formed without any manufacturer's razzle-dazzle. A well-spent 27 seconds!
Thank goodness the video slows things down enough so that we can see the process of making a stitch.
Can you imagine how fast it'd be moving on a newer machine capable of stitching 1600 stitches/minute?
Apply what you know...
...about how sewing machines work to help solve your machine problems.
It should start to make sense why your sewing machine needle is so important and why it's prudent to keep extras on hand to quickly determine if the problem IS your needle.
If it's not inserted all the way, it pushes further into your machine as it passes thru the throat-plate. The loop will either not form correctly or not form at the proper time. The rotary hook won't be able to catch the loop to form the stitch.
A bent or damaged needle deflects as it pierces the fabric. Again, it won't be in the correct position for the rotary hook to catch the loop.
If the rotary hook doesn't catch the loop to twist the threads together, you've got skipped stitches.
If the thread doesn't flow smoothly around the hook, you'll have skipped stitches.
Many Christmases ago, I unknowingly wore a grove into my rotary hook and shuttle assembly by pulling my piecing out from under the needle when the uptake arm wasn't in its highest position.
The tension on the thread and repeated pulling action wore a
groove into the rotary hook and shuttle that had to be polished out by
my dealer.
If your tension isn't balanced, that can effect when the loop is formed. Or how big it is or isn't. Too small means a skipped stitch. Too big is the beginning of a thread nest.
Use what you've learned about how a stitch is formed to help you reason through many of the most common problems.
More on how sewing machines work...
This last video, a bit longer than the first, adds a bit of history on the beginnings of the sewing machine.
It's humorous, with good visuals of how sewing machines work using humans for the parts of the machine that make a stitch. Enjoy!
Now that you understand how sewing machines work, you may be interested in these pages:
- Thinking about a new machine? Check out what Quilters think of the machines they've bought for honest opinions.


