- Home
- Free Quilt Block Patterns
- Follow the Leader Quilt Block
Stitch, Laugh, Repeat! Master the Follow the Leader Quilt Block
Sized for 5", 7½", 10", 12½", and 15" finished blocks
This post contains affiliate links, for which I receive compensation.
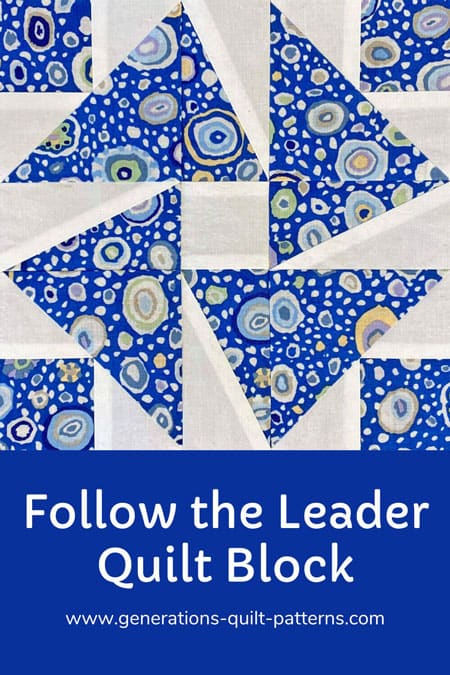
Follow the stitches! 🧵 Our Follow the Leader quilt block is a playful masterpiece based loosely on the morphing of a Friendship Star and a Pinwheel.
Worried about pointy-points and precision?
Fear not!
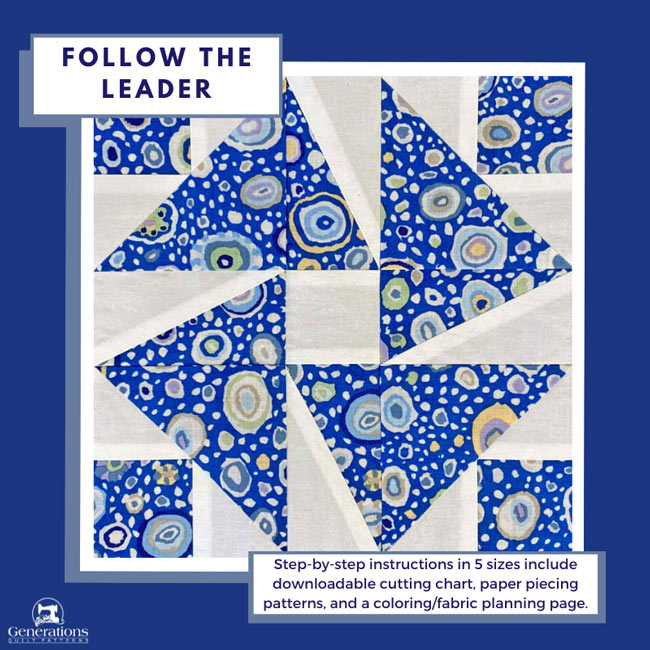 The Follow the Leader quilt block ~ Let the games begin!
By sewing on a line, you'll effortlessly create sharp, perfect points that sit exactly 1/4" from the edge—no sweat involved! Get ready for a piecing experience where every step is guided, every stitch is an accomplishment, and every moment is filled with playful confidence.
After all, sewing should feel like a game of 'Follow the Leader', filled with joy and peppered with self-belief.
You've got this. 💪
🧭Ready to navigate this quilting adventure like a pro? 🔍
Ready to navigate this quilting adventure like a pro? Use these handy anchor links to jump to the exact spot you need. It's like GPS for your quilting journey! ✨
- A coloring or fabric planning page to download and print
- Stitching against a ticking timer? Worry not! Park a pin on this and dive into the quilting fun later.
It's time to follow along.
General Instructions
Several abbreviations are used on this page. They are:
- SA - seam allowance
- RST - right sides together
- HRT - half rectangle triangles
- BW - Brave World units
- Bac - Background fabric
A 1/4" SA is used in this tutorial.
Highlighted in yellow, pressing instructions are easy to spot.
To press, first press the patches in the closed position as they came off your sewing machine. This sets the seam, melding the fibers of the threads into the fibers of the fabric.
Download and print paper piecing patterns
To download the pattern, use the most current version of Adobe.
For accurate results, on Adobe's Print Menu page, under 'Page Size and Handling' set 'Custom Scale' to 100%. Then print.
Click here to see what it looks like on the Print Menu page.
Find your finished block size from the chart below. Print the corresponding number of pages for a total of 4 BW and 4 HRT-A units.
Print the Patterns | |||||
|---|---|---|---|---|---|
| Finished Block Size | Brave World Units | Half Rectangle Triangles | |||
| Copies to print | BW Size | Copies to print | HRT-A Size | ||
| 5" | 1 | 2" | 1 | 1" x 2" | |
| 7½'' | 1 | 3" | 1 | 1½" x 3" | |
| 10" | 2 | 4" | 1 | 2" x 4" | |
| 12½'' | 4 | 5" | 2 | 2½" x 5" | |
| 15" | 4 | 6" | 2 | 3" x 6" | |
After printing, use the 1" square graphic on the printed page(s) to double check that your patterns printed at the correct size.
Not sure which paper piecing paper to use?
Click here for "Does it really matter which paper piecing paper you use?" to help you make the best decision for your needs.
The newest quilt fabrics to tickle your fancy...
Click the images below to see the full collection. We share any commercial and/or free patterns that showcase them, too. (For inspiration, of course!)
✂️ Cut the patches for your Follow the Leader quilt block
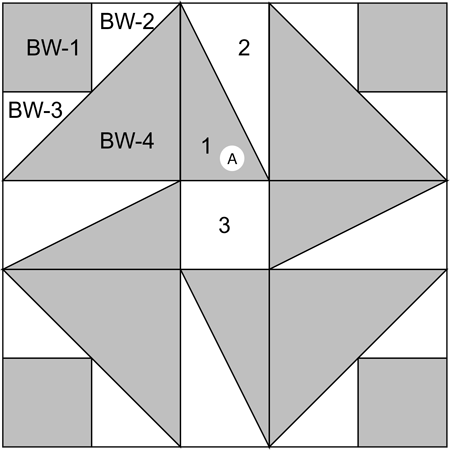
Sample Block Size: 7½" finished / 8" unfinished
Grid: 5x5
AKA: Twist and Turn, Crazy Ann
Design Type: Pinwheel | Uneven 9-patch, small center | Paper piecing
Label your patches. We use their numbers in this tutorial.
 | Cutting Chart for a~ Paper & Traditional Piecing ~ | |||||||
|---|---|---|---|---|---|---|---|---|
| Patch | Fabric | Qty | Finished Block Size | Sub Cut | ||||
| 5'' | 7½'' | 10'' | 12½'' | 15'' | ||||
| BW-1 | Dark | 4 | 1¾'' x 1¾'' | 2¼'' x 2¼'' | 2¾'' x 2¾'' | 3¼'' x 3¼'' | 3¾'' x 3¾'' | no |
| BW-2 BW-3 | Bac | 4 | 2⅜'' x 2⅜'' | 2⅞'' x 2⅞'' | 3⅜'' x 3⅜'' | 3⅞'' x 3⅞'' | 4⅜'' x 4⅜'' | |
| BW-4 | Dark | 2 | 3⅜'' x 3⅜'' | 4⅜'' x 4⅜'' | 5⅜'' x 5⅜'' | 6⅜'' x 6⅜'' | 7⅜'' x 7⅜'' | |
| 1 | Dark | 2 | 2⅞'' x 3¼'' | 3⅜'' x 4¼'' | 3⅞'' x 5¼'' | 4⅜'' x 6¼'' | 4⅞'' x 7¼" | yes |
| 2 | Bac | 2 | 2⅞'' x 3¼'' | 3⅜'' x 4¼'' | 3⅞'' x 5¼'' | 4⅜'' x 6¼'' | 4⅞'' x 7¼" | yes |
| 3 | Bac | 1 | 1½'' x 1½'' | 2'' x 2'' | 2½'' x 2½'' | 3'' x 3'' | 3½'' x 3½'' | --- |
| Unfinished Block Size | 5½'' | 8'' | 10½'' | 13'' | 15½'' | na | ||
| Grid Size | 1'' | 1½'' | 2'' | 2½'' | 3'' | na | ||
Subcutting patches
Layer the #1 dark rectangles all right side up, aligning all the edges. Do this for the #2 backgrounds, too.
The height of the rectangles should be along the left and right sides. The width should go across the top and bottom.
This orientation is important! When the rectangles are arranged this way, the angle we cut is correct.
With a pencil, make a mark at the edge, 5/8" in from the upper-left corner and 5/8" in from the lower-right corner.
Match the edge of your ruler with these marks at the top and bottom edges of the #1s and #2s. Cut in half.
Repeat for both sets of rectangles. ALL RIGHT SIDES UP.
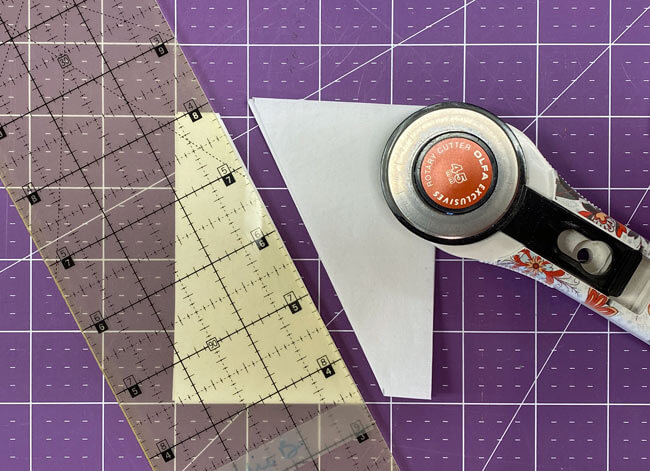 Subcutting the #2 background rectangles
After subcutting, you'll have 4 identical triangles for #1 and #2.
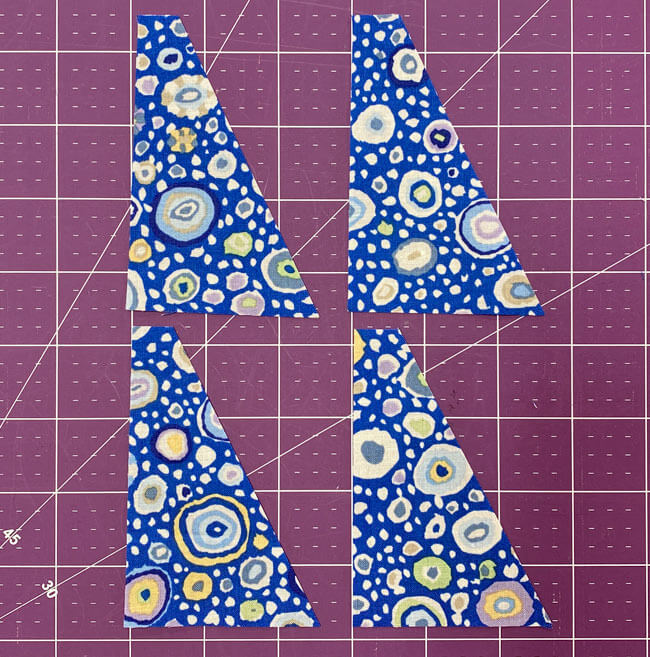 #1 dark rectangles after subcutting
Cut the BW-2, BW-3, and BW-4 squares in half once on the diagonal.
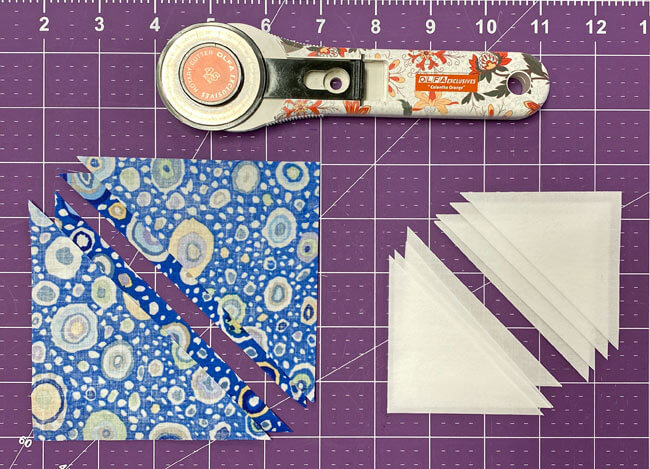
Our subcutting is complete.
🪡 Create the units for our Follow the Leader block
Position the wrong side of the #1s and BW-1s on the unprinted side of each pattern, using a dot of Elmer's Washable Glue Stick to hold them in place.
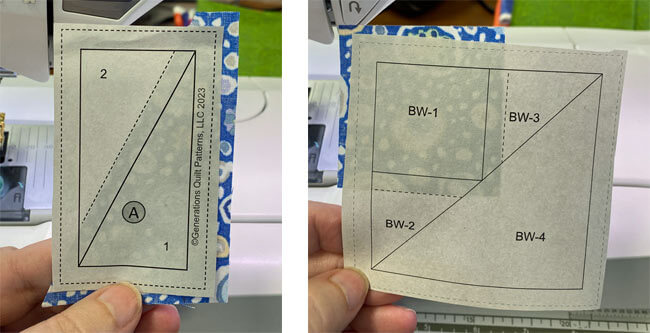
After all 8 patches are glued, put the glue stick away. We're done with it for this block.
Next, set up your sewing machine for paper piecing as outlined below.
We need to make a few adjustments to our sewing machine settings to paper piece.
- Reduce your stitch length to 16–20 stitches per inch (1.3-1.6 mm). This perforates the paper and stabilizes the seam when you remove the pattern. [Learn more about stitch length here.]
- Reduce your machine's speed or just plain slow down. Sew only as fast as you can AND stay on the solid stitching line.
- Install an open toe appliqué foot (sometimes called an 'embroidery' or 'satin stitch' foot) if you have one (it makes it easier to see where you're stitching).
- Use a larger needle (90/14) IF you have problems removing the pattern. Personally, I use an 80/12 Microtex Sharp for paper piecing without any issues.
Half Rectangle Triangles (HRT)
Make 4
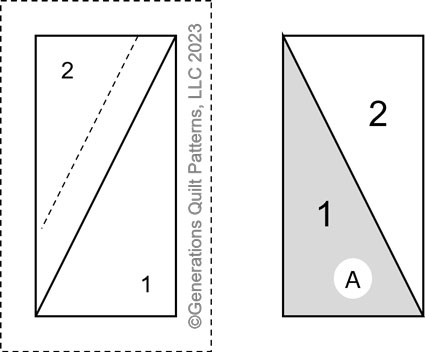
NOTE: The two sides of this unit are the reverse of each other. Don't let that confuse you as you stitch.
With RST, align the long bias edge of #2 (background) with #1.
Since #1 is so much darker, I'm going to scooch #2 a couple of threads past the edge. This is so the darker fabric won't accidentally shadow or show through the top of the block when it's finished.
This simple trick also helps us avoid having to come back and trim away a bit from the darker patch.
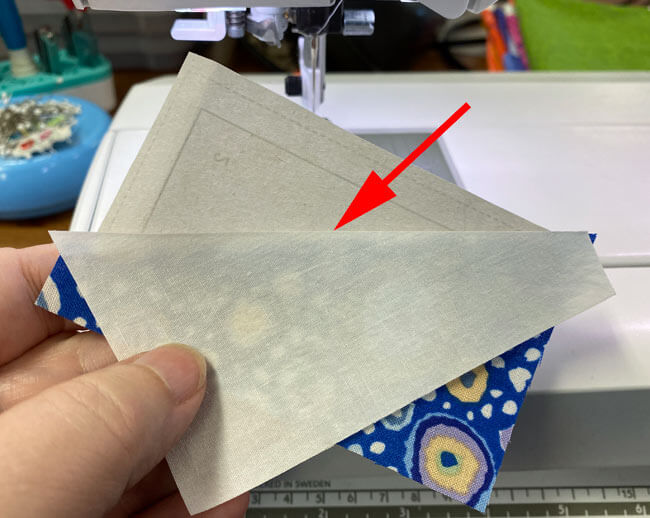
Sew on the line between #1 and #2, starting and stopping past the outside edges of the HRT. These units are candidates for chain piecing to save a bit of time.
Once sewn, give them a good press at the ironing board.
Now to trim to perfection.
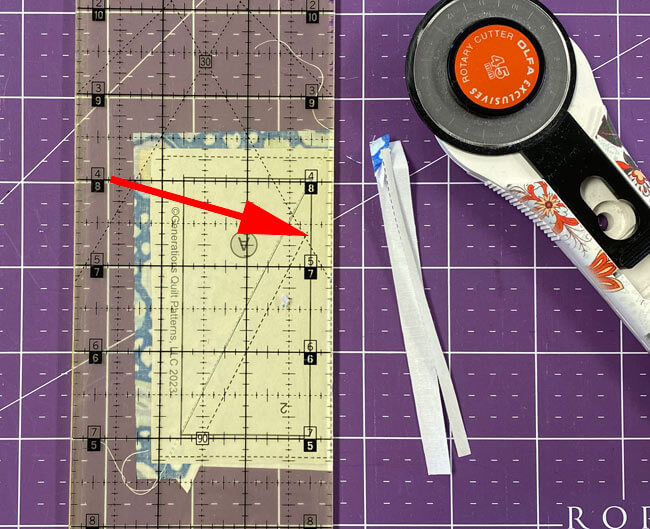
Align the 1/4" mark on your ruler with the solid rectangle that represents the finished size of the patch.
With your rotary cutter, cut away the excess fabric. Repeat for all 4 sides of all the HRTs.
Here we can see the HRT, from the pattern side (left), from the fabric side, still a hot mess (middle) and after trimming to exactly the right size.
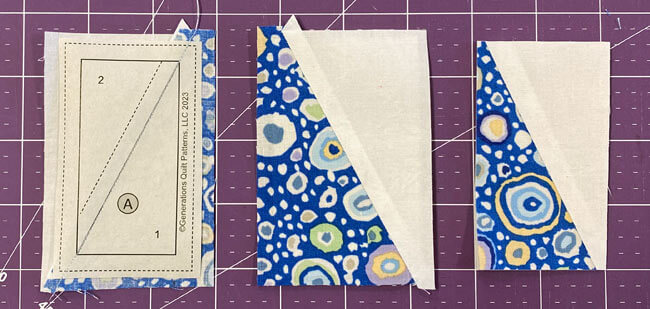 An HRT, stitched backside (left), stitched fabric side (middle) and trimmed (right)
Piecing perfection without having to purchase an expensive specialty ruler…
…and remember where you put it…
…and where the instructions are!
SWEET!!!
Brave World Units (BW)
Make 4
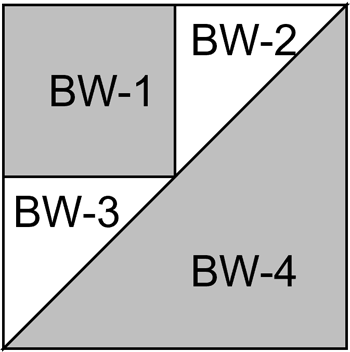 Brave World unit (BW)
With RST, align a short edge of #BW-2 with #BW-1. If you're new to making this unit, flip this #2 open while holding the SA to check it's positioned properly.
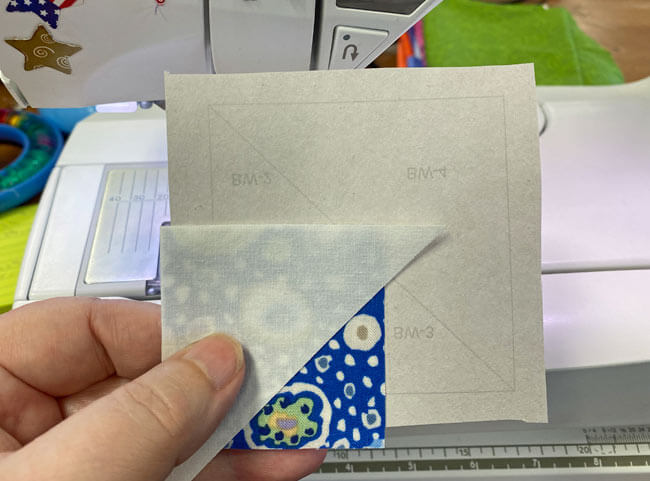
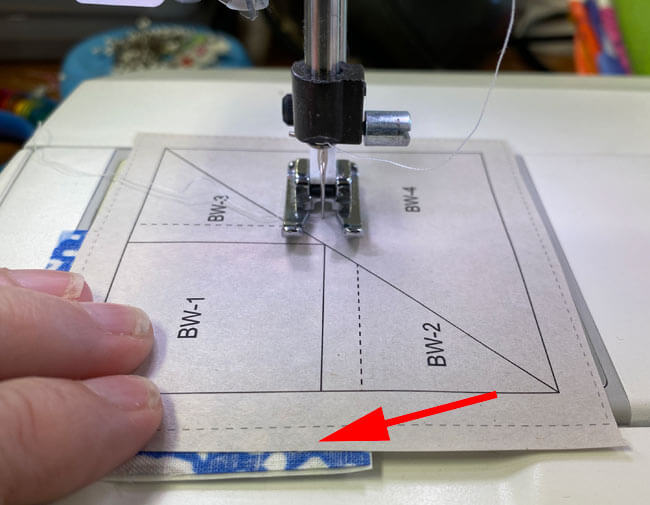
Sew on the solid line between BW-1 and BW-2, starting and stopping a good 1/4" before the line begins and ends (red arrow).
Press. If you've starched your fabric, you can fingerpress this seam instead of jumping up to the iron.
With RST, position BW-3. Check it's in the correct position and stitch the seam as before.
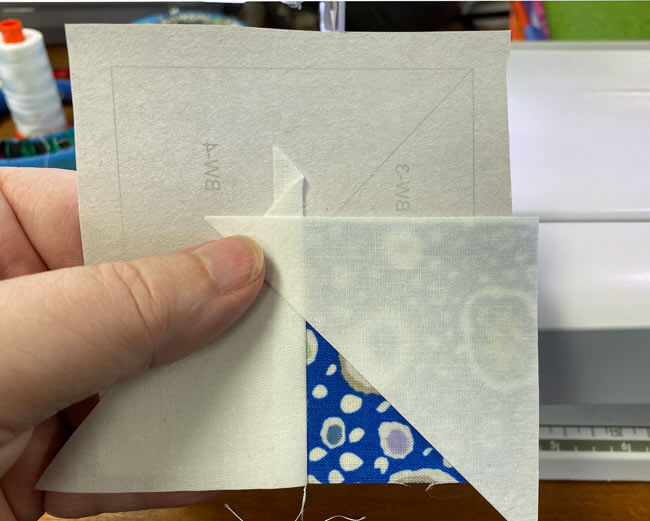
Press at the iron.
At the cutting mat, pattern side up, pull the paper away from the stitches in the center of the block. The paper will tear a bit.
Be gentle, it doesn't take much to pull the paper back a bit past the upcoming stitching line.
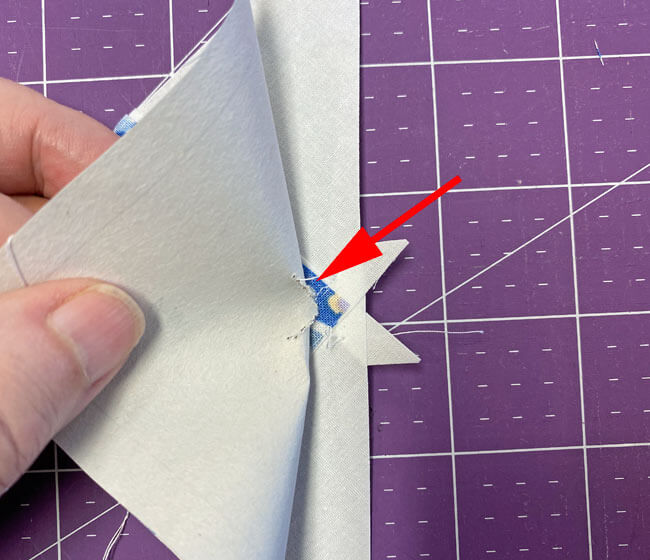
Line up your ruler with the solid line between BW-4 and BW-2/BW3. Use your thumbnail to crease on the line.
Fold back the paper pattern and align the 1/4" markings on your ruler with the fold.
Trim away the excess fabric past this 1/4" SA.
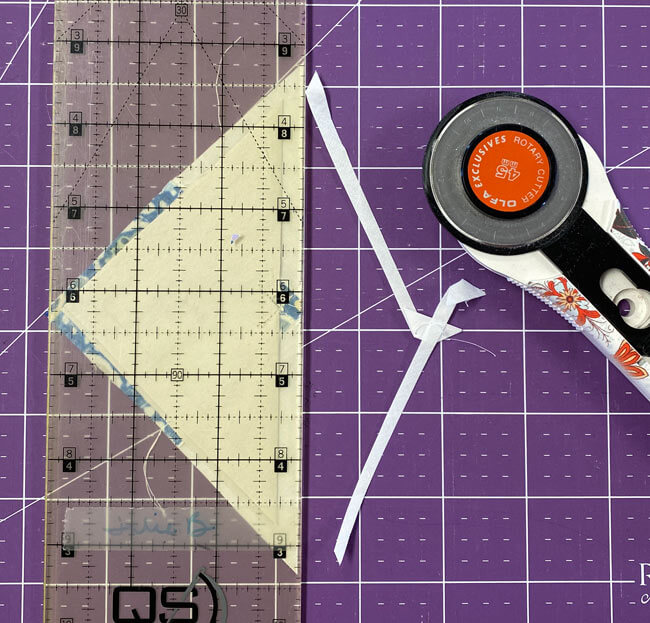 It's a bit difficult to see, but the 1/4" line is on the folded edge of the pattern.
You've just created the perfect positioning line for your final patch.
With RST, line up the long edges of BW-4 with the freshly trimmed edge. (No need to nudge it because it's darker than the unlaying patch.)
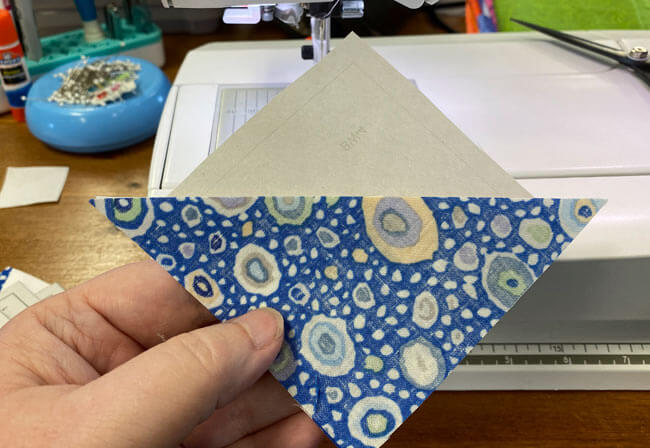
Stitch on the line, starting and ending past the dashed lines that surround the block.
Give your BW a good pressing with the iron.
All that's left is to trim this little beauty to perfection.
Just as we did for the HRTs, line up the 1/4" mark on your ruler with the solid line that surrounds the block. The ruler's edge should be just about at or on top of the outside dashed line.
Trim away the excess. Repeat for the three remaining sides.
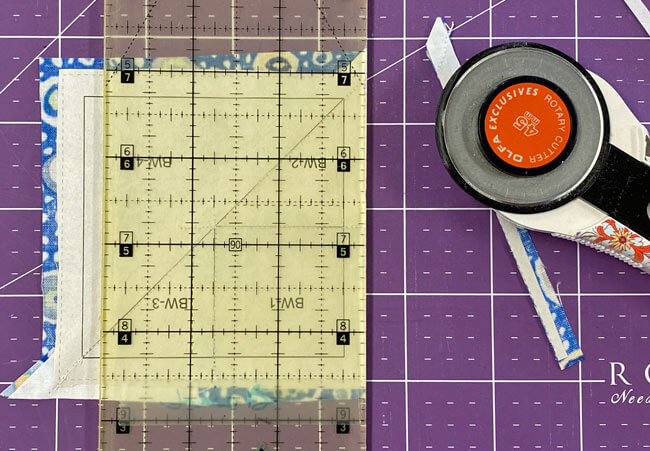
Continue until you've finished the 4 BWs.

The paper piecing is complete. From this point forward, return your stitch length to the one you regularly use for piecing and install your favorite 1/4" presser foot.
Remove the paper pattern from all your patches. It has served its purpose.
Using precut patches means all the outside edges of each unit are on the straight of grain just like any traditionally pieced quilt block. The paper no longer serves a purpose.
Sayonara, paper!
🧩 Assemble the Follow the Leader block
Arrange your stitched BWs, HRTs and cut center square into the Follow the Leader design. Darker squares in the four outside corners, The HRTs all pinwheel clockwise around the block design.
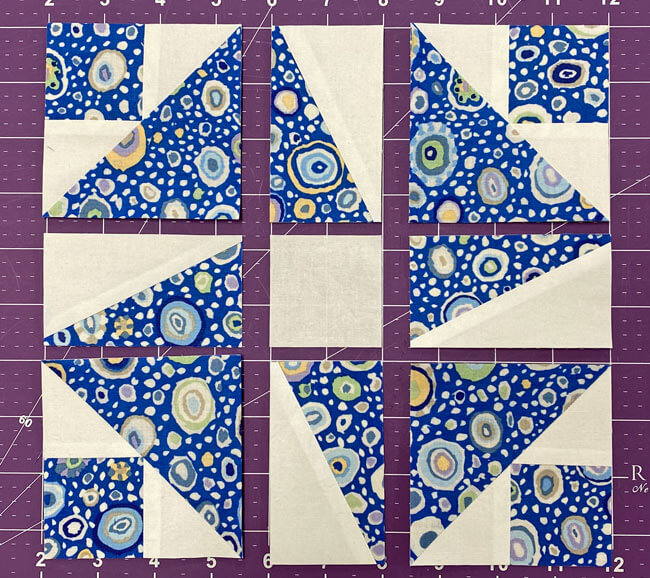
With RST, sew the units in each row together.
Use pins to match the points on the outside edge. The more vigilant your were about sewing on the line, the easier it is to get a good match here. That's the magic of paper piecing—along with not needing a specialty ruler for a shape you just don't make frequently.
The SAs are pressed toward the BWs in the top and bottom rows and towards the center in the middle row, all to avoid creating excessive bulk.
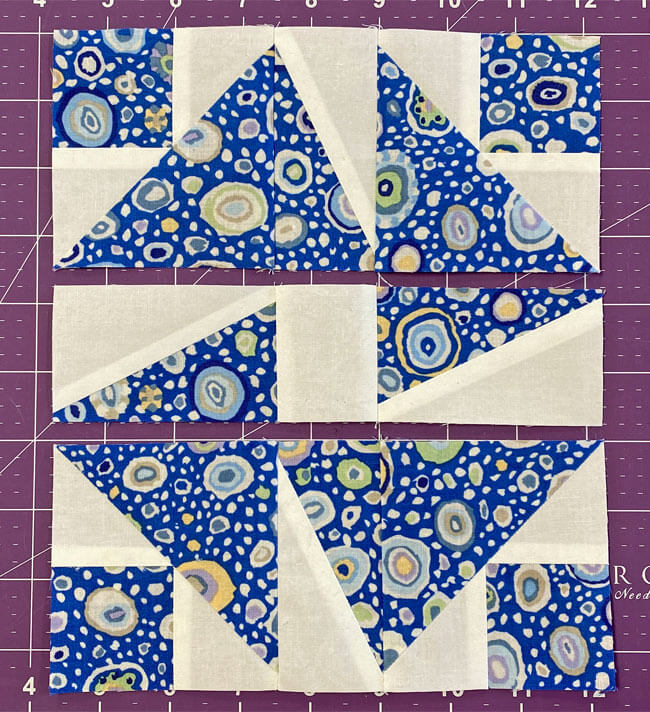
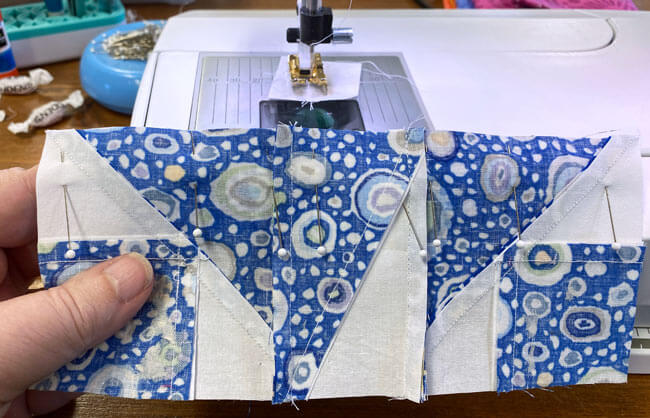
With RST, stitch the rows together. Pin as you need for a good match.
You can see my pinning below. Again, sewing on the line makes this an easy match,
One final press at the ironing board. The least two seams are pressed away from the HRTs.
Our Follow the Leader block is complete.
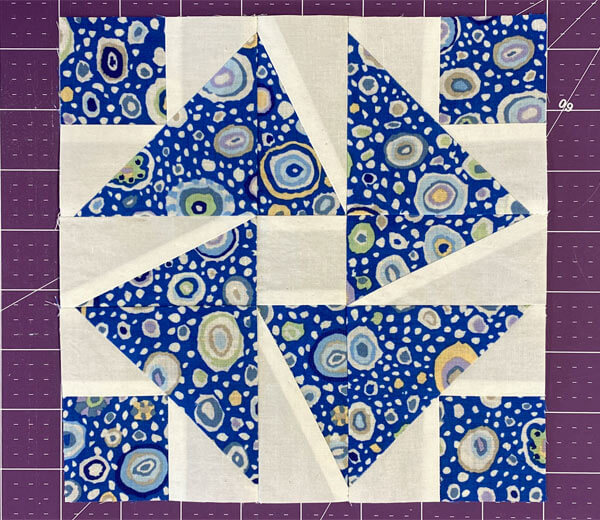
Here it is from the backside. All the SAs are away from the HRTs and toward the BWs.
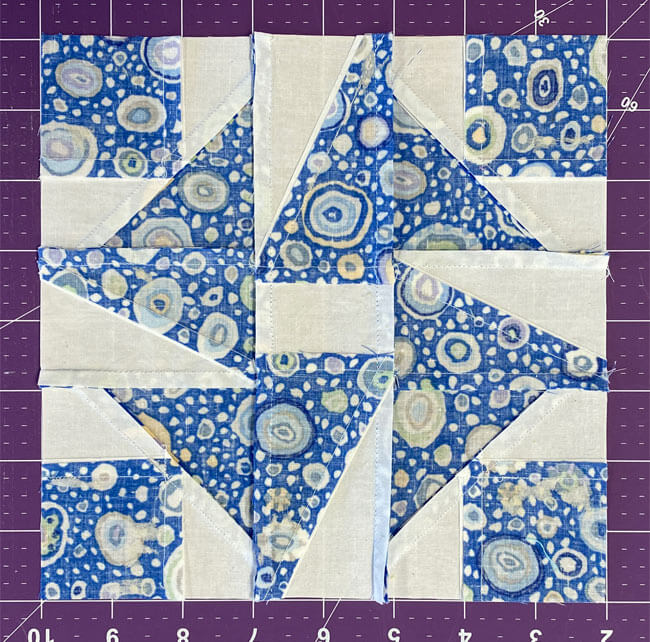 You can see where the lighter fabric was 'nudged' out a couple of threads past the seam line to prevent shadowing.
For a three fabric version of this block, take a gander at our Crazy Ann quilt block tutorial.
So what's this about shadowing?👥🤔
As you can see in the picture of the finished block above, the light seam allowances 'shadow' through the top of the quilt block.
Use a white batting in a quilt with this background fabric and those SAs will disappear immediately.
The reason SAs show here is the picture was taken while the block was on the purple cutting board.
Congratulations, Quilter Extraordinaire! 🎉
You've followed the stitches, embraced your creativity, and pieced this little beauty.
Stand tall, relish in your accomplishment, and bask in the pieced glory of your finished block. Your stitches, like a well-led parade, showcase your skill and creativity.
Keep following your quilting instincts to more stitching triumphs! 🚀✨
Fabric stash calling your name 📞 but time's not on your side? ⏳😩
Pin this post 📌 and let it marinate in your quilting queue—good leaders know when to wait for the perfect moment!
🌀More playful pinwheel quilt blocks to stitch!
You've finished your pinwheel quilt block, and you're ready for more!
Our pinwheel quilt blocks are a delightful blend of playful interlocking patterns and vivid, eye-catching color. The interlocking patterns dazzle your eyes and inspire your creativity, while our step-by-step instruction ensures that you can create these stunning blocks with ease.
Click here to dive in and turn your fabric into MAGIC!
For even MORE blocks to make… 🧩🎨

...visit our Free Quilt Block Pattern Library, with over 260+ blocks to choose from in multiple sizes.
Free downloads are included in all sizes for any blocks require paper piecing patterns or templates.
- Home
- Free Quilt Block Patterns
- Follow the Leader Quilt Block
