- Home
- Free Quilt Block Patterns
- Flock of Geese Quilt Block
Flock of Geese Quilt Block Pattern
From our Free Quilt Block Patterns Library
This post contains affiliate links, for which I receive compensation.
Skill Level: Confident beginner
The Flock of Geese quilt block may be more commonly known as 'Birds in the Air'. Since we've already got a block by the same name (just simpler) in the library, this namesake will have to do.
Other names for this block include: Birds of the Air, Flying Birds, Flying Geese and White Cloud.
In this lesson you'll learn to make it with rotary cut shapes and traditional piecing methods.
Let's get started!
📋 General Instructions
All seam allowances (SA) are 1/4".
First press a pieced unit flat to set the seam. Then open ig, pressing from the front to prevent tucks at the SA. Seams are pressed to the dark fabric unless otherwise noted.
Step 1: Cut the patches for a Flock of Geese
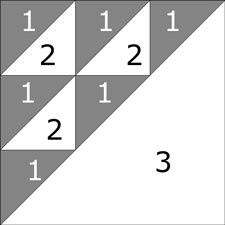
Sample Size: 4½" finished / 5" finished
Grid: 3x3
Attribution: Ruth Finley
AKA: Birds in the Air (Ruth Finley), Birds in the Air (Scioto Imhoff Danner), Flying Birds (Ruther Finley), Flying Geese (Marguerite Ickis), Flying Geese (Yvonne Khin)
To create a block with pointy points, choose fabrics that highly contrast each other. Large florals or prints with big open spaces are not suitable for this block.
We will be working with exposed bias edges (#1 and #3 patches) during construction. To tame them, I suggest starching your quilt fabric before cutting. (I did for the sample pictures in these instructions.)
 |
Cutting Chart for a~ Traditional Piecing ~ | |||||
|---|---|---|---|---|---|---|
| Patch | Fabric | Qty | Finished Block Size | |||
| 3” | 4½" | 6” | 9” | |||
| 1 | D | 3 | 1⅞" x 1⅞" | 2⅜" x 2⅜" | 2⅞" x 2⅞" | 3⅞" x 3⅞" |
| 2 | L | 2 | 1⅞" x 1⅞" | 2⅜" x 2⅜" | 2⅞" x 2⅞" | 3⅞" x 3⅞" |
| 3 | L | 1 | 3⅞" x 3⅞" | 5⅜" x 5⅜" | 6⅞" x 6⅞" | 9⅞" x 9⅞" |
| Unfinished Block Size | 3½" | 5” | 6½" | 9½" | ||
| Trim HSTs to | 1½" x 1½" | 2” x 2” | 2½" x 2½" | 3½" x 3½" | ||
| Grid Size | 1” | 1½" | 2” | 3” | ||
Step 2: Assemble the Flock of Geese quilt block
Draw a diagonal line on the back of 2 of the 3 dark #1 squares. I've used my Bohin Mechanical Chalk Pencil. The chalk is easy to see on the dark fabric. The line stays fine from end to end. (I love this marking tool!)
Cut the remaining #1 in half on the diagonal and set it aside.
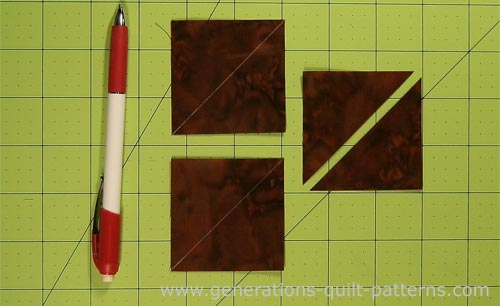
With right sides together (RST), layer #1 and #2. Repeat for a total of 2 pair.
Sew 1/4" away from the drawn lines for a total of 3 stitching lines as shown below.
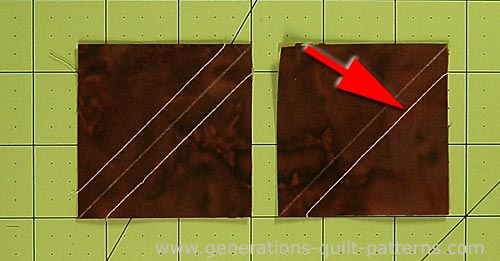
With a rotary cutter, cut along the drawn line to separate the sewn patches into 3 triangle squares and two loose triangles as shown below.
Trim away the dog ears (circles in red, top, right). In the cutting chart locate the row labelled 'HST measure...'. Where this row intersects the Finished Size column is what your HST should measure at this point. For this 4-1/2" sample, that number is 2".

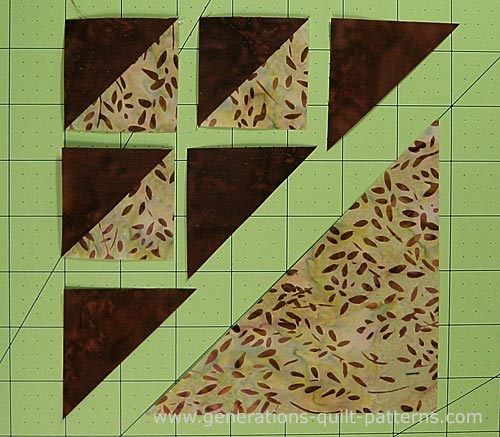
Lay out the cut and sewn patches to create the Flock of Geese design.
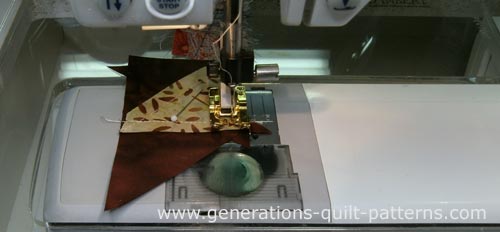
Sew the HSTs and loose triangles together in each row. I get the best results when I feed the flat edge of the HST into the sewing machine first as shown below.

After stitching...
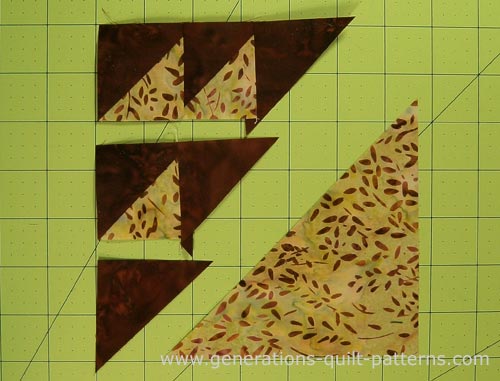
Press the SA of the top row of triangles in the opposite direction of the second row so that the seams will nest in the next step.
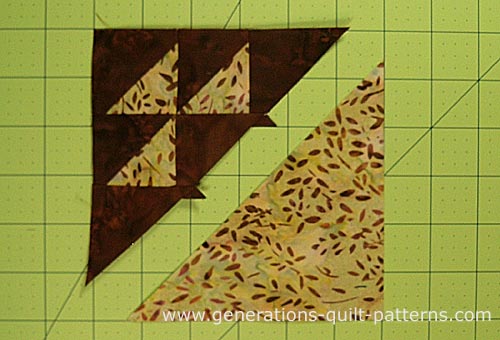
Sew the rows of triangles together. (Yep, I'm a pinner...even for short seams!)
Press. At this point, ideally, the two halves are the exact same size.
Match the two halves, RST and stitch along the long diagonal edge. I prefer to sew from the pieced side so that I can see where the points of the little triangles are, and avoid sewing through them.
Give your block one final press, check it's measurement against the unfinished block size from the chart.
Your Flock of Geese quilt block is ready to take off!
 The finished Flock of Geese block
OK. I've got a confession...
I think this Flock of Geese block is really rather...well...meh!
I could take it or leave it. But.
There's always a 'but', isn't there?
This ho-hum block is part of some pretty neat looking ones...that all of a sudden don't look so hard to make, like...
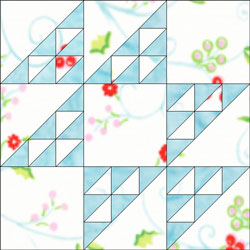
The Double Hour Glass
You might know it as 'The Wandering Lover', but all those triangles really help you eye 'wander' all around the block.
It looks like a more complicated version of our Old Maid's Puzzle.
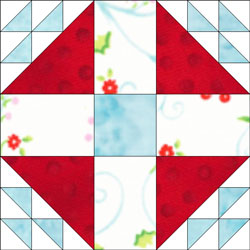
But this block is called Old Maid's Puzzle and it doesn't look ANYTHING like it's simpler cousin. Who knew??!!
With all the fabrics, this one's got a lot going on.
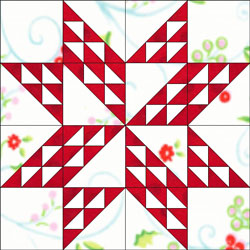
This is my favorite, The Twinkling Star.
I admit, there's a lot of bias edges to contend with in a single block. But starch is the great equalizer. Take it slow and steady and you'll have a real stunner when you're finished!
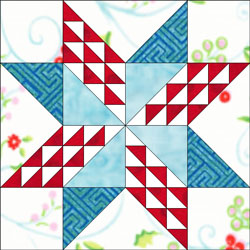
Now add another color—two shades. It's totally transformed!
What about a different quilt block?
For a list of all the 220+ quilt block patterns on this site, start here.
If you know the name of the block, shorten your search by using these links:
Click here if you're looking for blocks with at least some paper piecing.
Click here if you're looking for the basic building blocks of quilting, i.e., Flying Geese, half square triangles, quarter square triangles, etc., along with several techniques to make each.
And finally, use these links to find blocks in these finished sizes:
For even more blocks to make...
For you, are quilt block designs like potato chips...
...you can't have just one?!!
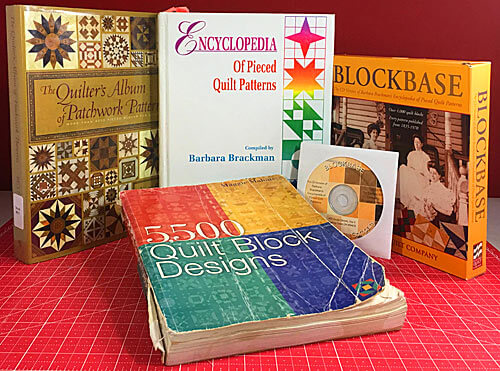
Check the amazing resources I rely on for all the quilt block designs you see on this website.
To see if they're worthy of a spot in YOUR quilting library, CLICK HERE.
