This post contains affiliate links for which I receive compensation
Favorite Quilt Marking Tools
A reader asks...
What's the best marking tool for marking the quilt top for quilting?GQP replies...
The simple answer, as with so many things in quilting, is 'It depends on you!'When will you mark your quilt?
That has a definite impact on your choice, because some markers are more 'resistant' to the wear and tear that comes from manipulating your sandwich back and forth under the needle while you're quilting.
How detailed is the marked quilting design?
More intricacy means the marks must stand up to a much longer time under the needle.
If you can and are willing to wash your finished quilt, then you have the most choices available.
The trade-off for this flexibility is extra work at the beginning of making your quilt top. You will need to test all of the fabrics in the quilt (except the whites/creams) to weed out the bleeding fabrics. (See my page Bleeding Fabric: Stop It Before It Starts)
I can't stress this part enough, prewashing your fabric doesn't guarantee your fabrics won't bleed. It does remove dirt, sizing and shrinkage.
But you'll need to test for bleeding. And really, it's simple to do. Just follow the directions on the page referenced above.
All-Around 3 Favorite Markers
For all three, you can use them either before or after you've sandwiched your quilt, though before is much, much easier because you don't have to contend with the batting and backing layers.Blue Washout Pens
For quilts that can be washed, my favorite markers the Clover Blue Washout Marker(I prefer a fine line if possible) or the Collins Fine Line Water Erase Marking Pen (blue).On most fabrics, they produce a line dark enough for my old eyes to easily see. And if you're going to take the time to mark a design, you want to be able to see the lines. I do not use any other brands of the blue washout markers and can't make a recommendation.
Mostly I'm quilting feathers by backtracking—stitching over the same design line twice for each feather—so the fine tip is what I want. If I will be quilting feathers with spaces, then I'll use the thicker blue washout marker and quilt on each side of the line.
There are horror stories out there about these quilt markers and marks that either don't wash out or reappear over time.
The key is to thoroughly wash out the marks with cool water...
...NO SOAP OR DETERGENT...
...FIRST.
Spritzing the marks away with a water bottle IS NOT washing away the markings, no matter how many times you've seen it done that way on TV. Adding water to the ink merely makes it disappear from sight and migrate into the batting.
Washing removes the ink.
Follow the manufacturers' instructions to the letter.
After this cool wash, then wash your quilt as needed.
During the process, never, never, ever heat the marks in your quilt.
Don't iron.
Don't leave in your project in the car.
Heat can and does make the ink left in your quilt reappear. Usually as a brownish marking.
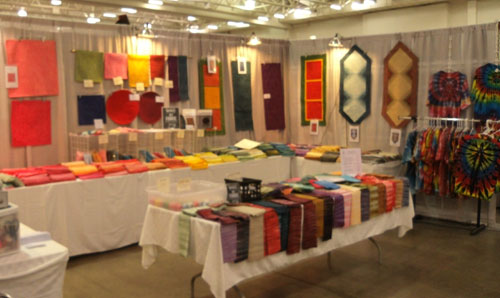
In my booth when I vend at quilt shows, I display all of our machine quilting pattern samples. All, with the exception of one marked with Clover's white marker, were marked with the blue washout marker. These samples go from hot car to hot convention hall to hot lights.

No marks have re-appeared after eleven years. All were washed out according to the manufacturer's directions.
If you choose to use this type of marker and do a lot of marking, I recommend buying several of them at a time. Store them in a ziplock bag.
As you use them, they can get a bit dry. When that happens, simply switch to another marker, and cap and return the dry one to the Ziploc bag to 'recharge' a bit.
Clover's White Marker
When the fabric is too dark for the blue washout, then I'll go to Clover's white pen.It takes a bit for the marks to appear (kind of like that 'spinning ball of death' on your computer when a page is loading) but they do eventually appear. All it takes is an iron to get rid of them.
Now, if you don't want to wash your quilt or plan to mark your quilt after it is sandwiched, then chalk markers are a good choice. My favorite for markings designs is the...
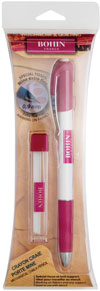
Bohin Mechanical Chalk Pencil
This looks and feels like a nice quality pen in your hand. It uses what look like colored pencil leads, but they are really compressed ceramic chalk 'leads'.
Unlike traditional chalk pencils, the line is always fine. You never need to sharpen the point. You can use different colors of chalk in the same pencil.
I've used it to mark feathered quilting designs, after I'd sandwiched the quilt. ('Didn't know what I was going to put in the borders until after I'd started quilting it.)
For more detailed designs, you'll probably need to do a bit of 're-marking' as you move the quilt around and in and out from under the needle and this IS chalk, not ink like my first two recommendations.
That's just how it is with chalk. But it's not hard.
I also stick to the white chalk and have not tried the other colors that Bohin offers.
I've gotten a lot of questions this year about how to remove stubborn colored chalk markings from quilts.
There are several possible remedies, each with varying results.
The best advice I can give is to test whatever you choose on samples of the fabrics in your quilt.
That's what I do. Religiously.
Mark the pieces before you start piecing with whatever markers you think you might use. Once the top is pieced, remove the marks according to the manufacturer's instructions. That way you'll know what works for your quilt and hopefully avoid problems.
There are other brands of this type of chalk pencil, all ranging from about $10 to $13, but Bohin is the one I purchased first and have had no reason to buy/try another. It's a quality product.
So those are my favorites, my go-to quilt marking tools.
Again, whether or not you'll be able/want to wash your quilt and when you'll mark have a lot to do with the choice of marker.
Readers, what are your favorites and why? Just use the 'comments' link below to share your thoughts. Thank you!
Piecefully,
Julie Baird
Editor
Comments for Favorite Quilt Marking Tools
|
||
|
||
|
||


